
CHAPTER 2
Nikon D7000 Essentials
After you familiarize yourself with the basic layout of the D7000 and all the various dials, switches, and buttons, you are ready to navigate to and adjust the settings that allow you to control and fine-tune the way you capture images with your camera. In this chapter, I cover some of the most commonly changed settings of the camera, such as exposure modes, metering, autofocus (AF) settings, white balance, and ISO. All these settings combined create your image, and you can tweak and adjust them to reflect your artistic vision or to simply ensure you create the best-possible images in complex scenes.
Knowing which modes and features to use in any given situation allows you to get a good exposure, no matter what.
Exposure Modes
Exposure modes dictate how the camera chooses the aperture and shutter speed as well as the metering mode. Metering modes control how the camera gathers the lighting information so that the camera can choose the appropriate settings based on the exposure mode. The four main exposure modes are Programmed Auto (P), Aperture Priority (A), Shutter Priority (S), and Manual (M). They are all you need to achieve the correct exposure, but for simplicity and ease of use Nikon also offers scene modes. In these modes, the camera chooses the correct settings for different situations. The modes designate everything from AF modes to Picture Controls, flash, and ISO settings, though you are able to adjust some of these settings.
The U1 and U2 user settings are a welcome addition to the D7000. They allow you to customize camera settings to meet specific shooting criteria. For example, if you are shooting portraits, you can program the U1 setting for outdoor natural light portraits and the U2 setting for indoor portraits with studio strobes. Of course, the settings are entirely up to you. This new option can save you untold amounts of time.
To switch among the exposure modes, simply rotate the large Mode dial on the top of the camera.
Programmed Auto
Programmed Auto mode (P) is an automatic mode that's best for shooting snapshots and scenes where you're not concerned about having complete control over the settings.
When the camera is in Programmed Auto mode, it decides the shutter speed and aperture settings for you based on a set of algorithms. The camera attempts to select a shutter speed that allows you to shoot handheld without suffering from camera shake while also adjusting your aperture so that you get good depth of field to ensure everything is in focus. When the camera body is coupled with a lens that has a CPU built in (all Nikon AF lenses have a CPU), the camera automatically knows what focal length and aperture range the lens has. The camera then uses this lens information to decide what the optimal settings should be.
This exposure mode chooses the widest aperture possible until the optimal shutter speed for the specific lens is reached. Then the camera chooses a smaller f-stop and increases the shutter speed as light levels increase. For example, when you use a 17-55mm f/2.8 zoom lens, the camera keeps the aperture wide open until the shutter speed reaches about 1/40 second (just above minimum shutter speed to avoid camera shake). Upon reaching 1/40 second, the camera adjusts the aperture to increase depth of field.
![]() When you use Auto ISO with Programmed Auto, the camera tries to hold the shutter speed at the number specified in the Auto ISO sensitivity settings.
When you use Auto ISO with Programmed Auto, the camera tries to hold the shutter speed at the number specified in the Auto ISO sensitivity settings.
The exposure settings selected by the camera are displayed in both the LCD control panel and the viewfinder display. Although the camera chooses what it thinks are the optimal settings, the camera does not know your specific needs. You may decide that your hands are not steady enough to shoot at the shutter speed the camera has selected, or you may want a wider or smaller aperture for selective focus. Fortunately, you aren't stuck with the camera's exposure choice. You can engage what is known as flexible program. Flexible program allows you to deviate from the camera's selected aperture and shutter speed when you are in P mode. You can automatically engage this feature by simply rotating the Main Command dial until the desired shutter speed or aperture is achieved. This allows you to choose a wider aperture/faster shutter speed when you rotate the dial to the right, or a smaller aperture/slower shutter speed when you rotate the dial to the left. With flexible program, you can maintain the metered exposure while still having some control over the shutter speed and aperture settings.
A quick example of using flexible program would be if the camera has set the shutter speed at 1/60 second with an aperture of f/8, you're shooting a portrait, and you want a wider aperture to throw the background out of focus. By rotating the Main Command dial to the right, you can open the aperture up to f/4, which causes the shutter speed to increase to 1/250 second. This is an equivalent exposure, meaning you get the same exposure but the settings are different.
When flexible program is on, an asterisk appears next to the P on the LCD control panel. Rotate the Main Command dial until the asterisk disappears to return to the default Programmed Auto settings (or turn the camera off and back on).
![]() Programmed Auto mode is not available when you use non-CPU lenses. When you're in P mode with a non-CPU lens attached, the camera automatically selects Aperture Priority mode. The P continues to appear on the LCD control panel, but the A for Aperture Priority appears in the viewfinder display.
Programmed Auto mode is not available when you use non-CPU lenses. When you're in P mode with a non-CPU lens attached, the camera automatically selects Aperture Priority mode. The P continues to appear on the LCD control panel, but the A for Aperture Priority appears in the viewfinder display.
![]() In Programmed Auto mode, if there is not enough light to make a proper exposure, the camera displays Lo in place of the shutter speed setting.
In Programmed Auto mode, if there is not enough light to make a proper exposure, the camera displays Lo in place of the shutter speed setting.
Aperture Priority
Aperture Priority mode (A) is a semiautomatic mode. In this mode, you decide which aperture to use by rotating the Sub-command dial and the camera sets the shutter speed for the best exposure based on your selection. Situations where you may want to select the aperture include when you're shooting a portrait and want a large aperture (small f-stop number) to blur out the background by minimizing depth of field, and when you're shooting a landscape and want a small aperture (large f-stop number) to ensure the entire scene is in focus by increasing depth of field.
Choosing the aperture to control depth of field is one of the most important aspects of photography and allows you to selectively control which areas of your image, from foreground to background, are in sharp focus and which areas are allowed to blur. Controlling depth of field enables you to draw the viewer's eye to a specific part of the image, which can make your images more dynamic and interesting to the viewer.
![]() In Aperture Priority mode, if there is not enough light to make a proper exposure, the camera displays Lo in place of the shutter speed setting.
In Aperture Priority mode, if there is not enough light to make a proper exposure, the camera displays Lo in place of the shutter speed setting.
Shutter Priority
Shutter Priority mode (S) is another semiautomatic mode. In this mode, you choose the shutter speed by rotating the Main Command dial and the camera automatically sets the aperture. You can choose shutter speeds from as long as 30 seconds to as short as 1/8000 second.
![]() When you're in Shutter Priority mode, dialing the shutter speed past the longest shutter speed of 30 seconds sets the shutter speed to the Flash sync speed. You can set the Flash sync speed in the Custom Setting menu (CSM e1).
When you're in Shutter Priority mode, dialing the shutter speed past the longest shutter speed of 30 seconds sets the shutter speed to the Flash sync speed. You can set the Flash sync speed in the Custom Setting menu (CSM e1).
Shutter Priority mode is generally used for shooting moving subjects or action scenes. Choosing a fast shutter speed allows you to freeze the action of a fast-moving subject. A good example would be if you were shooting a horse race. Horses move extremely fast, so you'd need to be sure to use a fast shutter speed of about 1/1000 second to freeze the motion of the horse and prevent blur. This would allow you to capture most of the crisp details of the subject.
There are also times when you may want to use a slow shutter speed, and you can use this mode for that as well. When you shoot scenes at night, a long exposure is often preferable, and choosing your shutter speed can allow you to introduce many creative effects into your photography. I often like to shoot city skylines at night and more often than not the skyline is located near a river. Selecting a slow shutter speed of about 2 to 4 seconds gives moving bodies of water a glasslike appearance that I find appealing. Be sure to bring along your favorite tripod for support.
Even when you shoot action, there are times when you may want to use a slower shutter speed. Panning along with a moving subject at a slower shutter speed allows you to blur the background while keeping the subject in relatively sharp focus. The blur of the background is extremely effective at portraying motion in a still photograph. I use this technique extensively when shooting motorsports.
![]() In Shutter Priority mode, if there is not enough light to make a proper exposure, the camera displays Lo in place of the aperture setting.
In Shutter Priority mode, if there is not enough light to make a proper exposure, the camera displays Lo in place of the aperture setting.
Manual
When in Manual mode (M), you set both the aperture and shutter speed settings. You can estimate the exposure, use a handheld light meter, or use the electronic analog exposure display on the D7000 to determine the exposure needed.
There are a few situations where you may want to set the exposure manually:
- When you want complete control over exposure. Most times the camera decides the optimal exposure based on technical algorithms and an internal database of image information. Oftentimes, what the camera decides is optimal is not necessarily what is optimal in your mind. You may want to underexpose the image to make it dark and foreboding, or you may want to overexpose it a bit to make the colors pop (making colors bright and contrasty). When your camera is set to M, you can choose the settings and place your image in whatever tonal range you want without having to fool with exposure compensation settings.
- When you use studio flash. When you use studio strobes or external non-dedicated flash units, you don't use the camera's metering system. When using external strobes, you need a flash meter or manual calculation to determine the proper exposure. Using the Manual exposure mode, you can quickly set the aperture and shutter speed to the proper exposure; just be sure not to set the shutter speed above the rated sync speed of 1/250 second.
- When you use non-CPU lenses. When you use older non-CPU lenses, the camera is automatically set to Aperture Priority with the camera choosing the shutter speed. Switching to Manual allows you to select both the shutter speed and aperture while using the camera's analog light meter that appears in the viewfinder display.
Auto modes
The D7000 has two fully automatic, or Auto, modes that do all the work for you. These are simple grab-and-go settings to use when you're in a hurry or you just don't want to be bothered with changing the settings. The Auto modes control everything from shutter speed and aperture to ISO sensitivity and white balance.
![]() You can override the Auto ISO setting using the Information Display menu. You can also override the Auto ISO if the Function button is set to ISO. The override remains in effect unless the camera is changed to P, S, A, or M and returned to one of the scene modes. When you change back to a scene mode from P, S, A, or M, the Auto ISO function is again activated.
You can override the Auto ISO setting using the Information Display menu. You can also override the Auto ISO if the Function button is set to ISO. The override remains in effect unless the camera is changed to P, S, A, or M and returned to one of the scene modes. When you change back to a scene mode from P, S, A, or M, the Auto ISO function is again activated.
Auto
The Auto mode is basically a point-and-shoot mode. The camera takes complete control over the exposure. The camera's meter reads the light, the color, and the brightness of the scene and runs the information through a sophisticated algorithm. The camera uses this information to determine what type of scene you are photographing and chooses the settings that it deems appropriate for the scene.
If there isn't enough light to make a proper exposure, the camera's built-in flash pops up when the Shutter Release button is half-pressed for focus. The flash fires when the shutter is released, resulting in a properly exposed image.
This mode is great for taking snapshots, when you simply want to concentrate on capturing the image and let the camera determine the proper settings.
Auto (flash off)
This mode functions in the same way as the Auto setting, except that it disables the flash, even in low-light situations. In instances when the lighting is poor, the camera's AF-assist illuminator lights up to provide sufficient light to achieve focus. The camera uses the focus area of the closest subject to focus on.
This setting is preferable when you want to use natural or ambient light for your subject or in situations where you aren't allowed to use flash, such as museums, or events where the flash may cause a distraction, such as weddings.
Scene modes
Sometimes the Auto mode isn't going to give you settings that suit your needs, especially when you are shooting under difficult situations or when you have special circumstances. The scene modes take into account different lighting situations and modify the way the camera meters the light. Scene modes also control the focus points, the flash settings, and the aperture, shutter speed, and ISO sensitivity settings.
The camera also determines if there is enough light to make an exposure and activates the built-in flash if the light is insufficient. Some scene modes, such as Landscape, also make sure that the flash is not used, even in low-light situations.
Nikon has added 13 more scene modes than were previously available on any dSLR with the exception of the D5000. These additional modes serve to cover almost every possible shooting scenario.
The scene modes in the D7000 allow you to capture the image with the settings that are best for what you are photographing. The camera has the parameters programmed into it; you simply rotate the Mode dial to Scene and choose the setting from the menu option on the LCD by rotating the Main Command dial.
![]() When you use scene modes, you cannot adjust the white balance (WB) and Active D-Lighting settings. Although each scene mode has default settings for ISO, AF-area, AF modes, and flash modes, you can change them. These settings return to default when you turn the camera off or turn the Mode dial to another setting.
When you use scene modes, you cannot adjust the white balance (WB) and Active D-Lighting settings. Although each scene mode has default settings for ISO, AF-area, AF modes, and flash modes, you can change them. These settings return to default when you turn the camera off or turn the Mode dial to another setting.
Portrait
This scene mode is for taking pictures of people. The camera automatically adjusts the colors to provide natural-looking skin tones. The camera focuses on the closest subject. It also attempts to use a wide aperture, if possible, to reduce the depth of field. This draws attention to the subject of the portrait, leaving distracting background details out of focus.
The built-in flash and AF-assist illuminator automatically activate in low-light situations.
Landscape
This mode is used for taking photos of far-off vistas. The camera automatically adjusts the colors to apply brighter greens and blues to skies and foliage. The camera also automatically focuses on the closest subject and uses a smaller aperture to provide a greater depth of field to ensure focus throughout the entire image.
In this mode, the camera automatically disables the AF-assist illuminator and the flash.
Child
This mode is for taking portraits or candid shots of children. The camera automatically adjusts the colors to provide more saturation while still providing a natural skin tone. The camera automatically focuses on the closest subject and uses a fairly small aperture to capture background details. The built-in flash is automatically activated when the light is low.
Sports
This mode uses a fast shutter speed to freeze the action of moving subjects. The camera focuses continuously as long as you have the Shutter Release button half-pressed. The camera also uses Predictive Focus Tracking based on information from all the focus areas in case the main subject moves from the selected focus point.
The camera disables the built-in flash and AF-assist illuminator when this mode is selected.
![]() To shoot a quick sequence shot, rotate the Release Mode dial to Continuous mode.
To shoot a quick sequence shot, rotate the Release Mode dial to Continuous mode.
Close-up
This scene mode is used for close-up or macro shots. It uses a fairly wide aperture to provide a soft background while giving the main subject a sharp focus. In this mode, the camera focuses on the subject in the center of the frame, although you can use the Multi-selector to choose one of the other focus points to create an off-center composition.
When light is low, the camera automatically activates the built-in flash. Be sure to remove your lens hood when using the flash on close-up subjects because the lens hood can cast a shadow on your subject by blocking the light from the flash.
Night Portrait
This mode is for taking portraits in low-light situations. The camera automatically activates the flash and uses a longer shutter speed to capture the ambient light from the background. This balances the ambient light and the light from the flash, giving you a more natural effect. You may want to use a tripod when you use this feature to prevent blurring from camera shake that can occur during longer exposure times.
Night Landscape
This mode disables the flash, sets a small aperture, and uses a long shutter speed to capture ambient light. The AF-assist illuminator is automatically turned off. You will definitely need a tripod when using this mode.
Party/Indoor
This option activates the built-in flash and uses the Red-Eye Reduction feature. Use this mode for capturing snapshots with people in them while retaining some of the ambient light.
Beach/Snow
Sand and snow present a tricky situation for your camera's light meter, and often cause the camera to underexpose the scene, making the snow or sand appear a dingy, dull gray. This scene mode adds some exposure compensation to ensure the sand or snow appears a natural, gleaming white.
Sunset
This mode captures the intense shades of color that occur during the sunset or sunrise. The camera boosts color saturation to enhance this effect. The flash is turned off, and the camera focuses at the center of the frame. A tripod is recommended when using this mode.
Dusk/Dawn
This mode is similar to the Sunset mode. It is intended for after the sun sets or before it rises. The color saturation is boosted more to accent the colors that are less visible when the sun has already set (or has yet to rise) and there is little light available. In this mode, the flash is turned off. A tripod is strongly recommended when using this mode.
Pet Portrait
This mode is obviously for taking photos of pets. A faster shutter speed is used to freeze any movement a frisky pet might make. The AF-assist illuminator is disabled in this mode.
Candlelight
This mode gives you more natural colors when photographing under candlelight, which can be difficult on standard Auto WB settings. The camera also uses wide aperture settings. The flash is disabled.
Blossom
This mode is for shooting landscapes in which large fields of colorful flowers appear. The colors are boosted for a more vibrant look. The built-in flash is disabled in this mode.
Autumn Colors
When this mode is selected, the camera automatically boosts the saturation of the reds, oranges, and yellows in the image because those are the most prevalent colors in fall foliage. The built-in flash is disabled in this mode.
Food
Use this mode when photographing food items. The colors are boosted and the camera selects a fairly wide aperture. When the lighting is low, the built-in flash is automatically activated.
Silhouette
In this mode, the camera sets the exposure for the bright part of the scene to silhouette the dark subject against a bright background. This option is best when shooting during dusk or dawn.
High Key
Use this setting when shooting a light subject against a light background. The camera applies some exposure compensation to slightly overexpose and add some brightness to the scene.
Low Key
Use this setting when photographing dark subjects on a dark background. This mode also punches up the highlights just a bit to get good definition between the shadows and highlights.
Metering Modes
The D7000 has three metering modes — Matrix, Center-weighted, and Spot metering — to help you get the best exposure for your image. You can change the modes by pressing the metering mode button just behind the Shutter Release button (on the left side) and rotating the Main Command dial (you can see the metering mode icon on the LCD control panel or the Info display). Metering modes determine how the camera's light sensor collects and processes the information used to determine exposure. Each of these modes is useful for different types of lighting situations.
Matrix
The default metering system that Nikon cameras use is a proprietary system called 3D Color Matrix Metering II, or just Matrix metering. Matrix metering reads a wide area of the frame and sets the exposure based on the brightness, contrast, color, and composition. Then the camera runs the data through sophisticated algorithms and determines the proper exposure for the scene. When you use a Nikkor Dor G-type lens, the camera also takes the focusing distance into consideration.
![]() For more on lenses and lens specifications, see Chapter 4.
For more on lenses and lens specifications, see Chapter 4.
The D7000's 2016-pixel RGB (Red, Green, Blue) sensor measures the intensity of the light and the color of a scene. The sensor debuts with the D7000 and is a great improvement over the 1005-pixel sensor of previous camera models. After the Matrix meter takes the measurement, the camera compares the information to information from 30,000 images stored in its database. The D7000 determines the exposure settings based on the findings from the comparison.
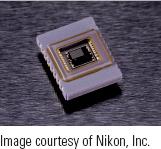
2.1 The 2016-pixel RGB sensor in the D7000
In simple terms, it works like this: You're photographing a portrait outdoors, and the sensor detects that the light in the center of the frame is much dimmer than the edges. The camera takes this information along with the focus distance and compares it to the ones in the database. The images in the database with similar light and color patterns and subject distance tell the camera that this must be a close-up portrait with flesh tones in the center and sky in the background. From this information, the camera decides to expose primarily for the center of the frame although the background may be overor underexposed. The RGB sensor also takes note on the quantity of the colors and uses that information.
The Matrix meter of the D7000 performs several ways automatically, based on the type of Nikon lens that you use.
- 3D Color Matrix Metering II. As mentioned earlier, this is the default metering system that the camera employs when a Gor D-type lens is attached to the camera. Most lenses made since the early to mid-1990s are these types of lenses. The only difference between the Gand D-type lenses is that on the G-type lens there is no aperture ring. When you use the Matrix metering method, the camera decides the exposure setting mostly based on the brightness and contrast of the overall scene and the colors of the subject matter as well as other data from the scene. It also takes into account the distance of the subject and which focus point is used, as well as the lens focal length, to further decide which areas of the image are important to getting the proper exposure. For example, if you're using a wide-angle lens with a distant subject with a bright area at the top of the frame, the meter takes this into consideration when setting the exposure so that the sky and clouds don't lose critical detail.
- Color Matrix Metering II. This type of metering is used when a non-Dor G-type CPU lens is attached to the camera. Most AF lenses made from about 1986 to the early to mid-1990s fit into this category. The Matrix metering recognizes this and the camera uses only brightness, subject color, and focus information to determine the right exposure.
- Color Matrix Metering. This type of metering is engaged when a non-CPU lens is attached to the camera and when the focal length and maximum aperture are specified using the non-CPU data in the D7000 Setup menu. The exposure is then calculated solely on the brightness of the scene and the subject color. If a non-CPU lens is attached and no lens information is entered, the camera's meter defaults to Center-weighted metering.
Matrix metering is suitable for use with most subjects, especially when you're in a particularly tricky or complex lighting situation. Given the large amount of image data in the Matrix metering database, the camera can make a fairly accurate assessment about what type of image you are shooting and adjust the exposure accordingly. For example, for an image with a high amount of contrast and brightness across the top of the frame, the camera tries to expose for the scene so that the highlights retain detail. Paired with Nikon's Active D-Lighting, your exposures will have good dynamic range throughout the entire image.
Center-weighted
When the camera's metering mode is switched to Center-weighted, the meter takes a light reading of the whole scene, but bases the exposure settings mostly on the light falling on the center of the scene. The camera determines about 75 percent of the exposure from a circular pattern in the center of the frame and 25 percent from the area around the center.
By default, the circular pattern is 8mm in diameter, but you can choose to make the circle bigger or smaller depending on the subject. Your choices are 6, 8, 10, or 13mm and are found in Custom Settings menu (CSM) b4.
There is also a setting for Average. When set to Average, the camera takes a reading of the full frame and decides on an average setting. (I'm not sure why the Average option is included in the Center-weighted menu because it's not center-weighted at all.) Averaging meters were one of the first types of meters used in SLR cameras and although they worked okay in moderately tricky lighting situations, you had to know when to use your exposure compensation or your image would come out flat and, well, average. An example of this is a snowy landscape — the averaging meter takes a look at all that white and wants to make it an 18 percent gray, causing the snow to look dingy. You have to know to adjust your exposure compensation +1 or 2 stops. Unless you're photographing something that is uniform in color and has very little contrast, I advise staying away from using the Average setting.
On the other hand, true Center-weighted metering is a very useful option. It works great when you are shooting photos with the main subject in the middle of the frame. This metering mode is useful when photographing a dark subject against a bright background, or a light subject against a dark background. It works especially well for portraits where you want to preserve the background detail while exposing correctly for the subject.
With Center-weighted metering, you can get consistent results without worrying about the adjustments in exposure settings that sometimes result when using Matrix metering.
![]() You can change the center-weighted circle diameter in CSM b4, which I explain in more detail in Chapter 3.
You can change the center-weighted circle diameter in CSM b4, which I explain in more detail in Chapter 3.
Spot
In Spot metering mode, the camera does just that: meters only a spot. This spot is only 3mm in diameter and only accounts for 2 percent of the frame. The spot is linked to the active focus point, which is good, so you can focus and meter your subject at the same time, instead of metering the subject, pressing AE-L (Auto-Exposure Lock), and then recomposing the photo. The D7000 has 39 focus points, so it's like having 39 spot meters to choose from throughout the scene.
Choose Spot metering when the subject is the only thing in the frame that you want the camera to expose for. You select the spot meter to meter a precise area of light within the scene. This is not necessarily tied to the subject. For example, when you photograph a subject on a completely white or black background, you need not be concerned with preserving detail in the background; therefore, exposing just for the subject works out perfectly. This mode works well for concert photography, where the musician or singer is lit by a bright spotlight. You can capture every detail of the subject and just let the shadow areas go black.
![]() When you use a non-CPU lens with Spot metering, the center spot is automatically selected.
When you use a non-CPU lens with Spot metering, the center spot is automatically selected.
Focus Modes
The Nikon D7000 has four focus modes: Auto (AF-A) Continuous (AF-C), Single (AF-S), and Manual (M). Each mode is useful for specific types of shooting conditions, from sports to still-life photographs. Nikon has changed the focus mode selector switch from previous models. You can switch from Manual to AF simply by flipping the switch. To switch between AF-A, AF-C, or AF-S, press the button in the center of the switch and rotate the Main Command dial. Looking through the viewfinder you can see which mode the camera is set to.
How the D7000 autofocus works
The D7000 has a completely new AF system, the Multi-CAM 4800 DX with 39 focus points, 9 of which are cross type sensor, providing the ability to detect contrast for focusing purposes.
Simplified, the Multi-CAM 4800DX AF works by reading contrast values from a sensor inside the camera's viewing system. The D7000 employs two sensor types: cross and horizontal. As you may have guessed, cross-type sensors are shaped like a cross while horizontal sensors are shaped like a horizontal line. You can think of them like plus and minus signs. Cross-type sensors are able to read the contrast in two directions, horizontally and vertically. Horizontal sensors can only interpret contrast in one direction. (When the camera is positioned in portrait orientation, the horizontal sensors are positioned vertically.)
Cross-type sensors can evaluate for focus much more accurately than horizontal sensors, but horizontal sensors can do it a bit more quickly (provided that the contrast runs in the right direction). Cross-type sensors require more light to work properly so horizontal sensors are also included in the array to speed up the AF, especially in low-light situations.
Phase detection
The AF system on the D7000 works by using phase detection, which is determined by a sensor in the camera's body. Phase detection is achieved by using a beam splitter to divert light that is coming from the lens to two optical prisms that send the light as two separate images to the AF sensor in the D7000. This creates a type of rangefinder where the base is the same as the diameter or aperture of the lens. The larger the length of the base, the easier it is for the rangefinder to determine whether the two images are “in phase” or in focus. This is why lenses with wider maximum apertures focus faster than lenses with smaller maximum apertures. This is also why the AF usually can't work with slower lenses coupled with a teleconverter, which reduces the effective aperture of the lens. The base length of the rangefinder images is simply too small to allow the AF system to determine the proper focusing distance. The AF sensor reads the contrast, or phase difference between the two images that are being projected on it. This is the primary way that the D7000 AF system works. This type of focus is also referred to as SIR-TTL, or Secondary Image Registration-Through the Lens, given the AF sensor relies on a secondary image, as opposed to the primary image that is projected into the viewfinder from the reflex mirror.
Contrast detection
Contrast detection focus is only used by the D7000 when you use Live View mode and video. This is the same method smaller compact digital cameras use to focus. Contrast detection focus is slower and uses the image sensor itself to determine whether the subject is in focus. It is a relatively simple operation in which the sensor detects the contrast between different subjects in the scene. The camera does this by moving the lens elements until sufficient contrast is achieved between the pixels that lie under the selected focus point. With contrast detection, a greater area of the frame can be focused upon, meaning you can set the focus area to anywhere within the scene.
Continuous (AF-C)
When the camera is set to Continuous AF (AF-C), the camera continues to focus as long as the shutter is pressed halfway (or the AE-L/AF-L button is set to AF-ON in CSM f5). If the subject moves, the camera activates Predictive Focus Tracking. Predictive Focus allows the camera to track the subject and maintain focus by attempting to predict where the subject will be when the shutter is released. When the camera is in AF-C mode, it fires when the Shutter Release button is fully depressed, whether the subject is in focus or not. This custom AF setting is known as Release Priority. If you want to be sure that the scene is in focus before the shutter is released, you can change the setting to Focus Priority. When the Focus Priority option is selected, the camera continues to focus while the Shutter Release button is pressed but the shutter releases only when the subject is in focus. This may cause your frame rate to slow down. You can choose between Focus and Release Priority in CSM a1. This is the AF-C mode you want to use when shooting sports or any subject that may be moving erratically.
Single (AF-S)
In Single AF, or AF-S mode (not to be confused with the lens designation), the camera focuses when the Shutter Release button is pressed halfway. When the camera achieves focus, the focus locks. The focus remains locked until the shutter is released or the Shutter Release button is no longer pressed. By default, the camera does not fire unless focus has been achieved (Focus Priority), but you can change this to Release Priority in CSM a2. This allows you to take a photo whether the camera has achieved focus or not. I recommend sticking with Focus Priority for the Single-servo AF (AF-S) mode and using Release Priority for Continuous-servo AF (AF-C) mode. The AF-S mode is the best mode to use when shooting portraits, landscapes, or other photos in which the subject is relatively static.
Using this mode helps ensure that you have fewer out-of-focus images.
Auto (AF-A)
This focus mode was originally introduced with Nikon's entry-level cameras, but has moved up to the D7000. When you use this mode the D7000's AF system automatically selects AF-C or AF-S by determining whether the subject is moving. This mode works adequately when shooting snapshots, but I wouldn't count on it to work perfectly in situations where focus is critical.
Manual (M)
When set to Manual (M) mode, the AF system on the D7000 is off. You achieve focus by rotating the focus ring of the lens until the subject appears sharp as you look through the viewfinder. You can use the Manual focus setting when shooting still-life photographs or other nonmoving subjects, when you want total control of the focus, or simply when you are using a non-AF lens. You may want to note that the camera shutter releases regardless of whether the scene is in focus.
When using the Manual focus setting, the D7000 offers a bit of assistance in the way of an electronic rangefinder. The rangefinder shows that you are in focus by displaying a green dot in the lower-left corner of the viewfinder. In addition the rangefinder has two arrows, one on either side of the green dot. If the arrow to the right is lit the focus is behind the subject; the arrow to the left indicates that the focus is in front of the subject. You still need to choose a focus point so that the camera can determine where the subject is in the frame so that the rangefinder can work properly.
Autofocus Area Modes
The D7000 has four AF-area modes to choose from: Single-point AF, Dynamic-area AF, 3D-tracking, and Auto-area AF. Each one is useful in different situations and can be modified to suit your needs for various shooting situations. To change the AF-area mode, press the AF mode button and rotate the Sub-command dial.
As discussed earlier in the chapter, the D7000 employs an impressive 39 separate AF points. The 39 AF points can be used individually in Single-area AF mode or they can be set to use in groups of 9, 21, or 39 in Dynamic-area AF mode.
The D7000 can also employ 3D-tracking, which enables the camera to automatically switch focus points and maintain sharp focus on a moving subject as it crosses the frame. 3D-tracking is made possible by the camera recognizing color and light information and using it to track the subject.
Nikon's Scene Recognition System uses the 2016-pixel RGB sensor to recognize color and lighting patterns in order to determine the type of scene that you are photographing. This enables the AF to work faster than in previous Nikon dSLRs, and it also helps the D7000 achieve more accurate exposure and white balance.
Single-point AF
Single-point AF area mode is the easiest mode to use when you shoot slow-moving or completely still subjects. You can press the Multi-selector up, down, left, right, or diagonally to choose one of the AF points. The camera only focuses on the subject if it is in the selected AF area. Once the point is selected, you can lock it in by rotating the focus point lock switch right below the Multi-selector.
By default, Single-area AF allows you to choose from any one of the 39 AF area points. Sometimes selecting from this many points can slow you down; this is why the D7000 also allows you to change the number of selectable points to a more widely spaced array of 11 focus points. Anyone who has used a D90 will be immediately familiar with the 11-point pattern. You can choose the amount of focus points in CSM a6.
Switching from 39 points to 11 points can speed up your shooting process when using Single-area AF mode. I often use 11 points when shooting concerts because I don't need to be super accurate on my focus point; this allows me to move the focus point to the preferred area in less than half of the button pushes it takes when using 39 points.
Dynamic-area AF
Dynamic-area AF mode also allows you to select the AF point manually, but unlike Single-area AF, the remaining unselected points remain active; this way if the subject happens to move out of the selected focus area, the camera's highly sophisticated autofocus system can track it throughout the frame. You can set the Dynamic-area AF to function with 9, 21, or 39 points by pressing the AF-mode button and rotating the Sub-command dial. The easiest way to see which mode you're selecting is by looking in the viewfinder. You can also see the mode in the LCD control panel and the Info display.
When you set the focus to AF-S, or Single AF, mode (discussed earlier in the chapter), the mode operates exactly the same as if you were using Single-area AF. To take advantage of Dynamic-area AF, the camera must be set to the AF-C, or Continuous AF, mode.
9 points
When your D7000 is set to the 9-point option, you can select any one of the camera's 39 AF points to be the primary focus point. If your subject moves out of the selected point, the AF system uses the eight AF points immediately surrounding the selected point to achieve focus. Use this setting for more predictable sports such as baseball. Baseball players typically run in a straight line and you don't need many points for AF coverage.
21 points
As with the 9-point area AF mode, you can select the primary focus point from any one of the 39 points. The camera then uses information from the surrounding 20 points if the subject moves away from the selected focus area. The 21-point area gives you a little more leeway with moving subjects because the active AF areas are in a larger pattern. This mode is good for shooting sports with a lot of action, such as soccer or football. Players are a bit more unpredictable and the larger coverage helps you maintain focus when the player cuts left or right. However, the 21-point coverage isn't so large that the camera's AF doesn't tend to jump to other players.
39 points
The 39-point area AF mode gives you the widest area of active focus points. You can select the primary focus point the same way you do with the 9-point and 21-point options. The camera then keeps the surrounding 38 points active in case the subject leaves the selected focus area. This mode is best for situations where there is a lone subject against a plain background, such as a bird, or even an airplane, against a plain blue sky or a single person against a simple background.
![]() When using Dynamic-area AF with 21 or 39 points, you may notice that AF takes a little longer to work given the processor in the D7000 has to sample more points.
When using Dynamic-area AF with 21 or 39 points, you may notice that AF takes a little longer to work given the processor in the D7000 has to sample more points.
3D-tracking
This mode has all 39 AF points active. You select the primary AF point, but if the subject moves, the camera uses 3D-tracking to automatically select a new primary AF point. 3D-tracking is accomplished by the camera using distance and color information from the area immediately surrounding the focus point. The camera uses this information to determine what the subject is, and if the subject moves, the camera selects a new focus point. This mode works very well for subjects moving unpredictably; however, you need to be sure that the subject and the background aren't similar in coloring. When you photograph a subject that has a color that is similar to the background, the camera may lock focus on the wrong area, so use this mode carefully.
Auto-area AF
Auto-area AF is exactly what it sounds like: The camera automatically determines the subject and chooses one or more AF points to lock focus. Due to the D7000's Scene Recognition System, when the camera is used with Nikkor Dor G-type lenses, it is able to recognize human subjects. This means that the camera has a better chance of focusing where you want it than accidentally focusing on the background when shooting a portrait. Normally, I tend not to use a fully automatic setting such as this, but I find it works reasonably well when you shoot candid photos. When the camera is set to Single-servo AF (AF-S) mode, the active AF points light up in the viewfinder for about 1 second when the camera attains focus; when it is set to Continuous AF (AF-C) mode, no AF points appear in the viewfinder.
![]() If you're really curious about knowing which AF point was selected, you can view the AF point while reviewing the image on your LCD. To do this, go to the Playback menu, select Display mode, and select the focus point under Basic photo info. Be sure to highlight Done and press OK to lock in the setting. When the image is played back, the active focus points will be overlaid. The focus points can also be viewed with Nikon Capture NX 2 and ViewNX 2 software.
If you're really curious about knowing which AF point was selected, you can view the AF point while reviewing the image on your LCD. To do this, go to the Playback menu, select Display mode, and select the focus point under Basic photo info. Be sure to highlight Done and press OK to lock in the setting. When the image is played back, the active focus points will be overlaid. The focus points can also be viewed with Nikon Capture NX 2 and ViewNX 2 software.
ISO Sensitivity
ISO, which stands for International Organization for Standardization, is the rating for the speed of film, or in digital terms, the sensitivity of the sensor. The ISO numbers are standardized, which allows you to be sure that when you shoot at ISO 100, you get the same exposure no matter what camera you are using.
You can set the ISO very quickly on the D7000 by pressing and holding the ISO button and rotating the Main Command dial until the desired setting appears in the LCD control panel. As with other settings for controlling exposure, the ISO can be set in 1/3or 1/2-stop increments. You can choose the ISO increments in CSM b1.
The D7000 has a native ISO range of 100 to 6400. In addition to these standard ISO settings, the D7000 also offers some settings that extend the available range of the ISO so you can shoot in very bright or very dark situations. These are labeled as H (high speed). By default, the H option is set in 1/3-stop adjustments up to H1. The options are as follows:
- H0.3, H0.7, and H1.0. These settings give you up to ISO 12800 in 1/3 steps.
- H2. This setting isn't adjustable. You get one H2 setting that is equivalent to ISO 25600.
You can also set the ISO in the Shooting menu under the ISO sensitivity settings option.
![]() When CSM b1 is set to half step, you have the option of selecting H0.5.
When CSM b1 is set to half step, you have the option of selecting H0.5.
![]() Using the H settings will not produce optimal results. It can cause your images to have increased amounts of digital noise.
Using the H settings will not produce optimal results. It can cause your images to have increased amounts of digital noise.
Auto ISO
The D7000 also offers a feature where the camera adjusts the ISO automatically for you when there isn't enough light to make a proper exposure. Auto ISO is meant to free you from making decisions about when to raise the ISO. You can set the Auto ISO in the Shooting menu under the ISO sensitivity settings option.
Be default, when Auto ISO is turned on the camera will choose the ISO settings from the native ISO range of 100-6400 in 1/3 stop settings. If you manually raise the shutter speed, however, the camera will not choose any settings lower than what the ISO is set to. For example, if you manually change the ISO setting to 800 by pressing the ISO button and rotating the Main Command dial, the Auto ISO feature will not select an ISO setting lower than ISO 800 no matter how bright the scene is.
Additionally, the D7000 allows you to set the maximum sensitivity of the Auto ISO feature. This enables you to decide how high your ISO settings go so that you can more easily control the noise in your images. For the most part, I set the maximum sensitivity to 3200.
Initially I was skeptical of this feature, but I began using it when the D700 was released and I have continued to use it on all subsequent models because Nikon's images are excellent at high ISO settings on all current cameras.
Be sure to set the following options in the Shooting menu/ISO sensitivity settings:
- Maximum sensitivity. Choose an ISO setting that allows you to get an acceptable amount of noise in your image. If you're not concerned about noisy images, then you can set it all the way up to H2. If you need your images to have less noise, you can choose a lower ISO; you can choose any setting from ISO 200 to H2 in one-stop increments.
- Minimum shutter speed. This setting determines when the camera adjusts the ISO to a higher level. At the default, the camera bumps up the ISO when the shutter speed falls below 1/30 second. If you're using a longer lens or you're photographing moving subjects, you may need a faster shutter speed. In that case, you can set the minimum shutter speed up to 1/4000 second. On the other hand, if you're not concerned about camera shake, or if you're using a tripod, you can set a shutter speed as slow as 1 second.
![]() The minimum shutter speed is only taken into account when using Programmed Auto or Aperture Priority modes.
The minimum shutter speed is only taken into account when using Programmed Auto or Aperture Priority modes.
Noise reduction
Noise starts appearing in images taken with the D7000 when you're shooting above ISO 1600 or using long exposure times. For this reason, most camera manufacturers have built-in noise reduction (NR) features. The D7000 has two types of NR: Long exposure NR and High ISO NR. Each one approaches the noise differently to help reduce it.
![]() For more detailed information on digital noise, see Chapter 5.
For more detailed information on digital noise, see Chapter 5.
Long exposure NR
When Long exposure NR is turned on, the camera runs a noise reduction algorithm to any shot taken with a long exposure (8 seconds or more). Basically how this works is the camera takes another exposure, this time with the shutter closed, and compares the noise from this dark image to the original one. The camera then applies the NR. The noise reduction takes about the same amount of time to process as the length of the shutter speed; therefore, expect just about double the time it takes to make one exposure. While the camera is applying NR, the LCD control panel blinks the message “Job nr.” You cannot take additional images until this process is finished. If you switch the camera off before the NR is finished, no noise reduction is applied.
You can turn Long exposure NR on or off by accessing it in the Shooting menu.
High ISO NR
When High ISO NR is turned on, any image shot at ISO 800 or higher is run through the noise reduction algorithm.
This feature works by reducing the coloring in the chrominance of the noise and combining that with a bit of softening of the image to reduce the luminance noise. You can set how aggressively this effect is applied by choosing the High, Normal, or Low settings.
You may also want to be aware that High ISO NR slows down the processing of your images; therefore the capacity of the buffer can be reduced, causing your frame rate to slow down when you're in Continuous shooting mode.
When the High ISO NR is set to off, the camera still applies NR to images shot at 1600 and higher, although the amount of NR is less than when the camera is set to Low with NR on.
![]() When shooting in NEF (RAW), no actual noise reduction is applied to the data, but NR is tagged in the file. For the in-camera NR to be applied to the final image the RAW file must be opened and edited using Nikon software.
When shooting in NEF (RAW), no actual noise reduction is applied to the data, but NR is tagged in the file. For the in-camera NR to be applied to the final image the RAW file must be opened and edited using Nikon software.
For the most part, I do not use either of these in-camera NR features. In my opinion, even at the lowest setting, the camera is very aggressive in the NR, and for that reason, there is a loss of detail. For most people, this is a minor quibble and not very noticeable, but for me, I'd rather keep all the available detail in my images and apply noise reduction in post-processing. This way I can decide how much to reduce the chrominance and luminance rather than letting the camera do it. The camera doesn't know whether you're going to print the image at a large size or just display it on-screen. I say it's better to be safe than sorry.
![]() Photoshop's Adobe Camera Raw and other image-editing software includes their own proprietary Noise Reduction.
Photoshop's Adobe Camera Raw and other image-editing software includes their own proprietary Noise Reduction.
White Balance
Light, whether from sunlight, a light bulb, a fluorescent light, or a flash, has a specific color. This color is measured using the Kelvin scale, and the measurement is also known as color temperature. The white balance (WB) allows you to adjust the camera so your images can look natural no matter what the light source. Given white is the color that is most dramatically affected by the color temperature of the light source, this is what you base your settings on; hence the term white balance. You can change the white balance in the Shooting menu or by pressing the WB button on the top of the camera and rotating the Main Command dial.
The term color temperature may sound strange to you. “How can a color have a temperature?” you might ask. Once you know about the Kelvin scale, things make a little more sense.
What is Kelvin?
Kelvin is a temperature scale, normally used in the fields of physics and astronomy, where absolute zero (0K) denotes the absence of all heat energy. The concept is based on a mythical object called a black body radiator. Theoretically, as this black body radiator is heated, it starts to glow. As it is heated to a certain temperature, it glows a specific color. It is akin to heating a bar of iron with a torch. As the iron gets hotter it turns red, then yellow, and then eventually white before it reaches its melting point (although the theoretical black body does not have a melting point).
The concept of Kelvin and color temperature is tricky as it is the opposite of what you likely think of as warm and cool colors. For example, on the Kelvin scale, red is the lowest temperature, increasing through orange, yellow, white, and to shades of blue, which are the highest temperatures. Humans tend to perceive reds, oranges, and yellows as warmer and white and bluish colors as colder. However, physically speaking, as defined by the Kelvin scale, the opposite is true.
White balance settings
Now that you know a little about the Kelvin scale, you can begin to explore the white balance settings. The reason that white balance is so important is it helps ensure that your images have a natural look. When you're dealing with different lighting sources, the color temperature of the source can have a drastic effect on the coloring of the subject. For example, a standard light bulb casts a very yellow light; if the color temperature of the light bulb is not compensated for by introducing a bluish cast, the subject can look overly yellow and not quite right.
In order to adjust for the colorcast of the light source, the camera introduces a colorcast of the complete opposite color temperature. For example, to combat the green color of a fluorescent lamp, the camera introduces a slight magenta cast to neutralize the green.
Here are the D7000's white balance settings:
- Auto. This setting is good for most circumstances. The camera takes a reading of the ambient light and makes an automatic adjustment. This setting also works well when you're using a Nikon CLS compatible Speedlight because the color temperature is calculated to match the flash output. I recommend using this setting as opposed to the Flash WB setting. In addition you can choose from two Auto settings in the Shooting menu under the WB settings.
- Auto1 Normal. This is your standard setting. It attempts to get a neutral white balance setting.
- Auto2 Keep warm lighting colors. This is a brand new feature introduced with the D7000. This gives the image a slightly warmer tone than with the regular Auto1 setting. This can actually make a lot of images look a little more natural in some cases. I recommend using this option outside at high noon, but I don't recommend using it under incandescent lighting as it can cause the images to look a little too yellow.
- Incandescent. Use this setting when the lighting is from a standard household light bulb.
- Fluorescent. Use this setting when the lighting is coming from a fluorescent-type lamp. You can also adjust for different types of fluorescent lamps, including high-pressure sodium and mercury-vapor lamps. To make this adjustment, go to the Shooting menu and choose White Balance, and then choose fluorescent. From there, use the Multi-selector to choose one of the seven types of lamps.
- Direct sunlight. Use this setting outdoors in the sunlight.
- Flash. Use this setting when using the built-in Speedlight, a hot-shoe Speedlight, or external strobes.
- Cloudy. Use this setting under overcast skies.
- Shade. Use this setting when you are in the shade of trees or a building or even under an overhang or a bridge — any place where the sun is out but is being blocked.
- Choose color temp. This setting allows you to adjust the white balance to a particular color temperature that corresponds to the Kelvin scale. You can set it anywhere from 2500K (Red) to 10000K (Blue).
- Preset manual. This setting allows you to choose a neutral object to measure for the white balance. It's best to choose an object that is either white or light gray. There are some accessories that you can use to set the white balance. One accessory is a gray card, which is included with this book. Simply put the gray card in the scene and balance off of it. Another accessory is the Expodisc. You attach it to the front of your lens like a filter, and then point the lens at the light source and set your WB. This setting (PRE) is best used under difficult lighting situations, such as when there are two light sources lighting the scene (mixed lighting). I usually use this setting when photographing with my studio strobes.
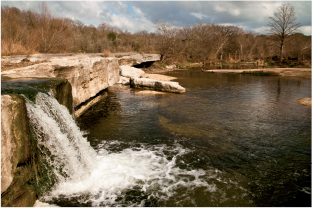
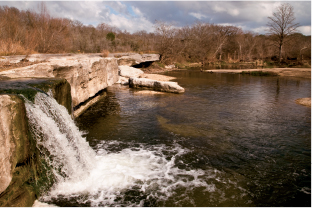
Figures 2.2 to 2.8 show the difference that white balance settings can make to your image.


Picture Controls
With the release of the D3 and the D300, Nikon introduced its Picture Control System. The D7000 is also equipped with this handy option. This feature allows you to quickly adjust your image settings, including sharpening, contrast, brightness, saturation, and hue based on your shooting needs. This is great for photographers who shoot with more than one camera and do batch processing to their images. It allows both cameras to record the images with the same settings so global image correction can be applied without worrying about differences in color, tone, saturation, and sharpening.
Picture Controls can also be saved to one of the memory cards and imported into Nikon's image-editing software, Capture NX 2 or ViewNX 2. You can then apply the settings to RAW images or even to images taken with other camera models. You can also save and share these Picture Control files with other Nikon users, either by importing them to Nikon software or loading them directly to another camera.
The D7000 comes with six Picture Controls already loaded on the camera, and you can customize up to nine Picture Control settings in-camera.
Right out of the box the D7000 comes with six Picture Controls installed:
- SD. This is the Standard setting. It applies slight sharpening and a small boost of contrast and saturation. This is the recommended setting for most shooting situations.
- NL. This is the Neutral setting. It applies a small amount of sharpening and no other modifications to the image. This setting is preferable if you do extensive post-processing to your images.
- VI. This is the Vivid setting. It gives your images a fair amount of sharpening, and the contrast and saturation is boosted highly, resulting in brightly colored images. This setting is recommended for printing directly from the camera or CF card as well as for shooting landscapes. Personally, I feel that this mode is a little too saturated and often results in unnatural color tones. This mode is not ideal for portrait situations, as skin tones are not typically reproduced with accuracy.
- MC. This is the Monochrome setting. As the name implies, this option makes the images monochrome. This doesn't simply mean black and white; you can also simulate photo filters and toned images such as sepia, cyanotype, and more. You can also adjust the settings for sharpening, contrast, and brightness.
- PT. This is the Portrait setting. It gives you just a small amount of sharpening, which gives the skin a smoother appearance. The colors are muted just a bit to help achieve realistic skin tones.
- LS. This is the Landscape setting. Obviously, this setting is for shooting landscapes and natural vistas. It appears to me that this is very close to the Vivid Picture Control with a little more boost added to the blues and greens.
You can customize all the Original Picture Controls to fit your personal preferences. You can adjust the settings to your liking, giving the images more sharpening and less contrast or a myriad of other options.
![]() Although you can adjust the Original Picture Controls, you cannot save over them, so there is no need to worry about losing them.
Although you can adjust the Original Picture Controls, you cannot save over them, so there is no need to worry about losing them.
There are a few different customizations to choose from:
- Quick adjust. This option works with SD, VI, PT, and LS. It exaggerates or de-emphasizes the effect of the Picture Control in use. Quick adjust can be set from ±2.
- Sharpness. This controls the apparent sharpness of your images. You can adjust this setting from 0 to 9, with 9 being the highest level of sharpness. You can also set this to Auto (A) to allow the camera's imaging processor to decide how much sharpening to apply.
- Contrast. This setting controls the amount of contrast your images are given. In photos of scenes with high contrast (sunny days), you may want to adjust the contrast down; in scenes with low contrast, you may want to add some contrast by adjusting the settings up. You can set this from ±3 or to A.
- Brightness. This adds or subtracts from the overall brightness of your image. You can choose 0 (default) + or −.
- Saturation. This setting controls how vivid or bright the colors in your images are. You can set this between ±3 or to A. This option is not available in the MC setting.
 The Brightness and Saturation option is unavailable when Active D-Lighting is turned on.
 - Hue. This setting controls how your colors look. You can choose ±3. Positive numbers make the reds look more orange, the blues look more purple, and the greens look more blue. Choosing a negative number causes the reds to look more purple, the greens to look more yellow, and the blues to look more green. This setting is not available in the MC Picture Control setting. I highly recommend leaving this in the default setting of 0.
- Filter Effects. This setting is only available when you set your D7000 to MC. The monochrome filters approximate the types of filters traditionally used with black-and-white film. These filters increase contrast and create special effects. The options are
- Yellow. Adds a low level of contrast. It causes the sky to appear slightly darker than normal and anything yellow to appear lighter. It is also used to optimize contrast for brighter skin tones.
- Orange. Adds a medium amount of contrast. The sky will appear darker, giving greater separation between the clouds. Orange objects appear light gray.
- Red. Adds a great amount of contrast, drastically darkening the sky while allowing the clouds to remain white. Red objects appear lighter than normal.
- Green. Darkens the sky and lightens any green plant life. This color filter can be used for portraits as it softens skin tones.
- Toning. Toning adds a color tint to your monochrome (black and white) images. Toning options are
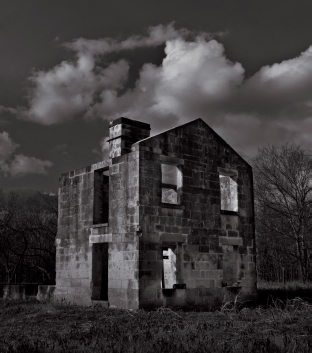
- B&W. The black-and-white option simulates the traditional black-and-white film prints done in a darkroom. The camera records the image in black, white, and shades of gray. This mode is suitable when the color of the subject is not important. You can use it for artistic purposes or, as with the sepia option, to give your image on antique or vintage look.
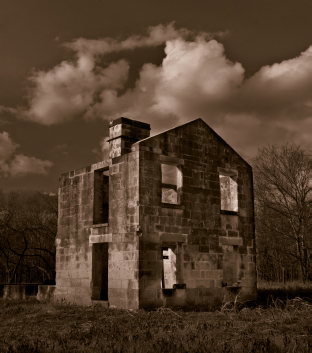
- Sepia. The sepia color option duplicates a photographic toning process that is done in a traditional darkroom using silver-based black-and-white prints. Sepia-toning a photographic image requires replacing the silver in the emulsion of the photo paper with a different silver compound, thus changing the color, or tone, of the photograph. Antique photographs generally underwent this type of toning; therefore the sepia color option gives the image an antique look. The images look reddish-brown. You may want to use this option to convey a feeling of antiquity or nostalgia to your photograph. This option works well with portraits as well as still-life and architectural images. You can also adjust the saturation of the toning from 1 to 7, with 4 being the default and the middle ground.
- Cyanotype. The cyanotype is another old photographic printing process. When the image is exposed to the light, the chemicals that make up the cyanotype turn deep blue. This method was used to create the first blueprints and was later adapted to photography. The images taken while in this setting are in shades of cyan. Because cyan is considered to be a cool color, this mode is also referred to as cool. You can use this mode to make very interesting and artistic images. You can also adjust the saturation of the toning from 1 to 7, with 4 being the default setting.

- Color toning. You can also choose to add colors to your monochrome images. Although this is similar to the sepia and cyanotype toning options, this type of toning isn't based on traditional photographic processes. It is simply adding a colorcast to a black-and-white image. There are seven color options you can choose from: red, yellow, green, blue-green, blue, purple-blue, and red-purple. As with sepia and cyanotype, you can adjust the saturation of these toning colors.
- B&W. The black-and-white option simulates the traditional black-and-white film prints done in a darkroom. The camera records the image in black, white, and shades of gray. This mode is suitable when the color of the subject is not important. You can use it for artistic purposes or, as with the sepia option, to give your image on antique or vintage look.
To customize an Original Picture Control, follow these steps:
- Go to the Set Picture Control option in the Shooting menu. Press the Multi-selector right.
- Choose the Picture Control you want to adjust. Choosing the NL or SD option allows you to make smaller changes to the effect because they have relatively low settings (contrast, saturation, etc.). To make larger changes to color and sharpness, choose the VI mode. To make adjustments to monochrome images, choose MC. Press the Multi-selector right.
- Press the Multi-selector up or down to highlight the setting you want to adjust (sharpening, contrast, brightness, and so on). When the setting is highlighted, press the Multi-selector left or right to adjust the settings. Repeat this step until you've adjusted the settings to your preferences.
- Press OK to save the settings.
To return the Picture Control to the default setting, follow the preceding Steps 1 and 2 and press the Delete button. A dialog box appears, asking for confirmation. Select Yes to return to the default setting or No to continue to use the Picture Control with the current settings.
![]() When the original Picture Control settings have been altered, an asterisk is displayed with the Picture Control setting (SD*, VI*, and so on).
When the original Picture Control settings have been altered, an asterisk is displayed with the Picture Control setting (SD*, VI*, and so on).
To save a Custom Picture Control, follow these steps:
- Go to the Manage Picture Control option in the Shooting menu. Press the Multi-selector right.
- Press the Multi-selector up or down to select Save/edit. Press the Multi-selector right.
- Choose the Picture Control to edit. Press the Multi-selector right.
- Press the Multi-selector up or down to highlight the setting you want to adjust (sharpening, contrast, brightness, and so on). When the setting is highlighted, press the Multi-selector left or right to adjust the settings. Repeat this step until you've adjusted the settings to your preferences.
- Press OK to save the settings.
- Use the Multi-selector to highlight the Custom Picture Control you want to save to. You can store up to nine Custom Picture Controls; they are labeled C-1 through C-9. Press the Multi-selector right.
- When the Rename Menu appears, press the Zoom out button and press the Multi-selector left or right to move the cursor to any of the 19 spaces in the name area of the dialog box. New Picture Controls are automatically named with the Original Picture Control name and a two-digit number (for example, STANDARD _02 or VIVID_03).
- Press the Multi-selector (without pressing the Zoom out button) to select letters in the keyboard area of the dialog box. Press the Multi-selector center button to set the selected letter and press the Delete button to erase the selected letter in the Name area. Once you type the name you want, press OK to save it. The Custom Picture Control is then saved to the Picture Control menu and can be accessed through the Set Picture Control option in the Shooting menu.
To return the Picture Control to the default setting, follow the preceding Steps 1 through 3 and press the Delete button. A dialog box appears, asking for confirmation; select Yes to return to the default setting or No to continue to use the Picture Control with the current settings.
You can rename or delete your Custom Picture Controls at any time by using the Manage Picture Control option in the Shooting menu. You can also save the Custom Picture Control to your memory card so that you can import the file to Capture NX 2, or ViewNX 2.
To save a Custom Picture Control to the memory card, follow these steps:
- Go to the Manage Picture Control option in the Shooting menu. Press the Multi-selector right.
- Press the Multi-selector up or down to highlight the Load/save option. Press the Multi-selector right.
- Press the Multi-selector up or down to highlight the Copy to card option. Press the Multi-selector right.
- Press the Multi-selector up or down to select the Custom Picture Control to copy. Press the Multi-selector right.
- Select a destination on the memory card to copy the Picture Control file to. There are 99 slots in which to store Picture Control files. The Custom Picture Controls are saved to the Primary memory card.
- After you choose the destination, press the Multi-selector right. A message appears confirming that the file has been stored to your memory card.
After you copy your Custom Picture Control file to your card, you can import the file to the Nikon software by mounting the memory card to your computer using a card reader or USB camera connection. See the software user's manual for instructions on importing to the specific program.
You can also upload Picture Controls that are saved to a memory card to your camera. Follow these steps:
- Go to the Manage Picture Control option in the Shooting menu. Press the Multi-selector right.
- Press the Multi-selector up or down to highlight the Load/save option. Press the Multi-selector right.
- Press the Multi-selector up or down to highlight the Copy to camera option. Press the Multi-selector right.
- Select the Picture Control to copy. Press OK or the Multi-selector right to confirm.
- The camera then displays the Picture Control settings. Press OK. The camera automatically displays the Save As menu.
- Select an empty slot to save to (C-1 through C-9).
- Rename the file if necessary. Press OK.
JPEG
JPEG, which stands for Joint Photographic Experts Group, is a method of compressing photographic files as well as the name of the file format that supports this type of compression. The JPEG is the most common type of file used to save images on digital cameras. Due to the small size of the file that is created and the relatively good image quality it produces, JPEG has become the default file format for most digital cameras.
The JPEG compression format was developed because of the immense file sizes that digital images produce. Photographic files contain millions upon millions of separate colors and each individual color is assigned a number; therefore the files contain vast amounts of data, which makes them quite large. In the early days of digital imaging, the huge file sizes and relatively small storage capacity of computers made it almost impossible for most people to store images. Less than 10 years ago, a standard laptop hard drive was only about 5GB. For people to efficiently store images, a file that could be compressed without losing too much of the image data during reconstruction was needed. Enter the Joint Photographic Experts Group. This group of experts came in and designed what is now affectionately known as the JPEG.
JPEG compression is a very complicated process involving many mathematical equations, but the steps involved can be explained quite simply. The first thing the JPEG process does is break down the image into 8 × 8-pixel blocks. The RGB color information in each 8 × 8 block is then treated to a color space transform where the RGB values are changed to represent luminance and chrominance values. The luminance value describes the brightness of the color while the chrominance value describes the hue.
Once the luminance and chrominance values have been established, the data is run through what is known as the Discrete Cosine Transform (DCT). This is the basis of the compression algorithm. Essentially the DCT takes the information for the 8 × 8 block of pixels and assigns it an average number because, for the most part, the changes in the luminance and chrominance values will not be drastic in such a small part of the image.
The next step in the process is quantizing the coefficient numbers that were derived from the luminance and chrominance values by the DCT. Quantizing is basically the process of rounding off the numbers. This is where file compression comes in. How much the file is compressed depends on the quantization matrix. The quantization matrix defines how much the information is compressed by dividing the coefficients by a quantizing factor. The larger the number of the quantizing factor, the higher the quality (therefore, the less compression). This is basically what is going on in Photoshop when you save a file as a JPEG and the program asks you to set the quality; you are simply defining the quantizing factor.
Once the numbers are quantized, they are run through a binary encoder that converts the numbers to the ones and zeros our computers love so well. You now have a compressed file that is on average about one-fourth of the size of an uncompressed file.
The one important consideration with JPEG compression is that it is what's known as a lossy compression. When the numbers are quantized, they lose information. For the most part, this loss of information is imperceptible to the human eye. A bigger issue to consider with JPEGs comes from what is known as generation loss. Every time a JPEG is opened and resaved, a small amount of detail is lost. After multiple openings and savings, the image's quality starts to deteriorate, as less and less information is available. Eventually the image may start to look pixilated or jagged (this is known as a JPEG artifact). Obviously, this can be a problem, but the JPEG would have to be opened and resaved many hundreds of times before you would notice a drop in image quality, provided you save at high-quality settings.
Image Size
When saving to JPEG format, the D7000 allows you to choose an image size. Reducing the image size is like reducing the resolution on your camera; it allows you to fit more images on your card. The size you choose depends on what your output is going to be. If you know you will be printing your images at a large size, you definitely want to record large JPEGs. If you're going to print at a smaller size (8 × 10 or 5 × 7), you can get away with recording at the Medium or Small setting. Image size is expressed in pixel dimensions. The large JPEG setting records your images at 4928 × 3264 pixels; this gives you a file that is equivalent to 16.2 megapixels. Medium size gives you an image of 3696 × 2448 pixels, which is in effect the same as a 9-megapixel camera. The small size gives you a dimension of 2464 × 1632 pixels, which gives you about a 4-megapixel image.
You can quickly change the image size by pressing the QUAL button and rotating the Sub-command dial on the front of the camera. You can also change the image size in the Shooting menu by selecting the image size menu option.
![]() You can only change image size when using the JPEG file format. RAW files are recorded only at the largest size.
You can only change image size when using the JPEG file format. RAW files are recorded only at the largest size.
Image Quality
With JPEGs, in addition to the size setting, which changes the pixel dimension, you have the Quality setting, which is the setting that decides how much of a compression ratio is applied to your JPEG image. Your choices are Fine, Normal, and Basic. JPEG Fine files are compressed to approximately 1:4, Normal files are compressed to about 1:8, and Basic files are compressed to about 1:16. To change the image quality setting, simply press the QUAL button and rotate the Main Command dial. Doing this scrolls you through all the file-type options available, including RAW, Fine (JPEG), Normal (JPEG), and Basic (JPEG). You will also be able to shoot RAW and JPEG simultaneously with all the JPEG compression options available (RAW + Fine, RAW + Normal, or RAW + Basic).
NEF (RAW)
Nikon's RAW files are referred to as NEF in Nikon literature. NEF stands for Nikon Electronic File. RAW files contain all the image data acquired by the camera's sensor. When a JPEG is created, the camera applies different settings to the image, such as WB, sharpness, noise reduction, and so on. When the JPEG is saved, the rest of the unused image data is discarded to help reduce file size. With a RAW file, this image data is saved so it can be used more extensively in post-processing. In some ways the RAW file is like a digital negative because the RAW files are used in the same way as a traditional photographic negative; that is, you take the RAW information and process it to create your final image.
Although some of the same settings are tagged to the RAW file (WB, sharpening, saturation, and so on), these settings aren't fixed and applied like they are in the JPEG file. This way when you import the RAW into your favorite RAW converter you can make changes to these settings without detrimental effects.
Capturing your images in RAW allows you to be more flexible when post-processing your images and generally gives you more control over the quality of the images.
The D7000 offers a few options for saving NEF (RAW) files. They include compression and bit depth. Like JPEGs, RAW files can be compressed to save space so that you can fit more images on your memory card. You can also choose to save the RAW file with more bit depth, which can give you more available colors in your image file.
Type
Under the NEF (RAW) recording option in the Shooting menu, you can choose the type of compression you want to apply to the NEF (RAW) file or you can choose none at all. Keep in mind that with the D7000 you can save an NEF file in 12-bit or 14-bit, which will affect the number of files you can capture.
You have two options:
- Lossless compressed. Unlike JPEG compression, this algorithm loses no data information when the file is closed and stored. When the file is opened, the algorithm reverses the compression scheme and the exact same data that was saved is retrieved. This is the camera's default setting for storing RAW files. You will get a file size that is approximately 15 to 40 percent of the size of an uncompressed RAW file. You can fit about 200 of these files on a 4GB CF or SD card in Compressed NEF (RAW) 12-bit capture.
- Compressed. Similar to JPEG compression, with this algorithm some of the image data is lost when these types of files are compressed. The complex algorithms they use to create these files actually run two different compression schemes to the same file. Given our eyes perceive changes in the darker areas of images more than in the lighter areas, the image data for the shadow areas are compressed using a lossless compression while the midtones and lighter are compressed using a lossy method. This compression scheme has very little impact on the image data and allows you to be sure that you retain all your shadow detail. Using this compression scheme, your file size will be about 30 to 60 percent of the size of an uncompressed file. You can fit about 276 of these files on a 4GB CF or SD card in Compressed NEF (RAW) 12-bit capture.
Bit depth
Simply put, bit depth is how many separate colors your sensor can record. The term bit depth is derived from digital terminology. A bit is the smallest unit of data; it is expressed in digital language as either a 1 or a 0. Most digital images saved as JPEG or TIFF are recorded in 8 bits, or 1 byte per channel (each primary color being a separate color: red, green, and blue [RGB]), resulting in a 24-bit image. For each 8 bits there are 256 possible colors; multiply this by 3 channels and you get more than 16 million colors, which is plenty enough information to create a realistic-looking digital image. By default, the D7000 records its RAW files using a bit depth of 12 bits per channel, giving you a 36-bit image. What this means is that your sensor can recognize far more shades of color, which gives you a smoother gradation in tones, allowing the color transitions to be much smoother. In addition to the 12-bit setting, the D7000 offers the option of recording your NEF (RAW) files at 14 bits per channel, which gives you even more color information to deal with when processing your images.
All this comes with a cost: the higher the bit depth, the more information contained in the file. This makes your files bigger, especially when the camera is shooting 14-bit NEF (RAW) files, which can result in larger files. When shooting at 14 bits, the camera has much more image data to contend with, so your top frame rate is reduced by just a bit.
I find that for most applications, shooting NEF (RAW) files at 12 bits is more than enough color information. I only switch to 14 bits when shooting portraits, especially when the portraits are low-key. This helps me get much smoother transitions from the shadow areas to the highlights.
![]() The Nikon D7000 uses a 14-bit A/D converter, so its theoretical maximum dynamic range is 14 stops. High bit depth really only helps minimize image posterization because actual dynamic range is limited by noise levels. A high bit-depth image does not necessarily mean that the image contains more colors; it just means it has the capacity to store more color data. If a digital camera has a high-precision A/D converter, it does not necessarily mean it can record a greater dynamic range. In reality, the dynamic range of a digital camera does not even come close to the A/D converter's theoretical maximum; 5 to 9 stops is generally all you can expect from the camera due to imaging sensor limitations.
The Nikon D7000 uses a 14-bit A/D converter, so its theoretical maximum dynamic range is 14 stops. High bit depth really only helps minimize image posterization because actual dynamic range is limited by noise levels. A high bit-depth image does not necessarily mean that the image contains more colors; it just means it has the capacity to store more color data. If a digital camera has a high-precision A/D converter, it does not necessarily mean it can record a greater dynamic range. In reality, the dynamic range of a digital camera does not even come close to the A/D converter's theoretical maximum; 5 to 9 stops is generally all you can expect from the camera due to imaging sensor limitations.
This issue has always created a controversy in the digital imaging world: Some people say that RAW is the only way to have more flexibility in processing images, and others say if you get it right in-camera then you don't need to use RAW images. For what It's worth, both factions are right in their own way.
Choosing between RAW and JPEG basically comes down to your goal for final output or what you're using the images for. Remember that you don't have to choose one file format and stick with it. You can change the settings to suit your needs as you see fit, or you can even choose to record both RAW and JPEG simultaneously.
Some reasons to shoot JPEGs include
- Small file size. JPEGs are much smaller in size than RAW files; therefore you can fit many more of them on your memory card and later on your hard drive. If space limitations are a problem, shooting JPEG allows you to get more images in less space.
- Printing straight from camera. Some people like to print their images straight from the camera or memory card. RAW files can't be printed without first being converted to JPEG (which you can do in-camera with the D7000).
- Continuous shooting. Given JPEG files are smaller than RAW files, they don't fill up the camera's buffer as quickly, allowing you longer bursts without the frame rate slowing down.
- Less post-processing. If you're confident in your ability to get the image exactly as you want it at capture, you can save yourself time by not having to process the image in a RAW converter and save straight to JPEG.
- Snapshot quality. If you're just shooting snapshots of family events or if you only plan to post your images on the Internet, saving as JPEG will be fine.
Some reasons to shoot RAW files include
- 16-bit images. The D7000 can capture RAW images in 12or 14-bit. When converting the file using a RAW converter such as Adobe Camera Raw (ACR) or Capture NX 2, you can save your images with 16-bit color information. When the information is written to JPEG in the camera, the JPEG is saved as an 8-bit file. This gives you the option of working with more colors in post-processing. This can be extremely helpful when you're trying to save an underor overexposed image. Bit depth is discussed in more detail earlier in the chapter.
- White balance. Although the WB that the camera was set to is tagged in the RAW file, it isn't fixed in the image data. Oftentimes, the camera can record a WB that isn't quite correct. This isn't always noticeable by looking at the image on the LCD screen. Changing the WB on a JPEG image can cause posterization and usually doesn't yield the best results. Because you have the RAW image data on hand, changing the WB settings doesn't degrade the image at all.
- Sharpening and saturation. As with WB, these settings are tagged in the RAW file but not applied to the actual image data. You can add sharpening and saturation (or other options, depending on your software).
- Image quality. Because the RAW file is an unfinished file, it allows you the flexibility to make many changes in the details of the image without any degradation to the quality of the image.