
CHAPTER 10
Landscape and Nature Photography
Landscape and nature photography is done outdoors and is simple and accessible. Any local park or nature preserve is filled with birds, plants, flowers, rock formations — almost any type of flora and fauna you can imagine. To take landscape and nature shots, you don't necessarily need a lot of specialized lenses or lighting equipment; almost any lens will do and the sun provides the light.
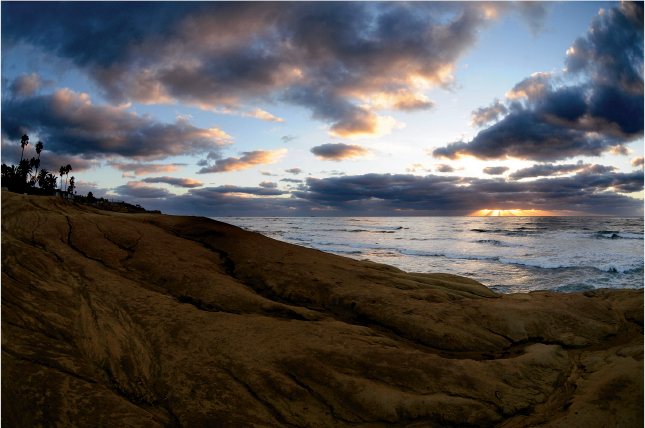
You can use photography to capture images of places you've visited. Exposure: ISO 200, f/5.6, 1/125 second using a Nikon 10.5mm f/2.8 fisheye lens.
Landscape
Landscape photography simply shows a specific scene as it exists within nature. Generally people and animals are excluded from the pictures so the emphasis is on the properties of the land.
You can take a landscape photograph in any type of environment — deserts, mountains, lakes, forests, skylines, or just about any terrain. One very interesting aspect of landscapes is that if you return to the same spot even as soon as a couple of hours after the first time, the scene will look different according to the position of the sun and the quality of the light. You can also return to the same scene months later and find it completely different due to the change in seasons.
There are three distinct styles of landscape photography:
- Representational. This is a straight approach — “what you see is what you get.” This is not to say that a representational landscape photo is a simple snapshot; it requires great attention to details such as composition, lighting, and weather.
- Impressionistic. With this type of landscape photo, the image is not realistic due to filters or special photographic techniques such as long exposures. These techniques can give the image a mysterious or otherworldly quality.
- Abstract. With this type of landscape photo, the image may or may not resemble the actual subject. The compositional elements of shape and form are more important than an actual representation of the scene.
One of the most important parts of capturing a good landscape image is quality of light. Quality of light is the way the light interacts with the subject. Many different terms are used to define the various qualities of light, such as soft light, diffused light, or hard light, but for the purposes of landscape photography, the most important part is knowing how the light interacts with the landscape at certain times of day.
Most photographers agree that the best times to photograph a landscape are just after the sun rises and right before the sun sets. The sunlight at those times of day is refracted by the atmosphere and bounces off low-lying clouds, resulting in a sunlight color that is warmer, which is more pleasing to the eye than it is at high noon. Photographers often refer to both times of day as the golden hour, given the color and quality of the light that appears.
One type of nature photography is wildlife photography. You will find wildlife in many different places — zoos, wildlife preserves, and animal sanctuaries as well as out in the wild. One of the easiest ways to capture wildlife photos is to be where you know the animals are.
Opportunities to take wildlife pictures can occur when you're hiking in the wilderness, or even when you're sitting out on your back porch enjoying the sunset. With a little perseverance and luck, you can get great wildlife images that rival the ones you see in National Geographic.
Using a telephoto lens is essential; for the most part the animals will be some distance away and a long lens enables you to get up close and personal. The most important thing to remember about wildlife photography is to be careful. Wild animals can be unpredictable, and even aggressive, when confronted by humans.
Although sunrise and sunset are usually considered the best times to shoot, you often will be constrained by time, especially if you're on vacation and running on a tight schedule. It is possible to shoot a great landscape image at high noon on a bright, sunny day. The bottom line is that it's best to grab your shot when you can rather than not taking the shot altogether.
Figure 10.1 is a representational landscape image that I shot at twilight. I used spot metering and metered the brightest part of the scene to underexpose the shot to give the sky a rich, deep color and to allow the palm trees and buildings to silhouette. Traditionally landscape images are framed horizontally, hence the term landscape orientation, but I composed this image vertically (portrait orientation) to play up the striking tallness of the central palm tree. Bending the rules sometimes adds interest to your composition.
In Figure 10.2, I used an ultrawide fisheye lens to add impact to the image. When you use a wide-angle lens, take great care when considering composition. You need to pay close attention to your foreground. Using a wide-angle lens enables you to fit a lot of the scene into the frame; this can often lead to having copious amounts of blank space, which doesn't make for a particularly compelling photo. Make sure your foreground is interesting; look for patterns, leading lines, or bold colors. In Figure 10.2 the leading lines of the trees add a dynamic tension to the image. Using the reflection allowed me to make a very surreal image. I actually flipped the image upside down to further the effect.
![]() Experiment with your image orientation; try shooting in portrait orientation to make a landscape more interesting.
Experiment with your image orientation; try shooting in portrait orientation to make a landscape more interesting.
While wide-angle lenses are generally your best bet for landscapes, you can use telephotos with great success as well. In the abstract landscape image in Figure 10.3, I used a 50-500mm telephoto lens zoomed to 500mm to get close up on the setting sun. Using the telephoto to achieve compression perspective distortion flattens the image, giving it a subtle abstract effect.
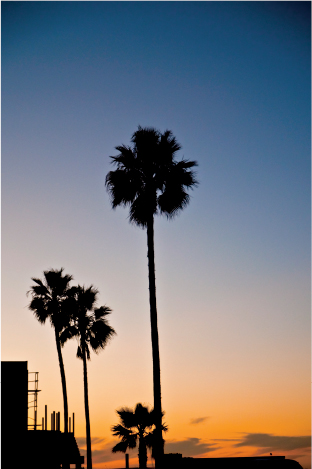
10.1 I shot this landscape just at twilight at a park in Encinitas, California. You don't necessarily need to leave the city to get a good landscape shot. Exposure: ISO 640 (Auto ISO), f/2.8, 1/250 second using a Tamron 17-50mm f/2.8 lens at 50mm.
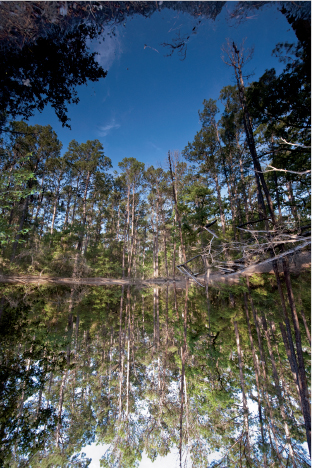
10.2 This landscape shot is more of an impressionistic shot due to the wide-angle lens distortion. Exposure: ISO 400, f/5.6, 1/125 second using a Nikon 10.5mm f/2.8 fisheye lens.
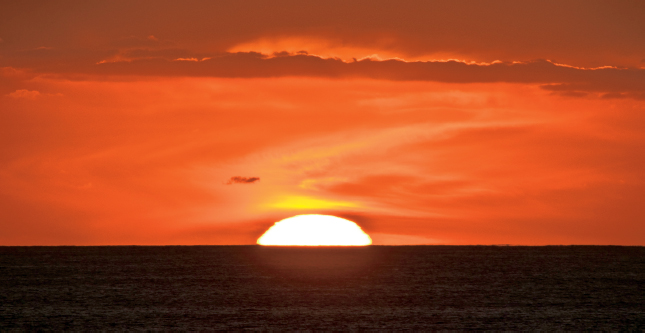
10.3 I shot this landscape with a telephoto lens. Exposure: ISO 200, f/11, 1/500 second using a Sigma 50-500mm f/4-6.3 lens at 500mm.
A few other landscape tips:
- Maximize your depth of field. Using a small aperture enables you to get everything in focus, which is generally the goal in landscape photography.
- Use a tripod. When using smaller apertures, your shutter speed will be slower by necessity. Using a tripod helps ensure that your images are sharp.
- Keep an eye on the horizon. Be sure your horizons are straight. There's nothing that screams out “snapshot” more than a crooked horizon.
Nature
There are many interpretations of nature photography but generally, it's agreed that nature photography is done outdoors. You will want to look carefully for plants, animals, and insects.
The techniques of nature photography are as varied as the subjects. You can use almost any type of lens to get different effects; the options are unlimited.
When going out to take general nature shots, I usually like to bring two lenses: a wide to normal zoom, such as a 17-55mm, and a longer lens, which is invariably the 105mm macro lens. If I know there is a chance that I will run into some wildlife, I bring a long telephoto zoom lens.
Flowers and plants are probably the easiest subjects for nature shots. They have inspired artists throughout the centuries. Many artists choose flowers and plants not only for their beauty but also because they don't have to pay them to model! Plants and flowers also offer an almost unlimited variety of colors and textures. From reds and blues to purples and yellows, the color combinations are practically limitless.
I was talking a walk through Austin's Zilker Park when I saw the flower in Figure 10.4. Because it was nearing twilight, the background was a distinct blue and the yellow/orange of the flower allows it to pop right out of the image. If you walk around and look at the interesting colors of the local flora, you may notice interesting features. Pay close attention to the way the light interacts with different plants. Though many times it is undesirable to have a backlit subject, sometimes the light coming through a transparent flower petal can add a different quality of beauty to an already beautiful flower.
Using complementary colors can also give your images an added boost. Pay attention to the color scheme of the background and subject. Try to avoid having a subject and a background that are similar colors.
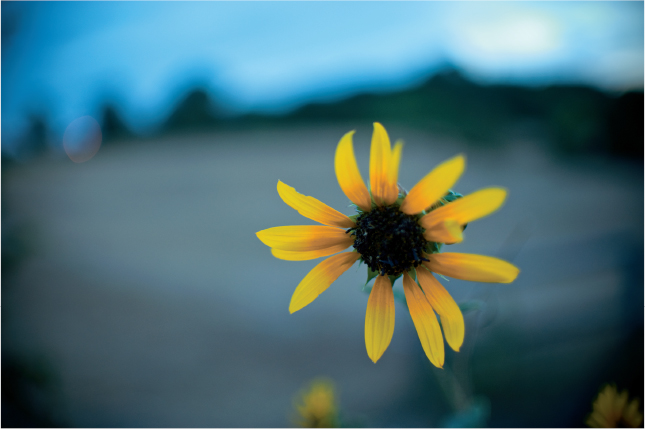
10.4 Flowers are easy subjects for nature shots. Exposure: ISO 800, f/1.8, 1/125 second using a 35mm f/1.8G lens.