You can use SharePoint Designer to convert an LVWP to a DVWP, so that you can use advanced tools to manipulate and format data. During the conversion process, SharePoint Designer generates the necessary XSLT to match the CAML used to render the list items data. The SharePoint SPDataSource control is added and refers to the list by a unique number called its List ID, not by its name. The value of the List ID is known as a Globally Unique Identifier (GUID).
In this exercise, you will convert an LVWP to a DVWP and then modify the Data View by using the extra functionality that the Data View provides.
Note
USE the site you modified in the previous exercise.
OPEN the site in SharePoint Designer, if it is not already open, and display LinksPage.aspx in Split view.
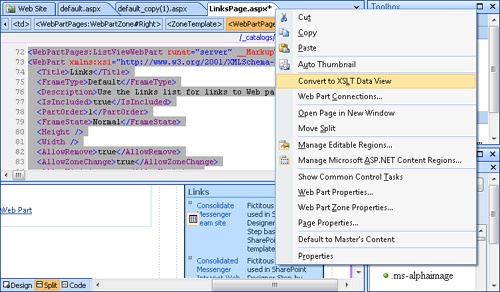
Right-click Links, and then click Convert to XSLT Data View.
The LinksPage.aspx page is redisplayed, and the Common Data View Tasks list opens. The WebPartPages:ListViewWebPart control is replaced by the WebPartPages:DataFormWebPart control.
Click the Code view, and on the Edit menu, click Find to open the Find and Replace dialog box.
Under Find where, select Current page if not selected, and under Advanced, select Find in source code if not selected.
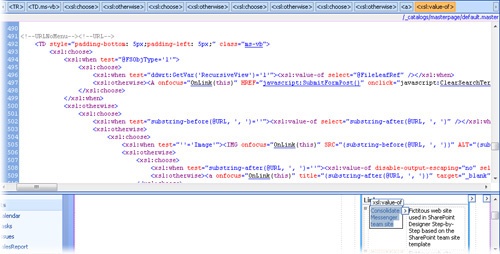
In the Find What text box, type URLNoMenu, and then click Find Next.
SharePoint Designer finds a comment with XSLT elements and HTML tags below it. This is the code that SharePoint Designer generated to replace the CAML FieldRef element.
Click Close to close the Find and Replace dialog box.
In the Design view portion of the document window, in the Links Data View, right-click Consolidated Messenger team site, and then click Hyperlink Properties.
The Edit Hyperlink dialog box opens.
In the Text to display text box, select {substring-after(@URL, ‘,’)}, right-click it, and then click Copy.
Click Screen Tip.
The Set Hyperlink Screen Tip dialog box opens.
Right-click the ScreenTip text box, and click Paste. Then click OK to close the Set Hyperlink Screen Tip dialog box.
Click Target Frame, click New Window, and then click OK.
Click OK to close the Edit Hyperlink dialog box.
The code view is redisplayed. The title and target attributes are added to the HTML <a> tag.
On the Common toolbar, click the Save button.