With SharePoint Designer, you can use three different methods of packaging your sites content:
Backup and Restore, where you create a content migration package (.cmp). Use this method when you need to copy or move an entire site or child site to another server or location.
Export and Import, using Personal Web Packages (.fwp). Use this method to share or reuse a site, list, or library structure. It does not include list items, only the list structure. It can be used to copy files, but only as part of the library structure.
Export a site as a site template. When you use this method, SharePoint Designer does not package the site for you; it opens the browser on the Save Site As Template page. More information on site templates can be found in Chapter 13.
Tip
None of the above packages can be modified after they are created. If you do want to alter the contents of the package, you need to restore/import the package to a site, modify the site, and re-create the package.
The Backup and Restore method includes the most data of the three, and is, therefore, the method to use if you want to move a site or child site from one server to another. It will not include any data stored at the site collection level, such as content types, nor does it include components from the Recycle Bin. Therefore, if your site references components, such as content types, site columns, or features other than the defaults, your site may not restore successfully. Both servers should be at the same service pack levels. Even if the servers and components on both servers are the same, you could still lose some customizations or configuration settings, such as alerts and personalized content.
Tip
If you need to back up more than one site, your SharePoint administrator has a number of tools he or she can use.
To back up a site, you need to be a site owner for that site. You can use SharePoint Designer to back up and restore Windows SharePoint Services 2.0 sites, but they can only be restored on the same server or on another server running Windows SharePoint Services 2.0. Similarly, if you move sites between servers, verify that they have the same level of software installed, such as service packs.
With any method that moves files from one location to another, you should choose carefully what you include in the package; for example, your Data Source Library (fpdatasources), may contain data connection details that could include connection strings, user names, and passwords. Similarly, you should be careful about creating content by using any method, because the content will contain pages, which does contain code, and, therefore, you need to verify that the source of the packages can be trusted.
In this exercise, you will back up and restore a site.
Note
USE the site you modified in the previous exercise.
OPEN the site in SharePoint Designer, if it is not already open.
On the Site menu, point to Administration, and then click Backup Web Site.
A Backup Web Site dialog box opens, stating that this operation may take a while, and asking whether you want to back up subsites.
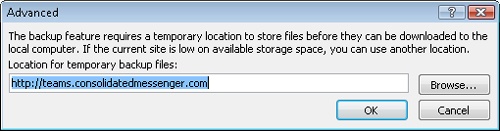
Click Advanced to open the Advanced dialog box.
Click OK to close the Advanced dialog box, and then click OK to close the Backup Web Site dialog box.
The Files Save As dialog box opens.
Navigate to DocumentsMicrosoft PressSPD2007_SBS, and in the File name text box, type SPDBackup.
Click Save to close the File Save as dialog box.
When the Backup Web Site Progress dialog box closes, the Microsoft Office SharePoint Designer dialog box opens, stating that the Web site backup completed successfully.
Click OK to close the dialog box.
On the Common toolbar, click the New Document arrow, and then in the list, click Web Site.
The New dialog box opens.
On the Web Site tab, click General, and then click Empty Web Site.
In the Specify the location of the new Web site text box, type http://<site>, where <site> is the URL of the location where you want to restore the site you just backed up. For example, <site> might be http://teams.consolidatedmessenger.com/spdbackup.
Click OK to close the New dialog box.
The new site opens in a separate SharePoint Designer program window. No content is listed in the Folder List task pane.
In the new SharePoint Designer program window, on the Site menu, point to Administration, and then click Restore Web Site.
The File Open dialog box opens.
Navigate to the location you used in step 4, DocumentsMicrosoft PressSPD2007_ SBS, and click SPDBackup.cmp. Then click Open.
The Restore Web Site dialog box opens.
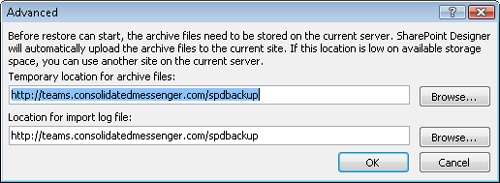
Click Advanced to open the Advanced dialog box.
Click OK to close the Advanced dialog box, and then click OK to close the Restore Web Site dialog box.
When the Restore Web Site Progress dialog box closes, the Microsoft Office SharePoint Designer dialog box opens, stating that the restore operation completed successfully.
Click OK to close the dialog box.
The Folder List task page displays the contents of the restored site.