Chapter 4. Organizing and managing information
If you are used to working with local files and folders or have worked with simple file sharing sites, you will certainly be able to manage your content in Microsoft SharePoint 2013. You can upload files, sort them into folders, and navigate these folders to find content in the future. At some point, however, a site can grow to contain so many files that a simple, folder-based structure is not sufficient to quickly find content, particularly if you have project files spread across many different folders.
In this section, we explain how you can enhance the ways that you store and organize content by using content types to differentiate types of files, site columns to provide additional information on each file, and document templates and workflows to support document automation.
As you organize content, a simple method is to add relevant information to the file name or to the name of the folder that contains the file. For example, you might add the company name, document type, and release date of the file to the file name, such as “Contoso - Proposal - May 2013.docx”. This can work nicely for a small number of files, but this method becomes difficult to manage for more complex tasks. For example, if you want to find all proposals released in the year 2013, you have no way to quickly find files across multiple companies. In these cases, metadata can be useful for adding additional information to files to help you search, sort, and categorize content. If you have ever used a file folder to store content, you’ve made use of basic metadata, such as file name, date modified, and size.
SharePoint site columns
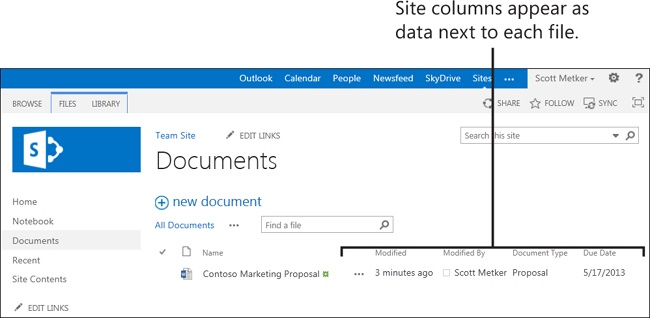
In SharePoint, metadata is referred to as site columns. A site column makes it possible for the same piece of metadata to be applied to multiple lists and libraries. When you apply a site column to a list or library, you can define a value for each of the items in that list or library. Additionally, you can add this value to views and further use it to sort or filter large numbers of files. For example, if you define a site column named “Department” and add this column to a document library, you can use this column to sort all files so that you can differentiate between the values “Sales” and “Marketing”. These site columns can also be configured to store different types of data, such as text values, date values, and restricted values that can be chosen from a list.
After a site column is defined, you can add it to multiple libraries, which helps support consistency between files located in different libraries. It also makes it possible for users to quickly define new libraries and metadata without entering new columns from scratch on each library.
SharePoint content types
You use content types to further organize information across multiple libraries and sites by grouping similar documents into a single category, such as legal documents, memos, or proposals. Because these content types can be used in multiple lists and libraries, documents stored in many different places can be easily classified and treated in a similar way. A content type might define the following behaviors:
Site columns that will be associated to files that use this content type
A document template that will be used as a starting point for all new files of this content type
Workflows that might be used with files of this content type
Custom New, Edit, or Display forms that might be used to edit metadata for files or items based on this content type
Custom Document Information Panel settings (used with Microsoft Office files only) for adding metadata while editing the files in Office
Information management policies (for auditing, expiring, and associating barcodes and labels to documents automatically)
Using content types, your team can manage and organize your information and documents in a consistent fashion. Because content types can include many site columns, you can use them to quickly apply a set of metadata that will be used to classify the files for a single library. This can save your team valuable time because content types can be reused across libraries and sites.
You can also add multiple content types to the same library; this means that a user can more easily classify the content in a list or library. Each content type can have different site columns and other associated behaviors so that only the relevant metadata is required when uploading one type of content versus another.
As with site columns, content types are inherited by child sites and can be used throughout a site collection. This makes them a very powerful, time-saving device for classifying documents and metadata.
SharePoint 2013 includes a variety of file and item content types that you can immediately use or extend as the parent content type for new content types that your team might create. The following are lists of the more commonly used content types:
Content type | Description |
Community content types | |
Category | Used to for community site categories |
Community Member | Used to associate a community member to a list |
Site Membership | Used to associate a community member to a list |
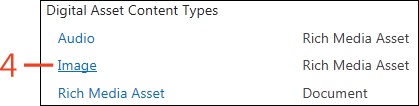
Digital asset content type | |
Audio | Used for audio files |
Image | Used for graphic and images |
Rich Media Asset | Used for other rich media |
Video | Used for video files |
Video Rendition | Used for renditions of video files, which are different sizes and encodings of videos that are generated for mobile devices, and so on |
Display template content types | |
JavaScript Display Template | Used for storing client-side rendering code written by developers to change the display of some controls |
Document content types | |
Basic Page | Used for basic site pages |
Document | Used for site documents. (Typically, this is the main content type that is used as a starting point for building new content types.) |
Dublin Core Columns | Used for content tagged by using the Dublin Core Metadata element set (an industry standard for resource discovery) |
Form | Used for storing data display and entry forms |
Link to a Document | Used for storing external links to documents |
List View Style | Used for list view styles |
Master Page | Used for master pages, which are developer resources for applying a consistent look and feel across a SharePoint site |
Master Page Preview | Used for master page preview images |
Picture | Used for uploaded pictures or images |
Web Part Page | Used for site pages containing Web Part zones (where new Web Parts may be added) |
Wiki Page | Used for wiki pages, which support community-edited documentation |
Document set content types | |
Document Set | Used for document sets, which are containers for other types of documents |
Folder content types | |
Discussion | Used for tracking discussions on discussion boards |
Folder | Used for organizing documents within libraries |
Summary Task | Used for grouping and describing related tasks |
Group work content types | |
Circulation | Used for adding a new circulation |
Holiday | Used for entering holiday information on calendars |
New Word | Used for entering new words on a list |
Official Notice | Used for official notices |
Phone Call Memo | Used for recording a memo from a phone call |
Resource | Used to describe an asset that can be reserved |
Resource Group | Used to group resources |
Timecard | Used to record a timecard entry for an employee |
Users | Used to associate users to a list |
What’s New Notification | Used to record a “What’s New” notification |
List content types | |
Announcement | Used for the announcements Web Part, with which announcements can be posted to a page within a site |
Comment | Used for comments associated with blog posts |
Contact | Used for storing information about a content (for example, First Name, Last Name, Email, and so on) |
East Asia Contact | Used for storing information about a content (for example, First Name, Last Name, Email, and so on) using East Asia formatting |
Event | Used for describing events that are to be displayed in calendars. |
Issue | Used for tracking issues or problems |
Item | Used for basic list items (This is the basic starting point used as the parent for many customized site columns.) |
Link | Used for links to other pages or assets |
Message | Used for messages |
Post | Used for storing blog posts on blog sites |
Reservations | Used for reservations of assets within meeting sites |
Schedule | Used for scheduling appointments |
Schedule and Reservations | Used for both scheduling appointments and reserving assets |
Task | Used for storing site tasks |
Workflow Task (SharePoint 2013) | Used for storing information about workflow tasks |
Special content types | |
Unknown Document Type | A special content type first used when documents are first uploaded to SharePoint, and a formal content type has not yet been associated to the file. |
Browsing through site columns
You can define site columns in SharePoint 2013 at the site-collection level, and you can add and use them within both lists and document libraries. Sites created under a primary collection can also make use of the same site columns available in the root site. As you explore site columns, you will be able to browse the site columns associated with your site and inspect individual site columns in detail.
Browse through site columns
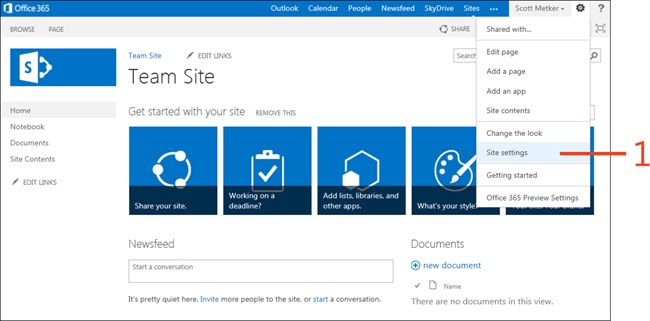
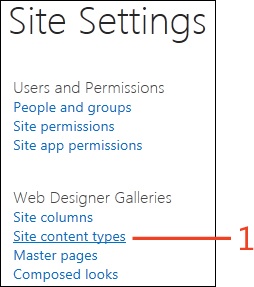
In the upper-right corner of the window, click the Settings icon (the small gear graphic) and then, on the menu that appears, click Site Settings.
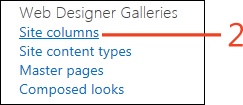
On the Site Settings page, in the Web Designer Galleries section, click the Site Columns link.
Tip
Site columns can be reused throughout a site or any child sites that inherit from the parent site. The site columns that you see within your site might belong to a parent site.
Tip
Remember that Site Columns can be inherited from a parent site. This is why you might need to click the Source link to navigate to the parent site if you want to view detail about a particular column. Also, when you click an entry in the Source column, you are taken to the Site Columns page within the parent site, so don’t forget to navigate back after you have finished exploring!
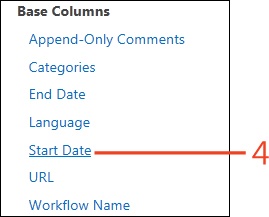
In the Source column, select a site column with a clickable link. If this link is not clickable, you can proceed to step 4.
In the Site Column column, click the name of the site column that you want to view.
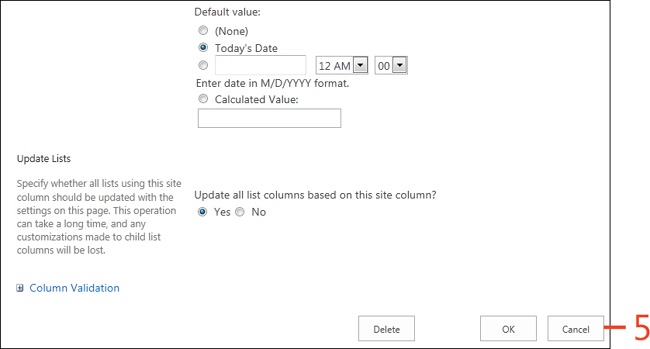
After you finish viewing the column information, scroll to the bottom of the screen and click Cancel to return to your previous view.

Creating site columns
When adding site columns to a SharePoint 2013 list or document library, you should first consider using those that already exist, either out of the box or previously defined by other site users. This supports consistency within a site and makes it easier for users of your site to explore and find content. For example, if you have two columns that have the same meaning, such as “Client” and “Client Name,” you make it more difficult for users to choose one of these columns when they search for content or browse through lists on your site.
If you decide to create your own site columns, there is a simple-to-use interface for defining them. In general, we recommend keeping the number of site columns on a site both concise and consistent. Each site column, when associated with a list or library, represents another piece of information that users must enter for each piece of content.
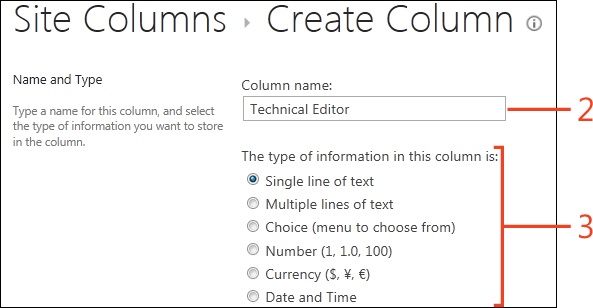
Create site columns
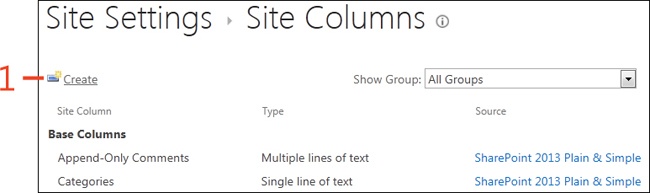
On the Site Settings page, in the Web Designer Galleries section, click the Site Columns link, and then, on the Site Columns page, click Create.
Enter a name for the column that you are creating.
Click the type of information that this column will store.
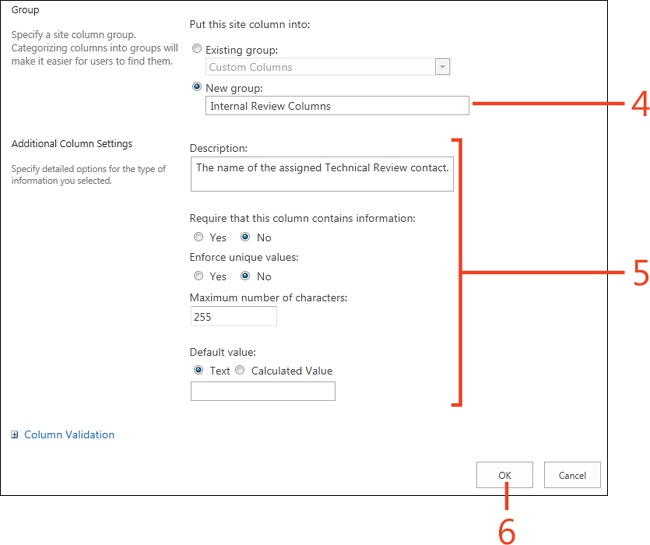
Pick from an existing group or create a new group in which to organize this column.
In the Additional Column Settings section, enter a description of the column and any other appropriate settings.
Click OK.
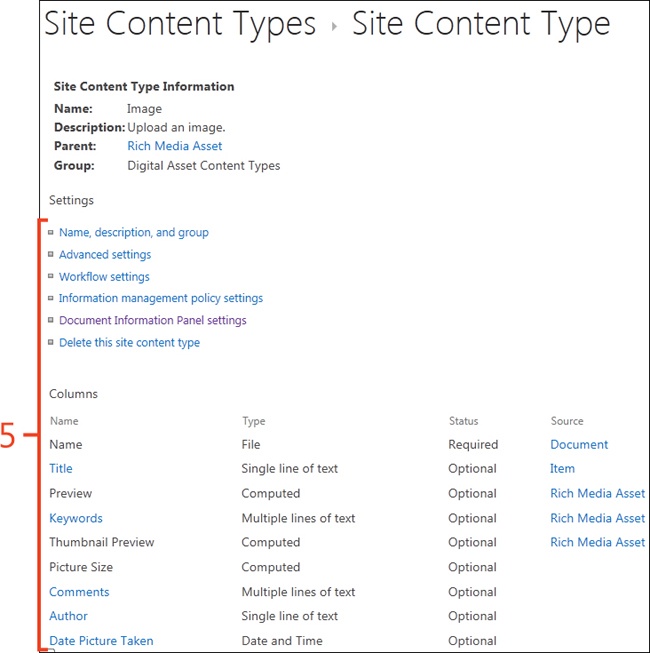
Browsing through content types
To work with SharePoint 2013 content types, you first need to view the existing content types that are available for use. You can use the Site Content Types page to quickly view all content types associated with your site (or its parent sites).
Browse through content types
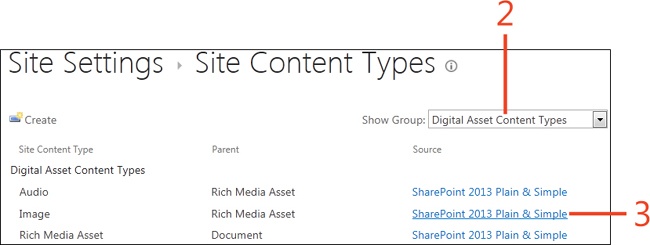
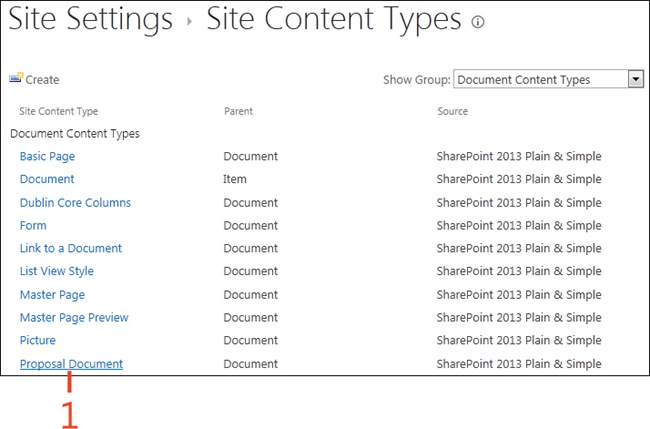
On the Site Settings page, in the Web Designer Galleries section, click Site Content Types.
On the Site Content Types page, in the Show Group list box, select a group to view.
Select a content type and, if you are able, click the Source link. Otherwise, proceed to the next step.
Click the Site Content Type column for the content type that you want to browse.
Explore the associated columns and other settings for the content type you selected.
Creating a new content type
In the event that you have a set of documents that you cannot classify by using one of the existing SharePoint content types, you can create your own content type.
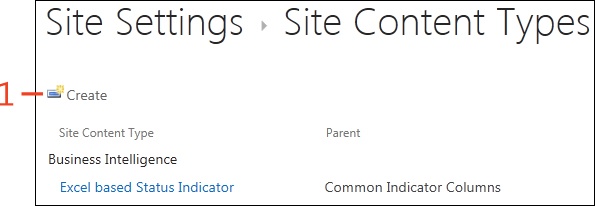
Create content type
On the Site Content Types page, click Create.
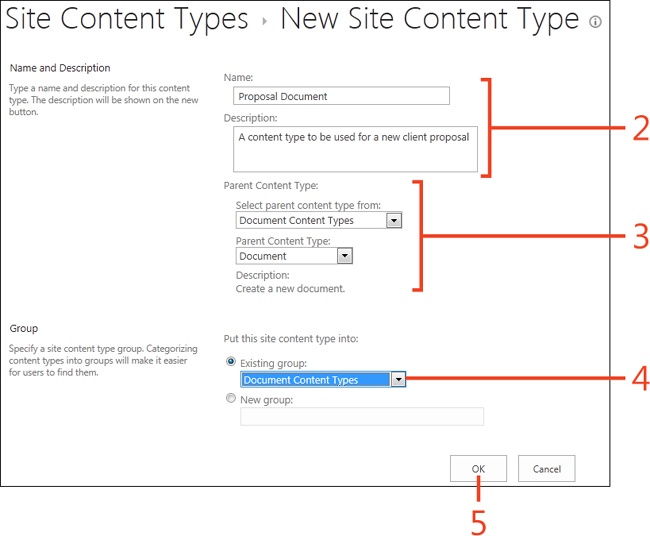
On the New Site Content Type page, enter the name and description of the content type.
Select a parent content type (you can first select a filtered list from which to choose).
Click to choose either a new or existing group in which to place this content type. If you select Existing Group, in the list box, select the group.
Click OK.
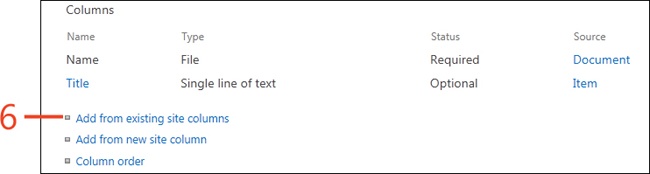
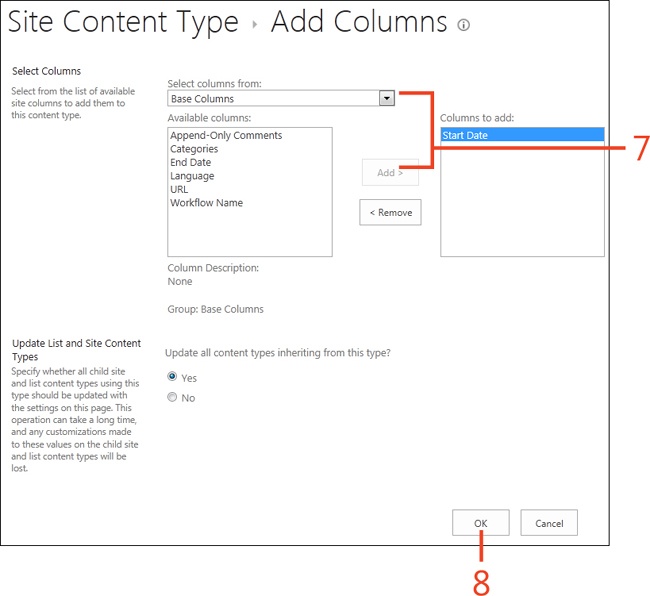
Click the Add From Existing Site Columns link.
In the Select Columns From list box, filter the list of columns. In the Available Columns section, select one or many columns to associate with the content type. Click Add to associate these columns.
Click OK.
Associating document templates with content types
A common issue with respect to managing content is enforcing a common look and feel within documents. For example, multiple proposals that are authored by separate departments might have different organizational structure, formatting, and wording.
One way to enforce consistency when using SharePoint 2013 is to upload and associate a document template with your content types. With document templates, users who create new documents based on a content type can have a prepopulated starting point (instead of a blank document). A simple usage is to create the various headers that would be expected in most documents and apply some basic formatting.
Associate a document template with a content type
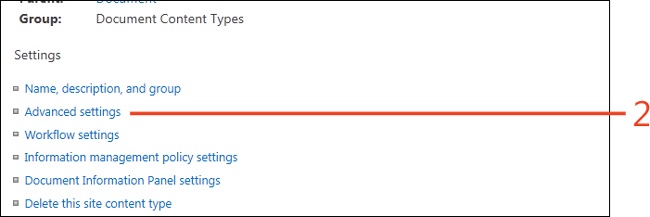
On the Site Content Types page, click the Site Content Type column where you will associate a document template.
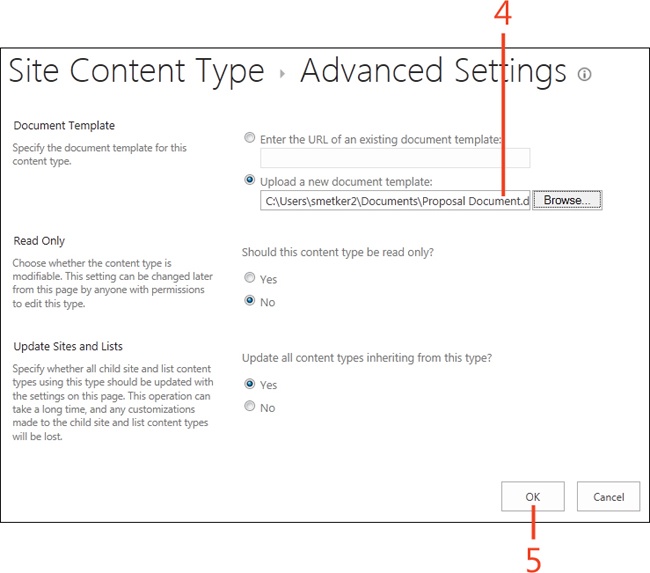
From the Site Content Types Page, click Advanced Settings.
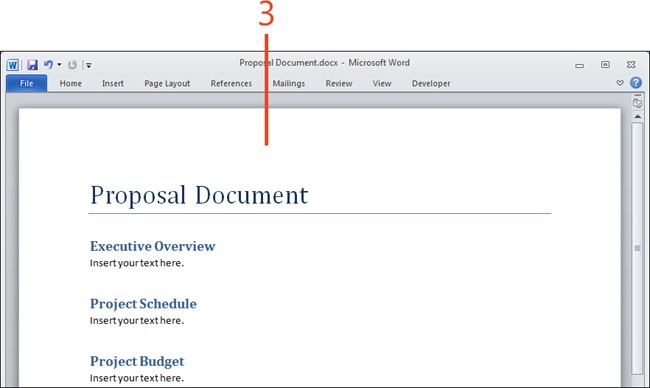
Prepare and save a Microsoft Word document locally with your desired formatting for new documents based on this content type.
Select the Upload A New Document Template option, click Browse, and then select your local document.
Click OK to save your changes.
Tip
Some content types do not support document templates. If you do not see an option to upload a document template, select another content type, preferably with a parent content type of Document.
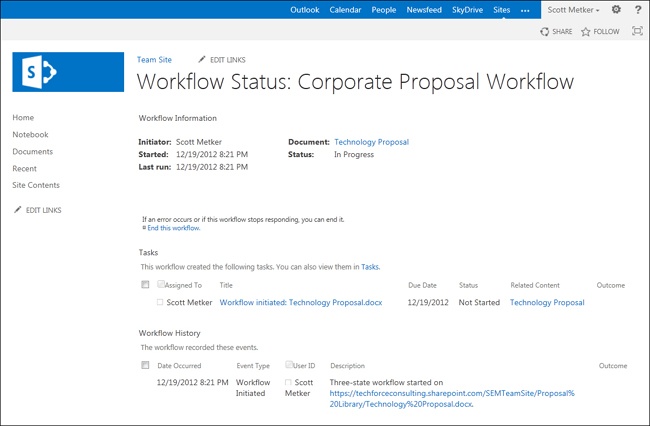
Within systems that manage content, workflows refer to a series of activities that are applied to a document or item. Content management systems use workflows to automate repetitive tasks such as assigning multiple reviewers to a document and routing the final response back to the originator. In SharePoint 2013, you can assign workflows to list items or documents to automate common tasks, as well.
The advantage of using workflows to automate document tasks is that workflows can include steps to ensure that documents are appropriately processed. For example, if multiple reviewers are assigned to a document within a workflow, the SharePoint workflow can make sure that the next reviewer has received a copy of the document immediately after the previous reviewer has completed her review. This ensures that documents are not forgotten or misrouted. Also, you can use workflows to send emails during important activities, ensuring that users are reminded that tasks are due.
SharePoint 2013 offers a completely updated workflow experience for users of the Server or Enterprise platforms. Users of SharePoint 2013 Foundation are limited to the workflow functionality that was provided with the previous version, SharePoint 2010. You can use these workflows for basic document routing and notifications of assignees for each workflow task as well as tracking the full history of the document as it is routed and changed within the workflow.