
AS WE MAKE our way into the upper body, comprising the torso, arms, and neck, we engage with regions of immense expressive potential. The upper body houses key bony structures such as the rib cage, clavicles, and scapulae, which are overlaid by the abdominal muscles and the flesh around the mid torso, the pectoral tissue, and the breasts. In the shoulders and arms, we have the deltoid, biceps, and triceps muscles. Finally, we add in tissues around the neck that will create visual cohesion between the head and body, connecting the cervical spine to the cranium on the back of the body and linking the mastoid process to both sternum and clavicles in the front. Collectively, these components add to the gestural information begun in the lower body and articulate a crescendo that completes the story of the figure.
GETTING STARTED
Now that we have the legs and the pelvis articulated and stable, we will continue with the torso, head, arms, and hands. At this stage, the lower body should have dried enough to be firm, with little to no movement. You will need to carefully monitor the dryness to ensure that the lower legs and feet do not enter the bone-dry stage before the composition is finished.
Mist the piece regularly while keeping the legs and pelvis covered in plastic as you work on the upper parts of the body. Protect the edges of the composition receiving the next addition of clay by adding extra layers of plastic over moistened cloth or paper towels.
As you add each new layer, it is helpful to step back and look at the figure in its entirety to assess the full gesture. Seeing all parts of the composition enables you to make alignment correlations and ensure that all elements are in proportion.
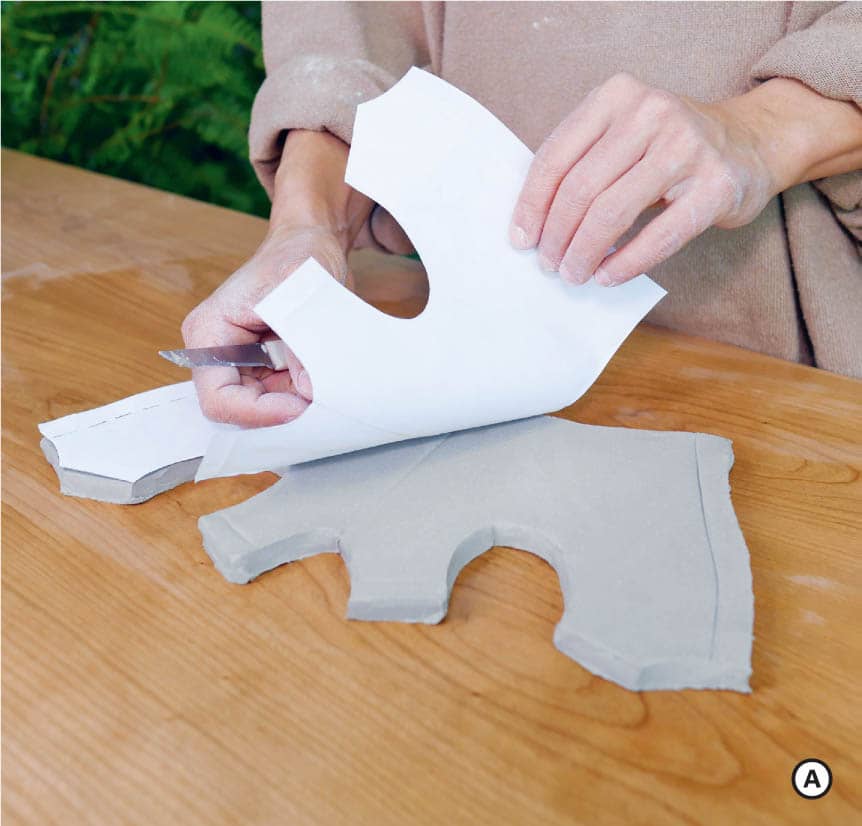
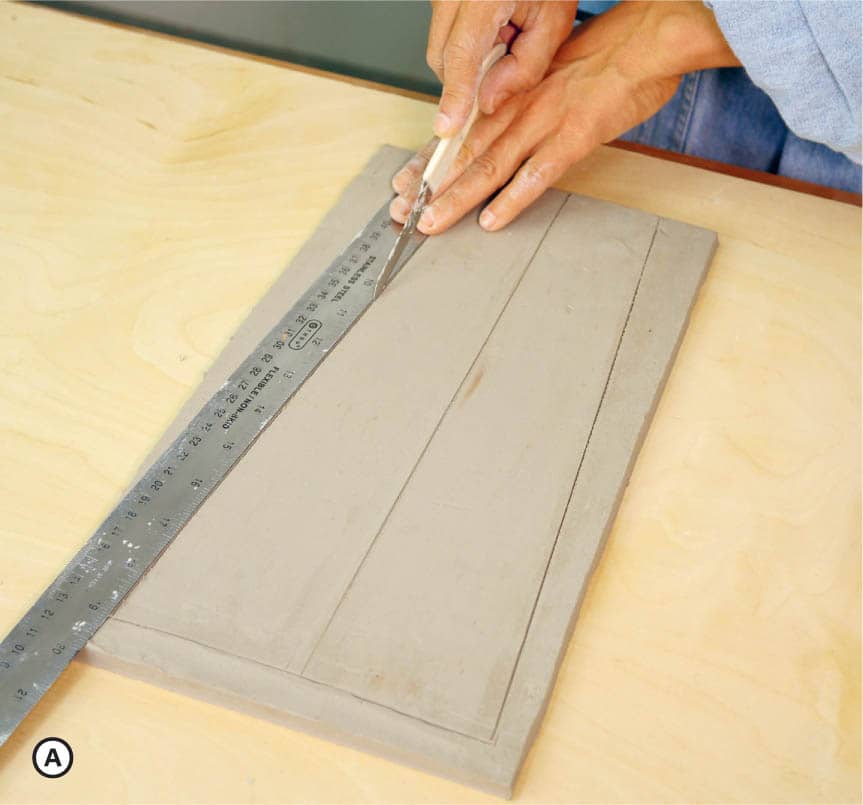
Place the torso template on top of a ⅜ inch (1 cm)–thick slab and use a knife to cut the edges and trace the guidelines. If needed, remove the templates and lightly redraw the guidelines so that they are more legible. Make sure your center guideline is shallow enough that it will not cause your slab to split. ![]()
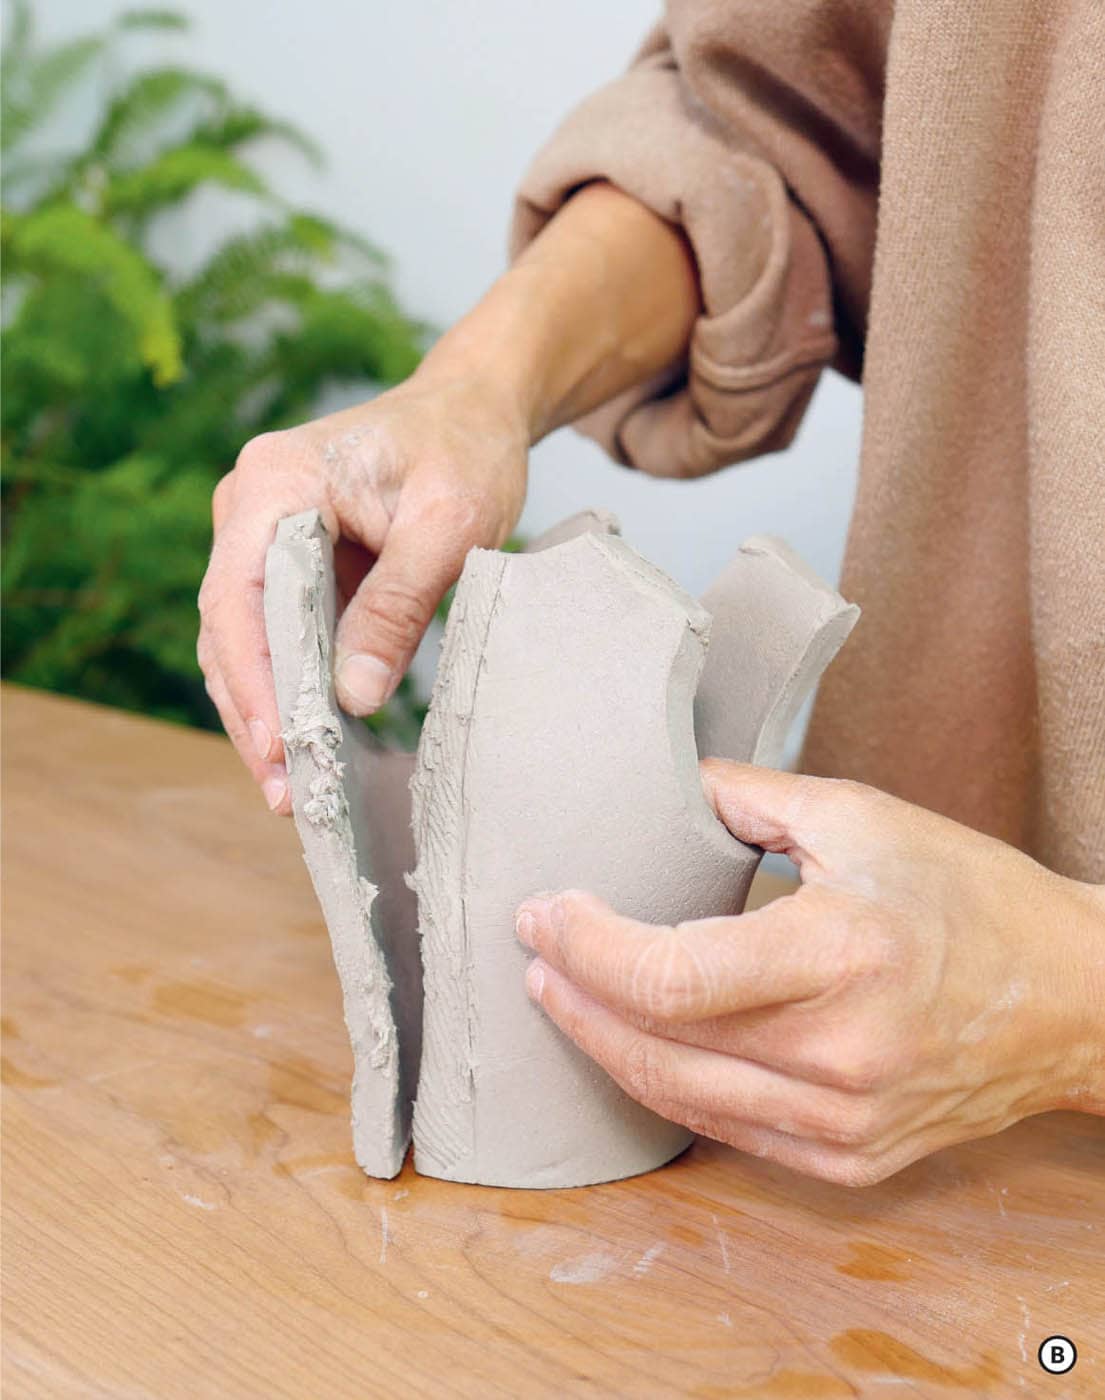
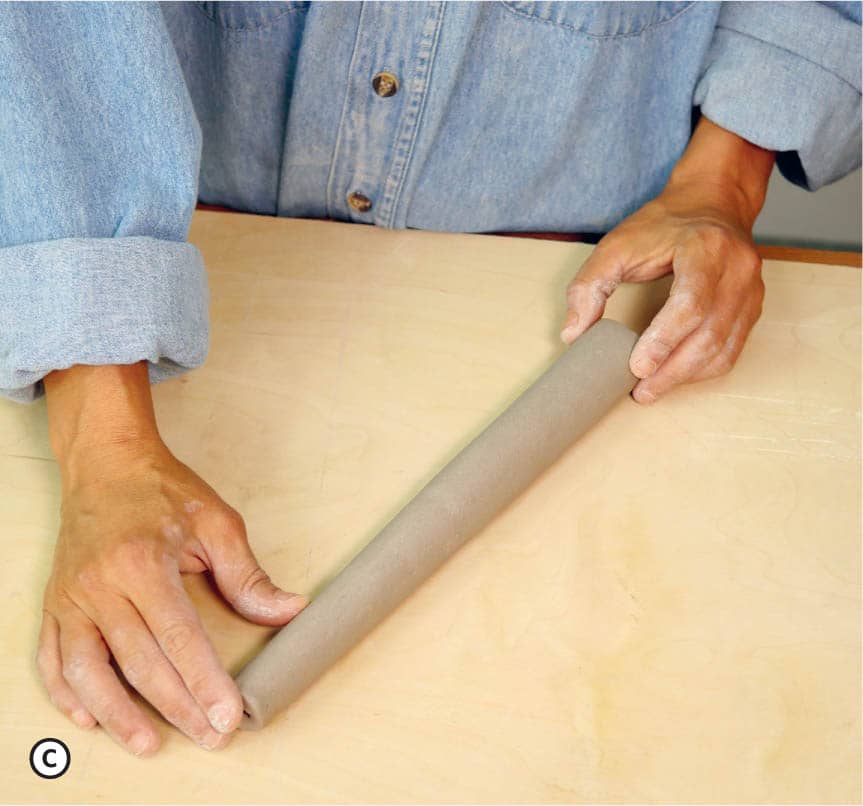
Next, curl the slab until the two short edges come together and overlap along the guideline. ![]() Slip and score these edges where they will touch and compress the seam together. Move your serrated rib across the outside of your seam in a cross-hatching motion to interlace the clay particles and strengthen this connection. On the inside, use your fingers or threaded rod to help with compression.
Slip and score these edges where they will touch and compress the seam together. Move your serrated rib across the outside of your seam in a cross-hatching motion to interlace the clay particles and strengthen this connection. On the inside, use your fingers or threaded rod to help with compression. ![]()
Note: Remember to counter that inner compression with outside pressure from your supporting hand, applying enough force to secure the seam without distorting the shape.
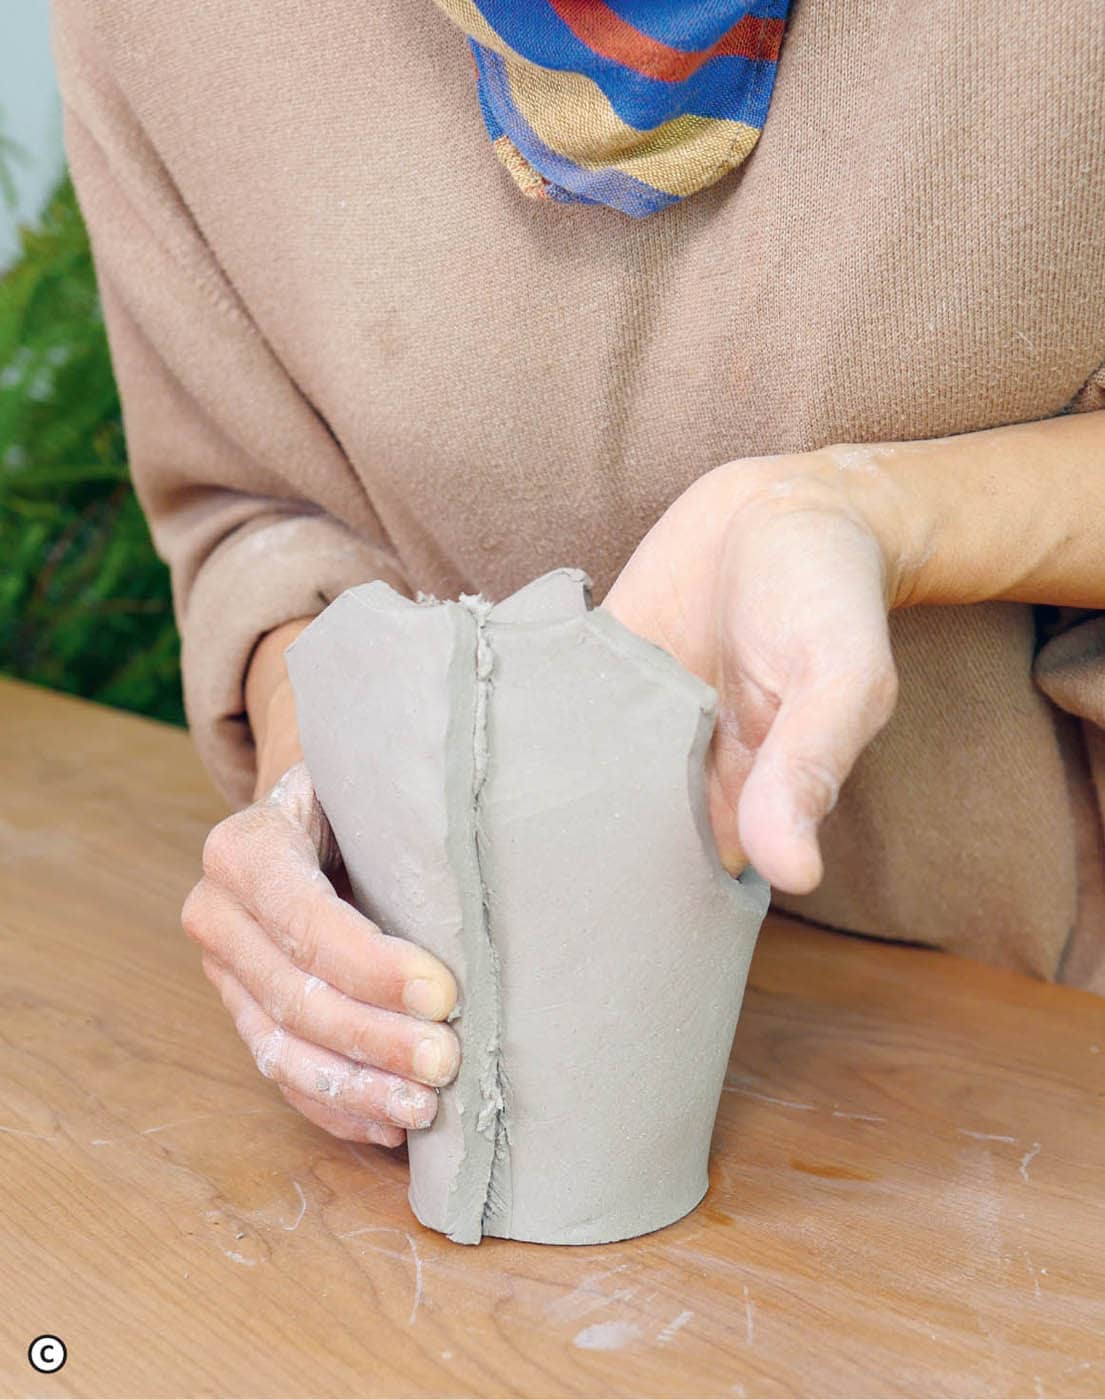
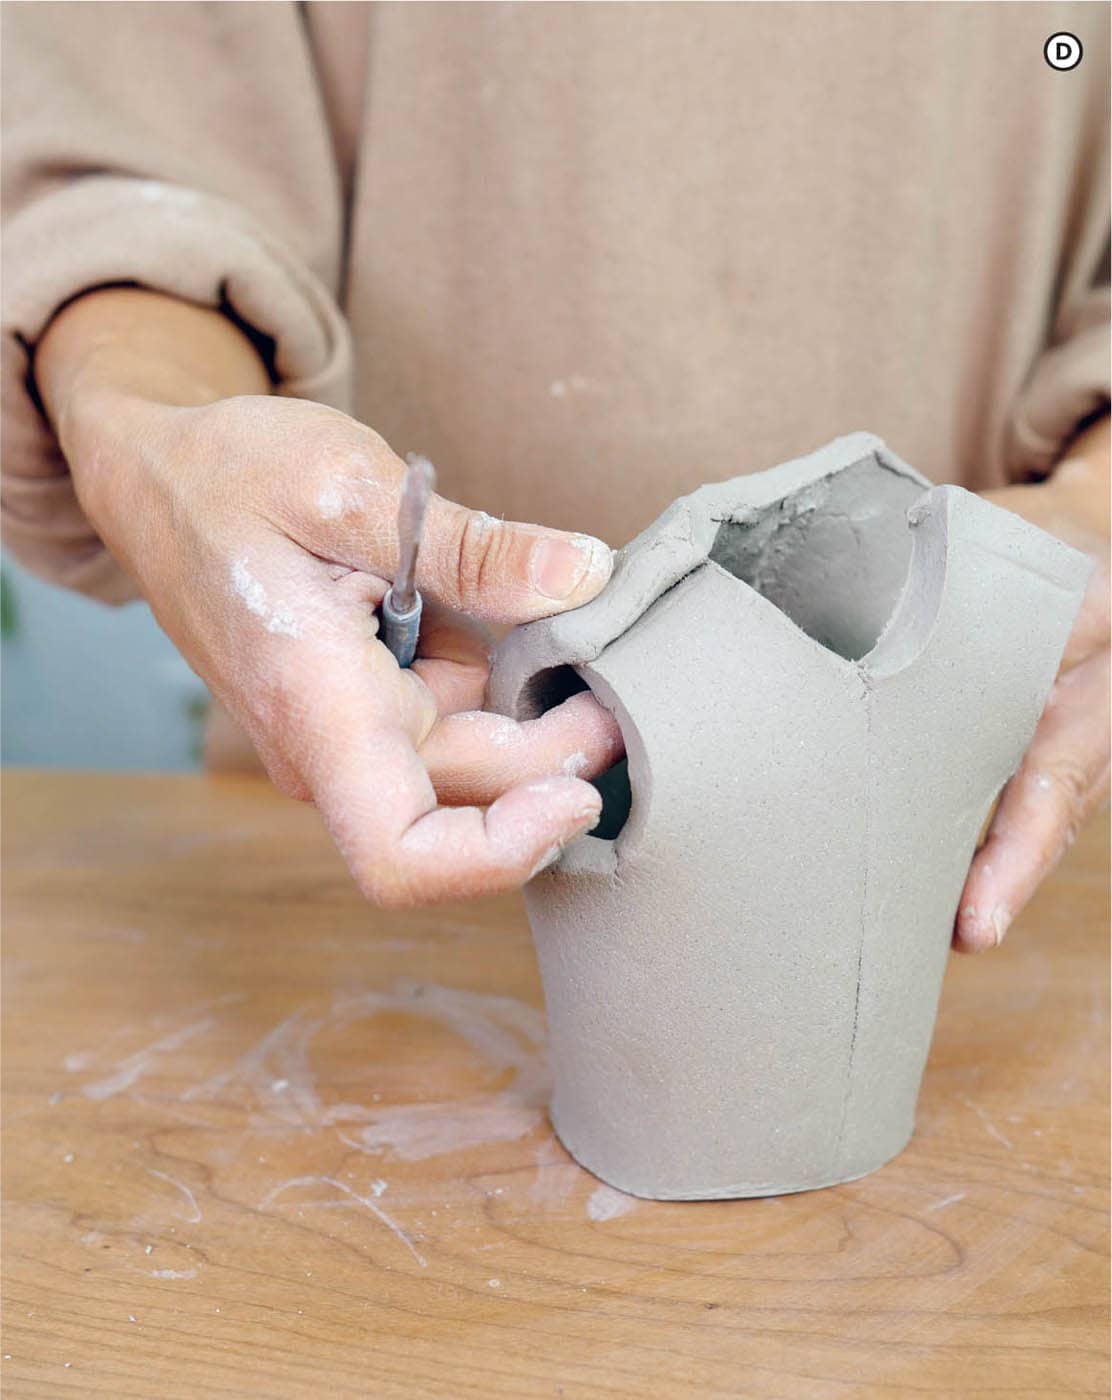
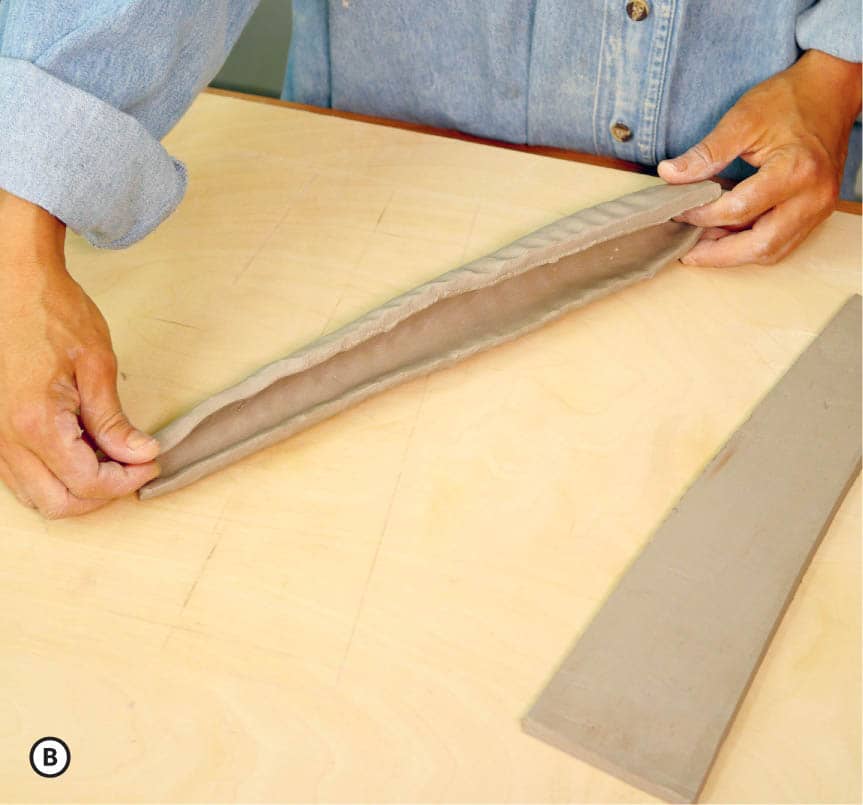
After the back seam is fully integrated, curl the two flaps that will comprise the top of the torso forward to meet the overlap lines before slipping, scoring, and compressing. ![]()
![]()
ATTACHING TORSO TO PELVIS
To prepare the torso to meet the pelvis, we will first make several adjustments.
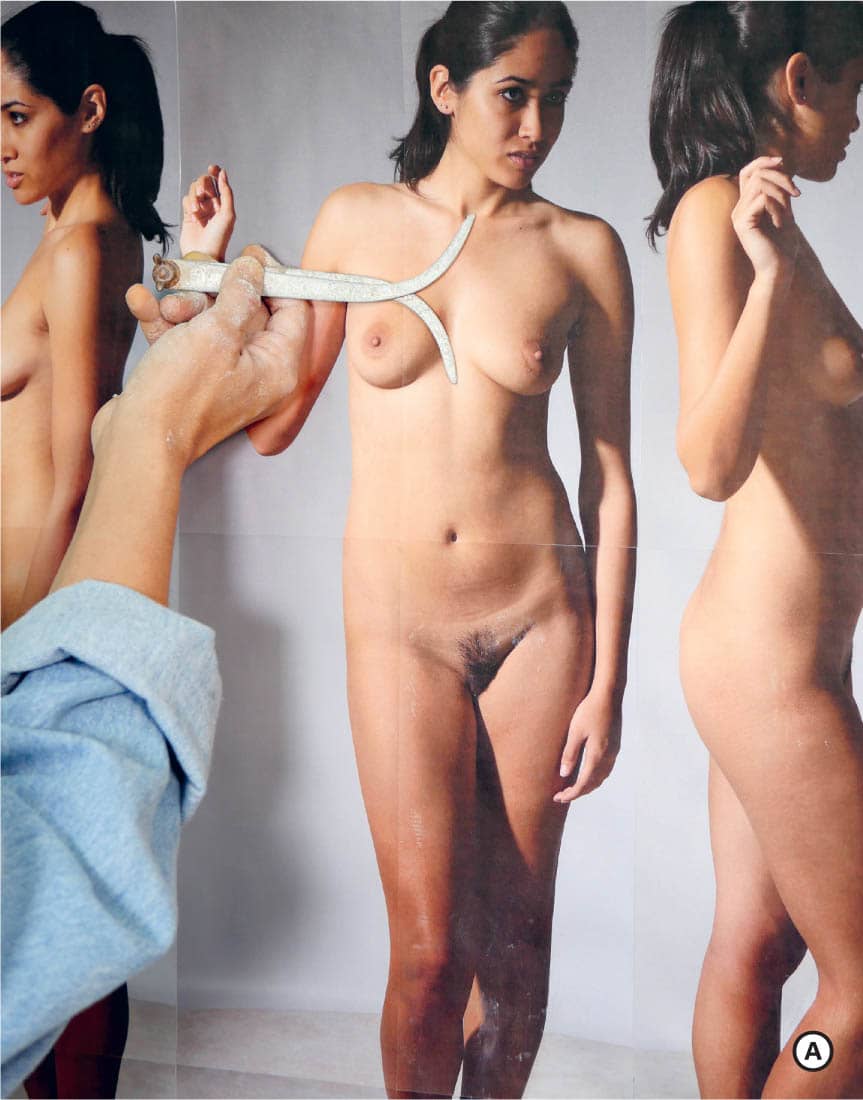
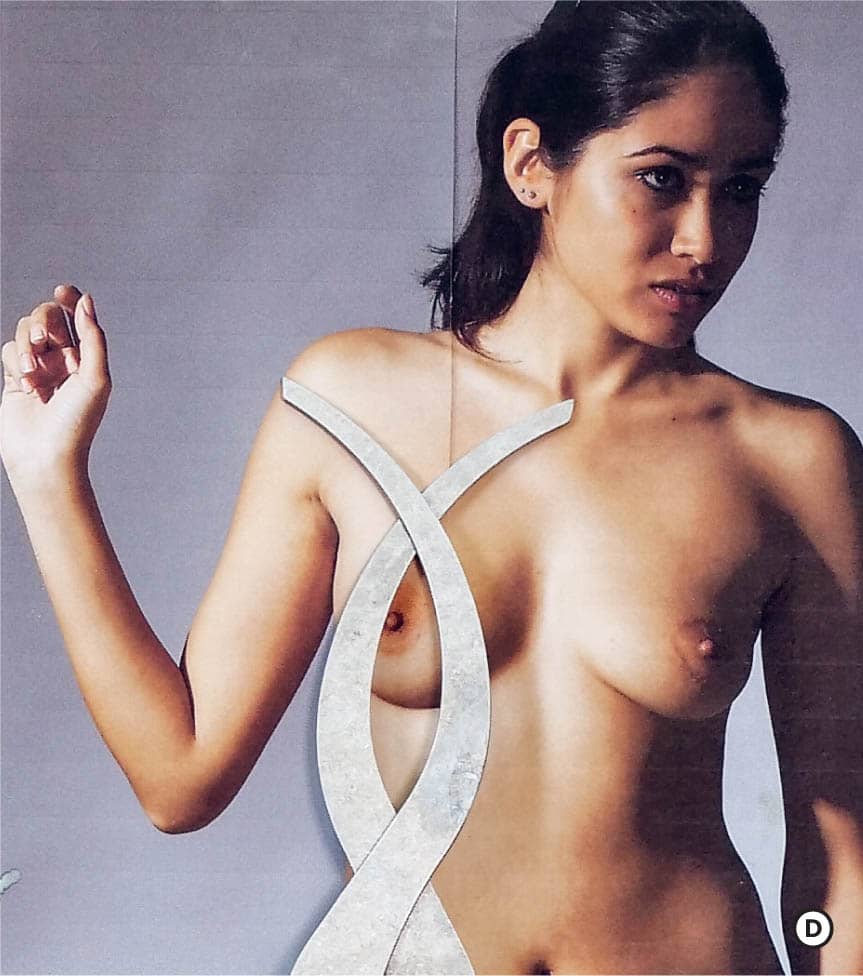
Turn to your forward-facing reference photograph and measure with your calipers the distance between the base of the neck, or jugular notch, and the bottom of the breasts. Place the bottom prong of your calipers along the centerline when taking this measurement to split the slight difference in height between left and right breasts. ![]() This is just a starting point; we will address this discrepancy more carefully later in the process.
This is just a starting point; we will address this discrepancy more carefully later in the process.
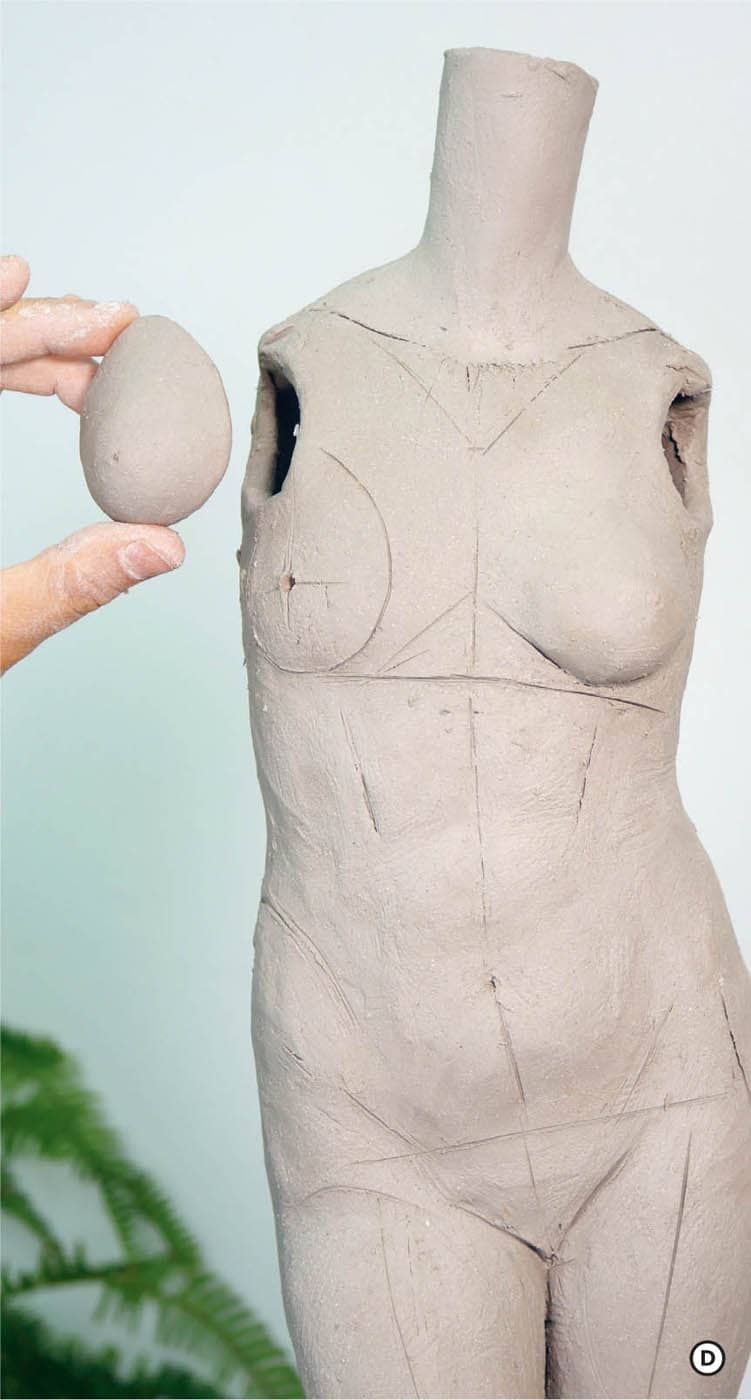
Carry this distance to the torso and, placing the top prong of your calipers at the base of the neck opening, draw a horizontal line with the bottom prong to mark your breast line. Make sure that the calipers remain perpendicular and do not incline back to follow the slope of the chest. Use this new mark as a guide in relation to the centerline imprinted on the form from the pattern. Push out gently on either side of the centerline and above the breast line to develop the breast area to use as a visual reference. ![]()

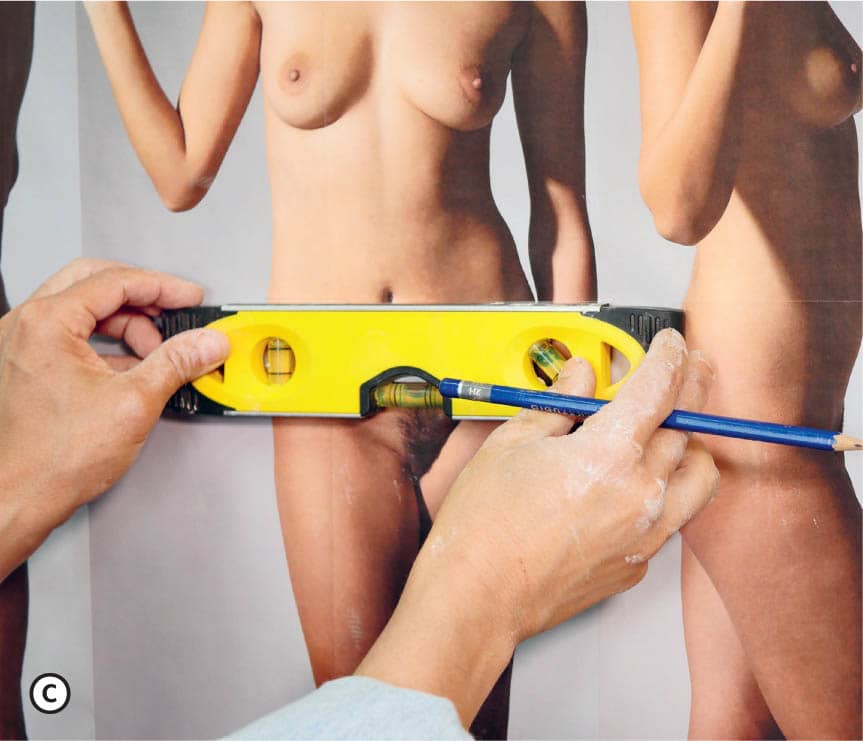
Stack the torso onto the pelvis. Holding your calipers up to your front view reference photograph, draw a level line across the navel of the model with a pencil. Take a measurement of the distance between the bottom of both breasts and the navel. ![]() Compare this measurement with its corresponding distance on your sculpture, utilizing the breast line you drew in the prior step. The length between the belly button and the bottom of the breasts should be slightly greater on your sculpture. This is intentional. Rather than cutting the torso straight across to correct the height discrepancy, use the excess material to help establish gesture by strategically trimming away material.
Compare this measurement with its corresponding distance on your sculpture, utilizing the breast line you drew in the prior step. The length between the belly button and the bottom of the breasts should be slightly greater on your sculpture. This is intentional. Rather than cutting the torso straight across to correct the height discrepancy, use the excess material to help establish gesture by strategically trimming away material.
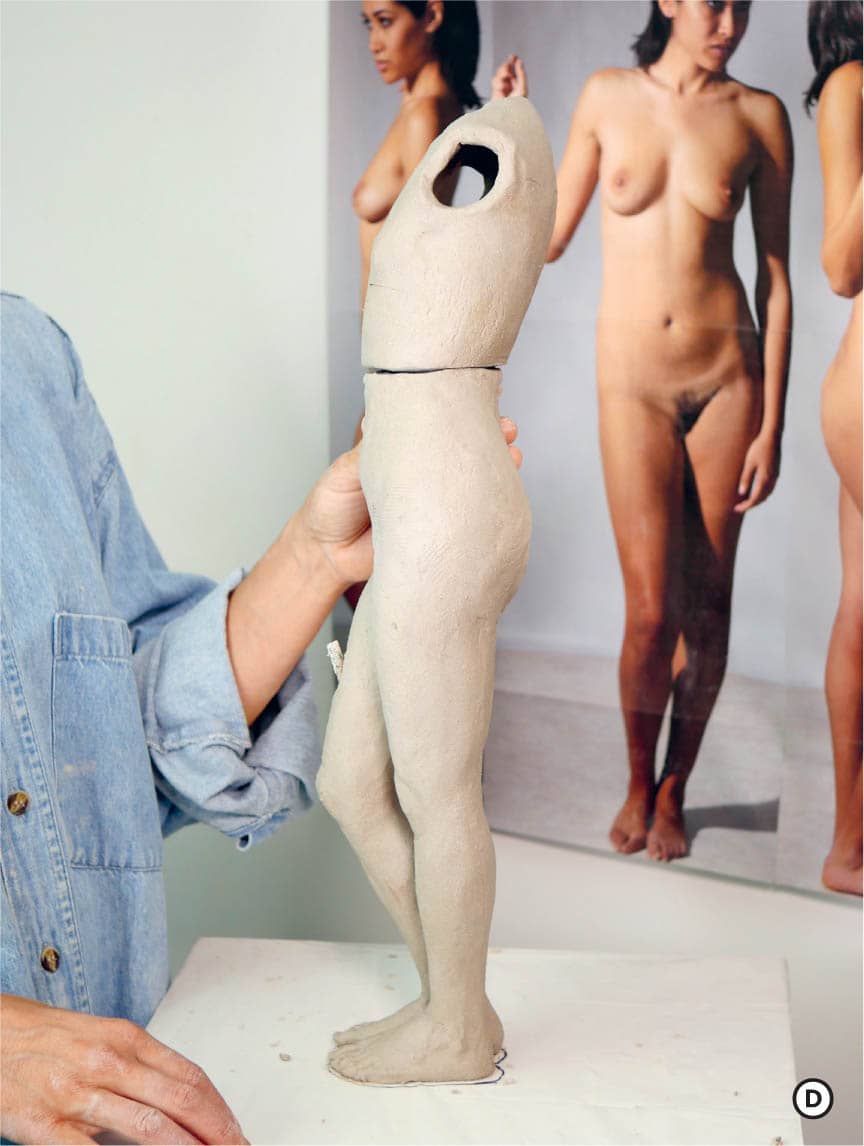
Note that in the side-view reference photos, our model’s torso sways slightly back. From the front and back views, notice the torso’s slight shift towards the left leg, in opposition to the pelvic alignment. To account for these shifts, we will trim the lower edge of the torso gradually to echo the positioning of the model. I normally start by resolving the front-to-back tilt before addressing the lateral movement. First trim roughly ½ inch (1.2 cm) from the back edge of the torso and paddle gently to even with the rest of the edge. Replace the form on top of the pelvis and visually compare your alignment against the two side view images.
Next, using the front-view reference image and your calipers, measure the distance between the base of the sculpture and the breast line again, checking the measurement on either side of the centerline. Once you are satisfied, establish the side tilt by trimming about 5/16 inch (8 mm) from the right edge of the torso to bring that side down and gently paddle to even out. Place the torso form onto the pelvis once more and check your alignments against the photographs, using your calipers to recapture measurements. Take the time you need to gradually move toward the best alignment, adding bits of clay to shim and adjust your torso’s position if necessary. If you feel you have trimmed too much material, you can add a coil to reset the correct distance. When you are satisfied, draw your vertical keys into either side of the piece. Slip, score, and connect the torso to the pelvis by firmly pressing down. Work over that seam with your serrated rib and add fresh clay to further bond these components together at the waist, filling in any gaps and securing the connection. ![]()
![]()
Note: Keep in mind that at this stage, the legs will have already set. Consequently, they will have shrunk by a small percentage (this percentage varies among clay bodies). In the context of our 25 inch (63.5 cm) sculpture, this shrinkage is of no significant consequence, but in the context of larger pieces, it can be more pronounced. When building large pieces, I will choose to take measurements from more hydrated areas adjacent to the site being developed, as opposed to measuring from the ground up.
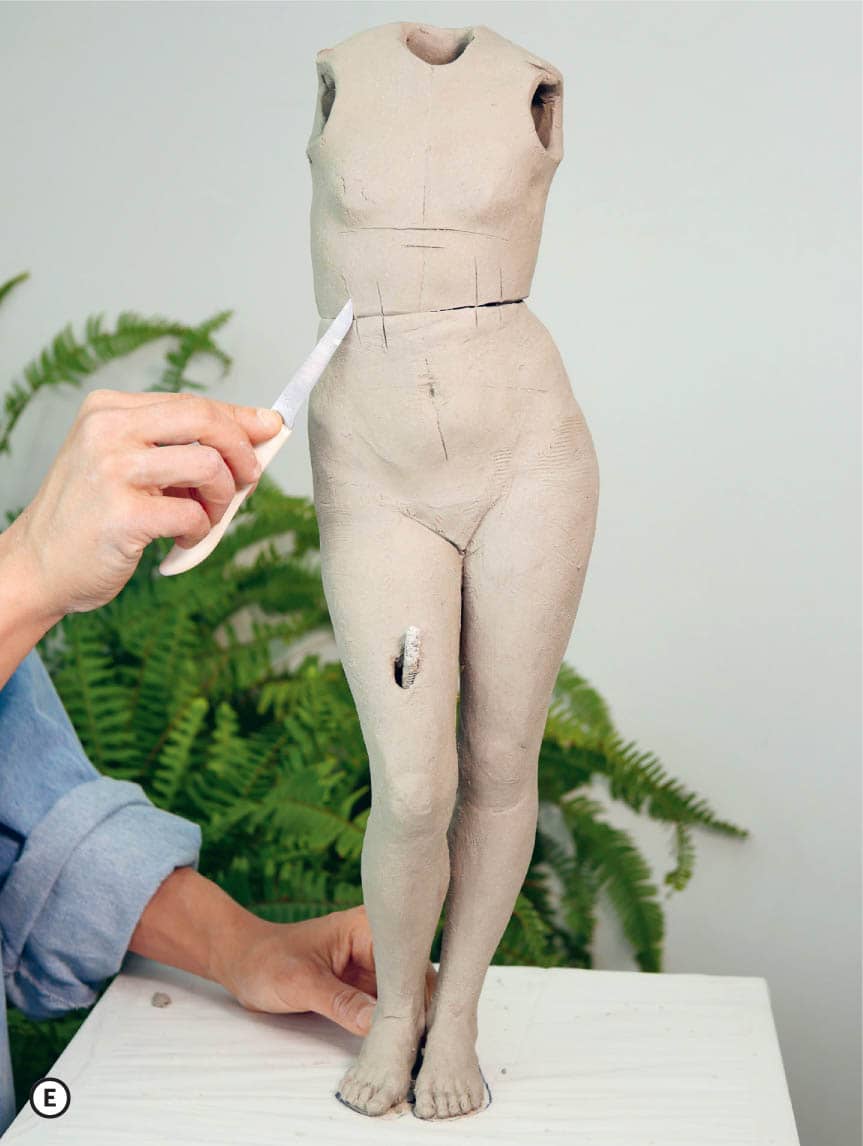
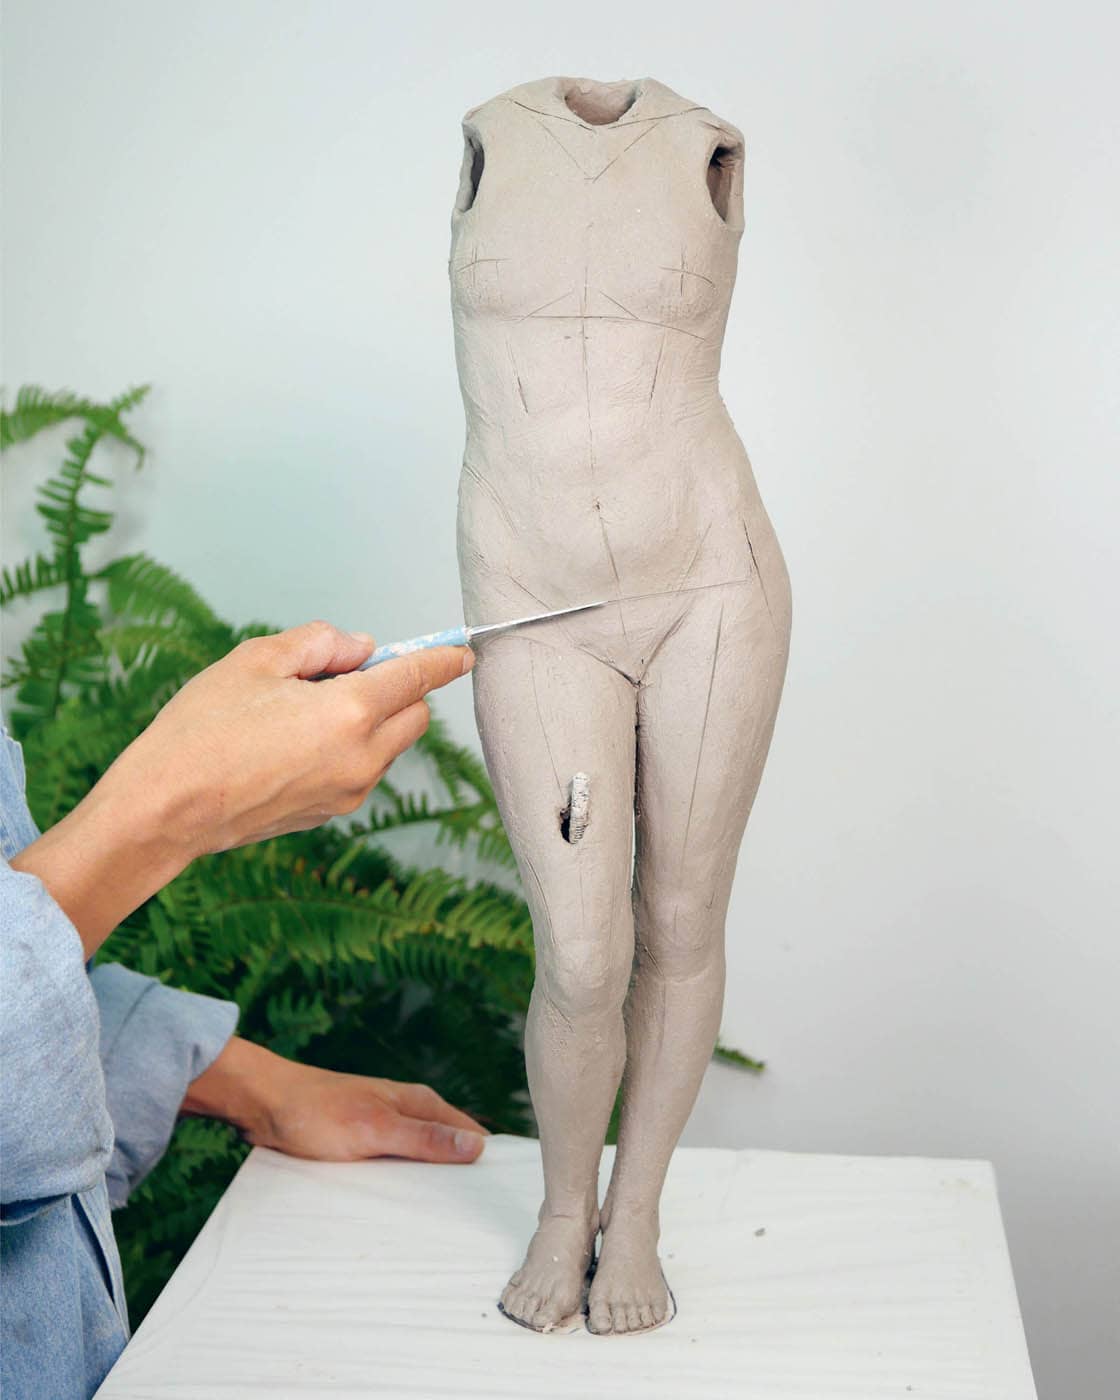
With your torso in place, take some visual notes and incise them onto the surface of the sculpture. Drawing marks onto your sculpture is a great way to guide the sculpting process and enhance your eye’s ability to ground and prioritize the abundance of information offered by the photographic references. ![]()
After aligning your composition with the front photographic blueprint, reset your drawn centerline so that it curves slightly to follow the pelvic and upper body shifts. Use your calipers to check the distances between the pubic area and the navel, the navel and the bottom of the breasts at either side of the centerline, and the bottom of the breast to the top of the shoulders, comparing each measurement with your sculpture and making marks and adjustments where needed.
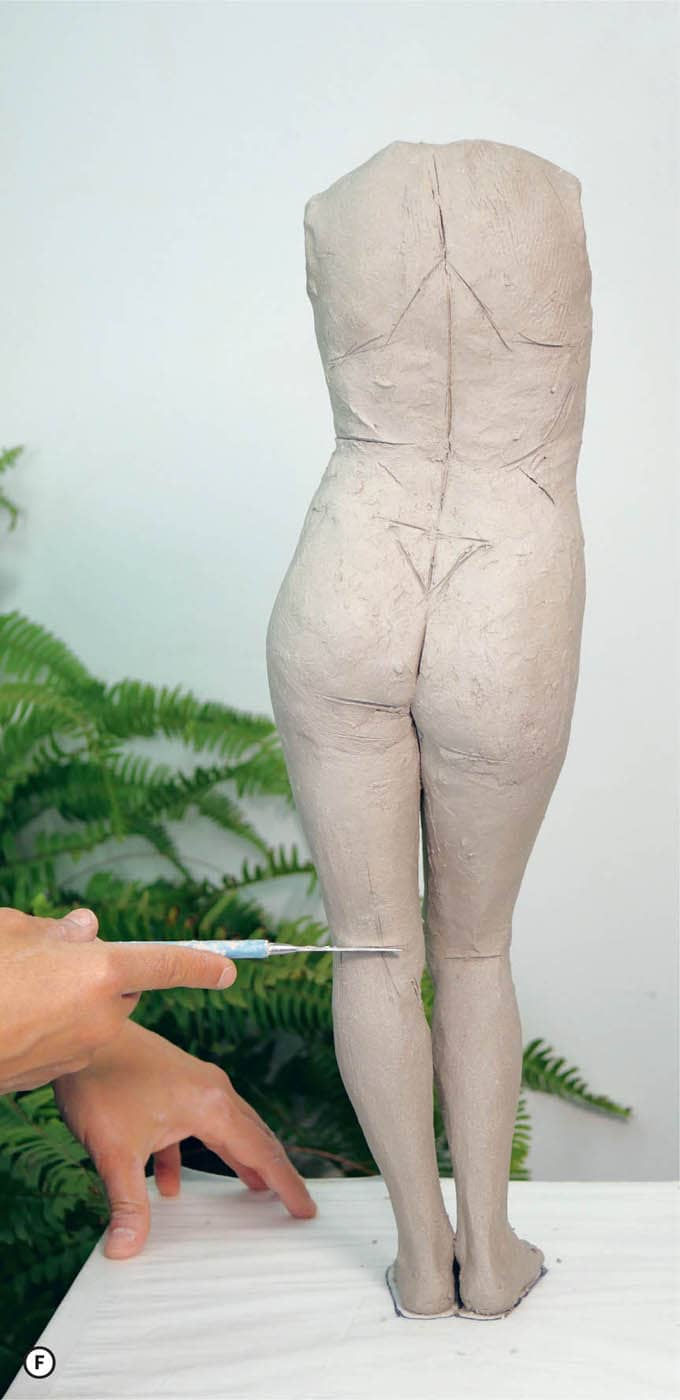
Observing the play between light and shadow in your front view photograph, draw the clavicles, the deltoid, and the triangle of the sternum onto your sculpture. Once you have drawn in these landmarks, make your way to the outer edge of your sculpture and compare its silhouette with those of your photographic references from each cardinal view. After placing your sculpture stand parallel with the wall so that your sculpture aligns with its respective reference photo, add, push out, and carve away clay when necessary to echo the gestures you observe in the photographs. At this point it is helpful to have your wooden finger tool handy to make adjustments by sliding the tool through the top opening of the torso and gently pushing out to articulate volumes as you compare your piece to the photographic references. The ability to push from the inside is one of the great benefits of this technique and the wooden finger tool allows access to the deeper parts of the form. Do this from each perspective.
THE NECK
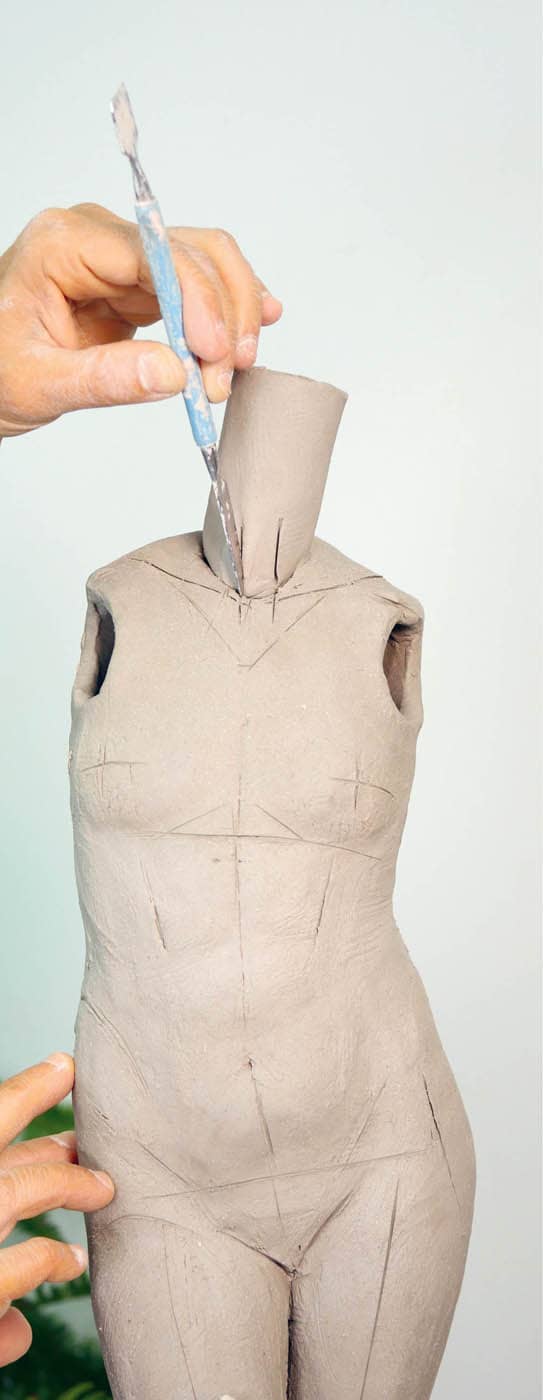
Once you feel satisfied with your torso, cut a rectangle 3½" (8.9 cm) wide by 3" (7.6 cm) high from a ¼" (6 mm) thick slab and curl it into a cylinder, slightly overlapping the edges at the seam. Compare it with your references, trimming any excess if needed to match the width of the model’s neck before slipping, scoring, and compressing your seam from the outside with a serrated rib and the inside with a threaded rod. The neck will be longer than we need it to be, but this is intentional to protect the edge and allow for options in the positioning of the head.
Next, use a paddle to gently bevel the bottom edge of the neck cylinder so it can more easily fit within the opening on top of the torso. On the back side of the neck opening, use gentle strokes of pressure from within to lift the clay and begin to articulate the upper trapezius muscle in accordance with your reference images. Bring the new cylinder to your torso and adjust the opening to fit the neck shape and facilitate a good connection. Looking at your references from all vantage points, adjust the placement of the neck front to back and side to side. When ready, score your keys onto the surface, slip and score, and attach the neck. To revise the seam, you can slide your dowel through the neck opening to offer counterpressure from the inside of the narrow shape. At this stage, it is okay if the neck seems longer than necessary. We will adjust the height in later steps as we attach the head.
BREASTS
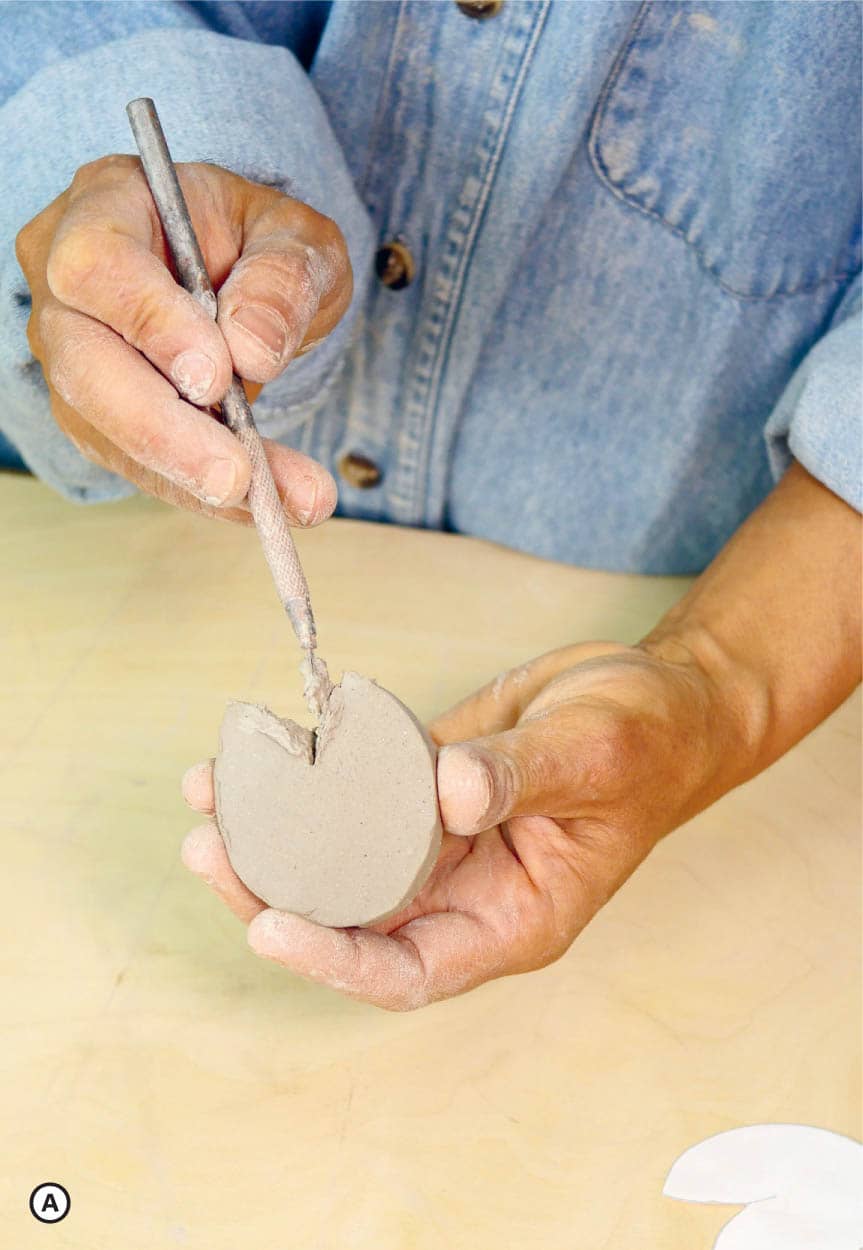
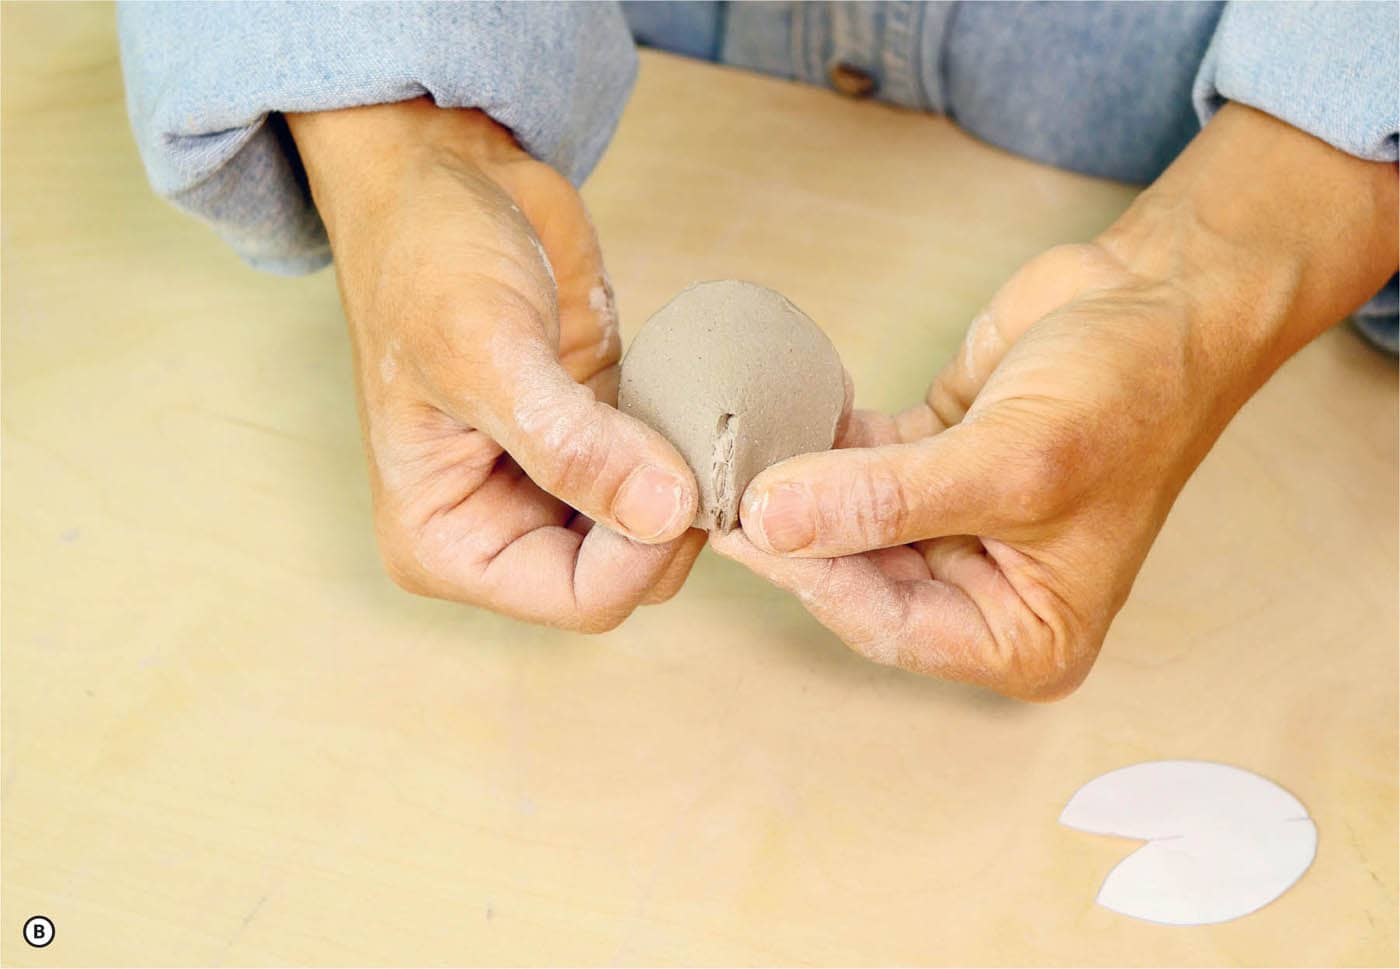
To assemble the breast shapes, place your templates onto a ¼ inch (6 mm) slab. Because these shapes are smaller and more delicate, they will be easier to form and articulate from a thinner slab. Trace and cut the circular forms with pie-shaped darts. Bringing the two straight edges together, gently slip, score with a wire brush, and compress with your fingers. ![]()
![]() To develop the breast forms, dip your thumb and index fingers in water and move them from the center of the cone outwards, along the seam towards the pointed edge, softly pinching either side of the cone along the seam, gently elongating the form to create a teardrop shape.
To develop the breast forms, dip your thumb and index fingers in water and move them from the center of the cone outwards, along the seam towards the pointed edge, softly pinching either side of the cone along the seam, gently elongating the form to create a teardrop shape.
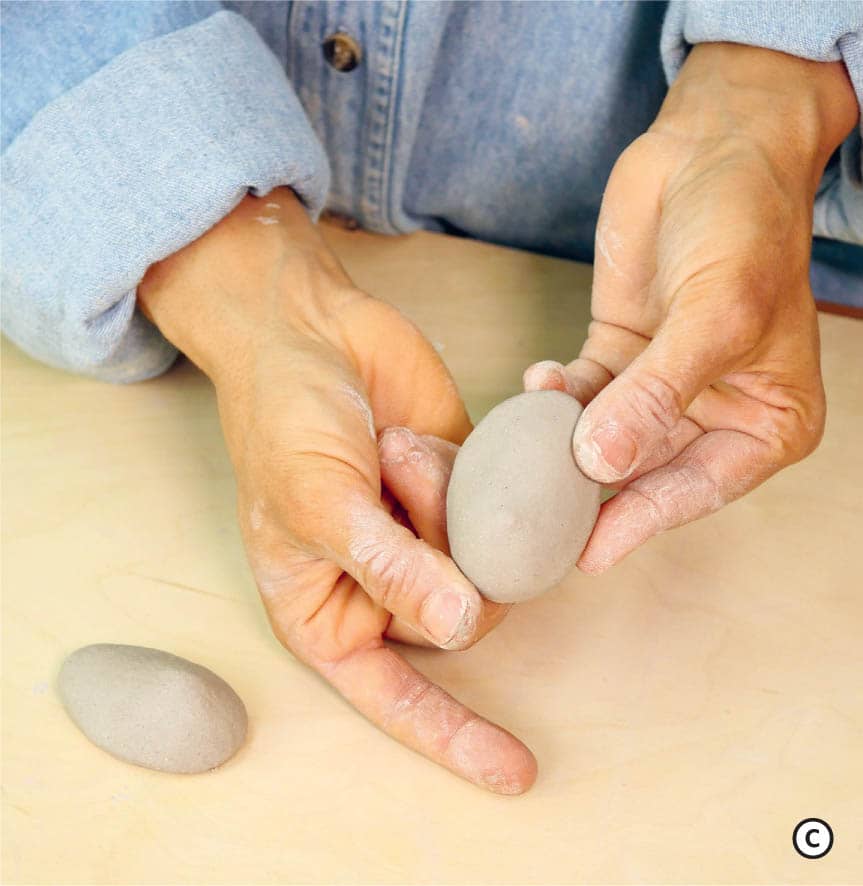
To develop the bulge of the breast, start at the widest part of the form and gently push out from the inside to create a convex mound along the underside of the teardrop shape. Note that this pushing out does not happen along the whole of the shape but only towards the bottom half and that it creates a bowl-like shape with the edges tucking back in instead of flaring out. Gravity dictates that the bulk of the breast tissue will gather at the bottom of the form, while the top of the breast will move in a gentle sloping. ![]()
Make sure to keep these shapes well hydrated until you apply them to the sculpture. I often keep several tightly lidded containers or “wet boxes” to hold the assembled bits and pieces of a composition and keep them properly hydrated until I am ready to use them.
To attach the breasts to the figure, find the bottom of breast line from the previous step and, with your calipers, measure the distance between each nipple. Transfer this measurement onto your sculpture with two horizontal marks on or near the bottom of breast line. Make a vertical line through each of these marks.
Next, take a measurement of the distance between the bottom of the breast and the nipple. Use this distance to measure up from where your vertical lines intersect the bottom of the breast line and make two marks, establishing the location of the nipples.
With these guides in place, align your breast shape with the bottom of the breast line and nipple mark and press gently toward the upper part of the form. Make your keys, slip and score, and attach permanently by pressing firmly but gently. Add fresh material to mediate the transition into the surrounding tissue. You can perforate the underlying surface for venting before attaching breasts permanently or pierce a venting hole at the finishing stages, making sure it goes all the way into the thoracic cavity before sealing from the outside. ![]()
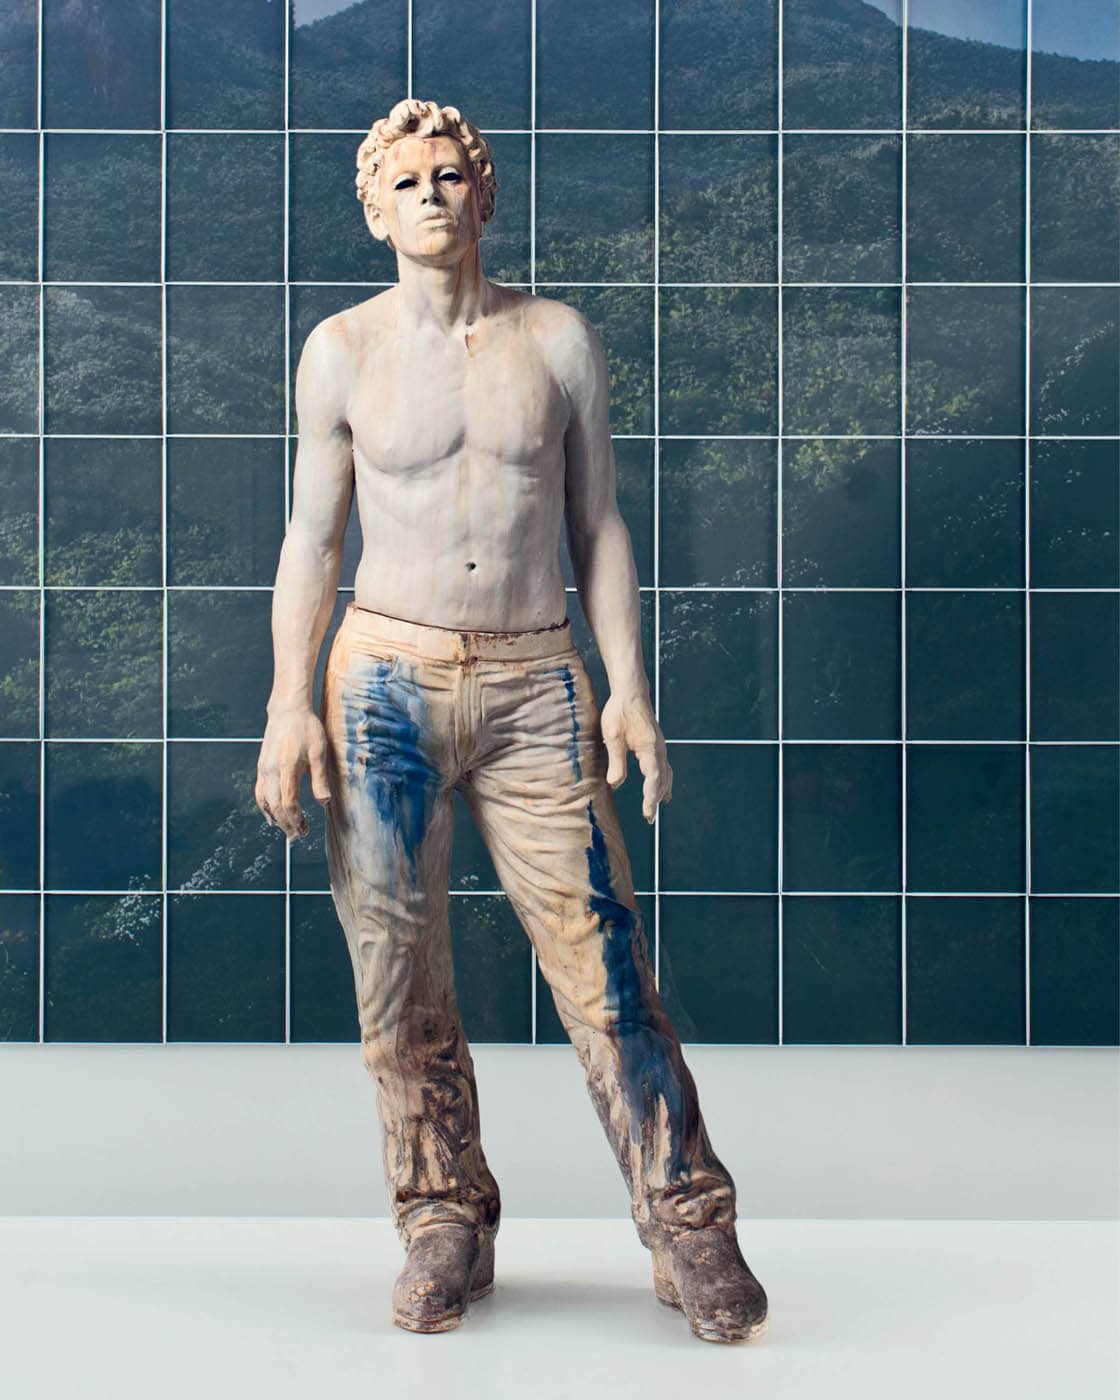
Claire Partington
Your pieces are viewed around the world but they are born in the U.K. How do you feel your studio setting informs your creative voice?
It’s fantastic that we are so connected (virtually) with images shared instantly to a global community. The downside being my work is primarily viewed as a tiny digital reproduction, which doesn’t convey the scale or surface details. I also wonder if some of my colloquial references are lost in translation.
My location totally informs my work. I live and work in London, in a normal residential part of the city and my studio is in an old warehouse next to a park. There aren’t really defined cultural or ethnic enclaves in London anymore (only the division between rich and poor) and everyone just rubs along together. I think Londoners have a pride in the city and a unique identity that sits alongside whatever heritage they may have—and that really is what city life is about: change and adaptation.
My exposure to art was also very informed by my location. Britain is full of art. I was at art school just around the corner from the National Gallery and British Museum and I worked at the V&A Museum. Contemporary British art in the late 1990s was very abstract and conceptual and not interesting for me, so I really immersed myself in the Old Masters and Colonial spoils which make up British National Collections. At the time, I didn’t question the historical and social exclusions or ethics of that art, but the iconic imagery and compositions definitely feed into my work.
What techniques come into play when constructing your figures and developing their surface?
The figures are all coil built from the base up. Sometimes I construct the bases from slabs with an internal support structure.
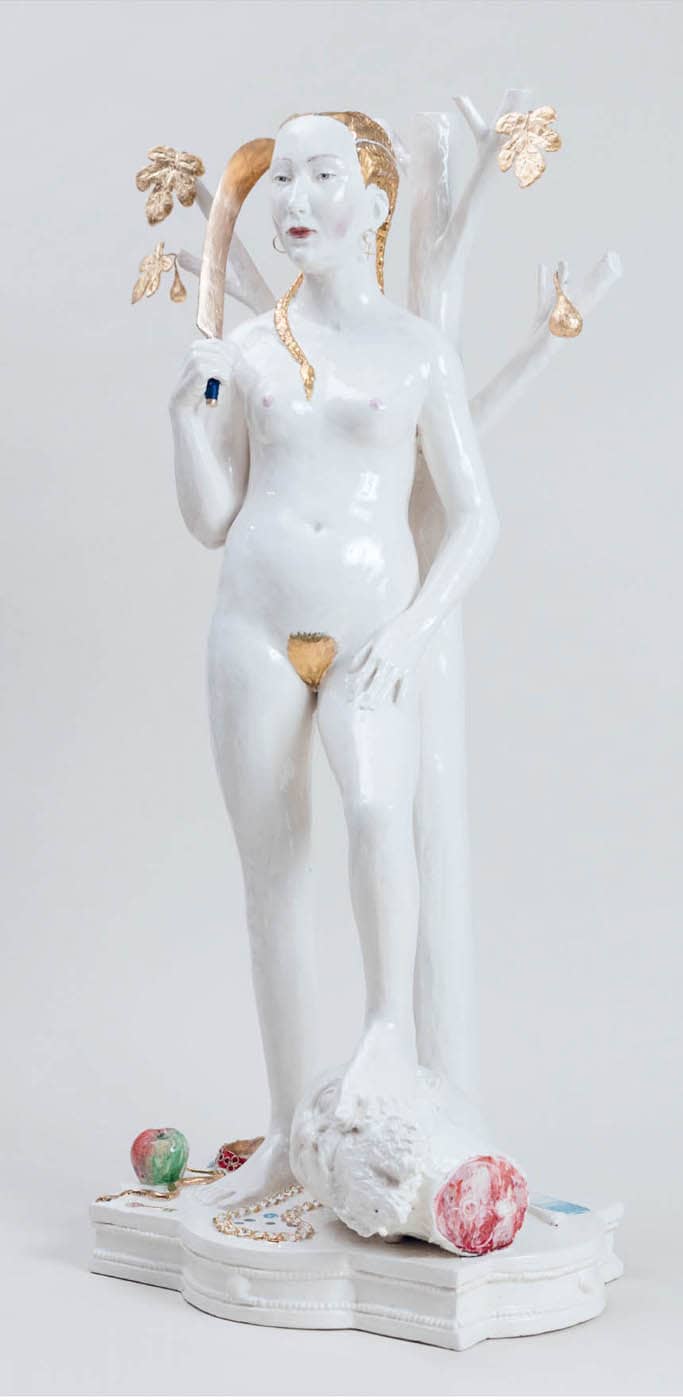
I’m building from an image I have in my head. Sometimes I’ll adopt a pose myself to help me visualize the position of limbs, or I’ll search online and print out some reference images (for specific clothes or dog breeds), but I don’t draw first. I think making in clay is similar to making a preparatory sketch which gets refined as you work the surface, similar to the process of oil painting.
The figures are usually glazed and then I’ll make my own surface decals for each piece to reflect a specific narrative.
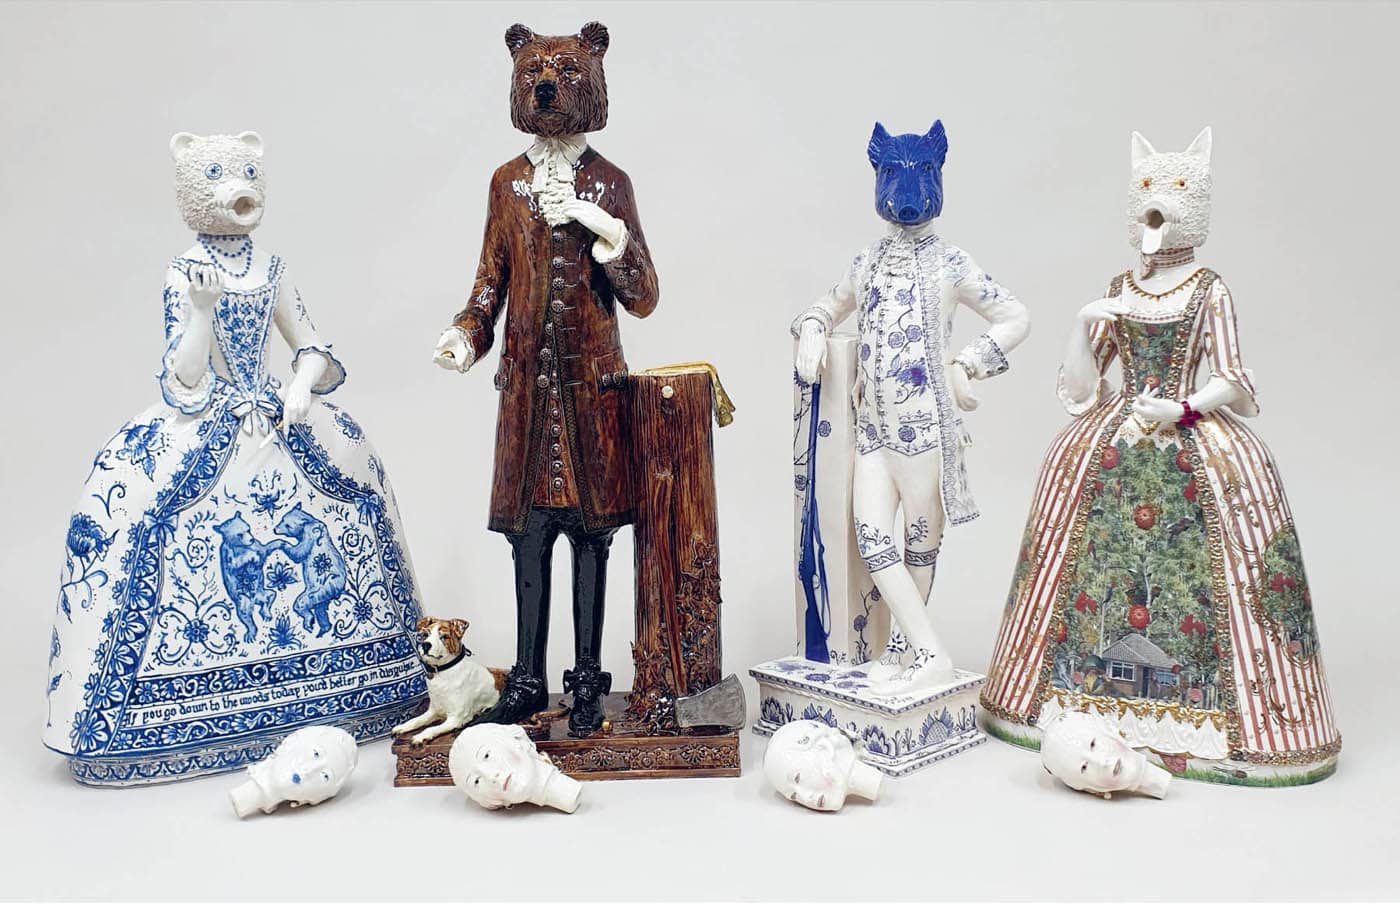
I have a mixed media approach to my work and I usually buy or make metal accessories for the figures too.
What strategies do you use to develop content?
My main issue is finding time to get my ideas out of my head. I don’t have any shortage of content; however, I’m better at editing myself now—before I get to the building stage. My work takes a long time to produce and, during the building, the ideas can evolve.
My figurative ceramic work started out as illustrations to European folk stories, but over time it has evolved into more of a comment on human nature. A lot of my figures are based on people I know or encounter in daily life: people in the schoolyard or park on my way to work. I do a lot of people watching and will spot a person’s style or pose that may remind me of a character or artwork and I’ll make a mental note to use an aspect of that in my work.
You’ve been on this path for years, keeping up an impressive creative rhythm both in terms of an abundant production and the degree of quality and complexity of the work. What practices support you?
I started making ceramic figures at night school when I had young children and it was a release to focus my mind on something away from work and home life. My kids are older now and my work is making my art, but being in my studio is still a luxurious novelty for me—a space to think and listen to music.
With regards to making practices, I studied sculpture at art school and I have always been very practical and intuitive in terms of making in all types of materials.
ARMS
To create the arms, you will plot dimensions onto a ¼ inch (6 mm) slab and create two tapered cylinders, which will be the simplified foundations for our upper and lower arms. Once attached, you will continue to articulate this core by pushing out, cutting, and pressing in. After these core forms have set, you will add another thin layer of clay and engage in nuanced modeling to bring the forms to their full fruition. Let’s begin.
On your slab, draw a 10¾ inches (27.3 cm) vertical line and two horizontal lines, perpendicular to and centered with the first at either end. Make one 62/3 inches (17 cm) and one 4 inches (10.2 cm). After connecting the outer edges of these lines, cut along the outer shape and down the centerline to extract your two arm shapes. ![]()
Curl the shapes onto themselves, using a gentle pinching action to guide the tight bend of these small forms. ![]() Bring each form to your photographic references and compare its width at various locations with the arm on the image. When you feel that you have the correct thickness, trim any excess material beyond the overlapping edges. Carefully slip, score, and enclose your cone, using your dowel or rod to compress from the inside by rotating each cone as the rod gently moves up and down within the form. For this part of the process, I particularly like a threaded ⅜ inch (1 cm) metal rod: the serration helps stitch the clay together and the weight aids in compression. Once the seams are integrated, cover them well and set them aside to stiffen.
Bring each form to your photographic references and compare its width at various locations with the arm on the image. When you feel that you have the correct thickness, trim any excess material beyond the overlapping edges. Carefully slip, score, and enclose your cone, using your dowel or rod to compress from the inside by rotating each cone as the rod gently moves up and down within the form. For this part of the process, I particularly like a threaded ⅜ inch (1 cm) metal rod: the serration helps stitch the clay together and the weight aids in compression. Once the seams are integrated, cover them well and set them aside to stiffen. ![]()
To attach the upper arms, you will uncover your arm cylinders and compare them against the photographic references. With calipers held to your front-view reference image, measure the distance between the top of the arm, just inside the shoulder, and the elbow joint. Next, hold one arm cylinder up to the front reference photo and slide the tapering cylinder up or down until its width matches that of the reference image. This is how you will decide which part of the cone to cut from. Mark the measurement from your calipers onto your cone, adding about a ¼ inch (6 mm) of extra length onto the thinner side, and then cut a segment from your arm cylinder that approximately matches the height and width of the upper arm.
Next, trim the top part of your cone segment at a diagonal where the arm will meet the torso and round the top of the form by pushing gently with your finger from the inside. Once you have prepared your upper arm segment to meet your torso, hold your calipers to your front-facing photographic reference and take a measurement of the distance between the centerline (sternum) of the torso and the outer part of the shoulder. ![]()
If necessary, trim the width of your torso around the armholes to prepare to receive your upper arms. Place your cylinders against the torso to both check for alignment and ensure sufficient surface contact for a strong connection. Use your calipers to once again grab the distance from the centerline to the outside of the upper arm, around the outer apex of the deltoid.
Make sure this distance on your sculpture is consistent with the measurement from the photographic reference by trimming, adjusting, and adding bits of clay where necessary. Observe the negative space between the arm and the torso from both front and back views, cross-referencing these shapes with those in your reference images to guide lateral placement. Add a bit of clay to the armpit to protect the distance between the torso and the arm, ensuring that the form will stay in place. Once you have evaluated the placement of the upper arm from all vantage points, draw your keys before slipping, scoring, and finalizing your seam. ![]()
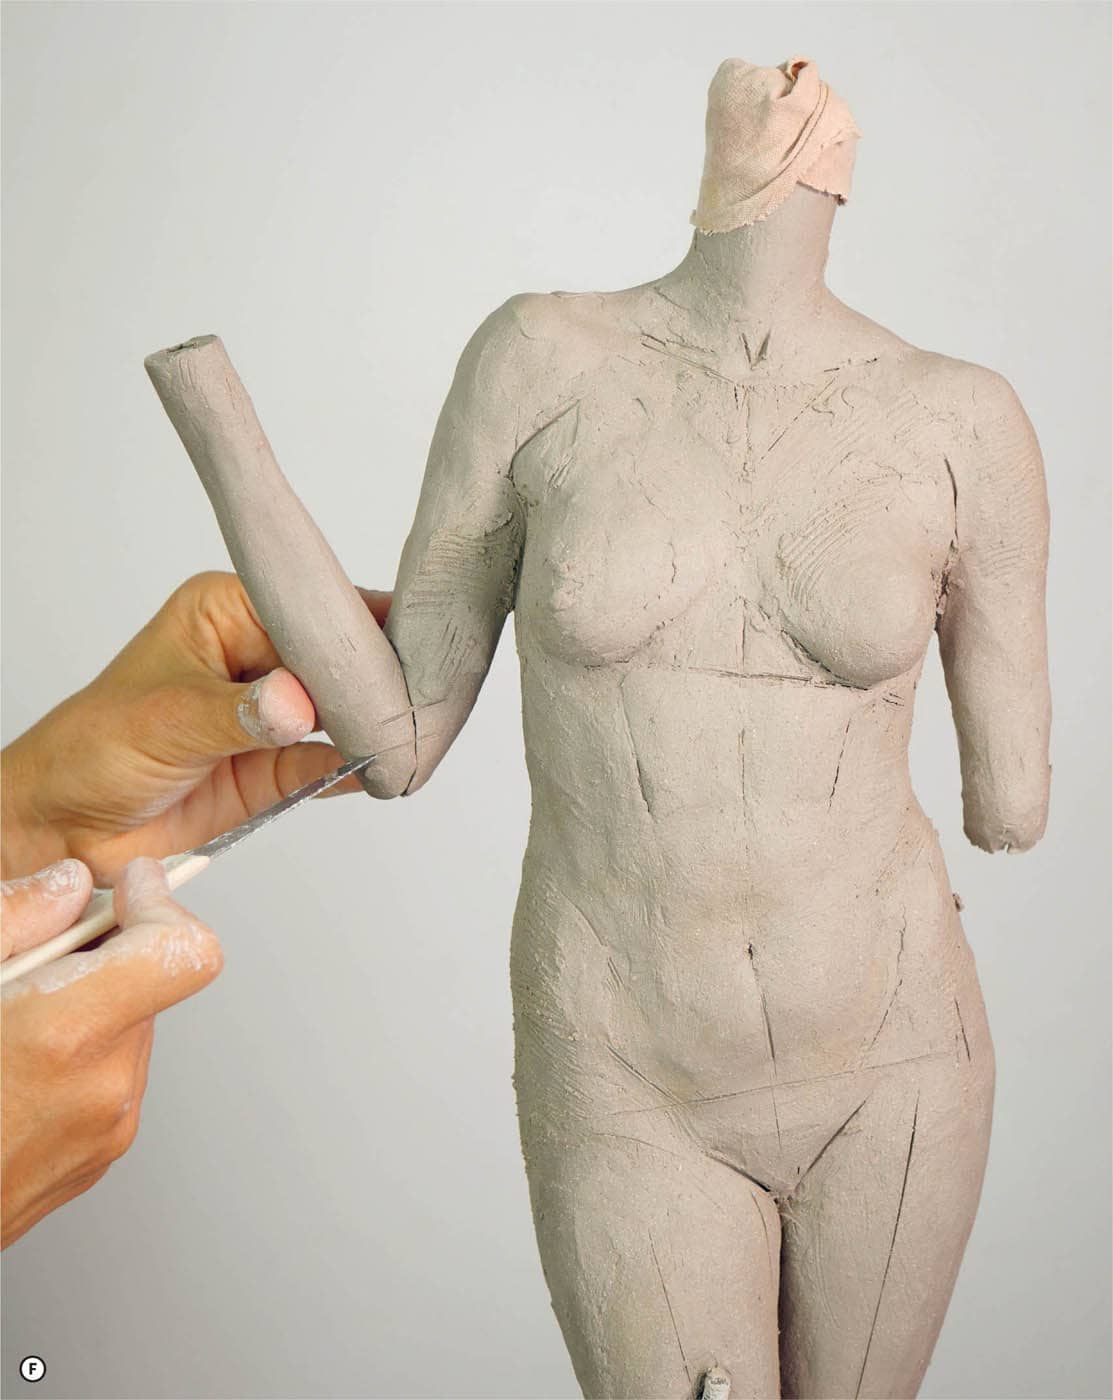
Once the shoulder joint has set enough to hold the weight of the upper arm, measure with your calipers against your reference the distance between the elbow and the wrist, right before the hand. Add about ¼ inch (6 mm) in length. Compare this segment to your photographic references to ensure it is the proper width and length. Starting with the bent right arm, take a measurement with your calipers of the distance between the top of the shoulder to the tip of the elbow from the side photographic view. Compare this measurement to the length of the arm on the sculpture and trim the lower edge at an angle to match the diagonal creased elbow established by the bending arm. ![]()
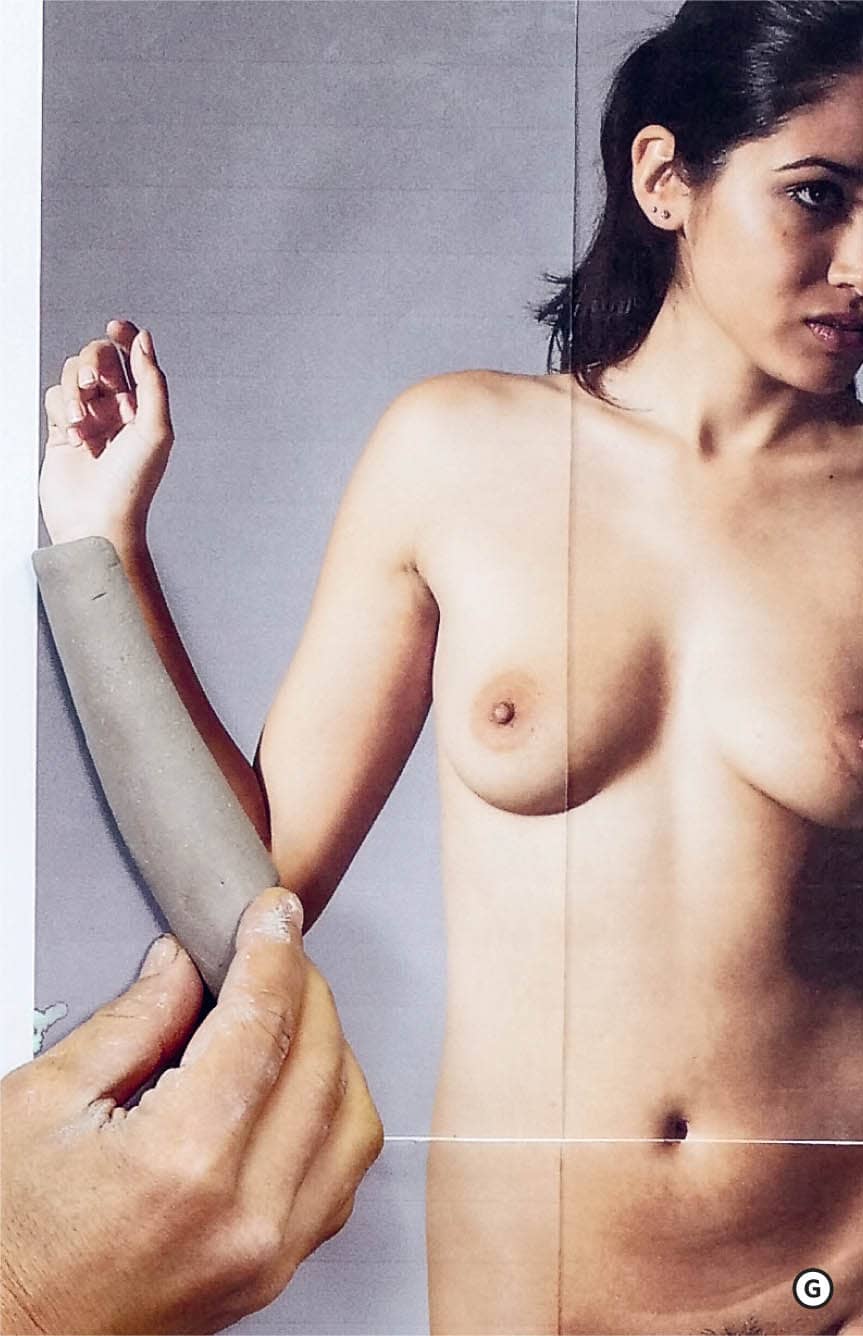
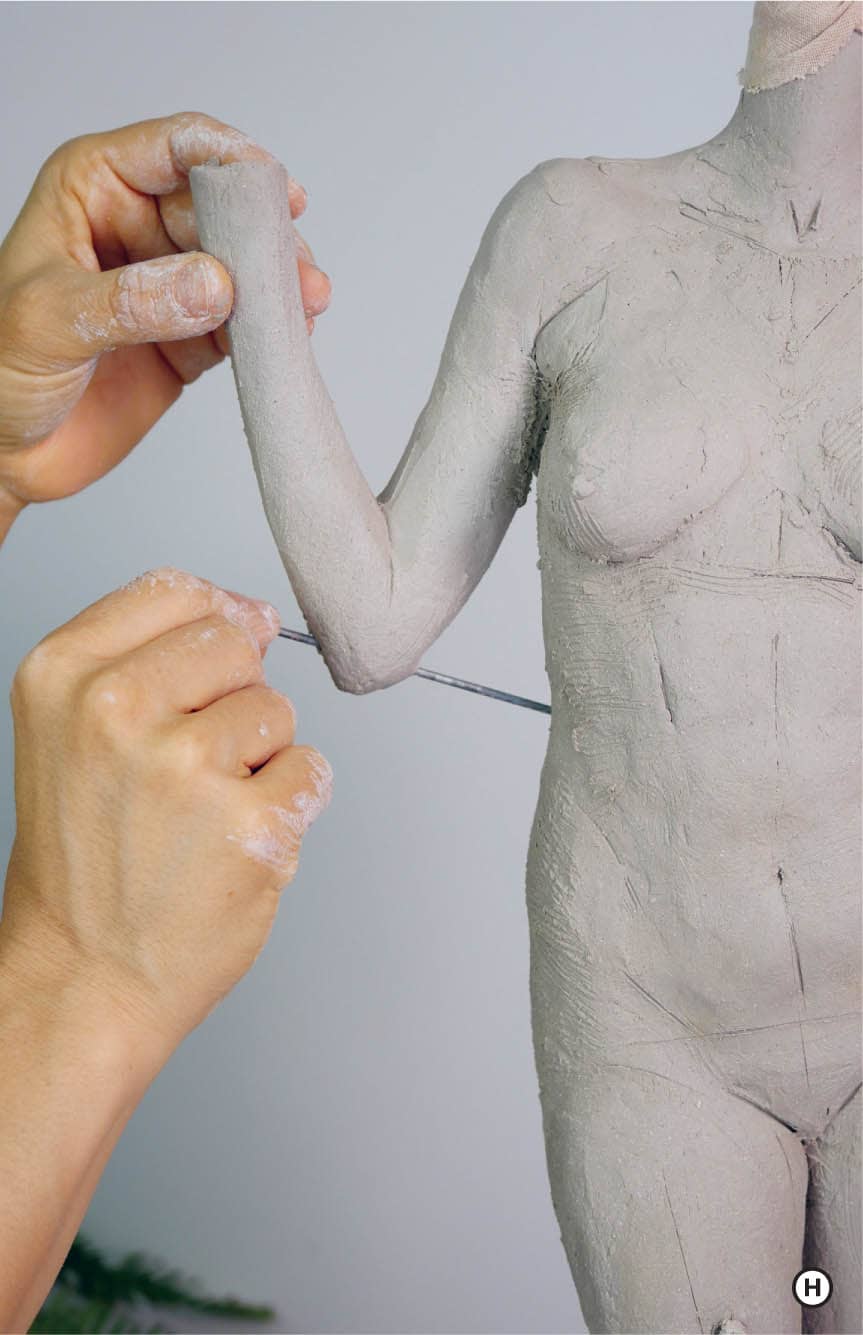
Repeat this process for the lower arm segment by trimming a matching diagonal on the wider side of the cone. ![]() Position the lower arm against the upper arm to check for alignments. Make adjustments where they are necessary, perhaps adding bits of clay to articulate the proper angle. As with the upper arm, look at the shapes of the negative space from the front, back, and right views of your photographic references and use these to establish alignment. When you are ready, set your keys and slip and score before attaching firmly and revising your seam. If necessary, pin a thin metal rod or wire from the lower arm into the torso to support the elbow joint before it sets.
Position the lower arm against the upper arm to check for alignments. Make adjustments where they are necessary, perhaps adding bits of clay to articulate the proper angle. As with the upper arm, look at the shapes of the negative space from the front, back, and right views of your photographic references and use these to establish alignment. When you are ready, set your keys and slip and score before attaching firmly and revising your seam. If necessary, pin a thin metal rod or wire from the lower arm into the torso to support the elbow joint before it sets. ![]()
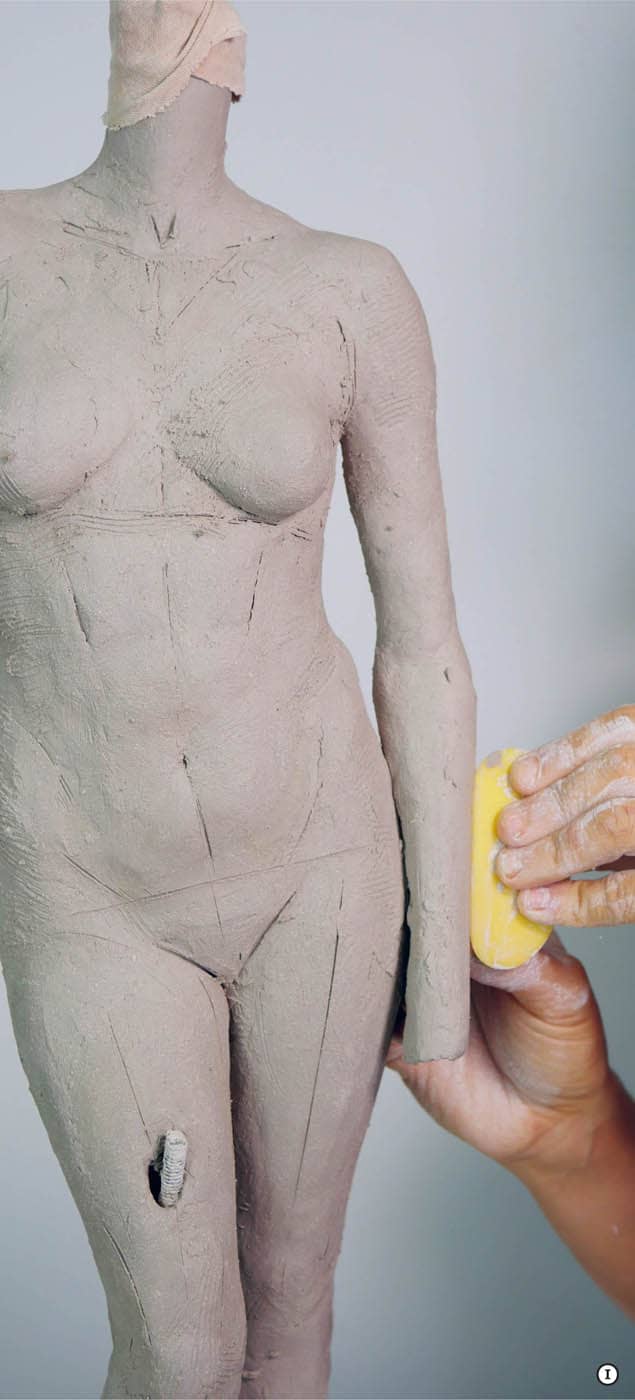
Follow the same process to cut and attach the extended arm. Note that on this side, there is a subtle internal rotation on the lower arm as it rests on the upper right thigh. You can use this point of contact to help support the weight of the lower arm. ![]()
As your figure compounds outward, the appendages become more vulnerable to drying. Make sure you protect the receiving edges of the neck and arms with extra plastic and moistened shop towels or cloth as needed. Spray your composition often, and whenever possible, keep the legs covered as you continue to develop the upper body.