
Lesson 12: Working with Web Fonts
Web fonts offer a way to enhance your page by embedding custom fonts, even if visitors to your site do not have the font on their system. In this lesson, you will explore two approaches; using the @font-face property and choosing fonts from a web-based font library service.
What you’ll learn in this lesson:
- • Understanding web fonts
- • Using @font-face to specify a web font
- • Using a web font service to generate multiple fonts
- • Using a font from Google Web Fonts
- • Using a font from Adobe Edge Web Fonts
Starting up
Working with web fonts
As noted in Lesson 3, Formatting Text with CSS, currently there are a few cross-platform compatible fonts that designers can use with the certainty that users have them installed on their system. Over the years designers have looked for alternatives and workarounds to this limitation. These workarounds ranged from using decorative fonts saved in images to font-replacement technologies such as Cufon, sIFR, FLIR and @font-face.
CSS3 uses a technique called @font-face supported by designers and by the companies that make and license fonts. @font-face lets you embed fonts within a page by declaring the font you want and placing this font on your web server. When a user visits your site, the browser renders the page using this font where specified. This technique is an excellent solution to the problem of uninstalled fonts, but there are complications that require some work. The following sections explain the complications and their solutions.
Using @font-face to specify a web font
The initial CSS syntax for @font-face is straightforward. In this exercise, you will embed an OpenType font called Sigmar that is licensed for free commercial use. The exercise is followed by an explanation of the complexities involved with font licensing.
1 In your text editor, choose File > Open, navigate to your HTML5_12lessons folder, select the webfont_base.css file, and then click Open.
2 Choose File > Open again, navigate to your HTML05_12lessons folder, select the 12_webfonts.html page, and then click Open. Keep the documents from this and the previous step open.
3 Preview the page in your browser to see its default appearance. For this exercise, you will style the heading 2 elements, Top Rated Smoothies and Our Mission Statement.
You will style the two heading 2 elements on this page.
These headings currently inherit the font-family property declared as follows in the body rule within the webfont_base.css external stylesheet:
font-family: "Trebuchet MS", Tahoma, Arial, sans-serif;
Additionally, the H2 rule has other style properties set: font-weight, text-transform, and letter-spacing. Lesson 3, “Formatting Text with CSS,” explains how to create these styles.
4 Return to your text editor; scroll to the bottom of the webfont_base.css stylesheet and add the following code:
@font-face {
font-family: Sigmar;
src: url('SigmarOne.otf'),
}
The font-family property creates a reference you can use in your CSS when you want Sigmar. The src property declares the location of the font; in this case, within your HTML5_12lessons folder on the same level as your HTML document.
Now, you need to specify where to use Sigmar. For this exercise, you will use it for the heading 2 element.
5 Scroll your stylesheet to locate the style rules for H2, and then add the new font-family as follows:
h2 {
font-size:1.125em;
letter-spacing:0.2em;
font-weight:lighter;
text-transform:uppercase;
font-family: Sigmar, serif;
}
Sigmar is first in the list, and should display properly on all modern browsers, but it is still a good idea to specify a default value in case the font is not rendered correctly. In this case, the alternative will be the device’s default serif font.
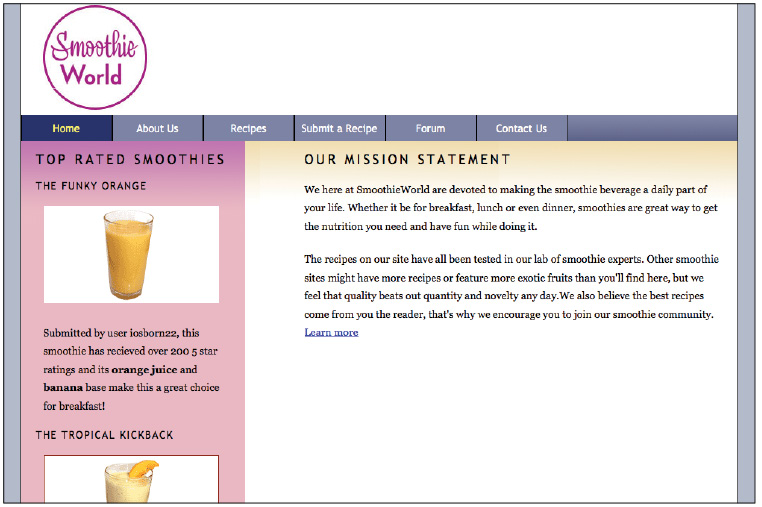
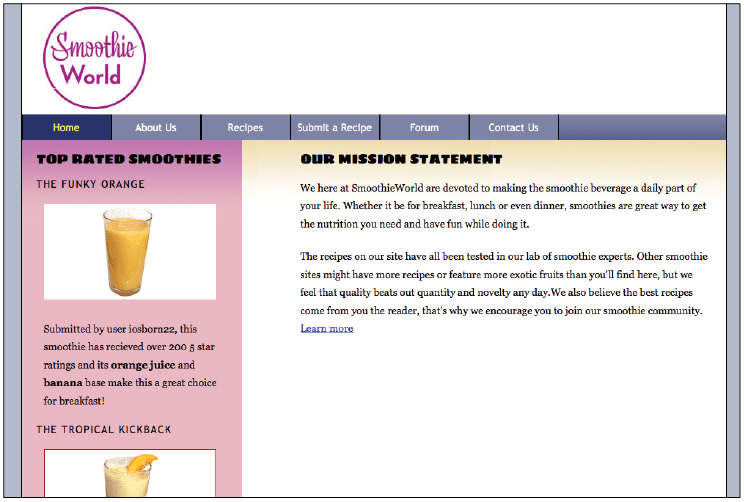
6 Save your HTML and CSS files, and then preview your page in the browser. As most browsers support @font-face and can render OpenType fonts, your two headings should use the Sigmar font, as shown by the following figure.
The two headings styled with the Sigmar web font.
If you are using the current versions of Firefox, Safari, Opera, or Chrome, your headings should appear as illustrated in the figure above. However, Internet Explorer 8 and below will display the heading as the Windows default serif font, usually Times New Roman, as shown by the following figure.
The two headings rendered in Times New Roman for Internet Explorer version 8 and below.
All versions of Internet Explorer starting from IE 5.0 support @font-face, but only versions 5.0-8.0 support the Embedded OpenType font type (EOT). Internet Explorer 9.0 supports OpenType with a few qualifications. Mobile devices, such as iPhone and iPad, support OpenType, WOFF and a format named SVG. If you want to display the Sigma font on as many browsers as possible, you need another method to display the font.
|
BROWSER |
OTF & TTF |
SVG |
WOFF |
EOT |
|
IE |
IE9+ |
— |
IE9+ |
IE5+ |
|
Firefox |
FF3.5+ |
— |
FF3.6+ |
— |
|
Chrome |
Chrome 4+ |
Chrome 0.3+ |
Chrome 5+ |
— |
|
Safari |
Safari 3.1+ |
Safari 3.2+ |
Safari 5.1+ |
— |
|
Opera |
Opera 10.0+ |
Opera 9+ |
Opera 11.1+ |
— |
|
iOS |
iOS 4.2+ |
iOS 1+ |
iOS 5.0+ |
— |
|
Android |
Android 2.2+ |
Android 3.0+ |
— |
— |
Using a web service to generate multiple fonts
The @font-face technique used in the last exercise allows you to declare multiple font alternatives for maximum compatibility; for example, you could declare OpenType fonts, Embedded Open Type, or WOFF formats for Internet Explorer, and WOFF and SVG for iOS. There are web services you can use for this purpose, such as Font Squirrel. This site offers the following options:
- • All the fonts on Font Squirrel are Commercial Free and can be used with the @font-face property.
- • Font Squirrel provides several kits that include different font types you can add to your site, as well as generated CSS you can copy and paste into your own CSS.
- • If necessary, you can generate your own kits using the site’s @font-face generator.
The following exercise illustrates how to generate a font kit for the Sigmar font.
 The files are included in the lesson folder. If you do not have access to the Internet, you can jump to step 6.
1 Using your web browser, navigate to www.fontsquirrel.com. In the navigation bar, click the Find Fonts link. This section lets your search the available web fonts on the site. A quick search for Sigmar will show there is only one result for the font, which should be the OTF font format.
Since we need to generate a full font kit, we will need to generate the other font formats manually.
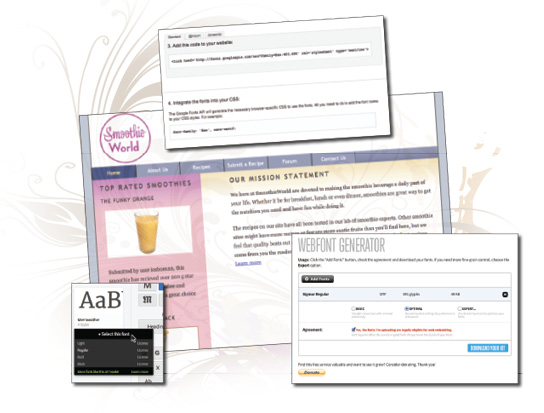
2 Click the Webfont Generator link to open this page. Click the Add Fonts button. A file browser window appears. Navigate to your HTML5_12lessons folder and locate the SigmarOne.otf file. Select it and click Open.
3 Select the Agreement check box to indicate that the font you are uploading is legally eligible for web embedding. The Download Your Kit button is made available.
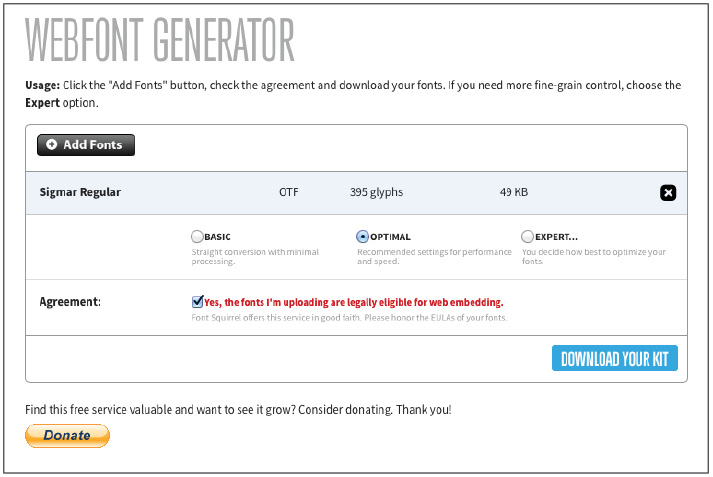
SigmarOne has an Open Font License and may legally be converted using FontSquirrel’s service.
 You can obtain the Sigmar font used for this exercise on the Font Squirrel site. The font has an Open Font License that lets you use it, study it, modify it, and freely redistribute it; but not sell it on its own. For more information on font licensing, refer to the section titled Understanding font licensing later in this lesson.
4 Normally, you would click the Download Your Kit button to download the file, but the Sigmar font has already been added to your HTML5_12lessons folder; do NOT download this file to prevent increasing the Font Squirrel bandwidth.
5 Close your browser and return to your text editor. Choose File > Open, navigate to the fonts folder located in your HTML5_12lessons folder, select the stylesheet.css file from the Fonts folder, and then click Open.
This file is the CSS created by Font Squirrel for the Sigmar styles. Select the entire @font-face rule, choose Edit > Copy, switch to your webfont_base.css file, and locate the original @font-face code you added in the last exercise. Delete this code and replace it with the new code generated from Font Squirrel:
@font-face {
font-family: 'SigmarRegular';
src: url('fonts/sigmarone-webfont.eot'),
src: url('fonts/sigmarone-webfont.eot?#iefix') format('embedded-opentype'),
url('fonts/sigmarone-webfont.woff') format('woff'),
url('fonts/sigmarone-webfont.ttf') format('truetype'),
url('fonts/sigmarone-webfont.svg#SigmarRegular') format('svg'),
font-weight: normal;
font-style: normal;
}
The web fonts generated by Font Squirrel have already been placed in the fonts folder. You can repeat these steps with a different font; if you do, move the web fonts from your download folder to your site folder.
The font-family property generated by Font Squirrel for Sigmar is different than the one you added in the last exercise, so you need to modify it.
6 In your webfont_base.css file, scroll to locate the H2 rule, and then change the value for Sigmar as follows:
font-family: 'SigmarRegular', Georgia, Palatino, Times New Roman, serif;
This step provides a font-family value compatible with all the different web fonts.
7 Save your HTML and CSS files and preview in the browser. If your browser rendered Sigmar in the last exercise, you should not notice a change. If you are using any version of Internet Explorer from 5.0 and above, you should see Sigmar rendered on the page.
8 Return to your text-editor.
The basics of using custom fonts with @font-face are well supported; ome font-styling properties in CSS have different support based on the browser. For example, your headings are still using letter-spacing, font-weight, and text-transform. These properties are not always reliable with @font-face and are not always needed, so you must evaluate these properties’ usability on a case-by-case basis. To illustrate with an example, you will modify the values of these properties.
9 In the rule for H2, change the letter-spacing value from 0.2em to 0em as follows:
h2 {
font-size:1.125em;
letter-spacing:0em;
font-weight:lighter;
text-transform:uppercase;
font-family: 'SigmarRegular', Georgia, Palatino, Times New Roman, serif;
}
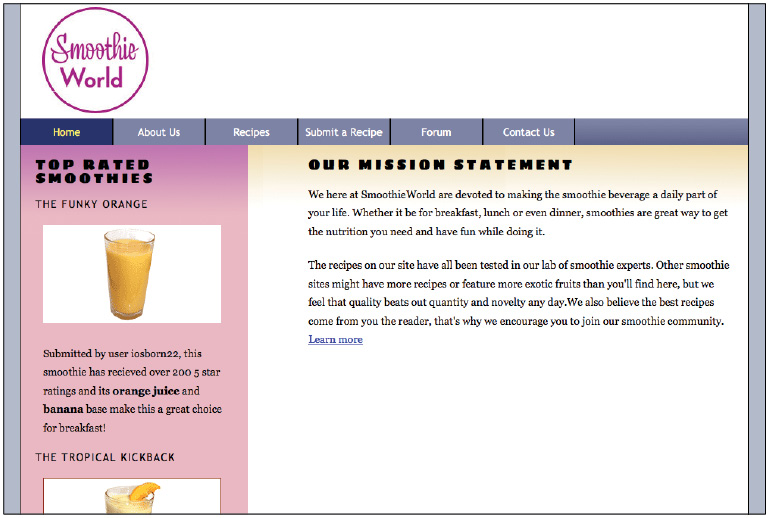
10 Save your files and preview in the browser. With letter-spacing set to 0, which is equivalent to removing the property, the width of the headings contract slightly. In the case of the first heading, Top Rated Smoothies, this has the added benefit of bringing the heading onto a single line.
With letter-spacing set to 0, the headings are reduced in width.
Changing the font-weight and text-transform values also alters the appearance of the headings. We strongly recommend that you test your pages on different browsers and platforms and make small changes as needed.
Using a web font library
Font Squirrel is not the only option available for web fonts; there are several more. This website allows you the option of generating font-kits, but there are legal restrictions you should consider. Font foundries regard the licenses for web fonts separately from the license to use them on your desktop in programs such as Photoshop. The font Sigmar used in these exercises is licensed under the Open Font License, so there are no restrictions for converting it. Most well-known fonts do have restrictions and you might be prevented by copy-protection laws.
There are web font service providers which help make it easier to select and use web fonts by providing access to fonts that are legally licensed for web use. These font service providers may often charge a fee, but there are also free alternatives from Google and Adobe. By using a web font service, you will eliminate the uncertainty of using an unlicensed font as all of the fonts on these services are licensed for free, commercial, web use. An additional benefit of web font service providers is that the fonts are downloaded from their servers, eliminating the bandwidth and throughput issues that could arise from hosting the files on your own servers.
In the following exercises, you will choose fonts from both the Google Web Fonts library and Adobe Edge Web Fonts and add them to your web page. We have also listed additional font library services where you can explore even more web fonts.
Using Google Web Fonts
Google Fonts provides web designers and developers with a directory of open source web fonts that make it easy to bring quality typography to your web pages and applications. The service runs on Google’s servers and is fast, reliable and thoroughly tested. All of the fonts are available free of charge and can be shared, customized and used on any projects from websites and applications to print, and everything in between.
The Google API service makes it easy to add fonts to a website.
In this exercise, you will continue to work with the webfont_base.css file from the previous exercises. This time, you will format h3 headings using a font from the Google Web Font service.
1 Open the file 12_webfonts.html in the HTML5_12lessons folder. You will be copying a <link> statement from the Google Web Fonts API site into the <head> section of this file.
2 Open a web browser and go to the Google Fonts home page at: http://www.google.com/fonts. There are multiple options to help you search for and preview various web fonts on the site. For example, you can search for a font by name, or filter the results by category, thickness and slant.
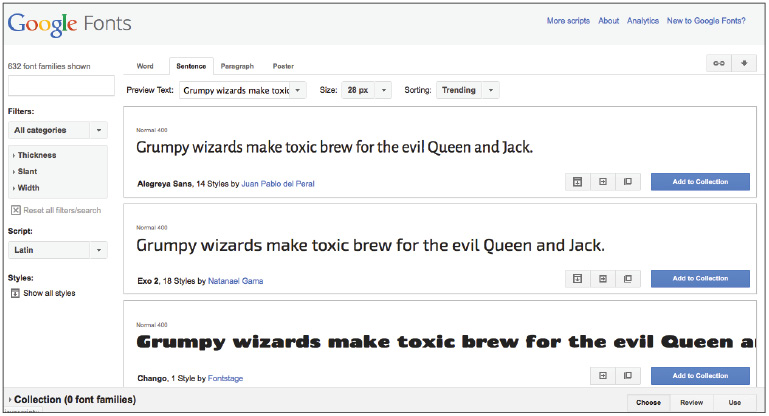
The Google Fonts site lets you choose from hundreds of free web fonts.
Type the font name Exo in the search box in the top left corner of the screen. You should see two fonts; Exo and Exo2. Find the font named Exo and click the Add to Collection button to select this font.
4 Next, click the Use button at the bottom right corner of the Google Fonts window. This will take you to the next step, where you can choose the styles you would like to use and where you will find instructions on how to use the font.
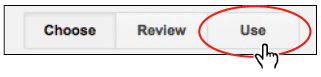
Click the Use button to view instructions on how to use the selected font.
5 Steps 3 and 4 of the page displayed will show you how to add a link to the font to your website and how to declare the add the font using the font-family property.
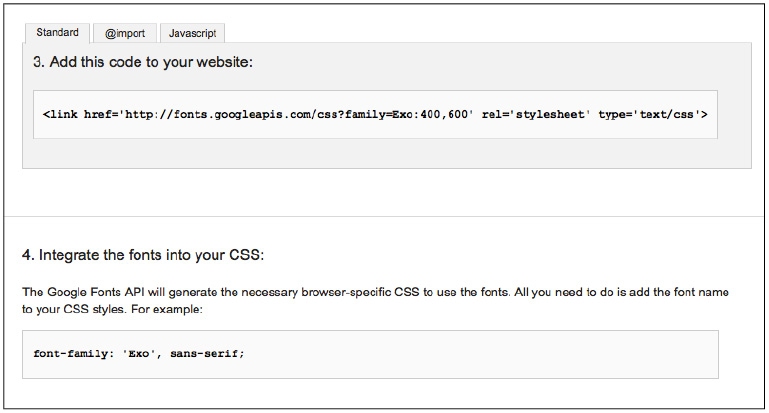
The Google Fonts API provides instructions on how to use the selected font.
6 Select and copy the link code and paste it into the <head> section of 12_webfonts.html, after the link to webfont_base.css as follows:
<link rel="stylesheet" media="screen" href="webfont_base.css" type="text/css" />
<link href='http://fonts.googleapis.com/css?family=Exo:400,600' rel='stylesheet' type='text/css'>
7 Save 12_webfonts.html before proceeding to the next step.
8 Open the webfont_base.css file from the HTML5_12lessons folder. Scroll down to the location where the h3 style rules are listed and add the font-family property from the Google Fonts API web page as follows:
h3 {
font-size:0.875em;
letter-spacing:0.1em;
font-weight:lighter;
text-transform:uppercase;
font-family: 'Exo', sans-serif;
}
9 Save webfonts_base.css and preview webfonts.html in your browser. You should now see the two heading 3 headings in the sidebar displayed using the Exo font.
Note that the font will appear lighter than the preview in Google Web Fonts because the existing h3 rule also sets the font-weight to lighter. Experiment with setting the font-weight to bolder.
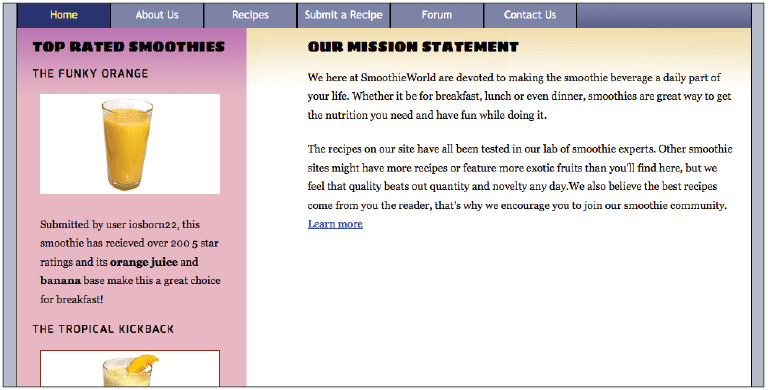
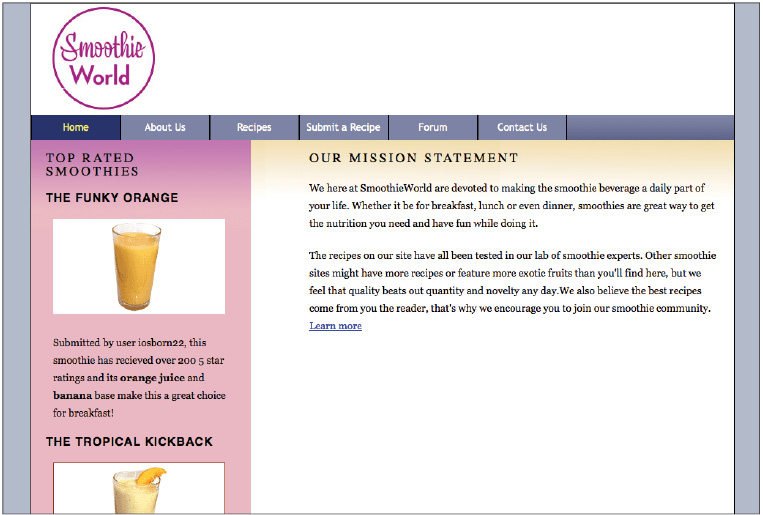
Viewing 12_webfonts.html in the browser will show the h3 headings The Funky Orange and The Tropical Kickback rendered with the Exo font. In this screenshot the font-weight has been set to bolder.
In the next exercise, you will use a font from the Adobe Edge Web Fonts service to style the paragraph text on your web page.
Using Adobe Edge Web Fonts
Adobe Edge Web Fonts is another font library service that provides a directory of free-to-use web fonts. The Adobe Edge Web Fonts service is powered by the same technology behind the font subscription service TypeKit and includes fonts from Adobe, Google, and other font foundries and providers.
The Adobe Edge Web Fonts service also makes it easy to add web fonts to a website.
In this exercise, you will continue to work with the webfontsbase.css file from the previous exercises. This time, you will format paragraphs using a font from the Adobe Edge Web Font service.
1 Open the file 12_webfonts.html in the HTML5_12lessons folder. You will be copying a <link> statement from the Adobe Edge Web Fonts site into the <head> section of this file, below the link to the Google Font.
2 Open a web browser and go to the Adobe Edge Web Fonts home page at: https://edgewebfonts.adobe.com/fonts. There are a number of options to help you choose a font. For example, you can search for a font by name or filter fonts by classification, or view fonts suitable for heading or paragraph text.
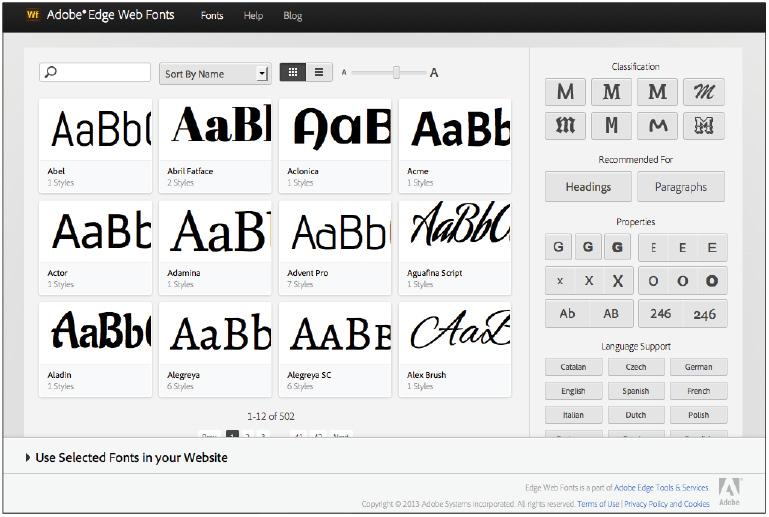
The Adobe Edge Web Fonts site lets you choose from hundreds of free web fonts.
3 Click the Serif button in the Categories section and then click the Paragraphs button under the label ‘Recommended for’ on the right side of the window. You will be presented with a list of fonts that match the chosen criteria.
4 When you mouse over each font, a popup window will display allowing you to choose the selected font. Mouse over the font Merriweather and click the +Select this Font link from the popup menu.
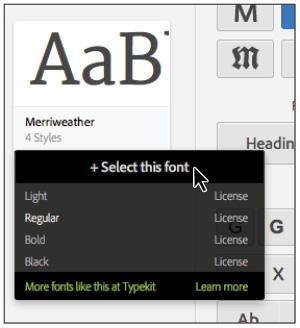
Mouse over the font you would like to choose to view the available styles.
5 Once you select a font, you will be shown instructions on how to add the font to your website, including the required script tag and proper font-family declaration.
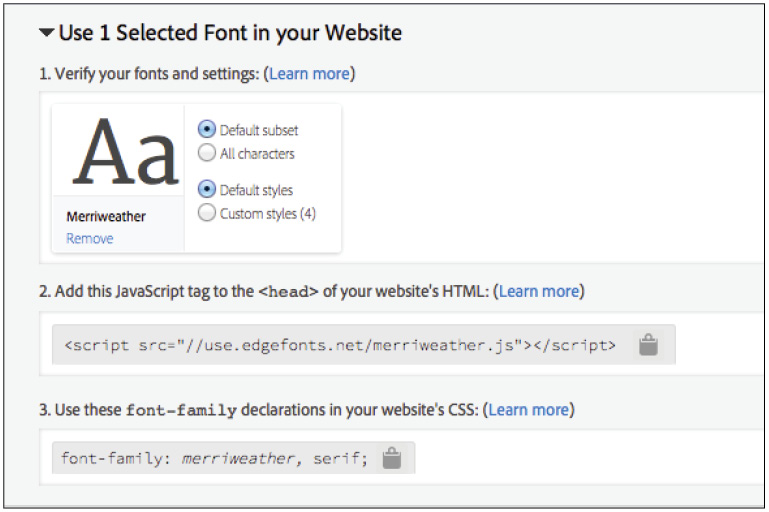
The Adobe Edge Web Fonts site provides instructions on how to use the selected font.
6 Select and copy the script code and paste it into the <head> section of 12_webfonts.html, after the link to the Google Web Font API as follows:
<link href='http://fonts.googleapis.com/css?family=Exo:400,600' rel='stylesheet' type='text/css'>
<script src="//use.edgefonts.net/merriweather.js"></script>
7 Save 12_webfonts.html before proceeding to the next step.
8 Open the webfontsbase.css file from the HTML5_12lessons folder. Scroll down to the location where the paragraph (p) style rules are listed and add the Merriweather font to the font-family as follows:
p {
font-family: merriweather, serif;
font-size: 0.875em;
/*border: thin red solid;*/
line-height:1.75em;
}
9 Save webfonts_base.css and preview 12_webfonts.html in your browser. You should now see the paragraph text in the main and sidebar areas displayed using the Merriweather font.

Viewing 12_webfonts.html in the browser will show paragraphs within main and the sidebar rendered using the Merriweather font.
10 You may now close the browser window and close both webfont_base.css and 12_webfonts.html files.
You have finished this lesson. You learned about the benefits of using web fonts to add new font options to your web pages, how to add web fonts to your pages using the @font-face property and using both the Google Fonts API and Adobe Edge Web Fonts services.
Self-Study
1 Find another font from the FontSquirrel website and use @font-face to restyle the text of the h2 headings in 12_webfonts.html with the new font.
2 Select another font from a font library service, like Google Web Fonts API or Adobe Edge Web Fonts, and use it to restyle the h3 headings and/or paragraphs in the lesson file 12_webfonts.html.
3 Experiment with web fonts by changing other font properties such as font-weight, font-size, letter-spacing or line-height.
Review
Questions
1 Name at least one benefit of using web fonts.
2 What property is used to specify the names and filenames of the web font files used in your web page?
3 Name one drawback of using web fonts with @font-face.
4 Name at least one benefit of using a web font service like Google Web Fonts or Adobe Edge Web Fonts.
Answers
1 Some benefits of web fonts include the variety of choices available for use in your designs and the fact that web fonts will work in all modern browsers.
2 The @font-face property is used to specify the names and filenames of the web font files in your web page.
3 Drawbacks to web fonts include the need to use fonts with a specific web license (which means your favorite font might not be available for web use), and the fact that even if a font is licensed for web use, it might not be optimized for the computer screen.
4 An added benefit of using a web font service is that you no longer have to manage your own web fonts or have them downloaded from your server.