C H A P T E R 6
Styles and Themes
Throughout my years of helping different businesses and business units plan and implement SharePoint, the most requested requirement is to make a SharePoint site look not like SharePoint. SharePoint's look is bland for a reason. It emphasizes function over form. It provides a basic road map, so to speak, to get you where you want to go. I always tell people that SharePoint is a platform with enormous functionality that is just waiting to be the foundation of your own creation! This chapter covers the main areas in customizing your own SharePoint look, or brand, with the use of styles and themes.
You will learn about the following topics in this chapter:
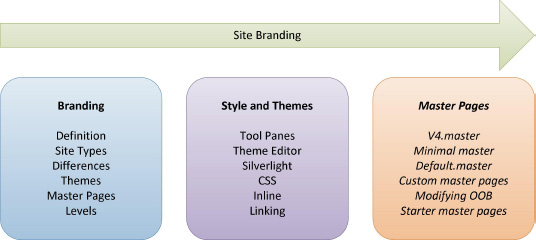
- Understanding SharePoint branding
- Knowing the differences between SharePoint 2007 and SharePoint 2010
- Working with the different levels of SharePoint branding
- Creating a new theme
- Modifying an out-of-the-box master page
What Is Branding?
Throughout the world, ranchers mark their livestock by permanently placing their brand on their animals. There are also some organizations in which the members brand themselves. The brand, when seen by others, provides a unique identity to the rancher or that organization. As it relates to commerce, branding is the creation of a mark or identity that uniquely identifies a company or product. Think of the logos of Target, McDonald's, and Pepsi, and you instantly recognize and associate a product with a brand without even needing words to describe it.
For web sites, branding entails creating a look and feel by using colors, styles, graphics, fonts, and logos. The SharePoint branding brand helps the user identify the web site and, if successfully done, promotes and encourages user adoption. When we talk more specifically about branding SharePoint, most people choose to brand to either make it unique to them, improve usability, or a combination of both. Most people are familiar with the bland user interface that comes with SharePoint. It was done that way on purpose. When we work with clients, we always say that SharePoint, while delivering a lot of functionality out of the box, is meant to be a platform for creating and developing your own solutions. It provides the foundation—you provide the walls and paint. The paint is your brand.
Site Type Considerations in Branding
How you approach branding is dictated by the type of SharePoint installation you have: intranet, Internet, or extranet. Each type of installation has its own specific characteristics and requirements.
![]() Tip A great resource for viewing web sites that use custom-branded SharePoint is
Tip A great resource for viewing web sites that use custom-branded SharePoint is www.topsharepoint.com.
Intranet
An intranet installation is typically for an authenticated, internal audience and controlled by the IT department. You will have more control over the platforms you have to support. Since the intranet is also meant for internal communication and collaboration, more emphasis is usually placed on function over form: the main page has a focus on communication, and subsites have a focus on collaboration. From a branding standpoint, an intranet site is easier to brand than other types of sites because you are usually able to standardize on one browser. You will also find that the most frequent site template used is the Team Site template.
Internet
On the other end of the spectrum is a public-facing Internet site. With Internet sites, the audience could be anyone who visits your site. Consequently, you will have to support more kinds of browsers, on different platforms. Internet sites are also typically owned by the marketing department of the company and tend to be visual. A premium is placed on form as well as function. An Internet site typically is used to communicate information to the visitor with very little collaborative content. There is typically no authentication requirement, and all visitors will browse the site anonymously. These sites take longer to implement because of the extra effort needed to test for browser compatibility.
Extranet
An extranet site lives in that happy middle between an intranet and the Internet. The extranet's audience is typically the customers of the company and can be a mixture of anonymous and authenticated users. Parts of the extranet are for disseminating information to the customer. Other areas of the site, after authentication, will then key on a collaborative function, such as managing orders, collaborating with internal users, or retrieving reports. Branding an extranet is also somewhere between an intranet, with its utilitarian requirement for collaboration, and the highly stylized branding of an Internet site. Like an Internet site, the extranet site will typically need to support different browsers and platforms, and that is what makes security the most challenging aspect of an extranet.
Branding in 2007 vs. 2010
Much has changed from 2007 to 2010 as it relates to branding. Microsoft Office SharePoint Server 2007 (MOSS 2007) introduced master pages and page layouts. This made standardizing an overall look and feel much easier. SharePoint Server 2010 continues using master pages and page layouts, and has added quite a few new features. These new features also make branding a SharePoint 2010 site much easier than branding a MOSS 2007 site.
Themes
MOSS 2007 themes worked by overlaying the theme's XML and CSS over the top of the default master page and CSS. They were normally stored in the 12 hive. In SharePoint 2010, themes are created with Microsoft Office clients and then loaded into SharePoint 2010 sites to be applied to any site by the site owner. The SharePoint Server 2010 version also allows a site owner to modify themes directly in the web interface.
Master Pages
Whereas MOSS 2007 came with only one master page for collaborative sites and one for a publishing site, SharePoint 2010 comes with several built-in master pages, including the following:
v4.master: This is the default master page.nightandday.master: This master page is available only on SharePoint Server 2010 sites with the publishing feature enabled.minimal.master: Unlike theminimal.masterpages that were produced as a base point for custom branding in MOSS 2007, in SharePoint 2010, theminimal.masterpage is meant to be used by pages that have their own navigation or need additional space. It wouldn't be a good starting point for a custom branding master page because it lacks some important SharePoint controls.
Master pages in SharePoint 2007 applied only to the site and not the settings page. SharePoint 2007 had an application.master master page that was separate from the default.master. Modifying the application.master was not supported by Microsoft. In SharePoint 2010, the master page is a dynamic page so that each site has a defined master page. That master page is used on all pages.
SharePoint 2010 provides fall-back-to-default functionality. If something creates an error in a custom master page, SharePoint will automatically fall back to the default v4.master page.
Wiki Pages
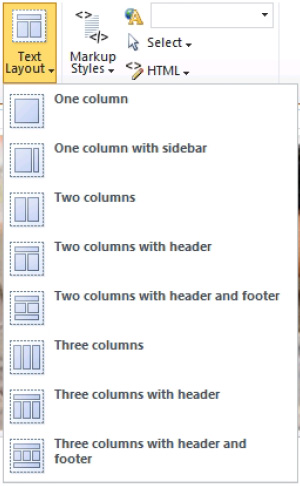
In MOSS 2007, the most popular site created was the team site. The wiki site was a separate template that was used as a special type of site. In SharePoint 2010, the wiki functionality is included as part of the Team Site template. With the new functionality, it is easier for team members to collaborate and create content. While wiki pages are available in both SharePoint Foundation 2010 and SharePoint Server 2010, the ability to create and use page layouts with wiki pages is available only in SharePoint Server 2010 (Figure 6-1).
CSS
In MOSS 2007, there was one large CSS file called core.css that was loaded with each page, whether all of the CSS was really needed or not. It made page loading times longer than they sometimes needed to be. SharePoint 2010 splits the default CSS among several smaller CSS files, which are loaded only as they are needed. SharePoint Server 2010 also has the ability to use alternate CSS files that are applied over the top of any out-of-the-box CSS files.
Multilingual User Interface
In MOSS 2007, multilingual support was provided with a feature called variations, which basically created a new site for each language you wanted to support. In SharePoint 2010, variations are still there, but multilingual user interface (MUI) support changed so that you can specify multiple languages for only one site. When a user browses to a SharePoint 2010 site that has MUI enabled, SharePoint automatically checks which language is specified in the user's browser and then serves up the page in the user's language if present in the SharePoint site.
What's New in SharePoint 2010
If you are familiar with SharePoint 2007, you will notice that there have been some significant changes to the user experience in SharePoint 2010. The most significant change comes in the form of the Ribbon. The Ribbon made its appearance in Microsoft Office 2007 as a way to allow users to perform different tasks without leaving the context they were in. As Microsoft released new products, the Fluent UI (or Ribbon) became more and more prevalent. You can now see the Ribbon used in all Office applications, the Windows 7 apps such as Paint and WordPad, and now in SharePoint 2010. Because of the Ribbon, the Site Actions menu was moved from the upper-right corner to the left side of the page. Like all new interfaces, it will take users a little while to get used to, but usually, common tasks will be more accessible.
New Controls
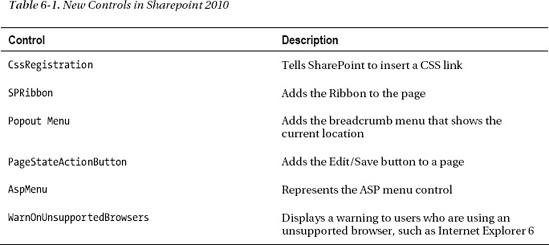
To enable some of the new features in SharePoint 2010, new controls were created that you can use in your master pages. Table 6-1 lists a few of the new controls and their purposes as they relate to customizing a master page. A complete list can be found at http://msdn.microsoft.com/en-us/library/microsoft.sharepoint.webcontrols.aspx.
Themes
Themes provide an easy way to change the look of a SharePoint site, by changing the colors and fonts used on a site. As mentioned earlier, new themes can be created in Microsoft Word or PowerPoint and even in the browser in SharePoint Server 2010 (Figure 6-2).
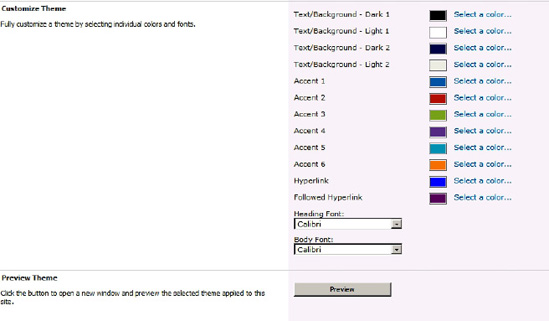
Figure 6-2. Browser theme selector
SharePoint 2010 introduces a new theme engine. The theme engine uses the same THMX file that is already used by Microsoft Word 2010 and Microsoft PowerPoint 2010. This OpenXML file format can be created and then imported into SharePoint to allow the user to change the look and feel of a SharePoint site.
To create a new theme, the user picks 12 colors and two fonts that work together. If you have ever created a new theme for a PowerPoint presentation, you can use that same theme in SharePoint.
EXERCISE 6-1: IMPORT A NEW THEME FROM POWERPOINT
A site owner has asked to have a custom theme created for her company's site. The company uses a theme for all of its slide presentations and would like to create a theme for the site that uses the same colors as the slide theme.
Because SharePoint uses the same theme engine that the other Microsoft Office products use, you can export a theme from PowerPoint and import it into SharePoint to be used on a site:
- Open PowerPoint 2010. If the program doesn't begin a project by default, create a new blank slide presentation.
- On the Ribbon menu, click Design.
- From the theme selector, select a theme that you like, as shown in Figure 6-3.
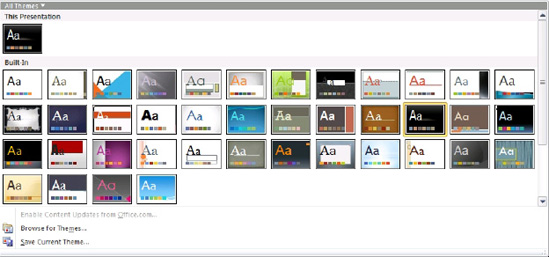
Figure 6-3. Theme selector
- Click the theme selector drop-down menu and select Save Current Theme.
- Save the theme on your desktop as PowerPointTheme.
- Close PowerPoint 2010 without saving the presentation.
- Open the root site of the SharePoint site collection in your browser.
- From the Site Actions menu, select Site Settings.
- The settings page opens. If you don't see the Theme Gallery listed under Galleries, make sure you are in the Site Collection Settings menu by selecting Go to Top Level Site Settings.
- From the Galleries section, click Themes (Figure 6-4).
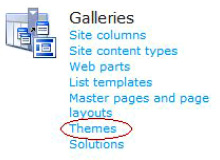
Figure 6-4. Themes link in Galleries section
- From the Documents menu, click Upload Document.
- When the dialog box opens, click Browse and select the PowerPoint theme that you saved on your desktop. Leave the destination folder as the default. Then click OK.
- When the next dialog box opens, you can provide a description if you want and then click Save. You should now see the new theme in the Theme Gallery, as shown in Figure 6-5.
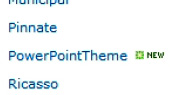
Figure 6-5. Imported theme
- Go back to your site.
- From the Site Actions menu, select Site Settings.
- From the Look and Feel group, click Site Theme.
- Find your PowerPointTheme theme and select it. Notice that all of the colors and fonts are selected (Figure 6-6).
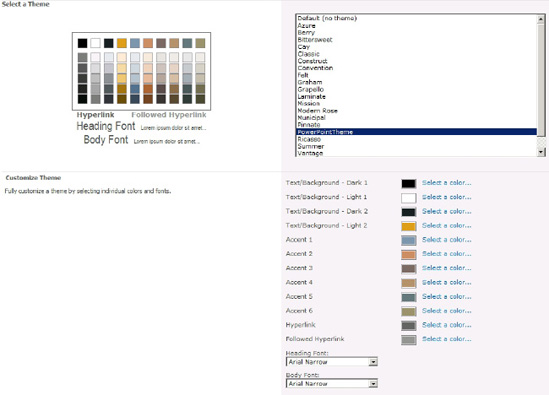
- Click the Apply button.
- Once your theme has been applied, click your home link to view your site with the new theme.
- For even more fun, go back to the browser theme editor by selecting Site Settings from the Site Actions menu.
- From the Look and Feel group, select Site Theme.
- Change colors and then select Preview to see how your changes affect your theme. If you don't want to save your changes, click Cancel.
- To put your site back to the default theme, open the theme settings again and select Default (no theme) from the selection list and then click Apply.
Wiki Pages
As mentioned earlier, wiki functionality is rolled into the new Team Site template. The great thing about this is that users can now begin editing content on a team site with just one click. It provides the power and flexibility of a wiki site with the collaborative functionality of a team site.
Client Object Model
If you have done any customization of SharePoint 2007, you know that there isn't any client-side interaction with the pages. Most power users and developers began to use jQuery to get some client-side functionality. However, using jQuery still made it difficult to update any SharePoint information from the client.
SharePoint 2010 introduces its own client object model. With it, you can use JavaScript or Silverlight to access SharePoint data. The client object model provides a simple create, read, update, and delete (CRUD) API that allows manipulation of the SharePoint data without any compiled code. The great part is that because all changes occur on the client, there is no need for a page refresh.
Silverlight
SharePoint makes use of Silverlight throughout the out-of-the-box templates. A new Silverlight web part is included with SharePoint 2010, so incorporating Silverlight into your SharePoint sites is easier than ever.
![]() Note The client object model and Silverlight are discussed in more detail in Chapter 9.
Note The client object model and Silverlight are discussed in more detail in Chapter 9.
Digital Asset Management
In today's world, media, in the form of audio and video files, is becoming more and more prevalent. This could include training videos or podcasts or customer informational videos. SharePoint 2010 has made improvements in its Asset library. A new Silverlight media player allows videos to be played directly from a SharePoint site. The Content Query web part (CQWP) also provides some new functionality specifically for media, allowing a file to stream instead of having to download the complete file before playing.
Accessibility
The W3C's Web Content Accessibility Guidelines (WCAG) were developed to make web content more accessible. By more closely following web development standards, SharePoint makes it possible to have a more WCAG-compliant web site.
Standard Compliance
In SharePoint 2007, browser compatibility was painful. It took a lot of effort to make sure that customizations would render properly in different browsers. With its emphasis on more closely following web development standards, SharePoint 2010 produces cleaner HTML and fewer tables. While not fully XHTML compliant, the new version has made branding much easier.
High-Level SharePoint Branding
Branding a SharePoint site basically entails creating or modifying a few key web elements. At its most basic level, a SharePoint site consists of a master page, CSS, and page content. The following items are key elements of SharePoint branding:
- Themes: Developing a custom theme is the easiest way to create a new brand for your site. As mentioned previously, you can create a new theme by using Microsoft Office or Microsoft PowerPoint.
- Master pages: Every SharePoint site requires a master page. It is not possible to render a SharePoint page without a master page. SharePoint 2010 provides some master pages out of the box that you can modify to create your own branded master page.
- Content pages: Master pages define the structure of a page, and the content pages define the body. Depending on the type of site you are creating, you will have different types of content pages.
- Wiki pages: These pages enable users to quickly create and edit content on the page. Because these pages can be modified by any number of users, they tend to be informal content pages. Typical uses for these are knowledge bases or a place where users can collaborate.
- Web part pages: A web part page is a more structured page. By definition, it provides a place for a user to place web parts in defined web part zones. Any user with the appropriate permissions can create a web part page and place web parts on them.
- Publishing pages: Publishing pages are available only after enabling the publishing feature in SharePoint Server 2010. The publishing feature enables authors to create pages that have an approval workflow so that the page content can be reviewed and approved before being published. Publishing pages use templates called page layouts that define the content areas. When creating content, users can select a specific page layout template that meets the user's needs.
- Cascading Style Sheets: CSS on a web site is like paint on a house. CSS defines the style, look, and feel of the web site. SharePoint 2010 makes wide use of CSS. All of the controls that are loaded in a master page are styled by CSS. Because CSS is so important in SharePoint, a thorough understanding of CSS is critical to branding a SharePoint site.
Levels of Effort
Each branding project can be classified by who normally does the branding, what skills are required to complete the branding project and the level of effort requred. Projects typically fall into one of the following three levels of effort.
Low Effort
This is typically the branding that an end user could perform. Examples include adding logos to the top of every page, selecting themes or master pages, and even creating a custom theme.
Medium Effort
This is typically the level of branding done by using SharePoint Designer. It entails making changes to CSS and HTML. In medium-effort projects, you might create additional web part zones on a page or modify an out-of-the-box master page by making a copy of an existing master page and customizing it. This level of effort is usually performed by a power user.
High Effort
The most extensive effort is usually done with other web development tools. In a high-effort project, you would likely be creating custom master pages, page layouts, and CSS. This level of effort is usually performed by a developer or designer experienced in web site design and also in ASP.NET and SharePoint. This is the level of effort typically required for highly stylized public Internet sites.
Before You Begin
While beyond the scope of this chapter, several considerations need to be taken into account before you begin branding any site. In addition, you can use other tools along with SharePoint Designer to help in your branding efforts. Both topics are covered in this section.
Considerations
The decisions you make based on the following considerations will dictate the level of effort required in your branding project:
- Targeted audience
- Is this an intranet, extranet, or the Internet?
- Targeted browsers
- Remember that IE6 is not supported out of the box.
- Only 32-bit IE7 and IE8 on Windows are fully supported without limitations.
- Other browsers are supported with some limitations.
- Version of SharePoint
- SharePoint Foundation
- SharePoint Server
- Screen resolution
- The most common resolution now is 1024×768.
- Will your users require something different?
- Questions to ask
- What is the time frame to create the brand?
- Is this a new design or one based on an existing design?
- Does this require any custom web parts or third-party web parts?
- What navigation is required?
- Horizontal
- Vertical
- Breadcrumb
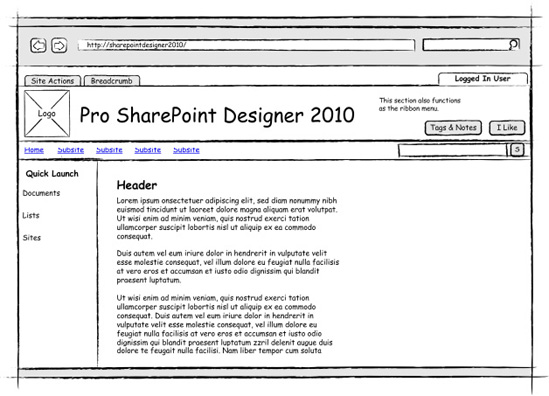
- Wireframes (Figure 6-7)
- They define the skeleton of a site.
- They define the layout and flow of a web site.
- They promote ideas without distracting with colors.
- Great prototyping tools include Microsoft Visio and Microsoft Expression Studio's SketchFlow (
www.microsoft.com/expression/products/SketchFlow_Overview.aspx).
- DOCTYPES
- SharePoint's master pages are set to use the XHTML 1.0 Strict DOCTYPE.
- If you are going to use another DOCTYPE, make sure that SharePoint controls will render correctly.
- IE8 compatibility mode
- Each major release of IE has added features that increase security and more closely support standards. As each feature is released, there is always a risk that older web sites will not display correctly. The
X-UA-Compatibleheader indicates the version of IE that the page is coded for. By default, all SharePoint 2010 pages come with compatibility mode set toIE=8.
- Each major release of IE has added features that increase security and more closely support standards. As each feature is released, there is always a risk that older web sites will not display correctly. The
- Tableless design
- Modern web site design uses CSS to define layout. SharePoint 2007 used tables to define its structure. In SharePoint 2010, Microsoft has embraced the tableless design. CSS is used to define layouts, and tables are used to display tabular data.
- Testing
- How much time will be dedicated to testing?
- What browsers are being used for testing?
Other Tools Used in Branding
Along with SharePoint Designer, other tools can play an important part in your branding exercise and can help making branding that much easier.
Visio 2010
In previous versions of Visio, software developers could prototype software by using the Windows XP stencils. This made prototyping a new software application much easier than had been possible before. In SharePoint 2010, Microsoft made it much easier to prototype web applications with their Wireframe stencil set. These are interactive stencils that allow you to quickly create a wireframe of a new site and present it to a user.
Visio is also the place where you can create new themes to use in SharePoint. The theme engine in SharePoint is shared in the Microsoft Office family, so any theme you create in Visio 2010 or PowerPoint 2010 can be used on a SharePoint site. Creating themes is covered later in this chapter.
PowerPoint 2010
As mentioned earlier, you can use PowerPoint 2010 to create new themes for SharePoint. It is also a tool you can use to create a wireframe if you don't have Visio or another tool like it.
Image Editors
If you are the resident designer, you most likely already have an image editor you like to use. If you don't, the following are a couple of open source or freeware applications I like to use:
- IrfanView: This lightweight graphic viewer can open just about any graphic and then save it in another. It has a lot of great features that make this a Swiss-Army-knife graphic utility. It's great for format conversion, resizing, and even screen captures. It even plays MP3 files! You can find this program at
www.irfanview.com. - GIMP: The GNU Image Manipulation Program is a multiplatform, multilingual program for creating, manipulating, and retouching images. See
www.gimp.org.
Branding with SharePoint Designer
When branding SharePoint sites, SharePoint Designer is most likely the first place everyone turns. In many cases, it is the only tool used to develop custom branded sites. Because of this, Microsoft has put a lot of work into making SharePoint Designer a very useful branding tool. You can create master pages, page layouts, and CSS pages. This section covers how you go about branding a SharePoint site with SharePoint Designer. You will start with a simple branding and lead up to developing a custom-branded master page. You will not be trying to create a new Ferrari.com site, but you will see examples that will get you started creating your own personally branded SharePoint site.
Simple Branding
All simple branding tasks can be done in the web editor. This includes creating custom-branded content pages, modifying themes, changing the logo for the site, and, on the publishing site, creating an alternate CSS. It is important to know what can be done in the browser before you start branding your site with SharePoint Designer.
EXERCISE 6-2: CREATE A SIMPLE CUSTOM-BRANDED SITE
As a site owner in the Systems Support department, you want to create a custom look for your site without a lot of effort. You want to use your own department logo and a different theme. Unfortunately, you do not have authority to use SharePoint Designer to make any changes to your site. In this exercise, you will use the browser to create a simple branded site. You will create a new SharePoint team site and then apply some simple branding to make it look unique:
- Open a Site Collection root site in the browser.
- Click the All Site Content link in the Quick Launch menu.
- Click Create and then select the Team Site template.
- Give the site the name Support Team and the URL support.
- Leave all other settings to their default settings.
- Click Create.
- As soon as your site is rendered, select Site Settings from the Site Actions menu.
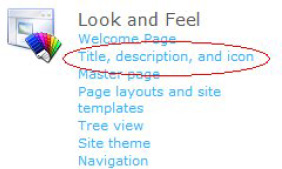
- In the Look and Feel group, select Title, description, and icon, as shown in Figure 6-8.
- When the page opens (Figure 6-9), type the following URL in the Logo URL box:
/_layouts/images/AccessAssets.png.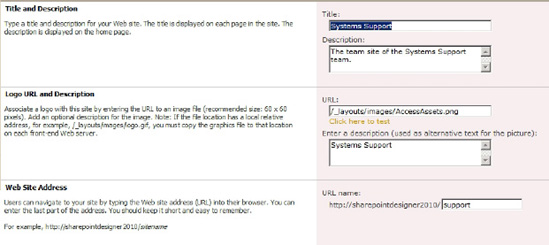
Figure 6-9. Title, description, and icon settings
- Type Systems Support in the textbox that is labeled, Enter a description (used as alternative text for the picture):.
- Click OK to save your changes. Your site should now have a custom site logo.
- While remaining on the Site Settings page, select Site Theme from the Look and Feel section.
- Select the Municipal theme and click Apply.
- Go back to the home page by clicking the Home link on the top navigational bar.
- From the Site Actions menu, choose Edit Page.
- Click the graphic of the people collaborating.
- From the Picture Tools menu, choose Change Picture from Address.
- When the Select Picture dialog box opens, replace the filename in the Address field with
officialfile.jpg, as shown in Figure 6-10.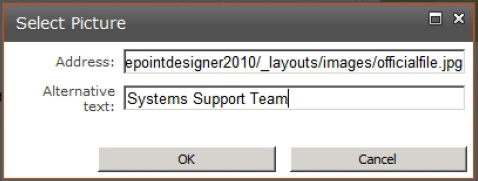
Figure 6-10. Select Picture dialog box
- Type Systems Support Team in the Alternative Text box. Then click Save.
- While remaining in Edit mode, delete the few lines of text below the graphic.
- In the area that reads Welcome to your site, change the heading to Welcome to the Systems Support Site!
- Modify the text of the paragraph that describes what this site is for. For the purposes of this exercise, you can type anything.
- On the Ribbon, click Save & Close from the Edit menu. Your page should look something like Figure 6-11.
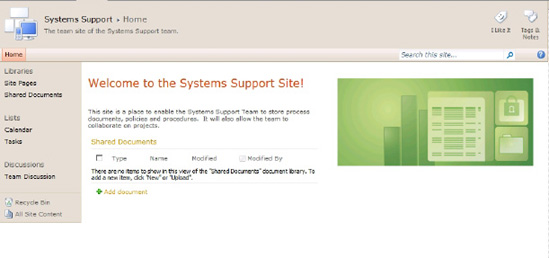
Figure 6-11. Your page with the new picture
Beyond the Browser
With SharePoint Designer, you have code-level access to the SharePoint site. With that level of access, you can create a completely custom SharePoint site. You can begin by modifying the CSS of the site to create a new look to the existing interface, or you could make your own master page or layout page. The options are almost unlimited.
In the next few exercises, you will use SharePoint Designer to perform branding functions. You will use the same site and keep building on it until you achieve a completely custom-branded SharePoint site.
To begin these next few exercises, you will use the team site that you just used in Exercise 6-2. If you didn't complete that exercise, go back and complete it so you will have a base for the next few exercises.
Modifying CSS
CSS is prevalent in SharePoint 2010. If you were to look at a SharePoint page with CSS disabled, you would see a plain page with a bunch of text on it—no form or function at all. The CSS provides the structure. This is a great aspect of SharePoint 2010. Whereas SharePoint 2007 used tables to provide structure, SharePoint 2010 uses CSS to provide the structure. This makes it that much easier to customize the user interface.
There are a couple of ways that you can add CSS to a SharePoint site. You can apply CSS to each element inline by using the style attribute of the HTML tags. This is easy, but it isn't the most desirable way to add style to an HTML page. By adding CSS to each element, the pages become quite large and hard to manage. If you want to apply the style used in one element, you would have to apply it to each element.
A better strategy is to add a <style></style> section in your HTML page. This is sometimes called an internal style sheet. Best practice and the XHTML Strict DOCTYPEs specify that the style element be placed inside the <head></head> element. The benefits of this are that it makes your document much more readable and more manageable. Additionally, if you want to change the style of an element in the whole page, you have to change it in only one place.
A third option, which is considered a best practice, is to create your CSS in a separate file and then link to it by using the <link> tag inside the <head> element.
Applying CSS in SharePoint Pages
In general, CSS is applied in the following order:
- External rules are applied first.
- Internal style sheets are applied next.
- Any inline style is applied last.
It is important to remember that if conflicts arise by defining a different style in the same element, the style that is loaded last supersedes any previously defined style. That means that any inline style defined on an element will always take precedence in an element.
If there are no conflicts, the style is just added to the previous definition. For example, you can define a font for a paragraph in an external style sheet and define the color in an internal style sheet. Because the two styles don't conflict, they will both be applied. If you use inline CSS to define the color, the inline style will overwrite the color defined in the internal style sheet.
EXERCISE 6-3: ADD AN INTERNAL STYLE SHEET TO A SHAREPOINT PAGE
You want to illustrate some sales figures in a graph and display it on your web site. You don't have a lot of charting tools and you want your users to be able to view the graph quickly on your site. In addition to creating web part pages, SharePoint Designer can create regular ASPX pages. This is perfect for quickly creating a web page that can be viewed and styled individually. You decide to create an ASPX page and style it by using an internal style sheet. If you downloaded the code for this chapter, the page code is available in the file Chapter6CssDemo.txt.
- Open a team site in SharePoint Designer.
- Select Site Pages from the Navigation pane.
- Choose Page > ASPX from the Ribbon menu, as shown in Figure 6-12.
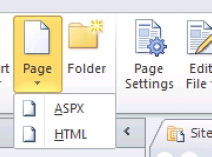
Figure 6-12. New Page menu
- Once the new page is created, rename the file to
Chapter6CssDemo.aspx. - Open the new file in Edit mode.
- A dialog box opens, asking whether you want to edit the page in Advanced mode. Click Yes, as shown in Figure 6-13.

Figure 6-13. Advanced mode caution dialog box
- If you aren't already in Code mode, switch to Code mode.
- Delete the
<form>tags. - Add the following code between the
<body>tags:<div id="chart">
<div id="east">East<br/>
<div class="red bar" style="width: 160px"></div ></div>
<div id="west">West<br/>
<div class="blue bar" style="width: 180px"></div ></div>
<div id="north">North<br/>
<div class="green bar" style="width: 120px"></div ></div>
<div id="south">South<br/>
<div class="yellow bar" style="width: 130px"></div ></div> - Add the following style code in the
<head>section, just before the end tag.<style type="text/css">
body {
font-family: Arial, Helvetica, sans-serif;
font-size: 10px;
}
div {
display: block;
}
#chart {
width: 200px;
border: 2px black double;
padding: 5px 5px 5px 5px;
}
.bar { height: 15px; }
.red { background-color: red; }
.blue { background-color:blue; }.green { background-color:green; }
.yellow { background-color:yellow; }
</style> - Save the page.
- Click Preview in Browser to view how the style is applied to your HTML. Figure 6-14 shows the graph.

Figure 6-14. Output of the ASPX example
Modifying SharePoint CSS
As mentioned previously in this chapter, the main CSS file loaded by a SharePoint page is called corev4.css. It is found in the 14 folder. Its path is <Program Files Dir>Common FilesMicrosoft SharedWeb Server Extensions14TEMPLATELAYOUTS1033STYLESThemablecorev4.css. Best practices dictate that you don't modify any internal SharePoint files but that you make copies of the files you want to modify and make your changes on those files. From a purely safety standpoint, it goes without saying that if something breaks in a copy of any native SharePoint file, you can always roll back to the original.
Microsoft also takes precautions when you modify pages in SharePoint Designer. When you open a page in Code view, you can see hyperlinks for all of the CSS classes in the code. When you Ctrl+click one of those links, SharePoint opens a copy of the associated CSS file. When you save your changes, a link to your new CSS pages is placed in your file so that it refers to the new CSS file instead of the core file.
When you make CSS changes on a page, they apply only to that page. In fact, any changes you make on a web page will apply only to that page. CSS changes will be stored in a copy, and the SharePoint page is separated from its site definition. If you want those changes to be reflected across the whole site, you need to make changes to the underlying master page.
Master Pages and CSS
Master pages were first introduced in .NET 2.0, and have been used in both SharePoint 2007 and SharePoint 2010. You can use your SharePoint 2007 master pages with SharePoint 2010 by doing an in-place upgrade, but this is really meant as a temporary solution. There are a number of new features in the SharePoint 2010 interface that were not present in earlier versions. One glaring example is the Ribbon. Because of these differences, you should upgrade your master page as soon as you can.
If you have the publishing feature enabled, you will also be able to use layout pages. This concept was introduced in SharePoint Server 2007 publishing sites. By using layout pages, you can define multiple layout templates that your users can use to create content. Page layouts control the inner layer of content on a page. When a page is requested from a web server, the layout page is generated first, and then the master page referenced by the layout page is rendered. This process is better illustrated in the diagram shown in Figure 6-15.
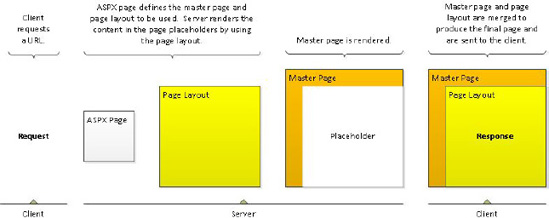
Figure 6-15. Page layout flow diagram
Modifying a Master Page
Because master pages define the outer shell of all the web pages in a site, almost all branding done in SharePoint Designer involves working with a master page. One of the easiest ways of creating your own brand is to modify a copy of one of the master pages provided by Microsoft. In SharePoint 2010, you store any custom master pages in the Master Page Gallery.
You already learned about some of the out-of-the-box master pages earlier in this chapter. The complete list of the out-of-the-box master pages you can begin your branding project with are as follows:
v4.master: This is the default master page for a majority of all pages served in SharePoint 2010.MWSDefaultv4.master: This is the default master page for the Meeting Workspace.simple.master: This is the master page used for the error and login pages.nightandday.master: This is available only in SharePoint Server 2010 publishing sites. This master page is a good starting point for public-facing sites.default.master: This master page is used only when upgrading a SharePoint 2007 site to SharePoint 2010. It will make the site look almost identical to a SharePoint 2007 site. This can be used only when SharePoint 2010 is in SharePoint 2007 mode using Visual Upgrade.minimal.master: This master page is used by SharePoint sites that need more screen real-estate, have their own navigation, or are special applications. This master page should not be confused with what was commonly called a minimal master page in SharePoint 2007. That master page was created by the user-communityas a starting page for creating custom master pages.
As mentioned earlier in the chapter, it is a best practice not to edit one of these master pages directly. Instead, when making modifications to one of these master pages, make a copy of it and modify the copy.
EXERCISE 6-4: MODIFY AN OUT-OF-THE-BOX MASTER PAGE
As a site owner, you have been tasked with creating a custom-branded SharePoint site. You want to retain a lot of the out-of-the-box functionality, but you want to go a little further in branding your site than you can with the browser itself. To create your own branded site while maintaining the functionality that SharePoint already provides, you decide to modify an out-of-the-box master page.
This exercise is pretty long. In order make it easier to understand, we have divided it into sections.
Make a copy of an existing Master Page
- If you didn't create the Team Site in the previous exercises, create a new site based on the Team Site template.
- On the Navigation pane click the Master Pages menu item.
- In the list of the master pages, right-click the
v4.masterand select Copy from the menu. - Right-click a blank area in the list of master pages and select Paste from the context menu.
- You should see a new file called
v4_copy(1).master, as shown in Figure 6-16.
Figure 6-16. Copy master page
- Click the filename
v4_copy(1).master, and the page properties window opens. - On the filename area of the property page, click the filename and rename your copied master page to
chaptersix.master, as shown in Figure 6-17.
- When the properties page comes up, click Edit File in the Customization section. You'll need to be in Edit mode to customize the master page.
- Best practices dictate that you not modify the main CSS file that ships with SharePoint named
corev4.css. You will create a new CSS file instead and use that. - In the Navigation pane, click Site Assets.
- On the Ribbon menu, select CSS from the New
 Asset menu item, as shown in Figure 6-18.
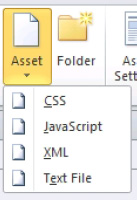
Figure 6-18. Asset menu
- Name your CSS file
chapter6.css, as shown in Figure 6-19.
Figure 6-19. Filename of new CSS file
- Now that you have an empty CSS file, you can associate it with your custom master page.
- Go back to your master page by clicking the tab labeled
chaptersix.master. If you have two tabs labeled the same, make sure you are on the tab where you can see your master page, and not the properties tab. - To associate your new CSS file with your custom master page, click the Style menu on the Ribbon.
- In the Create section, click Attach Style Sheet.
- When the Attach Style Sheet dialog box comes up, click Browse and select your newly created CSS file located in the Site Assets folder of your site, as shown in Figure 6-20.
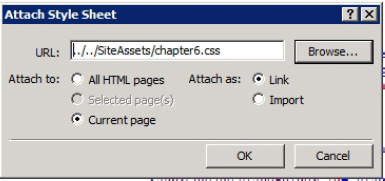
Figure 6-20. Attach Style Sheet dialog box
- Make sure the Attach To option is set to Current Page and the Attach As option is set to Link. Then click OK.
- Save by clicking the Save button or by pressing Ctrl+S.
- If a dialog box pops up warning that you are customizing the page and that it will no longer be based on the site definition, click Yes to continue saving your modifications (Figure 6-21).
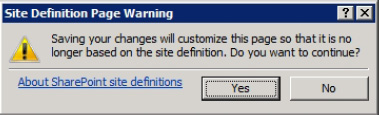
Figure 6-21. Site Definition customization warning
- If you look at the code of your master page, you should see the entry shown in Figure 6-22 right before the ending
</head>tag.
Figure 6-22. Linked style sheet code
- Now, to make sure you can see the effects of your customizations, you need to make your custom master page the default master page. In the Navigation pane, click Master Pages.
- When the list of master pages opens, right-click your custom master page,
chaptersix.master, and in the context menu that opens, select Set as Default Master Page, as shown in Figure 6-23.
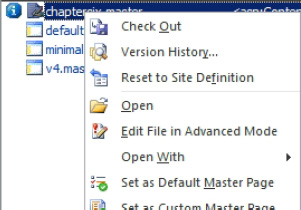
Figure 6-23. Set as Default Master Page menu item
Hide the Recycle Bin and All Site Content link
One of the most common things people want when they modify the master page is to hide the Recycle Bin or the All Site Content link from the Quick Launch pane. It's fairly easy to accomplish this. Make sure your edit window is in Split mode, and then click the Recycle Bin at the bottom of the Quick Launch pane, as shown inFigure 6-24.
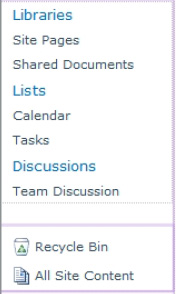
Figure 6-24. Quick Launch pane
- Look at the code that is highlighted. It should be
ClusteredSPLinkButton, as you can see in Figure 6-25. If you look a few lines above that list control, you will see that it is part of an unordered list (UL) that has the classs4-specialNavLinkList. This is the class you will want to override.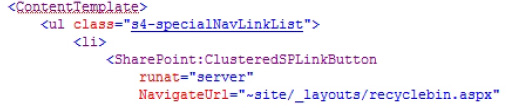
Figure 6-25. Code where the Recycle Bin is located
- If your Manage Styles pane is not open, select Manage Styles from the Styles menu on the Ribbon.
- Locate the s4-specialNavLinkList class in the list of CSS styles, as shown in Figure 6-26.
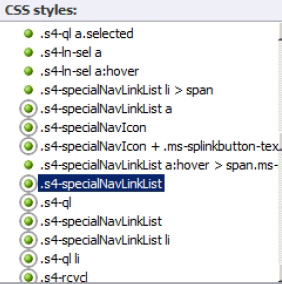
Figure 6-26. CSS style for the s4-specialNavLinkList class
- Right-click the style name and select New Style Copy.
- When the New Style dialog box opens, delete the word Copy from the end of the Selector name so that the class has the same name as the original, as shown in Figure 6-27.

Figure 6-27. New Style dialog box
- From the Define In list box, choose Existing Style Sheet.
- Select the URL of your new
chapter6.cssfile from the drop-down. - From the Category options, select Layout.
- For Visibility, select Hidden.
- Click OK. This makes an entry in your
chapter6.cssfile for the class. - If you don't already have the
chapter6.cssfile open in Edit mode, open it and notice the new entry, as you can see in Figure 6-28.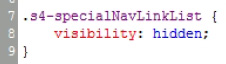
Figure 6-28. Visibility set to hidden
- Because you are going to hide that section, you can then delete all of the other lines in that CSS class except the
visibilityline. - Click Save and then go back to your master page. In the Design part of the view, you should see the bottom section empty.
Add a Footer to a Master page
Another common request for modifying the master page is to add a footer for the site. This usually provides a copyright or even a site menu. You'll add a footer next.
- In the master page code view, locate the tag
<SharePoint:DeveloperDashboard runat=“server” />. It us usually somewhere around line 624. - Right before that tag, add the footer code shown in Figure 6-29.

Figure 6-29. Code to insert footer
- Click Save.
- Because you haven't defined the footer CSS class, you need to do that. Open the
chapter6.cssfile for editing, and add the following CSS class code:.siteFooter {
Clear: both;
Background-color: #99CCFF;
Padding: 5px;
} - Click Save.
- Open your site in a browser and view how your site is beginning to change, as you can see in Figure 6-30.
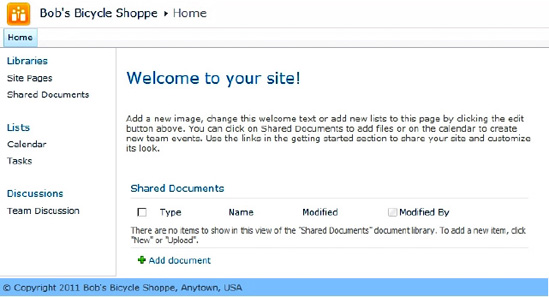
Figure 6-30. Site reflecting changes to CSS
If you start navigating around your site and you get to a page that opens a dialog box, notice that your footer also appears in the dialog box, as shown in Figure 6-31. This is because in SharePoint 2010, instead of navigating to a new page to add a new list item or document, they encapsulate that page in a dialog box.
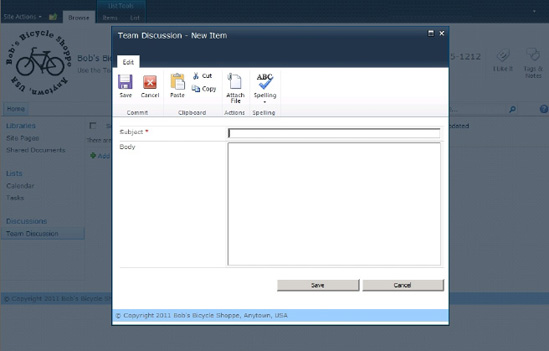
- Because SharePoint still uses the master page to create the look and layout of the dialog box, it provides a class called
.s4-notdlgto use on any element that you don't want to appear in a dialog box. So, in this footer example, you need to change the class attribute as shown in Figure 6-32.
Figure 6-32. Add s4-notdlg to the class
Create Custom Header
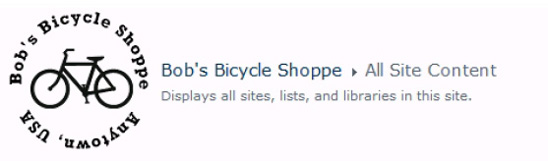
The next part that most organizations want to customize is the logo or site name in the header. This can be done through the browser, but you are still restricted to the basic layout of the default template. In this exercise, you will replace the header with the Bob's logo along with a custom title.
- The first thing you need to do is to get your image assets in your Site Assets folder. From the Navigation pane, click the Site Assets link.
- Click Import Files and then Add File, and locate the
bicycleshoplogo_120.pngfile (from the downloaded chapter code), as you can see in Figure 6-33. Click OK to close the Import dialog box.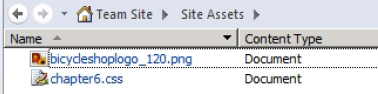
- Go back to your
chaptersix.masterfile. Make sure you are in Split editing mode on your custom master page. - Click the existing logo. You should see the logo code highlighted. Notice that the logo image is a special
SharePoint:SiteLogoImagecontrol. This control allows a site owner to change the logo from the web interface. Because you are creating a custom master page, you want to remove that capability so the logo cannot be changed. - You can use CSS to make this change. In the
<td>declaration that the logo is part of, Ctrl+click on theclass=“s4-titlelogo”link, shown in Figure 6-34.
Figure 6-34. s4-titlelogo code
- This should open
corev4.cssto thes4-titlelogoclass declaration. This is the class you will override in your custom CSS. Copy the three declarations fors-4-titlelogofromcorev4and paste them at the end of yourchapter6.cssfile:.s4-titlelogo{
padding:12px 10px 12px 0px;
text-align:center;
vertical-align:middle;
}
.s4-titlelogo > a > img{
vertical-align:middle;
}
.s4-titlelogo > img{
vertical-align:middle;
} - Notice that the class deals with the positioning of the logo. If your second command merges the last two entries as shown in Figure 6-35, you will need to divide them.

- You will use the
background-imagecommand to place your logo into that same<td>. In yourchapter6.cssfile, locate the firsts4-titlelogodeclaration that you just pasted into the CSS file. Modify the declaration as shown in Figure 6-36.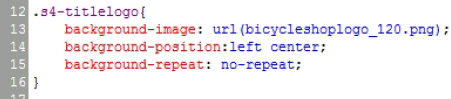
Figure 6-36. Code to add logo
Notice that you are putting only the filename as the logo. Because the logo file resides in the same folder as the custom CSS, the URL is relative and you have to include only the name.
In the next declaration, you can see that the rule will apply to any
imgtag that resides in an ‘A’tag that is assigned the.s4-titlelogoclass. If you look at the master page code, this is where the following line of code is.<SharePoint:SiteLogoImage name="onetidHeadbnnr0" id="onetidHeadbnnr2" LogoImageUrl="/_layouts/images/siteIcon.png" runat="server"/> - Because you are going to use the
background-imageCSS command, you want to hide the actual logo. Settingvisibilitytohiddenwill make the original logo file invisible, but you will still be able to click the link. - Figure 6-37 shows the change you need to make to the
.s4-titlelogo > a > imgcommand.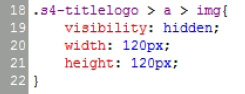
Figure 6-37. Setting to hide current logo
What does this do? First, it makes the original image invisible while still maintaining the space it would have taken on the page. This is important because you still want to be able to click the link that will take you to the root of the site. Second, you need to make sure that you set the width and height to the dimensions of the logo file. That will provide the space required to view the background image.
- Save your work and view the site. You should now see your new logo, as shown in Figure 6-38. If you go to the Site Actions menu in the browser and try to change the logo from the site settings menu, it will have no effect on your CSS logo modification.
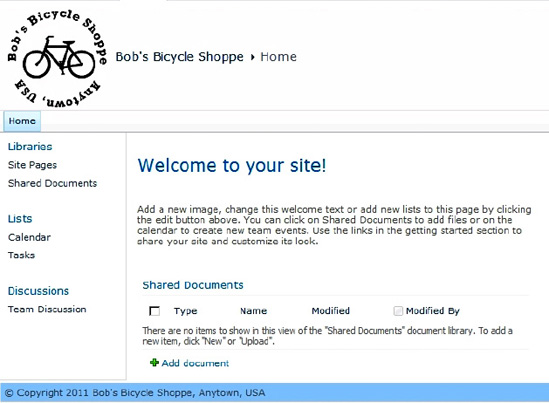
Figure 6-38. Custom page with new logo
Customize the Header
Bob also wants the header to look different from other SharePoint sites. He wants his site name larger and he wants a contact number in the header.
- Click the header of the master page and notice the code that is highlighted. If you look at the whole <tr> row, you will see that the row contains the logo, the site name, a secondary title, a page description, and the social media controls.
 Note The social media controls will appear on pages when the administrator has ratings and tags turned on. If this is a feature that you will want in your site, it is best to take the delegate control,
 GlobalSiteLink3, into consideration. On a regular site page, this control is pretty large and could get in the way of a custom header. One way of providing this functionality while giving yourself some room to customize the header is to use an alternateGlobalSiteLink3control calledGlobalSiteLink3-mini. This provides the same functionality in a smaller format.If you look at the page, you can see the social media control, the search control, and the help control.
To provide as much room as possible for the header, you are going to move the social media tags between the search control and the help control.
- Locate the piece of code around line 323 that is shown in Figure 6-39.

Figure 6-39. GlobalSiteLink3 code
- Cut the whole line of code from the table cell.
- Scroll down until you find the search area, at about line 332.
- Right after the
ContentPlaceHolderfor theSmallSearchInputBox, paste the line of code for theGlobalSiteLink3. - Add
-minito theGlobalSiteLink3control ID name. Your code should look like that in Figure 6-40.
Figure 6-40. Edited code for GlobalSiteLink3
- Because the title is really just one
<table>element, you can delete the cell that contained the delegate control. - If you click around the site, you will notice that the site title is also used for breadcrumb navigation. A link to the site root is always available by clicking the site name, so you should keep that. You will notice that a page description is also present underneath the breadcrumb navigation. This provides a hint to the user about what the page is used for (Figure 6-41).
- To make the site title more visible, you will add a row to the site table and separate the title from the other navigation. Start by adding the CSS classes to the
chapter6.cssfile, as shown in Figure 6-42.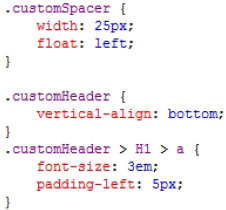
Figure 6-42. CSS code for the header
- Locate the Title table at about line 298. If you have downloaded the chapter code, open the file
TitleTable.txt, shown in Figure 6-41. Select all and paste the code between the<tbody>tags. If you haven't downloaded the code, type the code snippet shown in Figure 6-43 between the<tbody>tags.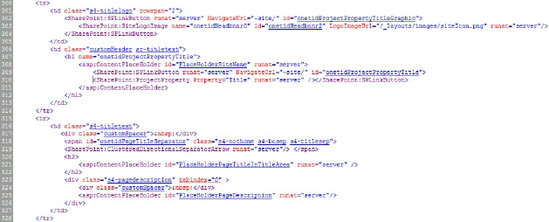
- Save your changes and view the site in a browser.
- Click the different links and notice that you still have the breadcrumb navigation.
- Click the Lists link in the Quick Launch pane. Your site should look like Figure 6-44.
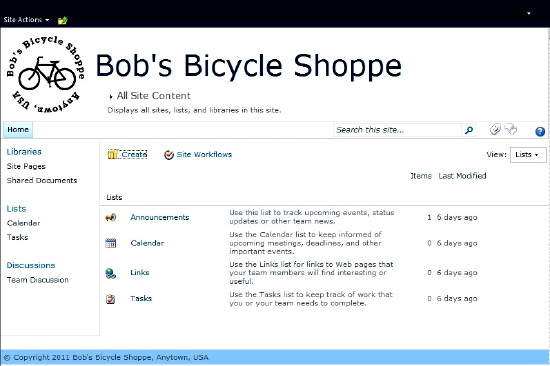
Figure 6-44. Finished customized site
Creating Your Own Custom Master Page
The branding that requires the most effort begins by creating your own custom master page. Although creating a master page from scratch is beyond the scope of this book, there are some things that we can cover here to get you started.
When designers create a completely custom master page, they usually create it in another application, such as Microsoft's Expression Blend or Adobe Photoshop. A master design is created and then the content placeholders are added based on the functionality that is desired for the site. When a site is highly customized, a lot of the built-in controls and placeholders will not be used. If you want to retain some of the functionality, such as breadcrumb navigation, horizontal navigation bar, search, and so on, the designer will need to plan for those items and then include them in the code of the master page.
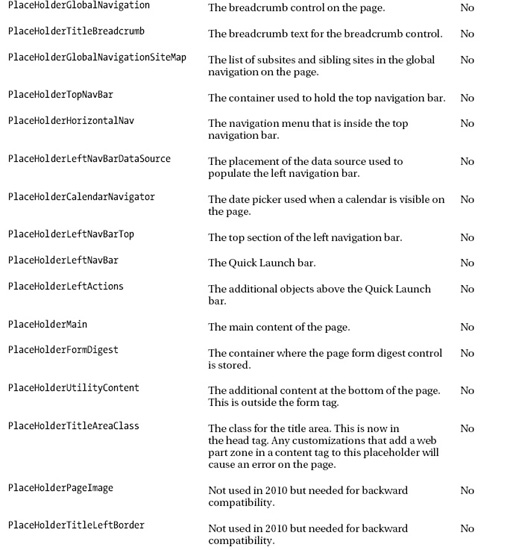
Regardless of how highly customized the site design is, when you create your own master page, placeholders are required for SharePoint to operate properly. When you create a custom master page, it is important to include in your code all of the 33 required placeholders listed in Table 6-2.
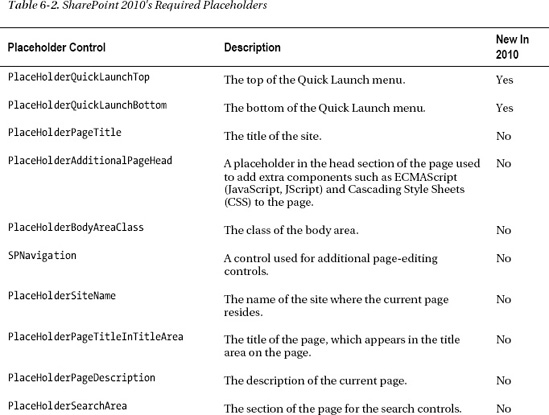

In addition to these controls, you also need to plan for the server ribbon. More details and the ribbon code can be found at http://msdn.microsoft.com/en-us/library/ee539981.aspx.
Hiding Placeholders
What do you do if some of the required placeholders are not necessary for your design? Hide them. They still need to be listed in your code, or you will receive an error when the server tries to render them. The best place to do this is inside an <asp:Panel> control right before the closing </form> tag, and then set the visible attribute to false.
The following is an example of hiding placeholders:
<!-- Hide Placeholders -->

<asp:Panel visible="false" runat="Server">

    <asp:ContentPlaceHolder id="PlaceHolderSearchArea" runat="server" />

    <asp:ContentPlaceHolder id="PlaceHolderHorizontalNav" runat="server" />

    <asp:ContentPlaceHolder id="PlaceHolderPageTitleInTitleArea" runat="server" />

    <asp:ContentPlaceHolder id="PlaceHolderPageDescription" runat="server"/>

    <asp:ContentPlaceHolder id="PlaceHolderLeftNavBarDataSource" runat="server" />

    <asp:ContentPlaceHolder id="PlaceHolderCalendarNavigator" runat="server" />

    <asp:ContentPlaceHolder id="PlaceHolderLeftActions" runat="server" />

    <asp:ContentPlaceHolder id="PlaceHolderLeftNavBarTop" runat="server"/>

    <asp:ContentPlaceHolder id="PlaceHolderLeftNavBar" runat="server" />

    <asp:ContentPlaceHolder id="PlaceHolderQuickLaunchBottom" runat="server" />

    <asp:ContentPlaceHolder id="PlaceHolderGlobalNavigation" runat="server" />
    <asp:ContentPlaceHolder id="PlaceHolderTitleBreadcrumb" runat="server" />

    <asp:ContentPlaceHolder id="PlaceHolderGlobalNavigationSiteMap" runat="server"

Visible="false" />

    <asp:ContentPlaceHolder ID="SPNavigation" runat="server">

</asp:Panel>

<!-- End Hide Placeholders -->
Starter Master Pages
If you do a search for StarterMasterPages, you will find a CodePlex project at http://startermasterpages.codeplex.com that was created by a SharePoint Server MVP. He has created master pages with all of the required placeholders that you can use as a starting point for your custom master pages. This helps ensure that you will have all required elements for a functional SharePoint 2010 master page.
Branding Considerations
There are considerations that should be made when creating your own master pages. Because SharePoint is a complex platform with lots of moving parts, great care should be taken when creating your own custom master pages. Take into consideration that SharePoint 2010 includes certain features that make it appealing to users—for example, the page editing features or the Ribbon. Removing or limiting this functionality could hinder the user experience and could hinder widespread user acceptance.
You also have to think about the amount of time testing your custom master page will require. Microsoft has taken care to test all aspects of the user experience to ensure proper functionality with its included master pages. Proper testing of your master page will need to be done to ensure that all default SharePoint functionality (adding web parts, for one) actually works and that all default web parts (data grids, calendars, and explorer views) work in your custom master page.
When Things Go Wrong
When you create your own master page, inevitably something will go wrong. Creating your own master page is difficult because of all of the parts that make SharePoint such a powerful platform. There are some common problems that could cause your master page to break. Consider the following when debugging your master page:
- Required placeholders: As mentioned previously, SharePoint requires placeholders to function properly. This is why it is suggested that you begin with a copy of an out-of-the-box master page.
- Missing controls: In addition to the required placeholders, controls are required for SharePoint to function correctly. Check the following:
- The
SPPageManagercontrol needs to be placed in the<head>element and is used to route commands to page components. - The
ScriptLinkcontrol needs to be placed in the<head>element also. It creates a reference to the SharePoint client-side script libraries. - The
ScriptManagercontrol needs to be placed in the<body>element. It manages all client-side script functions on the page and controls communication between the browser and server without having to refresh the page.
- The
- Duplicate placeholders: Make sure that all placeholders are on the page only once. SharePoint Designer will throw an error if a duplicate placeholder exists on a page.
- Typographical errors: Make sure all control names, placeholder names, and other required elements are spelled correctly. It is advisable to copy and paste elements from a working master page instead of manually typing these.
Summary
This chapter has covered SharePoint branding and the different levels of effort required to create your own branded SharePoint site when using SharePoint Designer 2010. The top take-aways from this chapter are as follows:
- The main master page used by SharePoint 2010 is called
v4.master, and the main CSS file is calledcorev4.css. - Never modify the included SharePoint pages directly. Instead, make a copy of them first and then edit the copy.
- If you don't know CSS, you can still use the tools provided by SharePoint Designer to style your site.
- If you are going to create a custom master page, it is important to remember to include the 33 required placeholders in your code, even if you aren't planning on using them.