
Chapter 12
Supercharging the User
Experience with AJAX
We’re most of the way through the book, and we haven’t yet hit explicitly on one chronic annoyance to web users in general, and mobile users especially: the dreaded refresh!
Why dreaded? Well, in the mobile world, as we’ve learned, speed is everything. The last thing a mobile user wants to do is reload an entire webpage. Even if the “heavier” aspects of the page are cached on the user’s phone (such as graphics, fonts, etc.) the phone’s browser must still reload them into the browser. This takes an amount of time, processing power, battery power, and the user’s patience. Thankfully a series of technologies exist that can help us, known as AJAX.
What Is AJAX?
AJAX stands for Asynchronous JavaScript And XML. Let’s break down that name. The first word, Asynchronous, may sound a bit daunting at first, but it’s the whole key to what makes AJAX special.
Asynchronous?
Most web pages are programmed to require communication in a send/receive/display series. The user presses a button on a web app, the page sends the required information to the server, the server sends back some response, and the app displays a new page with that response on it. Back and forth it goes, until the user is finished with the app. Each time the user interacts with the app, the page is refreshed completely. This is, for some, the very definition of annoying.
Asynchronous transfer refers to the idea that we can break this chain down into simply send/receive/display/send/receive/send/receive, and so on, instead of including the display portion in each successive round. In other words, we can send and receive data without ever loading a new page. An asynchronous call is simply a request that we make to the web server through this alternate method. For an example of this, we only need to visit Google’s search engine on our phone. We start with a blank search page, as in Figure 12–1.
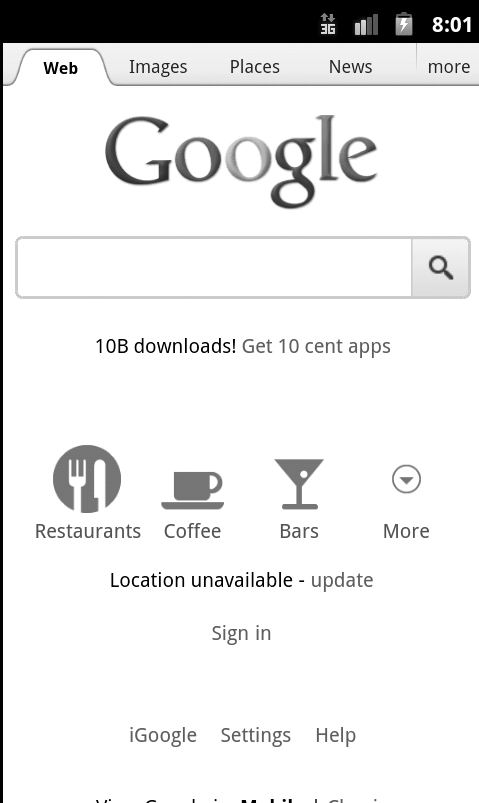
Figure 12–1. The Google search home page
Now say it’s early in the morning and I want to start my day listening to a great song set to a bunch of pictures of the events the song is discussing. I might begin to type in the name of the song, as in Figure 12–2, and while I do that, Google is using asynchronous calls to try to figure out what I’m looking for. As I type, it’s checking each letter against a central database, without requiring me to refresh the page. It’s then showing these suggestions below the search bar.
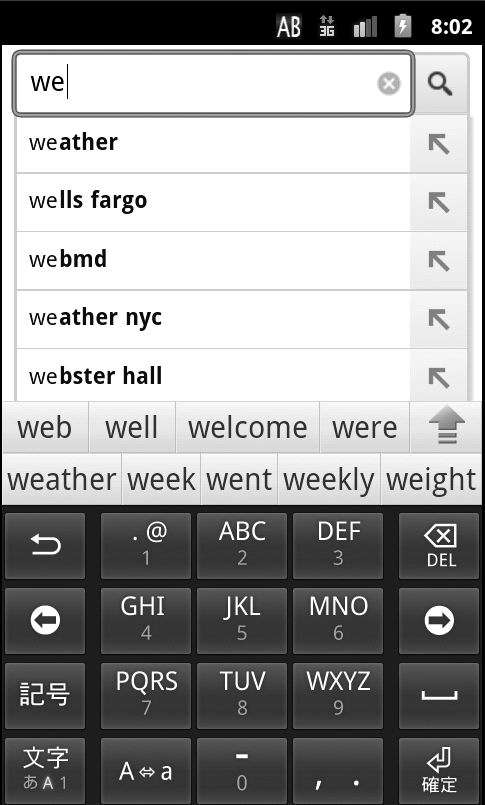
Figure 12–2. Beginning my search
At some point, around Figure 12–3, the suggestion matches the whole phrase I’m looking for, and I can simply click on it.
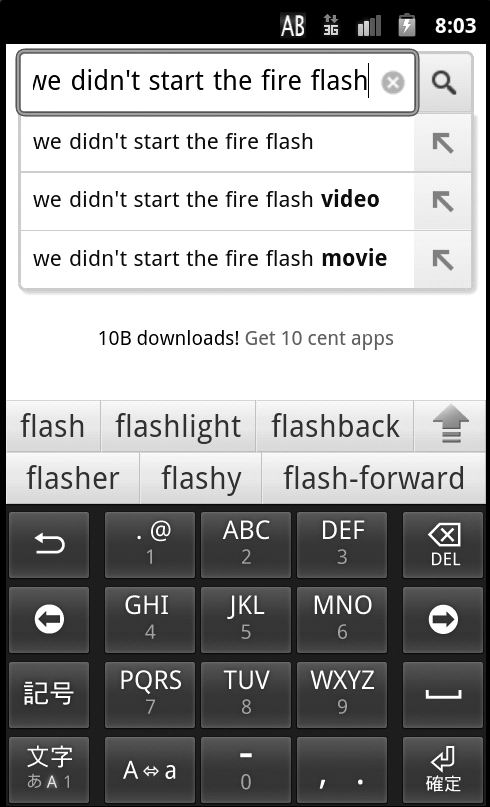
Figure 12–3. As I type more, the web page tries to fill in likely queries. Interestingly, the Android operating system is also trying to figure out what I’m writing—it’s like they’re both trying to read my mind!
Basically, Google has been able to predict what I’m looking for and is giving me a shortcut to access those search listings directly. When I tap on the suggestion that fits what I want, it brings me to the search results I see in Figure 12–4.

Figure 12–4. Ah, my results—now I can listen to the flash video I’ve been searching for
Prior to Google rolling out these asynchronous calls on the search page, one entered an entire query into the search box, pressed “Search,” and waited for the screen to reload. If there was an error in the query, the user didn’t know until the new page loaded and Google pointed it out. This took up the user’s time (by loading pages needlessly) and Google’s bandwidth. Recently, Google has taken this “helping hand” a step further by running the entire search asynchronously—you can type your query and, letter by letter, the search results update within the same browser window.
So What About the JavaScript and XML?
AJAX, technically, can work with any client–side programming language (client–side languages, like JavaScript, process within the user’s browser. Server–side languages, like PHP, process on the web server). However, JavaScript is predominantly used as it’s become the lingua franca of client–side languages. XML gets in on the game because it’s become a simple and easy–to–understand way to move data around. While you could mix other technologies into the AJAX banquet, we’ll stick with JavaScript and XML in our examples here.
Now that we’ve established what AJAX is, let’s talk about some neat ways we can incorporate it into some very simple applications. We’ll start with a word–of–the–day example, and then move into something a bit more complex, referencing both a web service and our own local database.
AJAX–of–the–Day
It was recently reported that the “word of the year” for 2011 was “pragmatic.” This was because one dictionary–serving website found it to be the most looked up word in that year, and thus crowned it the winner. Perhaps you’re looking at this going, “I’ve always wondered what ‘pragmatic’ means” (or maybe, “What kinda moron doesn’t know what ‘pragmatic’ means?!?”), and wondering why we don’t have more web applications bringing us content like this. Well, today is your lucky day, because you’re about to write one.
For the word–of–the–day application, we’re going to create a rather bare–bones mechanism to provide said word. Later in this chapter we’ll discuss how to use AJAX to pull in information from a database or web service, but for now we’re going to use a good, old–fashionedflat text file. Named, aptly, word.txt:
Listing 12–1. word.txt
<em>Pragmatic</em>: relating to matters of fact or practical affairs. <i>-<A HREF=http://www.merriam-webster.com/dictionary/pragmatic>Merriam-Webster.com</A></i>
The file word.txt has some bits of HTML in it (in this case, we’re using simple style tags, however we could use CSS–themed div statements), and if we load it up in our web browser (Figure 12–5), we’ll see it displayed as simple text:
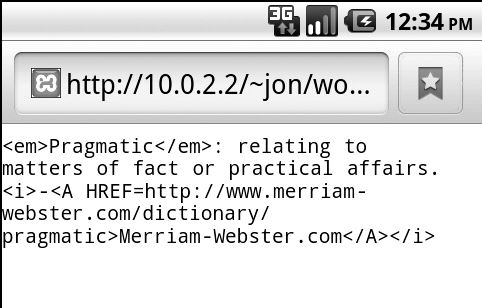
Figure 12–5. The word–of–the–day word.txt file
Next up, I’m going to build an HTML page that will load up the word–of–the–day when the user presses a button. It’s going to look something like Listing 12–2, in code terms. We’ll walk through this stepbystep.
Listing 12–2. word.html, Part 1: The Initial JavaScript Function to Load the Word
<html>

<head>

<meta content="text/html; charset=ISO-8859-1"

http-equiv="content-type">

<title>Word of the Day</title>

<script type="text/javascript">
function loadword(){

if (window.XMLHttpRequest){

// Modern browsers use this type of request

          request =new XMLHttpRequest();

}else{

// Old Microsoft browsers use this type!

          request =new ActiveXObject("Microsoft.XMLHTTP");

}
OK, we’re up and running. The first thing we did was create the top of a standard HTML page, and then started a new JavaScript function named loadword, which will do most of the heavy lifting of the page. Inside this function, we first need to figure out if we’re using a modern browser (i.e., something released in the last five years, like Firefox, Safari, Opera, Chrome, or newer versions of Internet Explorer) or an older Microsoft browser (Internet Explorer 5 or 6). The reason for this is simple: Older Microsoft browsers don’t know what an XMLHttpRequest() object is! For them, we’ll ask that an ActiveX object be created, which will give us the same functionality. It’s just a funny compromise to the way Microsoft used to code browsers. Let’s continue working with the JavaScript for this page in Listing 12–3.
Listing 12–3. word.html, Part 2: The JavaScript onreadystatechange Function, and the End of the JavaScript Block
     request.onreadystatechange=function() {

if ( request.readyState == 4 &&request.status == 200){

document.getElementById("theword").innerHTML = request.responseText;

}

}


          request.open("GET","word.txt",true);

          request.send();

}

</script>
Now that we have our request object, named aptly “request,” we can ask it to do some things. This next part of the code is written slightly “backward,” in that the code written at the top will be executed after the code written at the bottom. This is because the XMLHttpRequest object, the heart of AJAX, has a special function named onreadystatechange. Anytime the request we’re making, processing in the background, does something either expected or unexpected, it fires this function. In essence, this function is where we put the “what do I do with what I get back” code. You can think of the code here as the programming equivalent of “substitute teacher’s instructions.” You may remember, as an astute student, that when your teacher was absent, he or she would leave instructions for the replacement, perhaps in a special folder. Your onreadystatechange function acts as those instructions, telling the computer (in this case, the JavaScript engine) what to do when you’re not around but something happens. Most of the time, these instructions are similar to what we have preceding (in this case, “if the request is processed correctly, display it on the screen”). We can also include instructions for “worst case scenarios,” such as when the request cannot be fulfilled, or it throws an error.
In this function, we first test to see what the readyState and status are of our request. The former can return five different numbers, which correspond to where the request is in terms of processing. Returning a code of
- 0 means that the request hasn’t been started yet. This is the state in which a new request would be before being sent.
- 1 means that the connection to the server has been initialized. In essence, the pipe is open, and data is moving.
- 2 or 3 means that the request has been sent and is processing, respectively. At this point, all your code can do is sit and wait (or show a “loading” graphic, if you so choose).
- 4 means that the request is complete and ready for the code. You can now do whatever you want to do with the information. We only want to change the text on the page once we reach a
readyStateof 4.
We also care about the status, which can report 200 (for “OK”) or 404 (for “not found”). So the second line of Listing 12–3 translates to: “Only do this if the request is ready and it was done successfully!” From there, it’s simply one line that changes the ellipsis, or text placeholder (see Listing 12–4), to the text that was returned by the request.
Finishing up Listing 12–3, we’re creating and sending our request. The line starting request.open calls the function that specifies what we’re trying to retrieve and how we want to do it. In this case, it’s a really simple request—we’re just getting data, not sending any data we want the server to parse. We’ll use the “GET” method instead of “POST” because it’s faster, we’ll ask for “word.txt,” and we’ll set asynchronous to “true,” since we want the response in the background, allowing the script to continue running. For a discussion of why we might set this to false, as well as more detail on GET versus POST methods, see the end of this chapter in the “AJAX Considerations” section.
Finally, we simply call request.send(), which fires off our request. Once we get the request back, the XMLHttpRequest object will fire our onreadystatechange and change the line in the webpage.
Finally we finish the page off in Listing 12–4 by creating the basic HTML structure. We’ve got a special div id called “theword” which holds an ellipsis (…) to begin with. This is what will be replaced by the JavaScript code we wrote at the top. We have a button as well, which fires off our function, loadword().
Listing 12–4. word.html, Part 3: The Rest of the Page, Consisting of a Simple Body Portion and Text, Along with ‘theword’ div
</head>

<body>

<span style="font-family: Helvetica,Arial,sans-serif;">Get Today’s Word

Of The Day<br>

<div id="theword">

<h2>...</h2>

</div>

<button type="button" onclick="loadword()">Get The Word!</button>
</span>

</body>

</html>
When viewed on the Android web browser, the page loads and shows the default state (see Figure 12–6).

Figure 12–6. The initial page of the Word–of–the–Day example
Now when the user clicks the “Get the Word!” button, the ellipsis is replaced with the actual word of the day, drawn from word.txt (see Figure 12–7). You’ll also notice that the text seems to shrink up a bit—this is because the AJAX request is taking up the entirety of the ‘theword’ <div> section, including the <h2> tag which normally would provide more spacing. I’ve done this intentionally to point out that the nesting of tags is important when considering AJAX requests. Placing the <h2> outside the <div> would preserve the space.
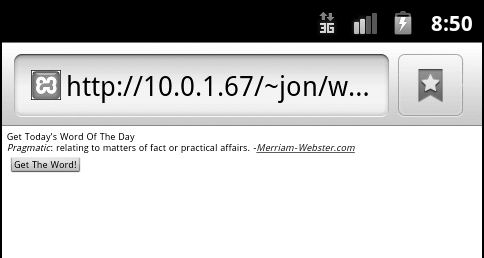
Figure 12–7. The word is now put into the page, without the page reloading!
Success! We’ve changed the content of the page, by making a call to the server, without actually reloading the page. Better yet, if the user hits “reload” on the browser, we’ll avoid an ugly error similar to that in Figure 12–8, since we didn’t actually send any “POST” data to the server (in the traditional sense).See the “AJAX Considerations” section at the end of this chapter for more information on POST data.

Figure 12–8. The Android Confirm Reload dialog
Now that the basics of word–of–the–day are done, we could continue by making it a bit prettier (i.e., using a nice CSS scheme as mentioned previously).For our purposes, though, you should now have a good idea of how flat text files can not only be included through PHP (as shown in previous chapters), but also now through AJAX. Our next stop? The wonderful world of web services, XML, and JSON.
My News!
Our next example calls a few web services to bring us content which won’t be stored on our own device. We’ll also have to take a slightly ego–centric view of the world, but hey, that comes with the territory of being a programmer!
Let’s imagine that we have a number of websites we like to visit, and we want our application to display the most recent news from them. To do this, we need to bring the RSS feeds of these websites together, merge them, and then display them. We’d like the list to update in real time, on our page, without user intervention. Sound complicated? Not really—if you know some tricks!
First: Create a Pipe
Yahoo! Pipes is one of my favorite web services (Figure 12–9, http://pipes.yahoo.com) and it doesn’t get too much coverage by most blogs or websites. But the service it provides is pretty awesome—it can stitch together RSS feeds and other data, and provide them in an easy–to–use format of your choosing.

Figure 12–9. The Yahoo! Pipes homepage
While other sites allow you to connect things together (Dapper, another Yahoo! property at http://open.dapper.net/, and ifttt (If This Then That) at http://ifttt.com come to mind), Pipes provides the more customizable “output,” so we will use it for this example. To get started, click on “Create a pipe” to load the Pipes editor, shown in Figure 12–10. The Pipes editor allows you to organize a series of modules (on the left side) into a logical structure of rules. Each pipe starts with one or more inputs, then uses modules to operate on them (i.e., to change data, or consolidate it), and then outputs the results in a variety of forms.

Figure 12–10. The Yahoo! Pipes editor
On the left side you’ll find the series of modules that you can drag into the Pipes UI. These modules can be connected to perform the operations you want. I’m going to use three modules—Fetch Site Feed, Union, and Truncate—to bring together the feeds of three websites, merge them together, and then cut off the output after five items (Figure 12–11).
- Fetch Site Feed takes the URL of the RSS feed for a web site. In this example, I’m going to take three RSS feeds, for three different websites, and link them together. You’ll notice in Figure 12–11, I have three “Fetch Site Feed” modules.
- Union simply combines up to five inputs into one feed. Here the union is combining the three feeds that I’ve entered. If desired, I could have multiple unions and feed more than five pipes by “union–ing” to a union, and so forth.
- Truncate tells Pipes that I only want five items output. This is useful to speed up response time, as Pipes only needs to export a few items, and not the tens or hundreds that multiple feeds may provide. Here it’s the last thing I’ve connected up before the Pipe’s output module.
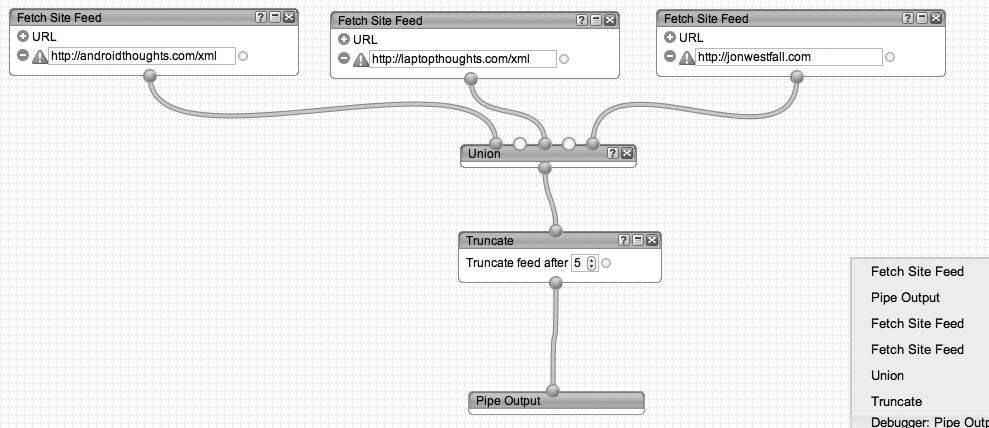
Figure 12–11. The completed Pipe
In the debugger window (Figure 12–12), I can see what the output will look like for either the whole Pipe or individual parts along the way. The following output (in Figure 12–12) is shown when I click on “Pipe Output.” If I had clicked on the Union instead, I would see all of the feed items, not just the five shown after the Truncate command. This intermediate level of debugging is useful when debugging pipes to see which component may be causing a problem.

Figure 12–12. The entire output of my pipe, given that we’ve truncated after five items
Once you’re done, click “Save” and give your Pipe a name. Then click on “Run Pipe” to see the output (Figure 12–13).
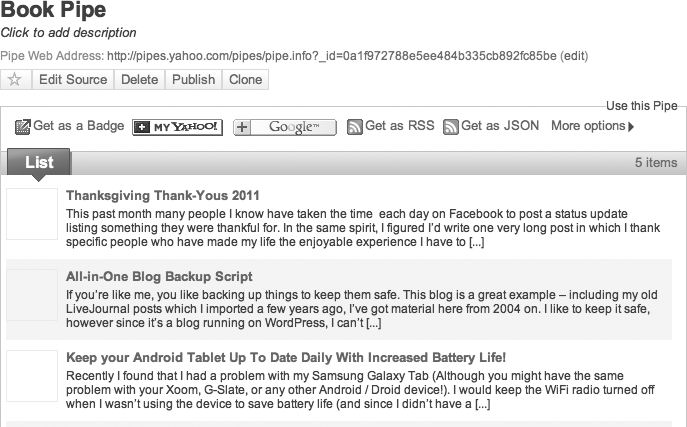
Figure 12–13. The book Pipe I created
You’ll notice that Yahoo! Pipes gives me options for how I want to access my Pipe. I can access it as an RSS feed itself, or I can get it as a JSON result output. Under “More Options” I can also configure to get my results by e-mail or through PHP. For this example, I’m going to want to get my results as JSON. You’ll recall that we’ve used JSON earlier in the book, in our apps in Chapters 2 and 3. Here, we’re using it again to get the output of our Pipe. Clicking on the JSON button gives me a fairly ugly screen full of content, but it’s really the URL that I want to remember. It looks something like http://pipes.yahoo.com/pipes/pipe.run?_id=0a1f972788e5ee484b335cb892fc85be&_render=json and it can be called through my AJAX web page.
Second: Get the Output and Display It!
We’re going to modify our word–of–the–day example to pull the JSON output and display it. While there are easier ways to do this (most notably using JSON’s getJSON function, and looping the list items), the code in Listing 12–5 is a bit more drawn out, which makes iteasier to see exactly what we’re doing to parse each item. Later, as a flex of your JavaScript skills, you can rewrite this code using getJSON if you’d like.
Listing 12–5. mynews.html
<html>

<head>

<meta content="text/html; charset=ISO-8859-1"

http-equiv="content-type">

<title>My News</title>

<script type="text/javascript" src="jquery-1.7.1.min.js"></script>

<script type="text/javascript">
function loadnews() {

     if (window.XMLHttpRequest) {

          // Modern browsers use this type of request

          request = new XMLHttpRequest();

          } else {

          // Old Microsoft Browsers use this type!

          request = new ActiveXObject("Microsoft.XMLHTTP");

          }


  request.onreadystatechange=function() {

          if ( request.readyState == 4 && request.status == 200) {

var resp = jQuery.parseJSON(request.responseText);

var lister = "<ul>";

             lister += "<li><A HREF=" + resp.value.items[0].href + ">" + resp.value.items[0].title + "</li>";

lister += "<li><A HREF=" + resp.value.items[1].href + ">" + resp.value.items[1].title + "</li>";

             lister += "<li><A HREF=" + resp.value.items[2].href + ">" + resp.value.items[2].title + "</li>";

             lister += "<li><A HREF=" + resp.value.items[3].href + ">" + resp.value.items[3].title + "</li>";

             lister += "<li><A HREF=" + resp.value.items[4].href + ">" + resp.value.items[4].title + "</li>";

             lister += "</ul>";

             document.getElementById("thenews").innerHTML = lister;

               }

          }


request.open("GET","http://pipes.yahoo.com/pipes/pipe.run?_id=4659b1f4f4bfdb96c3775b61be8ca3b8&_render=json",true);

          request.send();

 }

</script>

</head>

<body>

<span style="font-family: Helvetica,Arial,sans-serif;">Get the News!<br>

<div id="thenews">

<h2>...</h2>

</div>

<button type="button" onclick="loadnews()">Get The News!</button>

</span>

</body>

</html>
You’ll notice that much of this code is the same as the code we used in word–of–the–day. Notably, we’ve changed a few things, which are bold in our code.
- We’ve changed the request from
word.txtto the URL of the Yahoo! Pipes JSON output. - We’re now using jQuery, a library we’ve used before which contains some helpful functions to read and decode JSON output. Using jQuery means we have to add in the reference to the
jquery-1.7.1.min.jsfile at the top. - We’re now using
jQuery.parseJSONto parse the text we get back from our XMLHttpRequest. - And we’ve got an HTML formatted list that will be displayed once we’ve retrieved the JSON.
The finished product looks like this in our browser (Figure 12–14):
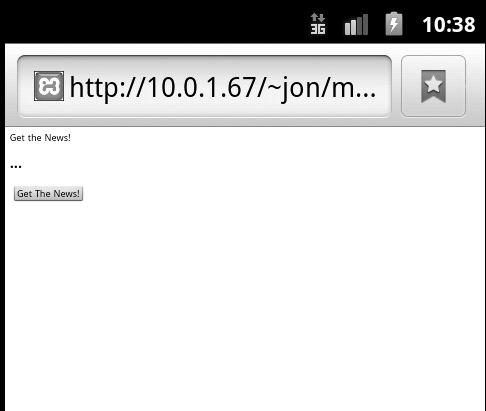
Figure 12–14. The My News application
And when we click on “Get the news!” the following is displayed (Figure 12–15):
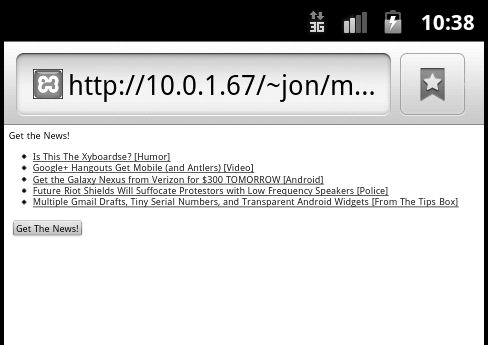
Figure 12–15. The news is now loaded!
Now that we’ve loaded data from our server, and loaded data from a web service, we can turn to the final installment: a back–and–forth interaction between a web page and a database.
Username Availability
One of the nicer things that websites have done in the last few years is the “instant username availability” field. This is done using AJAX, by checking what the user is entering into the “username” field and simultaneously checking on its availability in the database. We’ll create this experience using AJAX, communicating with a MySQL database using PHP on the back–end. This is similar to what Google does with its instant search results, the feature we discussed earlier. We’ll start by creating the database, using the schema in Listing 12–6. This listing begins by creating a table, and then populating it with several test usernames (“hardcore,”“dinosaur,” etc.).
Listing 12–6. the SQL Schema for the Users Table
CREATE TABLE IF NOT EXISTS `users` (

  `name` varchar(25) NOT NULL

) ENGINE=MyISAM DEFAULT CHARSET=latin1;


--

-- Dumping data for table `users`

--


INSERT INTO `users` (`name`) VALUES

('hardcore'),

('dinosaur'),

('yelius'),

('tep'),
Use the preceding schema to create the users table in your MySQL database. (MySQL is available at http://www.mysql.com/products/community/.) Note that you can name the database whatever you wish, but in this example it’s called “datab.” Now we need a simple PHP script which takes a value and checks it in the database. Listing 12–7 shall do nicely.
Listing 12–7. The check_name.php Script
<?php

$name = $_GET['u'];

$user = "root";

$pass = "";

$server = "localhost";

$db = "datab";

mysql_connect($server,$user,$pass) or die("Can not connect");

mysql_select_db($db) or die("No such database");

$query = "SELECT * FROM `users` where `name` = '$name'";

$result = mysql_query($query);

if (mysql_num_rows($result) == 0)

{ echo "<font color=green>Available!</font>"; } else { echo "<font color=red>Not Available :( </font>"; }

?>
The preceding script is fairly simple. It connects to the database and does a simple query to see in how many rows the name is entered. If the name is not found on any rows, then it’s available; the script sends back “Available” (and there is presumably much rejoicing). However, if it’s not available, because the database already has a row with the name in it, the script returns the considerably sadder “Not Available.” You can test this by visiting the check_name.php script in your web browser, including &u=test with some sort of test username. For example, in my testing environment, http://localhost/~jon/uname/check_name.php?u=dino returns “Available,” while http://localhost/~jon/uname/check_name.php?u=dinosaur returns “Not Available.” If this is working for you, then you’re ready to proceed.
With the back–end complete, we’ll now build a very simple form that will check the username as the person types, and tell him or her if the desired name is available.
We’ll accomplish this with the code in Listing 12–8.
Listing 12–8. The checkname.html Page
<html>

<head>

<title>Registration Page</title>

<script type="text/javascript">


function checkusername($name) {

     if (window.XMLHttpRequest) {

          // Modern browsers use this type of request

          request = new XMLHttpRequest();

          } else {

          // Old Microsoft Browsers use this type!

          request = new ActiveXObject("Microsoft.XMLHTTP");

          }


request.onreadystatechange=function() {

          if ( request.readyState == 4 && request.status == 200) {

             document.getElementById("theres").innerHTML = request.response;

               }

          }


          request.open("GET","check_name.php?u=" + $name,true);

          request.send();

 }

</script>

</head>

<body>

<form name="theform">

<span style="font-family: Helvetica,Arial,sans-serif;">Register!<br>

<div id="theres">

<h2>...</h2>

</div>

<input type="text" name="un" onkeyup="checkusername(this.form.un.value)">

</span></form>

</body>

</html>
You’ll notice that, like last time, we’re building off of the same format we used with word–of–the–day. This time we’ve changed the function to accept an argument (the name we need to check), and we’ve changed the button to a text field. This text field checks the name every time a key is released (the onkeyup event), and the result updates. When loaded, the page looks similar to Figure 12–16.

Figure 12–16. The check username page
If you enter a name that’s open, like “skip,” you’ll see a message of success, as shown in Figure 12–17.

Figure 12–17. Sweet victory
If, however, the username you want has already been taken by some awesome person, then you’ll see a sad message such as the one in Figure 12–18.

Figure 12–18. The “not available” screen
Incorporating this technique across an entire web form will allow you to not only check usernames on the fly, but also validate information so that the user never has to hit a “submit” button only to find that he or she has put in an invalid number, e-mail address, or username.
Before we finish, there are two quick tips regarding forms that you might find helpful. The first is to consider to what event you would like to bind the AJAX checking code. In this example, we’ve bound to the onkeyup event on the form field that we’re checking (the username). However, this causes a lookup action on each keypress, something that might bog down your script. An alternative would be to place the function code in the next element (e.g., perhaps a password field) in the onfocus event instead of onkeyup. This will cause the AJAX request to fire after the user has moved to the next field on the form, reducing load. A second consideration involves validation and auto–submission of forms. It can be tempting to make a form auto–submit once the last field is completed. After all, you might be validating information as users enter it, so why make them wait after they finish the last field. This could be a problem though, as some people may wish to check their answers before they continue. It might be best to keep a “submit” button on the page, and let users continue when they are ready.
AJAX Considerations
The examples we’ve used in this relatively short chapter span the three major types of data with which you’d be interacting while using AJAX. We’ve taken data from our server and put it into a page without refreshing, we’ve queried a web service to get RSS headlines, and we’ve checked usernames to make sure they’re available. At this point, you’ve got the basic tools that you need in order to write applications that leverage the power of AJAX. There are a few things one should consider when building out from here, which we’ll highlight next.
POST vs. GET
You’ll notice that in our examples, we’re consistently using the GET method versus the POST method, as first seen in Listings 12–3 and 12–4. The reason for this, primarily, is speed. GET is much faster than POST because of the simpler format it uses. If you’re wondering why, it’s most likely due to the original intent of GET—it was designed to be for “idempotent” data only. This simply means that the information isn’tmeant for lasting use (i.e., itshould simply be a lookup value, not data to be entered into a database or processed in any way).
However, there are times when POST will be appropriate. First, POST doesn’t have the size limitations that GET does, so if you’re passing a lot of information to the server, you’ll need to use POST. Second, POST should be used whenever you’re changing something on the server (such as a database update), versus referencing static or cached content. Simply put, use GET if you’re passing data that won’t be needed again. Use POST if you’re passing data that should be processed or entered into a database, e-mail, or file.
Using POST is slightly more complex than GET. You’ll need to set a request header, and send information through the send function. This is because POST data are encoded in a message body, whereas GET data are simply tacked onto the URL. This is why the Android browser in Figure 12–8 mentions resending POSTDATA—it’s referring to this specially encoded message. If we wanted to changeour username example to use POST, we could change the following lines:
request.open("GET","check_name.php?u=" + $name,true);

request.send();
The change would result in the lines shown in Listing 12–9.
Listing 12–9. Using POST in the Username Availability Example
request.open("POST","check_name.php",true);

request.setRequestHeader("Content-type&","application/x-www-form-urlencoded");

request.send("u="+$name);
We would also have to alter the PHP script (see Listing 12–7), changing the first line from $name = $_GET['u']; to $name = $_POST['u'];
Setting Asynchronous to False?
As you’ve seen from the preceding examples, the third argument of the open function for our XMLHttpRequest is normally set to “true.” It makes sense this way—after all, why would we want to set it to false anyway? Well, the answer is that there are very few times we would! Still, in some circumstances you might. For example, if you’re writing a script and you absolutely do not want something to happen until the request is returned and ready for processing, it would be permissible to set this to false. An example that comes to mind involves a username check form, similar to the one in Figure 12–16, that should only allow the user to continue with the form if the username is available (perhaps so that other options can be customized based on it). In this case one might disable or hide all subsequent form fields, then wait until the request is returned; if it is successful, the fields could then be re-enable or shown. But be mindful that your entire script will be held up, so doing this with larger amounts of data will not be a good idea. One could imagine the entire browser “stuck,” something frustrating on any platform, but especially vexing on a mobile device where the demand for speed is already greater than its availability.
Also be aware that if you decide to set asynchronous to false, you don’t need (and shouldn’t use) the onreadystatechange function. This is because there is no ready state to look for—the code will continue processing after the request is ready. Simply put the rest of your JavaScript code after the send function, and it will process sequentially.
Finally, before setting asynchronous to false, you may wish to ask yourself if AJAX is really the best solution for what you’re trying to accomplish. Sure, it will probably look cool, but if you need to force the user to wait for something, perhaps it would be easier to implement your code in a different way. For example:
- If there is the possibility that your users may disable JavaScript, requiring JavaScript to complete a form will render the page useless for them. Using AJAX with asynchronous set to true will generally avoid this problem.
- A long form that requires complex validation (e.g., database lookups) after several options might work better as a multi–page form, allowing users to create an account on page one, and then return to subsequent pages at their leisure. Each page could save the progress of the form, allowing users to jump back in where needed, while also providing adequate validation.
Given these thoughts and your own experience in testing, you’ll be able to get an idea about not only the best form submission method, GET or POST, but also about whether using the uncommon method of setting asynchronous to false is a good idea for your script.
Summary
In this chapter we’ve taken a big step forward in making our users’ lives easier. We’ve started doing some of the processing on our forms or our pages in the background, so that users do not need to refresh pages, submit forms, or reload content needlessly. By implementing the ideas and concepts outlined here across your projects and even in our previous examples, you’ll be able to create awesome “supercharged” designs in no time!