
Chapter 9
Publishing Your Game
You may have, by now, a pretty enjoyable 2-D game. Like most casual game developers, you probably want to share your creation with the rest of the world. The way to get your game into the hands, and onto the devices, of the masses is to publish it to the Android Marketplace. This chapter is going to outline the process of publishing your game on the Android Marketplace.
Before you can publish your masterpiece, you must do a few things to prepare your code to be compiled for release. This chapter will walk you through the steps to ready your game to be published. You must prepare your AndroidManifest file and sign and align your code.
NOTE: There are many resources on the Net, including the Android Developer Forums, for instructions on the actual upload process to the Marketplace. This chapter will not cover the upload process, just the preparation steps that may be overlooked otherwise.
This is your last chance to work with the 2-D code that you've created thus far. In the remainder of this book, you will be working on skills to create 3-D games. However, the steps outlined herein will hold true no matter what kind of game or application you are trying to publish.
Preparing Your Manifest
The first step to preparing your code to be published is to make sure that your AndroidManifest file is in order. There are three key pieces of information that your AndroidManifest must have to be able to be published. These key pieces of information are
versionCodeversionNameandroid:icon
Open your AndroidManfest file to the XML view. The information that you must have in your manifest is bolded as follows:
<?xml version="1.0" encoding="utf-8"?>

<manifest xmlns:android="http://schemas.android.com/apk/res/android"

   package="com.proandroidgames"

   android:versionCode="1"

   android:versionName="1.0">

<uses-sdk android:minSdkVersion="10" />


  <application android:label="@string/app_name" android:icon="@drawable/sficon">

    <activity android:name=".StarfighterActivity"

         android:label="@string/app_name" android:screenOrientation="portrait">

      <intent-filter>

        <action android:name="android.intent.action.MAIN" />

        <category android:name="android.intent.category.LAUNCHER" />

      </intent-filter>

    </activity>

    <activity android:name="sfmainmenu" android:screenOrientation="portrait"></activity>

    <service android:name="sfmusic"></service>

    <activity android:name="sfgame" android:screenOrientation="portrait"></activity>


  </application>

</manifest>
If your AndroidManifest file does not have this information, you must add it before you continue. The versionCode and versionName are used primarily by the Marketplace to track what version of your game is being uploaded. This is helpful if you are publishing upgraded version of your game.
Another key element in the preceding code is the specification of the icon. Your game must have an icon to be displayed on the Android UI. The icon does not need to be elaborate; it can even be the stock Android icon, but you do need one.
This information should already be in your manifest however, especially if you used Eclipse to create your project. The next step is to sign, release compile, and align your code.
Preparing to Sign, Align, and Release
All apps that are published to the Android Marketplace must be code signed. This allows the Marketplace to identify you, and your game will not be accepted unless it is signed. If you do not have a certificate from a certificate authority (CA), you can self-sign one. The Android Marketplace will accept self-signed apps.
After signing your code, you need to align it. Aligning your code simply makes sure that it is set at 4-bit boundaries. Having 4-bit boundaries is optimal for downloading on mobile devices.
Luckily, if you are using Eclipse as your Android IDE, an easy wizard will take care of both of these tasks at once. With your project open, go to File ![]()
Export, as shown in Figure 9–1. This will open the Export Wizard.
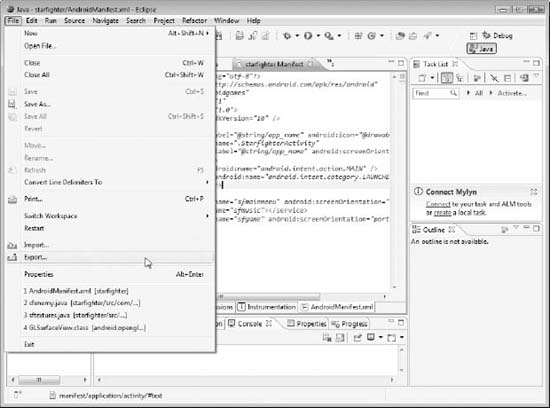
Figure 9–1. Opening the Export wizard
With the wizard open, select the Export Android Application option from the Android destination, as shown in Figure 9–2.
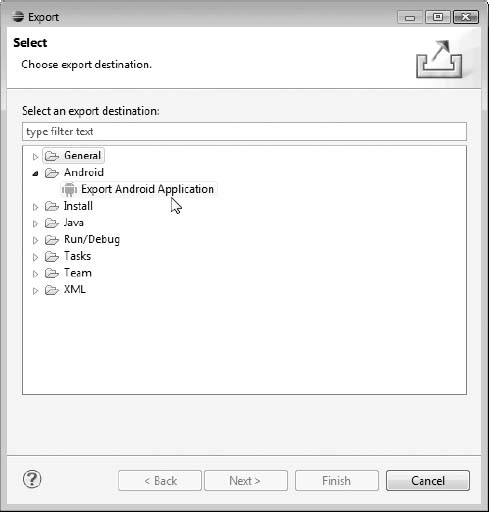
Figure 9–2. Selecting the Export Android Application destination
TIP: Alternatively, you can get directly to this step by right-clicking the project in Eclipse and choosing Export.
After making your selection, click the Next button. Eclipse will now test your project's AndroidManifest file to make sure that it meets the requirement discussed earlier-to be signed and released. From the Project Checks screen shown in Figure 9–3, click the Browse button.
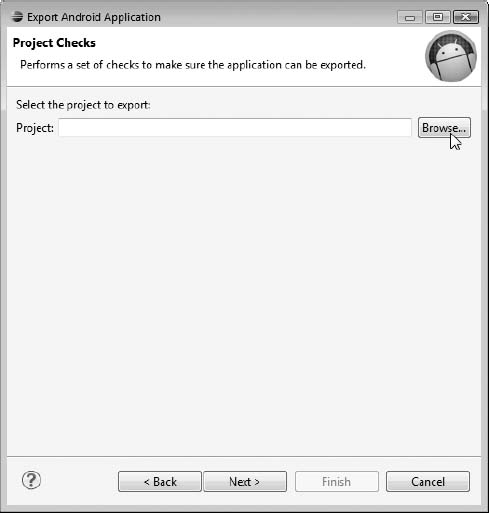
Figure 9–3. The Project Checks window
You can now let the wizard check your project for errors in the manifest that would prevent it from being able to be signed.
Checking the Readiness of AndroidManifest
When you click the Browse button, a smaller window will open that lists all of your loaded projects. Select your project from this list, as shown in Figure 9–4.
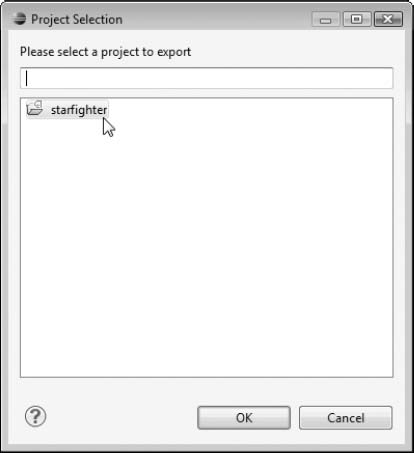
Figure 9–4. Selecting the starfighter project
The export wizard will now check your code to make sure it is ready to be signed. Assuming you have met the requirements, which include having an icon, a version code, and a version name, then you should see the message “No errors found,” as shown in Figure 9–5.
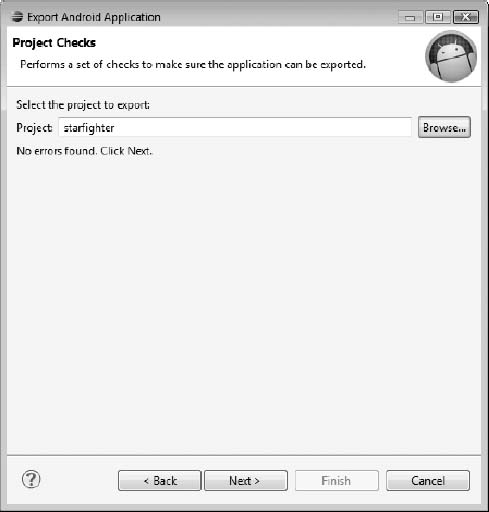
Figure 9–5. A successful check
When the check is finished, click the Next button to begin the signing process.
Creating the Keystore
The next screen of the wizard is the keystore selection, shown in Figure 9–6. If you have an existing certificate keystore created-perhaps from a previous app that you uploaded or a certificate that you purchased-select the “Use existing keystore option” to import it.
However, if you are self-signing, you should select the “Create new keystore” option. Selecting this option will walk you through the process of creating a new keystore.
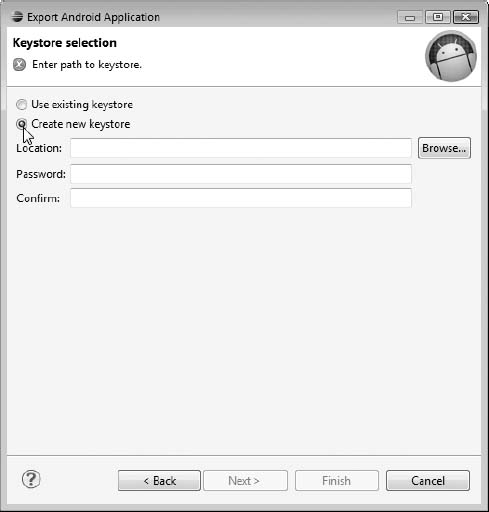
Figure 9–6. The “Keystore selection" window
Select a valid location for your keystore file, and enter a password.
CAUTION: You should choose a location for your keystore that is both secure and backed up. You must use the same keystore every time you update a game or app. Therefore, if you lose your keystore, you will no longer be able to upload updates to this game.
Click the Next button to enter the Key Creation window, which is shown in Figure 9–7. Here, you must enter all of the information that identifies you to the Marketplace.
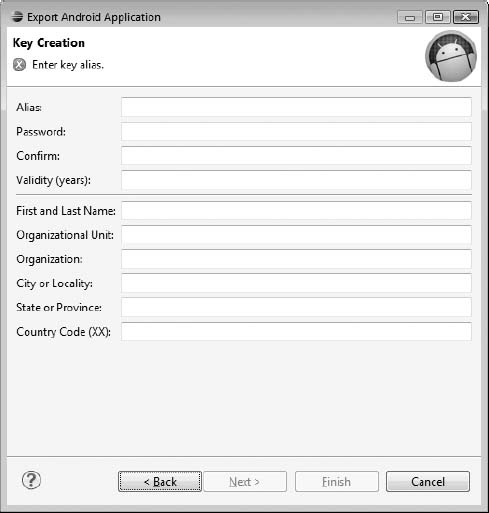
Figure 9–7. The Key Creation window
Click the Next button after you have entered the information required for your keystore. Eclipse will now generate a keystore for you that will be used in the next step of the process to sign your app. On the next and final screen of the wizard, the “Destination and key/certificate checks” window (see Figure 9–8), you will select your .apk file to be signed.
Selecting the .apk file before it has really been created may seem a bit confusing, but just follow along. Click the Browse button, and you should see starfighter.apk.
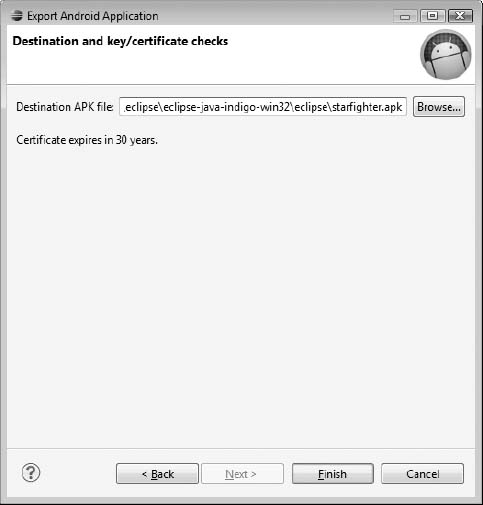
Figure 9–8. The final screen of the wizard
Click the Finish button to compile and sign your final game. During this process, the code will be aligned into 4-bit boundaries, making it much easier for mobile devices to download.
You are now ready to upload your creation to the Android Marketplace-much to envy of your friends and colleagues. If your game development tastes extend more toward the next gen rather than the retro, the remaining chapters of this book are what you need. The last four chapters of this book will build on the skills that you've learned to this point and add to them the ability to use OpenGL in a 3-D gaming environment.
Summary
In this chapter, you learned how to prepare your code for upload to the Android Marketplace. You also used the Eclipse Export wizard to create a keystore and sign and align your game as required by the Marketplace. In the next chapter, you will begin to use the same skills that you learned in the preceding eight chapters to create a 3-D game.