
![]()
Java EE Development with NetBeans IDE
Developing applications on the JVM can be a fun job, however, it can also become cumbersome if you constantly need to be concerned with Java environment details. When developing an application using only a text editor and the command line, you need to constantly keep the CLASSPATH in mind to ensure that all required libraries are available to your application. Moreover, organization can be difficult if you are working on multiple applications at one time, and you need to maintain some method of application separation. These are only a couple of reasons why development can become cumbersome if you are not working within a development environment. The NetBeans Integrated Development Environment (IDE) aims to ease the load on developers by abstracting the requirement to maintain CLASSPATH, organizing code effectively, and providing a plethora of features to make enterprise development much easier.
![]() Note This appendix covers NetBeans release 7.3, which was the most recent release at the time.
Note This appendix covers NetBeans release 7.3, which was the most recent release at the time.
A-1. Configuring Application Servers Within NetBeans
Before you can associate application projects with a server for deployment and testing, you need to configure one or more application servers for use within NetBeans. Please note that it is a good practice to only configure those application servers that are used for development purposes within NetBeans.
To add a local or remote server to NetBeans, perform the following tasks.
- Navigate to the Services window, and right-click the Servers menu selection. Click Add Server, as shown in Figure A-1.
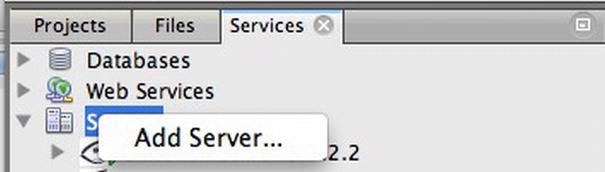
Figure A-1. Add Server to NetBeans IDE
- When the Add Server Instance dialog appears, choose the server type that you wish to add (see Figure A-2).
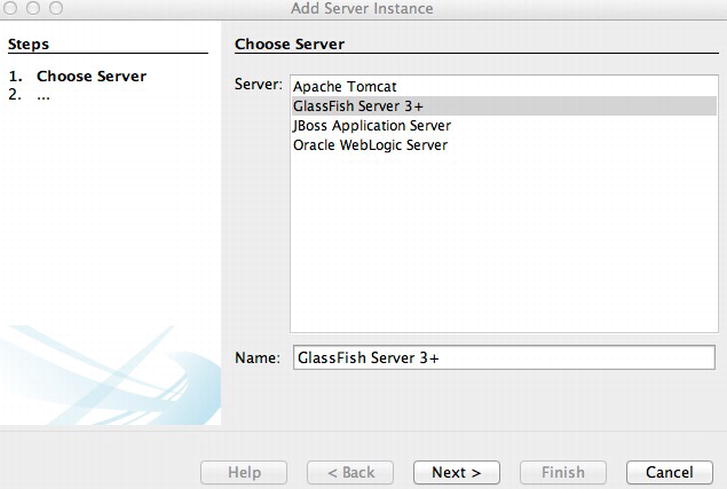
Figure A-2. Add Server Instance
- On the next screen, enter the path to the application server installation that you would like to configure within NetBeans (see Figure A-3). Once you have chosen the location, click the Finish button.
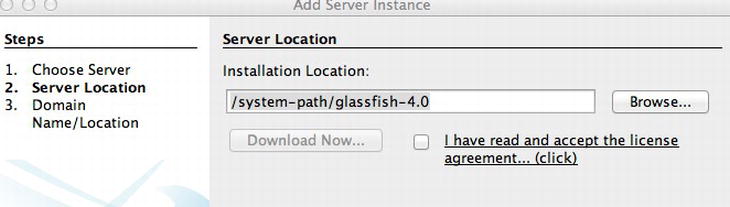
Figure A-3. Set Server Location
- You can now deploy applications to the server by registering it with a given project from within the project properties. Note: you can also perform some basic application server tasks by selecting the application server from within the Services window in NetBeans, as demonstrated in Figure A-4.
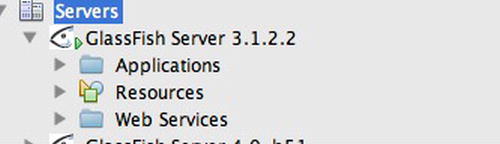
Figure A-4. Expand and administer server in NetBeans
Developing Java Enterprise Applications
The NetBeans IDE really makes it easy to develop Java Enterprise Applications. To begin, you first create a Java EE project within the IDE, and subsequently use the IDE to configure the project accordingly. NetBeans not only makes it easy to configure your application projects, but it also eases development with the aid of such features as autocompletion, syntax highlighting, autoformatting, and so forth. This section will cover how NetBeans can help Java EE developers with some of the most commonly performed Java EE development tasks.
A-2. Creating a NetBeans Java Web Project
There are a few different configurations to choose from for the creation of a Java Enterprise project within NetBeans. This book covers the creation Java Web application projects within NetBeans, which is the standard project selection for development of Java EE 6 and EE 7 applications.
To begin the creation of a new project, open the New Project dialog by choosing File ![]() New Project. In the New Project dialog, you will see all of the different Java project categories listed within the left-hand list box. Selecting one of the categories will display the project types for the selected category within the right-hand list box. To create a Java EE 6 or Java EE 7 project, select the Java Web category, and then Web Application as the project type (see Figure A-5).
New Project. In the New Project dialog, you will see all of the different Java project categories listed within the left-hand list box. Selecting one of the categories will display the project types for the selected category within the right-hand list box. To create a Java EE 6 or Java EE 7 project, select the Java Web category, and then Web Application as the project type (see Figure A-5).
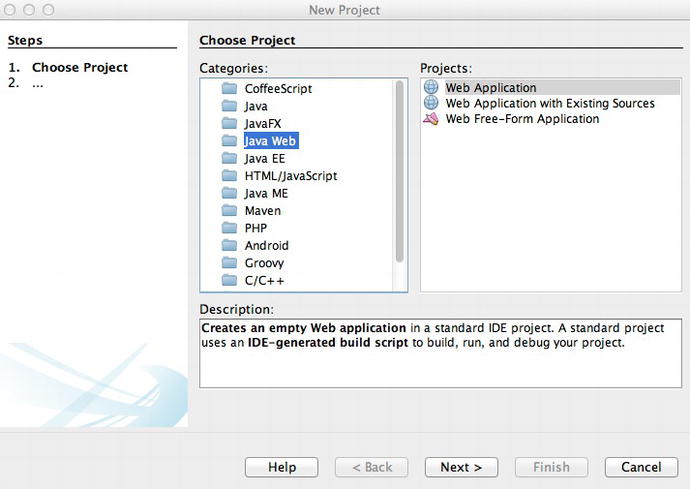
Figure A-5. Creating a new Java EE project in NetBeans
![]() Note The Java EE category allows the development of projects using the old-style Java EE configuration. That is, project types within the Java EE category adhere to standards for developing with Java EE 5 or earlier. In such projects, separate Web (WAR) and EJB (JAR) projects are created, rather than a single project that deploys to a single distributable WAR file.
Note The Java EE category allows the development of projects using the old-style Java EE configuration. That is, project types within the Java EE category adhere to standards for developing with Java EE 5 or earlier. In such projects, separate Web (WAR) and EJB (JAR) projects are created, rather than a single project that deploys to a single distributable WAR file.
After selecting the project type, the New Web Application dialog will open. Enter a project name and location, as shown in Figure A-6. Once finished, choose Next.

Figure A-6. New Web Application – Name and Location
In the Server and Settings screen, choose the application server that you wish to use for deployment (see Configuring Application Servers in NetBeans), along with the Java EE version that you wish to use. If you plan to make use of Contexts and Dependency Injection, then select the designated check box (see Figure A-7).
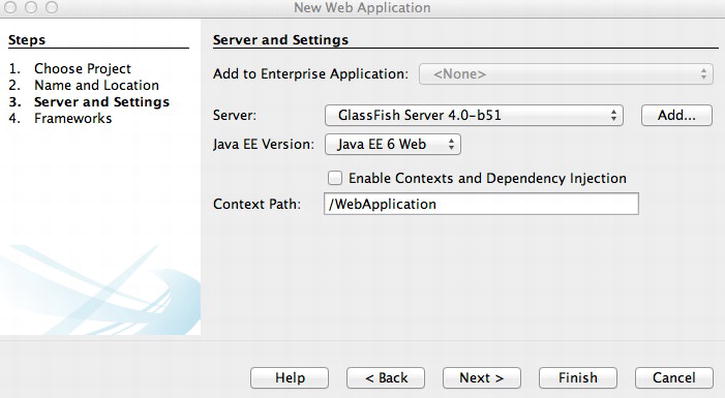
Figure A-7. New Web Application – Server and Settings
A-3. Creating JSF Application Files
The NetBeans IDE makes it easy to generate files for JSF application projects. To open the JSF menu, right-click an application Source Packages directory to open the context menu. From within the context menu, choose New and then Other… to open the New File dialog. Within the dialog, choose JavaServer Faces from the Categories list box to open the JSF file types within the left-hand list box (see Figure A-8).
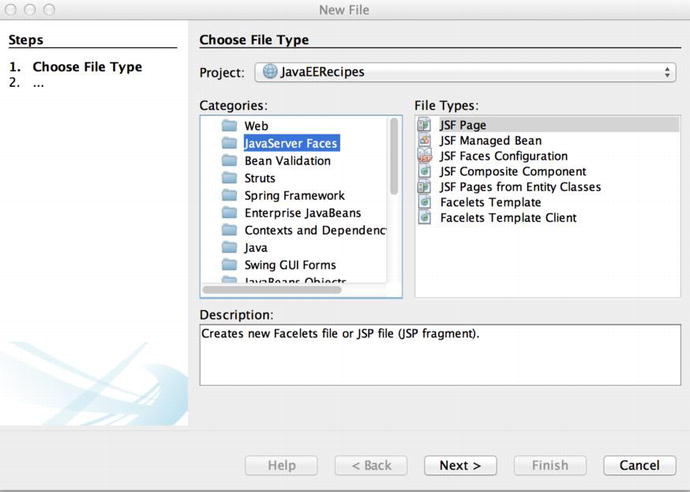
Figure A-8. New File menu – JSF file types
The JSF file types include the following options:
- JSF Page
- JSF Managed Bean
- JSF Faces Configuration
- JSF Composite Component
- JSF Pages from Entity Classes
- Faces Template
- Faces Template Client
The JSF Page file selection opens a dialog that can be used to generate a new JSF page (see Figure A-9). The dialog allows you to choose a file location and name, and it also contains the ability to apply different options for the page type. The option choices for page type are Facelets (default), JSP File, or JSP Segment. The examples throughout this book feature the Facelets page type.
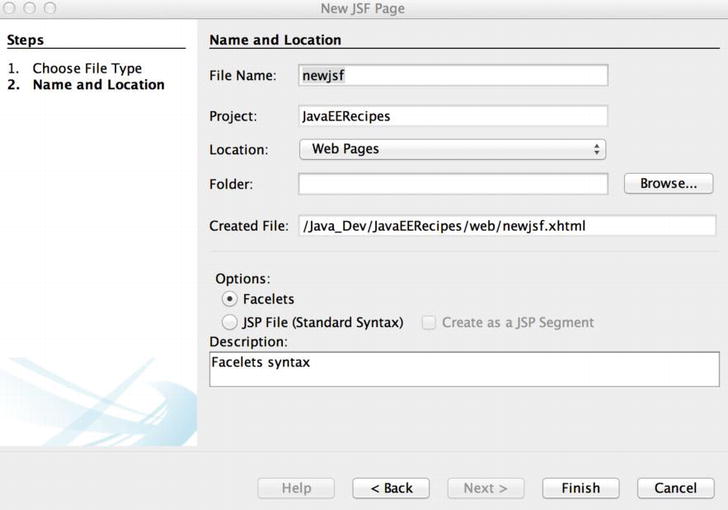
Figure A-9. New JSF Page dialog
The JSF Managed Bean file selection opens a dialog that allows you to generate a JSF Managed Bean controller class (see Figure A-10). The dialog provides the ability to choose to add the bean data to the faces-config file, as well as choose the scope of the bean.

Figure A-10. New JSF Managed Bean dialog
The JSF Faces Configuration File selection is used to create a faces-config.xml file for a project. However, this option is not required if you choose to create a JSF project within the NetBeans Project Creation wizard.
The JSF Composite Component file selection opens a dialog that can be used to create a composite component file. The dialog does not provide many options other than the ability to choose a file location and name. The generated file contains the skeleton of a composite component, as listed in the following lines:
<?xml version='1.0' encoding='UTF-8' ?>
<!DOCTYPE html PUBLIC "-//W3C//DTD XHTML 1.0 Transitional//EN" "http://www.w3.org/TR/xhtml1/DTD/xhtml1-transitional.dtd">
<html xmlns="http://www.w3.org/1999/xhtml"
      xmlns:cc="http://java.sun.com/jsf/composite">

    <!-- INTERFACE -->
    <cc:interface>
    </cc:interface>

    <!-- IMPLEMENTATION -->
    <cc:implementation>
    </cc:implementation>
</html>
The JSF Pages from Entity Classes file selection can be quite powerful in that it allows you to choose an Entity Class from which to generate a JSF page, and then the resulting JSF page will be bound to the entity class upon generation. In order to use this option, the project must contain at least one entity class.
A-4. Developing EJB Entity Classes
The NetBeans IDE provides facilities to help develop Entity Bean classes, either manually or based upon a selected database table. To access the entity class wizards, right-click a project’s Source Packages folder to open the context-menu, and then choose New ![]() Other to open the New File dialog. Once open, choose the Persistence category from the left-hand list box to display the file types in the right-hand list box (see Figure A-11).
Other to open the New File dialog. Once open, choose the Persistence category from the left-hand list box to display the file types in the right-hand list box (see Figure A-11).
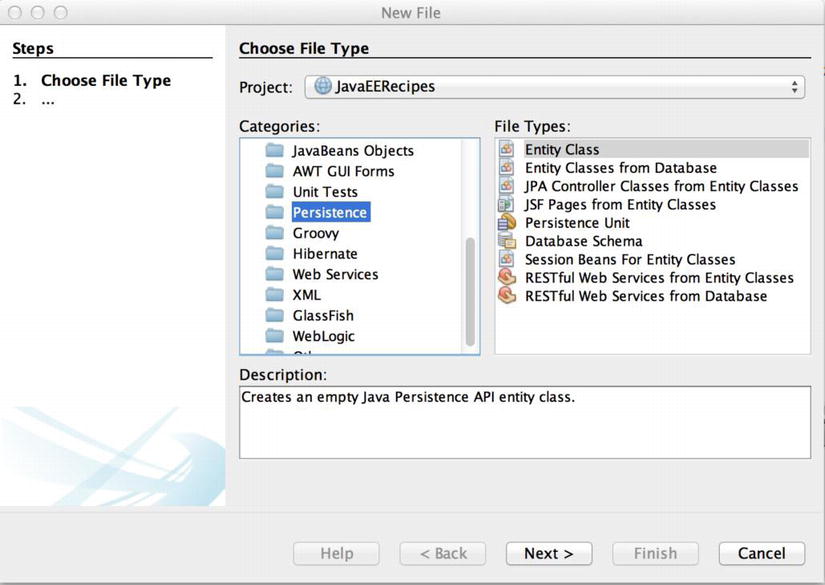
Figure A-11. New File - Persistence
The option reading Entity Class allows you to generate a blank entity class, and Entity Classes from Database allows you to generate an entity class from a selected database table. In doing so, all of the requisite code for mapping the entity class to the selected database table is automatically generated for you.
NetBeans 7.3 and beyond include a new feature that allows you to query a database using JPQL syntax. This can be quite helpful for those who are using JPQL in their EJB session beans. To access the JPQL query tool, perform the following steps:
- Expand a NetBeans Web Project that contains a persistence.xml configuration file in the project Configuration Files directory.
- Right-click the persistence.xml configuration file to open the context menu.
- Click Run JPQL Query to open the tool (see Figure A-12), type in your query, and click the Run button on the upper-right of the query editor.
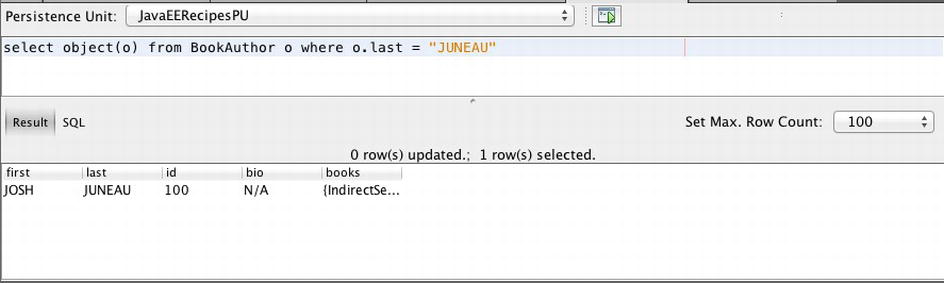
Figure A-12. JPQL tool
Many new-age applications make use of HTML5. The Java community has taken note of that and has made it easy to begin working with HTML5 within NetBeans itself. NetBeans has an HTML5 project option, which enables developers to debug HTML5 pages using a Chrome web browser plug-in. To create an HTML5 project from within the IDE, select the New Project option and then choose HTML/JavaScript in the Categories selection list, followed by HTML5 Application from the Projects selection list (see Figure A-13).
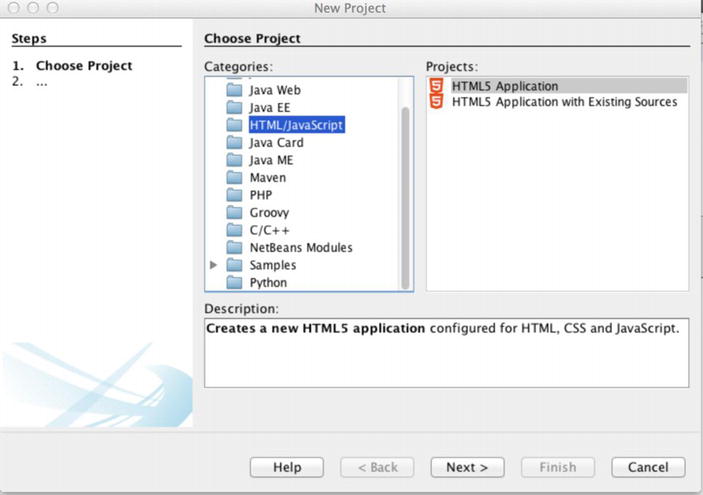
Figure A-13. Create new HTML5 application
Next, you are given the option to choose No Site Template, or you can select a template that you provide, or use one that you can download, as seen in Figure A-14.
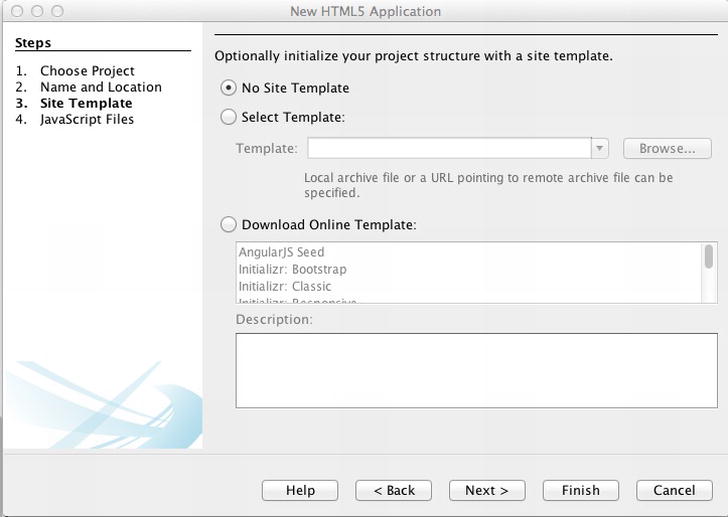
Figure A-14. Choose site template
Lastly, choose any libraries that you wish to add to your HTML5 Project (see Figure A-15), then click Finish.
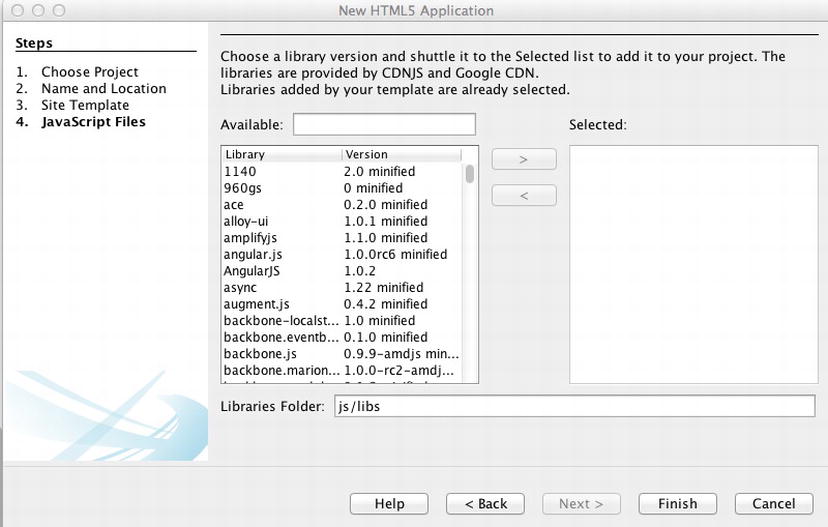
Figure A-15. Add libraries to project
Once the project has been created, you can choose Run to have it opened within Chrome, assuming that you have installed the Chrome plug-in. If you have not yet installed the Chrome plug-in, you will be prompted to do so.