11 Assignments
In the following sections, Ingrid and I will talk about different shooting assignments and ideas to get you out there and shooting film. The more you shoot, the better you will become at it. Don’t be afraid to do an assignment more than once; I’m sure you’ll learn something new every time you repeat one.
Not only will these assignments help you see better, they will also allow you to try new film types and different cameras without the fear of goofing on an important shoot.
To judge your work, simply share it with others online and ask them what they think. If there’s one thing that separates the online photography forums from those in the other arts, it’s that people are brutally honest.
One-Roll Assignments
Many things make film unique compared to digital; one of film’s more special attributes is that every shot really counts. For one thing, there are only 36 exposures on a typical roll of film. Digital cards can hold thousands of images, and digital images are often deleted if the photographer impulsively decides that the image on the LCD screen is no good. Think of how much history is lost at the hands of quick reaction. I can almost guarantee that some of my favorite images from childhood would have been deleted on digital because of a pair of closed eyes or a frown. Film doesn’t allow this. The roll is intact—one image connected to the next in celluloid. I love this about film.
On that note...the one-roll assignments! What can you do with just one roll of film? What story can you tell when you’re limited to 36 shots? How will you change the way you shoot, knowing you can’t redo or delete when you click the shutter? You’ll find a more thoughtful concentration and composition.
Try some of these projects:
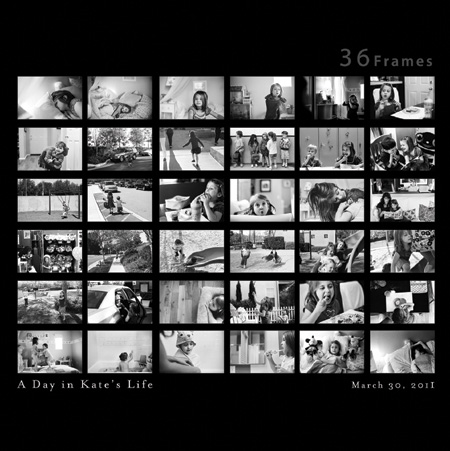
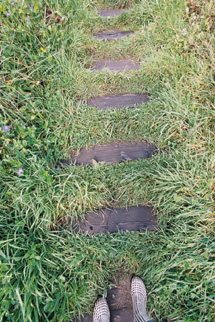
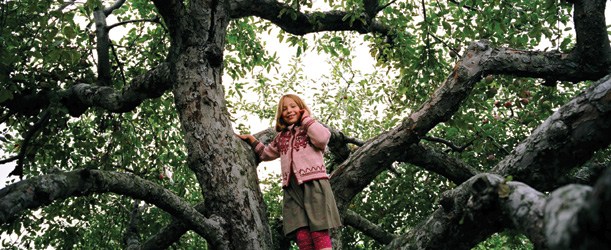
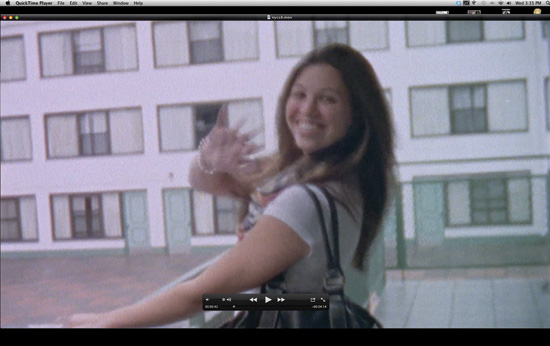
◆ Shoot one roll of film over the course of 18 waking hours. Or shoot a day in the life. Or take a shot every 30 minutes. Try to force yourself to take the image right at that 30-minute mark. Open your eyes to what surrounds you at any given moment. Develop and print the roll and press the images into a little book. Simply write the date on the cover.
◆ Shoot one image on a single roll of film every day for 36 days. Pick a scene or an object and take a photo of it every day until you have used up your roll of film. Try to see the space or item differently each time. Shoot from different angles, at different times of day, and in different light. Scan your roll of film and see how the film works with different lighting conditions. This assignment will push your creativity, but it’s also an informative test of your film in different situations when you have one constant. You can use this knowledge later for portraits, landscapes, and so on.
◆ Shoot one roll of self-portraits. You could do this with digital too, but it wouldn’t be as much fun.
◆ Make your one roll into a photographic comic strip. Plan a 36-exposure story with cardboard bubbles and words. Print the film as a contact sheet.
◆ Make a photographic short story. Shoot one roll of film with the idea that you will only make a contact sheet of the negatives, and that will become your final print. Take photos of words or objects that tell a story. Or shoot a linear scene. You can write out a story beforehand and then take your time searching for words or symbols.
◆ Make a rainbow. Shoot six red-influenced images, six orange images, six yellow images, and so on until you have all six standard colors of the rainbow. Print them as a contact sheet or make prints and display them in a line or curved shape.
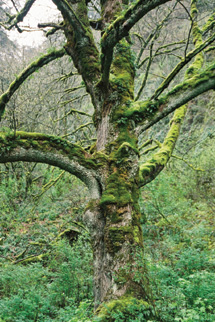
◆ Go monochrome. Do you like green? Focus on one color for an entire roll. See how that certain color shows up in unexpected places.
A day in the life. Photos by Paul F. Gero.
Go green!
So Many Choices!
With the huge variety of emulsions (films) available, be like a kid in a candy store. As creatures of habit, we tend to stick to the familiar. We find something we like, and we don’t deviate. The following fun ideas will push you out of your comfort zone and encourage a bit of variety.
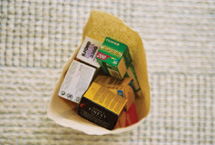
◆ Shoot from a mystery bag. Order one each of several types of film. Put the film in a brown bag and pull out a random selection. Shoot with that roll of film until you finish it. Then do it again until you’ve worked through the brown bag. Sometimes it’s nice not to make the choice. You might be surprised by how different emulsions will make your daily life look completely different. You may find a new favorite.
Create a film grab bag!
◆ Surprise yourself. Have a friend cover a film canister’s identity with a marker and load it into your camera. Most newer cameras set the ISO for you, or that can be the one bit of information your friend gives you. Shoot the roll, send it in, and be extra surprised when you get back your images.
◆ Take three. Choose three different films and run through each one exactly the same. This may work best if you have a controlled environment, but it doesn’t have to be an exact science. You could shoot one object, subject, or landscape and simply compare the differences. This is just a good way to do a simple test.
◆ Do you like the grittiness of a grainy photo? You can make it happen on purpose. Try underexposing your film and then pushing it in development. Or try using some of the higher-ISO films. Expired film can sometimes be grainy as well. Printing your image a bit larger will also increase the visibility of grain in your image. 35mm film will show more grain when printed than a larger negative will. Play with grain and instantly make your photos a little more rock ’n’ roll.
Go gritty with grain.
Play with Friends
Remember that telephone game you played as a kid? The one where you whispered into the ear of the person next to you, and the story had to make its way around the circle? The story was never the same as when it started. Have fun and try some variations on that theme.
◆ Pass the camera around to a select group of friends with a simple set of directions or one word that everyone must interpret in his own way. There’s no scrolling back to see what was shot before. There’s no way to be influenced by others’ images. At the end of the game, you should have an interesting collection of images on the same theme. Divide the number of shots by the number of players.
◆ Create an instant story. Use a Polaroid or Fuji Instax camera to write a little story with your friends. Have the first person take a photo, and then have the next person draw off that image. Have the third person draw off the first two images, and so forth until you have 20 shots. There should be no words or communication other than the photos. You could rotate through the same five or so people if you can’t find 20 to participate. Hang the images on a wire using small clips.
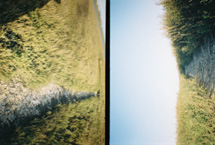
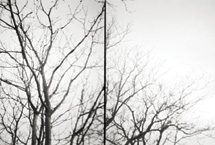
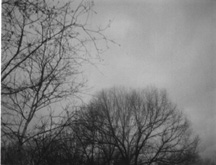
◆ Shoot up or down. Set your camera to the farthest focus point (if the camera has that option) and instead of taking photos looking out, point toward the sky. Trees, clouds, buildings—run a whole roll with one particular point of view. Adjust the focus and do the same pointing toward the ground. See how Lomography can make the everyday a little different, a little dreamlike. Mix different films in your rotation to find what you like best.
Go Lomo
Plastic cameras are everywhere now. You can pick them up online or at the mall. I make a habit of carrying my Diana Mini with me everywhere I go and trying to shoot one or two frames a day with it. One way to get into film without worrying too much about the technical aspects is to buy a toy camera and just have fun. Don’t think, just shoot. It’s lightweight and very small. Stick in a roll of Portra 400, and you’re good to go in most lighting situations. One great thing about shooting color negative film is the great latitude. Most plastic “toy” cameras are made to shoot 100-speed film in bright sun. The wonderful thing about Kodak Portra 400 is that it will hold highlight detail even when it’s overexposed by several stops. I’ve found that by toggling between the sun and shade settings that most of these cameras have (as well as bulb for longer exposures), you can shoot with these little cameras everywhere. You can experiment with many different films, of course—punchy and high-contrast ones seem to be popular with many Lomo users.
Point your Lomo at the ground and at the sky.
◆ Shoot while shotgun. Keep your little plastic camera in the car. Take photos when you’re in the passenger seat—through the car window or with the window rolled down. The camera is so lightweight that you can hold it out the window and snap.
Double Expose
Double exposing color negative film can be fun and easy. And because of the film’s wide latitude, you’ll still retain highlight details when you overexpose. Almost all cameras allow you to expose the same frame more than once. On non-electronic cameras, there is usually a lever that allows you to not advance the film. On electronic cameras, such as my F5, there is an option in the menu that allows me to keep taking photos without advancing to the next frame. Here are a couple fun assignments you could do:
◆ Expose a face, close up in flat light, and then, without advancing the film, take another frame overtop of the first one. Use a texture such as brick, cement, or a hedge.
◆ Photograph someone walking across a field. Use a tripod to keep the background the same and have your subject move across the film plane. You’ll need multiple exposures here. Every time your subject takes a few steps, take another frame without advancing the film. This way, it will look as if there are four or five of your subject walking in a line, while the background will be the same.
◆ Do a whole series of double exposures. No rules other than that. Make 10 shots, hang the show in your hallway, and invite friends over to see it.
◆ Don’t advance your film all the way; let the images overlap in some neat panoramas.
Create some fun panoramas by letting images overlap.
Expired Film
You can sometimes buy expired film at old drugstores or online, or maybe you have some random rolls tucked away in a drawer someplace. Or, do a quick Google search for expired film, and you will come up with many links to buy long expired and recently expired film. Some of the film will be out of production, and some will be film that just went past its expiration date. In terms of spoiling, film does not really go bad that quickly. Besides, when film is expired, it’s not unusable—it’s just not stable in terms of holding the characteristics that the manufacturer intended it to hold. This could be in contrast, latitude, grain, or color. Characteristics will change as film gets older. Expired film can be unpredictable, and that’s what makes it so much fun. For this assignment, I want you to get some expired film. Don’t get really old stuff—try to stay within the last decade. Then shoot it, bracket your exposure, and try to overexpose. Most film will lose its sensitivity to light as it ages, so a 100-speed film might be a 50 now—but again, this all depends on the film and how it was stored. I have shot 10-year-old Fuji Velvia 50 that was kept in a freezer in Ziploc bags, and when it was thawed, it was good as new. I shot it at 50 and 25, and everything was great.
You might even use your roll of expired film to photograph something very modern. Make a still life or photograph some modern architecture. The contrast alone will make a statement.
These are images taken on expired Fuji Sensia 200 film. Notice the increased contrast and grain.


Storing Film
Film should be kept refrigerated and away from heat and humidity to keep it fresh. Film that is not kept well can become grainy and fogged. If you don’t plan to use film for a long time, you can freeze it—just make sure it’s in a Ziploc bag to prevent moisture from getting to it.
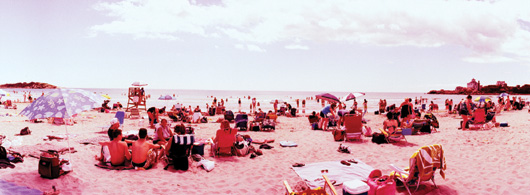
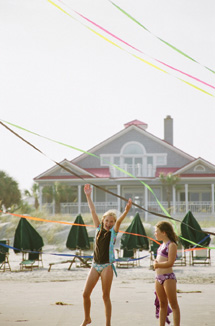
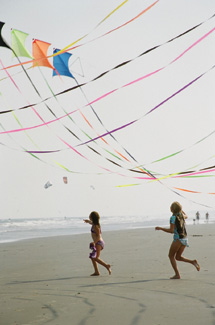
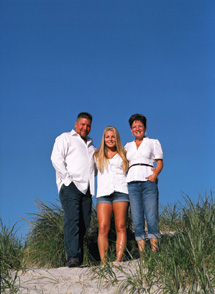
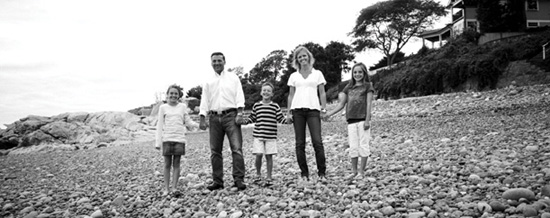
A Day at the Beach
Sun, sand, and water! One of my favorite places to be in the summer is the beach. I love it. The beach is filled with many colors, events, people, and objects to photograph. In my photos, I like to share the feelings of fun at the beach. Everyone is usually smiling and happy, and I love that.
I love the color at the beach, so I like to shoot on high-saturation films, such as Ektar 100, to convey the blue skies and the colors on everyone’s bathing suits. I recommend shooting with low-speed film, because there is plenty of light at the beach—the sand and water both bounce light everywhere.
For gear, I like to bring my Horizon Perfekt to get panoramas and show the vast beach vistas. It’s a great camera for shooting other beachgoers, too, because they don’t see the camera as a camera, and they don’t react as if they are being photographed. It’s also fantastic for getting different perspectives at the beach.
My Horizon Perfekt is, well, perfect for beach vistas.

I don’t like shooting medium format at the beach, because the cameras are pretty big and aren’t that weather-tight. There is sand and salt everywhere, so even if you’re shooting with 35mm, make sure to keep your gear clean and be super careful if you change a lens. A little sand in your camera will leave you with a host of problems.
Another fun thing to try at the beach is to shoot with a long lens rather than a wide lens. A long lens will compress everything and make a crowded beach much more interesting.
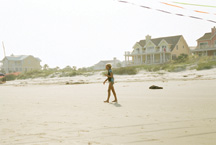
Stay at the beach for the day and photograph the light as it changes. Beaches look awesome and completely different at different times of day. From clear sunrise at dawn to beautiful sunsets and glowing skies, the beach is full of material for you to use in your photographs.
You can also try to photograph only details at the beach. Look for shells, starfish, and driftwood. The ocean tosses all sorts of things up on the shore; just go for a walk and see what you can find.
Every time you go to the beach, try to photograph something new. Now get to it!
Photograph all the action on the beach.
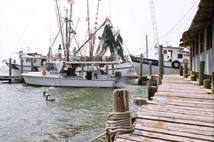
Fishing Port
Photographing people and what they do gives me great joy. I think photojournalistic-style portraits of people best capture who they are and what their lives are like.
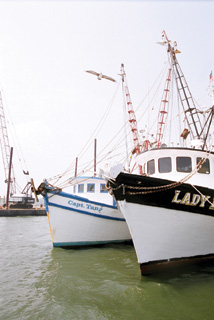
If you live near the shore, a fun assignment is to shoot fishermen going about their day. Go to the local fishing port and see whether you can photograph the men and women who bring us our daily fresh fish. Fishermen are hardworking people with gritty jobs. It’s not a pretty job, but because it’s so messy, it provides a lot of photography fodder.
Be mindful of the people you’re shooting—always ask whether you can take their portrait. Most people will say yes, and if they don’t, you can just move on to another boat. If people allow you to photograph them, be thankful and polite.
I like to use a good portrait lens and one wide-angle lens when I photograph people in their working environment. I don’t want to be obtrusive, so a quality 50mm or 85mm lens gets me good distance for my shots. Use the wide angle to get some shots establishing the scene. Tell a story.
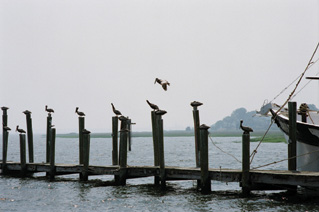
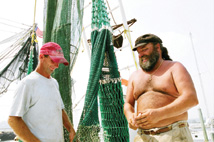
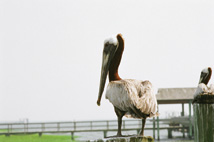
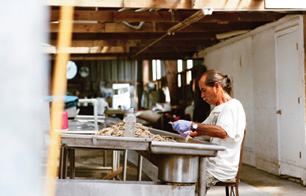
Try to look for the shots that tell the story. No single photo will perfectly describe a person, so look around, take in everything, and then take the shots. If I had only photographed the captain, you wouldn’t have an idea of the scale of the life at a shrimp port, so I photographed everything—from the dock with the birds, to the boats, to the crew, to the man inside shelling the shrimp before freezing them.
Images from a shrimp-boat port in South Carolina. I was exploring this little fishing port with a friend of mine when we saw this crew sewing their net together. They agreed to let me come on board to take some portraits. I promised I would send them copies of the images in return. I shot them using my Nikon F3 with a 28mm lens and an F5 with an 85mm lens. I used Fuji Reala 100 and Superia 400 for all these photos.

Flowers
I’m the first person to say that I’m no expert on photographing flowers—but that would never stop me from shooting them. Photographing flowers is an art in and of itself. I just know that when I see a lovely plant, I like to take a photo.
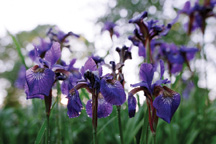
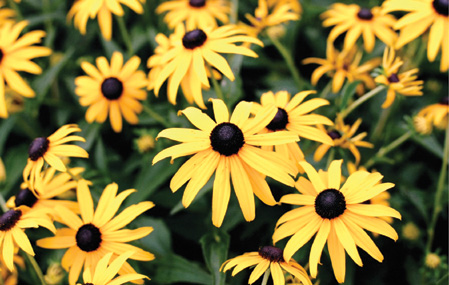
Making flowers look good comes down to a few simple things: light, contrast, and gear. I recommend using a macro lens that will allow you to get close to the flower and fill the frame. I find that flowers look best with some dew on them, just after it rains or in the early morning, when dew from the night is still clinging to them. This isn’t always the case, of course. Flowers can look good in a vase, too—it’s up to you to photograph what you like.
Here are a few key tips:
◆ Pay attention to the background. You want your flower to stand out and not get lost.
◆ Watch for patterns and look for the angle that will focus the viewer’s attention on the flower(s).
◆ Don’t be afraid to use flash; it can make flowers pop.
◆ Sometimes pulling back from the flower and taking in a big scene is better than just shooting a close-up.
◆ Use a slow-speed film so that you can pick up as much detail as possible.
Macro shots of flowers are great, but try shooting some wider angles, too.

Fourth of July
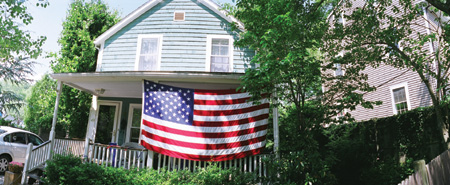
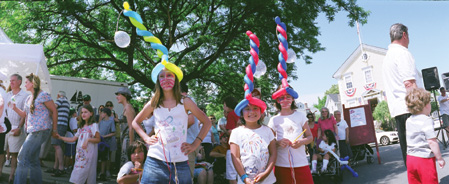
One of my favorite holidays is America’s birthday. It’s a day celebrated in virtually every town across the United States. Parades, parties, and barbecues abound, and the day ends with fireworks and music. There is plenty to photograph.
For this assignment, I challenge you to photograph local celebrations. Whether it’s a parade, a carnival, or a firework extravaganza, you’ll have the opportunity to document the day.
I recommend using a 35mm body with a good zoom or two prime lenses, one wide and one tight. Walk your streets, stake out the good spots, and watch for shots. Look for smiles and people having fun, and take photos. Your best bets for action and changing lighting situations are 200-and 400-speed film. For fireworks, you’ll need a good tripod and a shutter release. Place the camera on the tripod and set the Exposure mode to Bulb. You can use a shutter release cord to trip the shutter. You don’t want to trip it directly because you could inadvertently cause camera shake. Use a 400-speed film and vary your shutter speed to record some good fireworks.
Fourth of July photos from Marblehead, Massachusetts. I just walked around town and took photos of what I saw happening. I had only my Horizon Perfekt with me, because I was on a boat that day and wanted to keep my gear to a bare minimum.
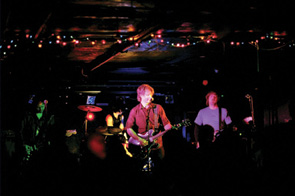
Concert
You can only learn to shoot in bad lighting one way: Shoot in bad lighting. For this assignment, find out where the local indie bands play and buy a ticket. Take some 400- or 800-speed film and be ready to push it to 1600 or 3200. Try some BW 3200, too. Learning to spot meter and shoot a band in a crazy lighting scenario will help you learn more about how to expose in low light and freeze action.
Spot meter for band members’ faces—that’s usually the best light—and then spot meter for the key lights. Find the average and shoot. Be careful with matrix or average metering modes in these situations, because all the crazy set lights and super-dark areas can wreak havoc with a camera meter. It’s best to spot meter and then guestimate and shoot.
Images of a band playing in Cambridge, Massachusetts. I shot this concert with Portra 400 rated at 1600 and then had the lab push the film two stops in development. I shot mostly wide open at f/1.4 or f/1.2 and then varied my shutter speed as needed. It was mostly set to about 1/60 to 1/125.

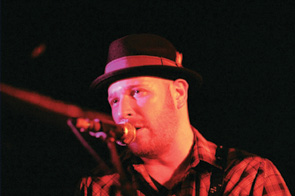
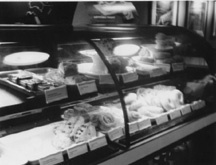
Commercial Portraits
For this assignment, I don’t want you to photograph a model, but rather a real person with a business. This means that you take professional photos for someone, which they can then use for their company. Just like when you’re shooting models, lighting is a key factor in this type of portrait, next to posing.
With commercial portraits, you need to be much more aware of your location and what the photos say about your subject. A person’s image is very important, and your picture has to convey that image to viewers.
Chef David in his kitchen. I used a 35mm lens and 400-speed film rated at 250 and processed normally. I had three lights set up, one bed-sheet softbox, a strobe bounced to the ceiling, and an on-camera flash bounced on the wall behind me. I balanced everything using my light meter.

Use a good 35mm lens to give a sense of your subject’s world. This is not a fashion shoot or a head-shot, so you don’t want to use a tight lens that’s going to throw the background into blur.
Use off-camera flash and studio strobes. I take a white sheet with me to make a softbox on location. I simply take two light stands and then tie the sheet between the two. Then I place a flash directly behind the sheet, aimed straight at it. I then have an 8’×10’ softbox that only cost the price of a bed sheet.
For these outdoor portraits of the chef, I used my Pentax 645 with a 75mm lens and Portra 400 rated at 200. There was no additional lighting, just good old afternoon light.

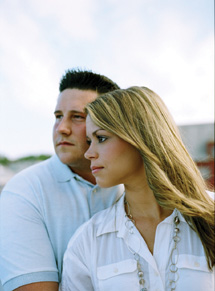
Couples Portraits
For this assignment, I want you to photograph some couples. Photographing a couple to show that they are together and in love can be fun and exciting. You will learn to create great portraits of people in love.
You can pose the couple or photograph them like a photojournalist—or even like a fashion photographer. It’s up to you.
For me, engagement photos are portrait sessions. They aren’t about getting a photo for a newspaper; they’re about taking real shots of a real couple, not cookie-cutter posed shots.
For most couples, I like to use my Pentax 645 and shoot in the afternoon light. I talk to the couple, get to know them, and learn who they are and what they’re about before I start taking photos. In a sense, I’m interviewing them. Knowing someone is very important when you’re photographing them. You want them to feel as if they know you too—that you’re not a total stranger. You might be surprised by how much comfort levels can impact a portrait session.
I like to keep my photos of couples simple. I find sweet light, take a reading with my light meter for the film I’m using (I meter differently for different films—see Chapter 3 to see how I meter for each), and then describe what I want the couple to do while I shoot. I usually start by having couples hold hands and walk or look at each other. What they do after that is up to them.
I also like to get a couple of cool headshots—a shot that is all about the person as an individual, not as a couple. A close-up shot of someone can tell you a lot about them. You can really look into their eyes.
I love these shots, taken on my Pentax 645 with Portra 160.


Babies and Kids
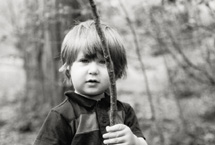
Odds are that you know someone who has kids, who just had a baby, or who will be having a child soon. Kids are everywhere, and they make great subjects as infants and even more challenging subjects as they grow up. Older kids like to run around and goof off. They don’t want to sit for portraits—well, most don’t.
You can get some fun, goofy pictures of kids being kids.


Newborns
Shooting newborns isn’t as challenging as it might sound. They actually don’t move around much and are generally fairly easy to pose. I like to keep it simple when shooting newborns and very young babies. I try to find a clean background and lay the child down or prop him up against something. (Obviously, you must make sure the baby is in a safe place with his head fully supported at all times!) Medium format is great for really young babies who don’t move much; it allows you to get much more detailed shots of the child.
I like to use natural light as much as possible when shooting babies. I don’t want my baby photos to look like a fashion shoot—I want them to be very documentary-based. Of course, you certainly don’t have to do it my way! If you want to light up babies with multiple strobes and make a high-end studio-type shot, that’s awesome—it’s just not my style.
An extra hint for you: Macro lenses can be very useful when shooting newborns if you want to get detailed shots of their little body parts or fill the frame with the baby’s head.
I shot this newborn’s pictures on my Pentax 645 with Tri-X 100 rated at 1600. Black-and-white film works well with infants. I prefer it over color because newborns tend to have rashes and reddish skin. Black-and-white film makes their skin look clean and clear.

When babies are slightly older and home from the hospital, you can have a bit of fun with them. I started shooting these twins in their parents’ room with just a blanket under them. Then we moved outside, and I got the family to hold them up and have fun. I metered for the shadows and shot with Kodak Portra 160. Use a slow-speed film to get as much detail with 35mm as possible.

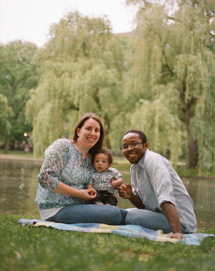
For a family shoot in the park, I brought my Pentax 645 to get neutral shots of the parents holding their newborn. We shot for under an hour and just walked around the park looking for good light. I shot about 40 frames with Portra 400 and was very happy with the results.
Older Children
When kids are a bit older, you can have a little more fun with them. I enjoy shooting families with young children. When kids reach about eight or ten years old, they actually enjoy being photographed, and it can make for a fun shoot. This is the age right before they turn into teenagers and become very self-conscious.
For a family shoot like this, I like to use all my gear: panoramic to 645 to normal 35mm. Each camera can help you capture something different.
Try to be aware of what the kids are doing, and never be scared of them. If you’re nervous, they will see right through you, and your shoot will be over. Be happy and cheerful with kids—keep them engaged and work with the parents to make everyone feel great. I don’t tell people to smile; I tell them to tell a joke or to tickle each other. I want to provoke a real emotion so that I get real smiles and joy. Try it.
A word to the wise: Autofocus comes in very handy when you have kids running around.
For locations, think simple. This isn’t an edgy fashion shoot, so that gritty alley or a junkyard may not be the best place for little kids. Think about safety and find a place that will work well with the family you’re shooting. Talk to them and find out what they like to do and where they like to go with their kids.
These photos were taken with me having all my gear handy. I like to take a travel bag with me to my shoots so that I always have what I need on hand.
Dogs!

I love animals—I’m crazy about them. I wish I could go on an African safari and see all kinds of animals, but alas I live in Boston, and aside from deer in the forest, the animals I have the greatest access to are dogs.
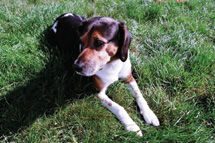
This is a good thing, though. Dogs are usually friendly and not shy, like wild animals can be. You can actually do photo shoots with dogs—dress them up or just let them run around. Most dogs love people.
I took most of these shots of dogs in my own yard.

For this assignment, your goal is to photograph a dog. You can photograph it just lounging, or you can pose it. I like to bring my dogs into the yard, get really close to them with a wide-angle lens, and shoot them close-up. Dogs move fast, but you don’t need autofocus if you can get them to sit down.

If you’re not photographing your own pet, have fun and play with the dog before you start taking photos—let him get to know you. A happy dog is much easier to photograph than an angry or suspicious dog.

Here’s a good tip: Fast film and some dog treats can be lifesavers when you’re trying to shoot dogs. Also, for darker dogs, use fill flash to highlight their hair and features; otherwise, you’ll lose the detail.
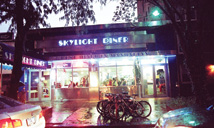
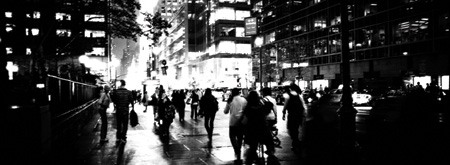
New York City at night, taken with BW film on my XPan.
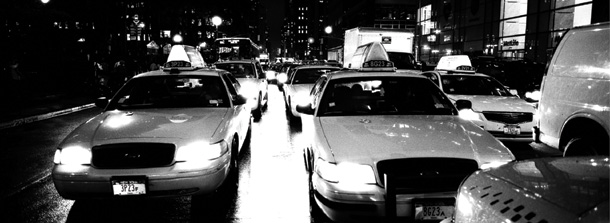
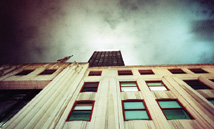
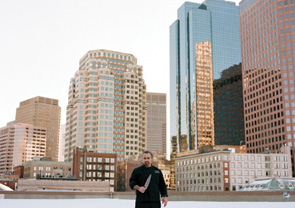
Cities: Part I
Some of my favorite photos have come from just walking around and exploring a city. I live in Boston—a rather typical city with good parts, bad parts, trendy areas, and all the normal things you expect to find in a big city. I like to just drive out somewhere, park my car, and walk around to look for new things and people—anything cool.
When I travel for gigs or conventions, I try to save at least one day for myself so I can go out and explore. It’s thrilling for me to just pop around a corner onto a new street, to a place I’ve never been before.
For this assignment I want you to find a city close to you and go explore it. Photograph the city as you see it. Tell the story of the city you see. Try shooting the city in BW and see how the shapes of the buildings and the streets create their own images. Shoot at night with a tripod or with highspeed film and let the colors of a bustling square or intersection fill your lens. Cities don’t sleep—they just go into neon and tungsten lighting, trading off from the sun.
When exploring, it’s helpful to travel light, because you will likely be walking around a lot. You also don’t want to be a target for theft. I recommend taking just one body and a good lens or two. You don’t want to be burdened by the weight of a heavy camera setup. Bring a fast lens if you’re shooting at night, or carry a mini tripod. Try experimenting with slow shutter speeds.
When photographing people in the city, try not to attract a lot of attention. People can get cautious and angry. I like to walk fast, and if I see something I like, I shoot it and then keep moving.
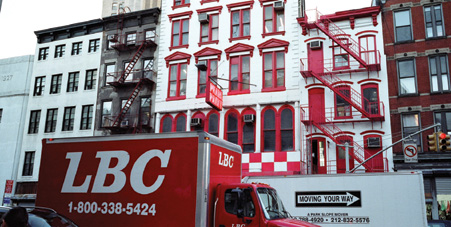
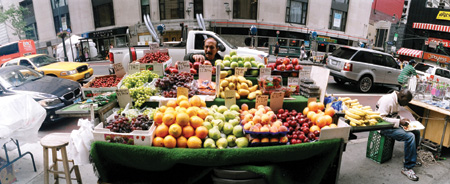
Images of New York City and Boston.

Cities: Part II
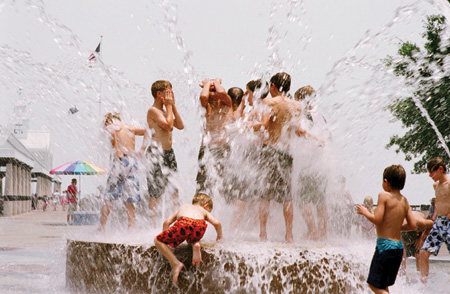
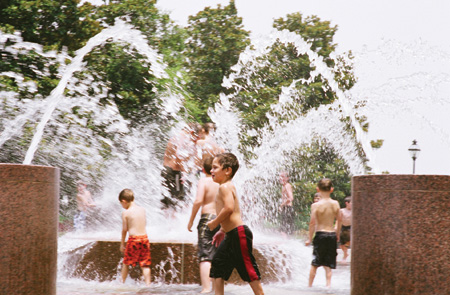
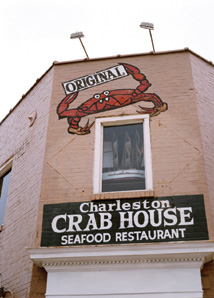
Kids playing in a fountain in Charleston, South Carolina.

Not every city is huge, like Boston or New York City. Many are more rural or smaller. Some are older and more charming, but regardless, every city has a story. If you don’t live near a large city, then go to the largest town or city near you to photograph. I promise you’ll be able to find subjects, objects, and scenes to photograph while you explore.
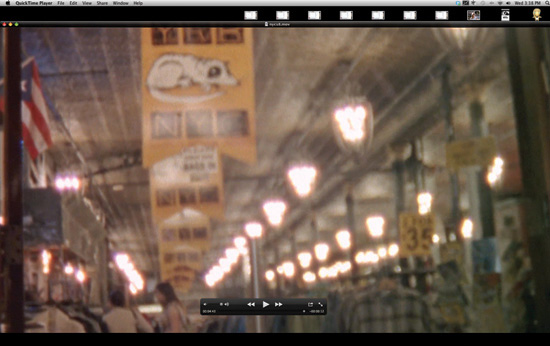
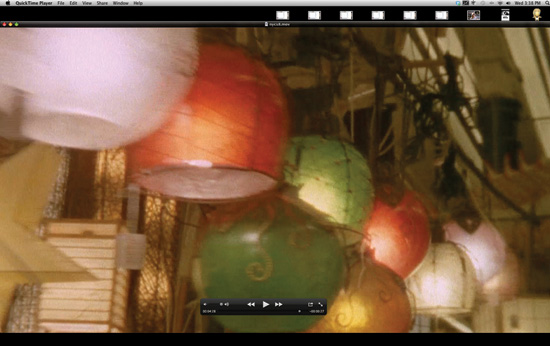
On a recent trip to Charleston, South Carolina, I walked around the downtown streets to the ocean and even stopped at a barbecue house. Everywhere I went, I took photos. While shooting in the city, I used the Sunny 16 rule and checked them with my camera’s meter. (For a discussion of Sunny 16 rules, see the next section.) It was midday, so I used 100-speed film and metered for the shadows. I just shot and shot.
Look for shapes, signs, color, and contrast that appeal to you. Try shooting the buildings with a telephoto lens (or one that isn’t a wide angle) to compress the buildings. Then try with a wide-angle lens so you can see the difference when you develop your pictures.
Shots from my walk around Charleston. I shot with my Pentax 645 loaded with Portra 160 and with my Nikon F5 with Reala 100.

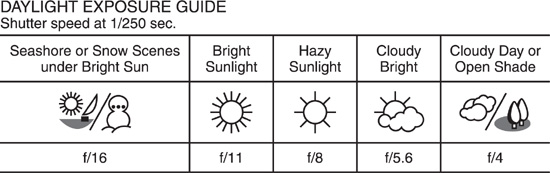
Sunny 16
For this assignment, I want you to shoot without a camera meter. Get a fully manual camera that has no meter or batteries and shoot a roll. The following information will teach you how to shoot without a camera meter.
I want you to be able to shoot without a light meter in your camera or a handheld meter in your pocket. Learning to set exposure based on just looking at the light where you’re shooting can save you time and create better photos for you. You can trick camera meters, but knowing ahead of time the general exposure for where you’re shooting can tell you how to compensate for your camera’s built-in meter.
The Sunny 16 rule is simple. Set your shutter speed closest to the ISO of your film that you have loaded. So, if you have 400-speed film, you would set your camera to 1/400 or 1/500—whichever setting your camera has.
Now, here’s what changes: your aperture. The shutter speed stays the same while you compensate for the light. Here are some guidelines:
◆ For bright, direct sunshine, use f/16 or f/22.
◆ For a partly sunny or a bright, overcast day, use f/11 or f/8.
◆ For the open-shade side of f/16 light, use f/8.
◆ For a cloudy day, use f/5.6.
◆ For dark shade, use f/4.
So now that you know the rules, get out there and shoot a roll to see how you do without a meter. Camera meters can be easily fooled, but once you teach your brain how to expose, you will know when to trust and when to ignore your camera’s meter.
Follow Sunny 16 rules.
Super 8mm
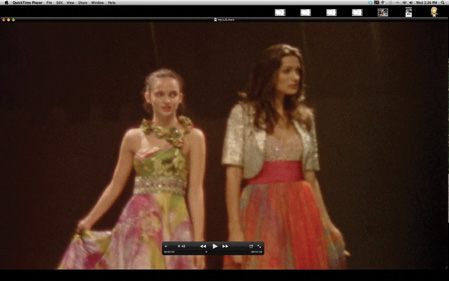
This assignment is meant to open your eyes to the larger world of film. Film is not just for stills; it’s for movies, too. When you go to the movies, there’s a good chance that what you’re watching was shot on film, not digital.
All the qualities that film yields for stills apply to movies, too: better highlight and shadow details, smoother skin tones and color renditions, and film-imperfection qualities.
For this assignment, you’ll need a super 8mm film camera. I recommend going to eBay and getting a cheap one. I have two great Canon cameras—the 310XL with an f/1.0 zoom lens and the 512XL with an f/1.4 zoom lens. These cameras are fully automatic; all you do is focus your lens and pull the trigger that starts the film moving at 18 fps (frames per second) and opens the shutter. The aperture is all automatic. You can get pro-level super 8mm cameras with full manual control, but for this assignment, you don’t need that.
Next you’ll need some film. Kodak has some amazing film available for super 8mm, from Vision 3 200T and 500T, to BW and 100D. I recommend getting some 200T, some Tri-X BW, and 500T for low-light filming. All you have to do is load the film into the camera, set the camera for daylight or tungsten shooting, and shoot. Because the films are tungsten-based (white balanced for incandescent light), when you shoot in daylight, the camera has an 85B filter that it will use to color-correct the blue daylight to the 3200K tungsten film. This is accomplished by a simple switch on the camera’s side. There is a picture of a sun and one of a light bulb. When you’re shooting inside with artificial light, you keep the switch on the light bulb, and the filter is off. If you go outside into the daylight, you set the switch to the sun, which will activate the 85B filter in the camera and correct for white balance.
A collection of super 8mm stills.
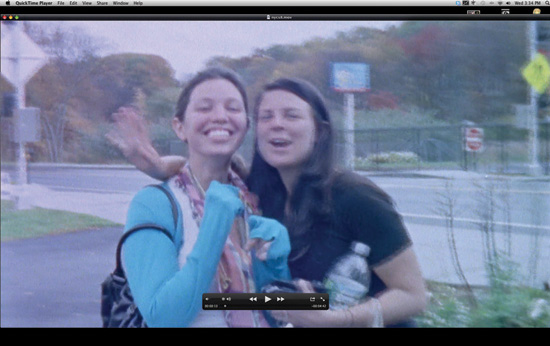
Now you just have to go out and shoot. Shooting super 8mm can be fun and challenging. Learning to shoot movies—even home movies—comes with a learning curve for still shooters who are used to recomposing and looking for a new shot every few seconds. With movies, you need to hold the camera steady and keep the shot going for some time. Panning back and forth, zooming, and changing the viewpoint all the time will make for a dizzying movie.
Shoot from your eye level. Shooting super 8mm is not like shooting a 35mm motion picture. It’s fast, grainy, and very personal. The small camera will allow you to get close to people and capture moments that would otherwise be disturbed by a larger camera setup. Above all, have fun! Super 8mm isn’t meant to be perfect; it’s meant to be fun and close to your heart.
After you’ve shot your film, send it to a movie lab near you and have it telecined (transferred frame by frame to video, QuickTime, and/or AVI) to HD. I use Cine Lab in Massachusetts. Pro8mm in California does a great job, too. You can also contact Kodak to find the closest lab to you.
After you have all your footage back in a .mov format, you can edit it on your computer using a simple program such as iMovie, or you can use pro software, such as Final Cut Pro or Adobe Premiere.
Post your finished film on YouTube or Vimeo. I personally use Vimeo because I like the quality and look of the site. When you’re making a film ready for the Web, use H.264 compression and use the highest bit rate possible to ensure the best HD file. You don’t want to lose quality due to file compression. So experiment and look at the upload limits for the site you’re going to use. I always try to stay above 15000 kilobits per second.
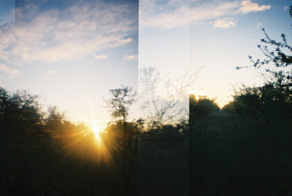
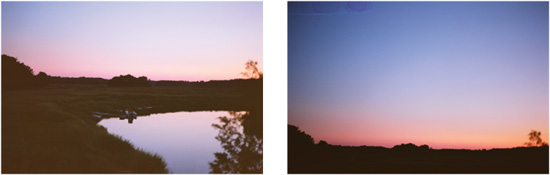
Time of Day
As the light changes from hour to hour, so does the way we see the world. Purple and blue dawn gives way to clear blue skies, which later yield red and orange sunsets. The color of the world around us is most magical in the early morning and in that last hour of light before night falls.
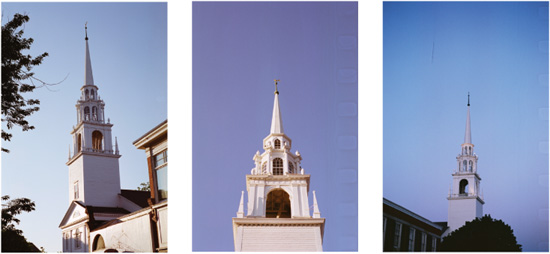
For this assignment, I want you to go out and shoot a location or a person at different times of the day with the same film, so that you can see how the color and direction of the sun’s light can affect your photos.
I photographed this church with Fuji 100-speed film in afternoon light, when the sun was still pretty high, and then again at sunset. Look at the difference in the contrast and color. The first shot features high contrast and a bold blue sky behind the church. The second image is flatter, warmer, and more romantic.
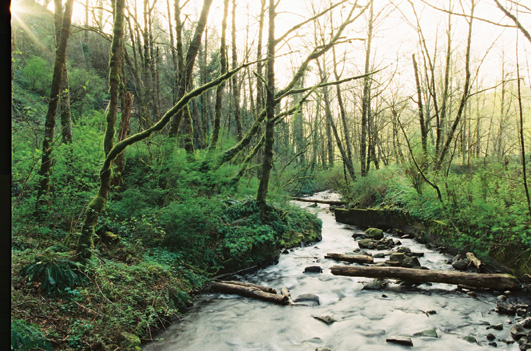
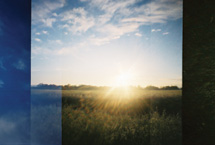
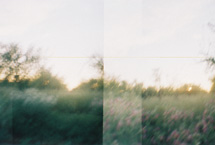
As I drove home from walking around a little coastal town, I saw a beautiful river. I pulled over, climbed up onto a guardrail, and started shooting. I knew the light was fading fast, but I wanted this shot. I bracketed my exposures and shot quickly. (I also shot quickly because the flies were eating me alive, so make sure you have proper bug spray if you want to shoot a marsh!)
Sunset at the marsh. Notice how the image is darker as the sun sets? Which one is your favorite?
Instant Photography
This is a fun assignment, but not everyone will be able to do it. For this assignment, you’ll need an instant camera, such as a Polaroid or a Fuji Instax, or a Polaroid back for your camera. You’ll also need instant film. It’s still around and pretty easy to get, but it’s not the cheapest stuff on earth.
If you have a Polaroid SX-70 or 600 series camera, you’ll need to get some Impossible film from the Impossible Project. Their film is great but not yet perfected. Each of their films is a little quirky, so make sure you read about them on the Impossible Project site so you can use them as they should be.
If you have a Polaroid land camera (land cameras were popular Polaroid cameras made for decades—they are easily found on eBay or at camera shows) or a film-pack back for your medium format camera, then you can shoot awesome sheet film made by Fuji. They offer color and BW in 3000 ISO and 100 color. This film is awesome because not only do you get the instant image, but you also get a negative that you can dry and scan to make more prints from later. With this film, you take a photo, pull out the film, and then wait the designated time for the image to develop. Then you peel apart the negative from the photo, and presto—instant photo! The time you have to wait for the image to develop is determined by the film you are using as well as the temperature.
Your other option is a new Fuji Instax camera. These cameras come in many shapes and sizes and produce both large instant prints and little credit card–sized prints. They are point-and-shoot, you don’t have to do any work with the film other than loading it. The camera and film do everything, so you don’t have to worry about exposing the film to light when it comes out or having to count the seconds until you can peel apart the image and see a photo. It’s instant.
Various instant-film images I have shot and scanned.
With that, I want you to go out there and take instant photos! Share them with your friends or the people you photograph. See how cool it is to actually have an instant print that you can show people. Trust me—you’re gonna like it!
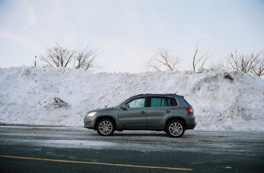
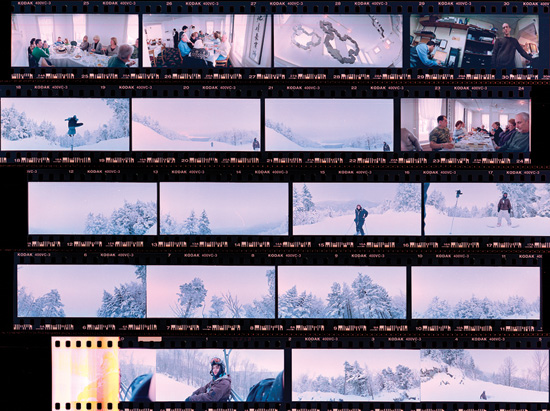
A Snowy Day
If you’re like me, you don’t live in the sunshine land, where it’s blue skies and warm weather year round. Here in Boston, we have winter for almost half the year and snow from November to March. Lots and lots of snow—not fun. The bright world full of color turns white. Gray clouds cover the sky, and most hope is lost—okay, it’s not that bad. The snow can be very beautiful and fun. It transforms landscapes into magical and awesome places.
Even if you live in sunny California, though, you may have access to snow. And if you do, this is a good lesson for you. Shooting a snow-covered landscape can be tricky at first. You need to watch out for glare from the sun, and you must make sure your exposure is correct. If you’re using your camera’s internal meter, it will want to make the white snow gray, so you need to overexpose or take a handheld reading with a light meter to get the correct exposure. A handheld meter does not take a reflective reading, so the snow won’t affect it. I just hold it up in the direction I want to shoot and take a reading or two.
Try to shoot just after it snows, when the trees are still covered in fresh powder and before the sun has had a chance to come out and melt it.
My car surrounded by snow mounds from winter storms. I was walking back to my car and realized I had to get a shot of the size of these piles. I had my Canonet QL17 with me, so I fired off a few frames and then got back to my heated seats.
These images are from a day spent skiing in New Hampshire. I took my Horizon Perfekt with me to try to get some really cool vista shots from the top of the mountain. When I saw the snow-covered trees, I was in photo heaven and just wished it wasn’t four degrees out and that I had more gear with me.
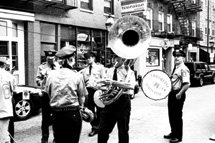
Festivals
All around the world, there are cultural and national festivals. I am an Italian living in Boston—a first-generation American—and we hold a giant feast in Boston’s North End. These feasts are celebrations of religion, culture, food, music, and love. People march around with bands, carrying statues of patron saints and collecting donations. It’s a very emotional event when you see your entire family there—grandparents to grandchildren, who have all taken part in the feast throughout the years, from the old country to the new.
For this assignment, I want you to capture a cultural or national event. Show the people and the festivities. This is photojournalism, so capture the event and tell a story. You will have to think and act quickly. I usually don’t want people to know I’m photographing them if I’m trying to be photojournalistic. Generally speaking, you don’t need permission to take photos in pubic areas and publish them, but if you’re going to take a portrait of someone and sell it or use it commercially, then you do need permission from the person.
The feast of the Madonna Della Cava (the Madonna of the Cave), all taken with HP5 Plus 400 pushed to 1600 with my Canonet QL17.

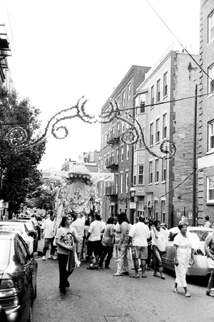
For these photos, I used my Canonet QL17 loaded with BW 1600 film. I wanted to be invisible—well, I wanted the camera to be invisible. My family has been members of the Madonna Della Cava society for generations, so I was able to get close to the action. Even so, I didn’t want to be like a tourist with a big SLR, snapping photos of this sacred event. I wanted to be part of it and record it. My little Canonet let me do that. It’s small, and no one even knew I was shooting.
I recommend using a small 35mm camera for this assignment. A rangefinder would be best, but an SLR will work too, as long as you’re quiet.
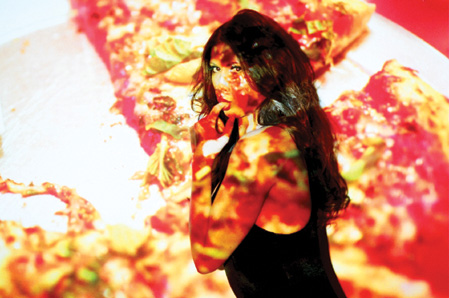
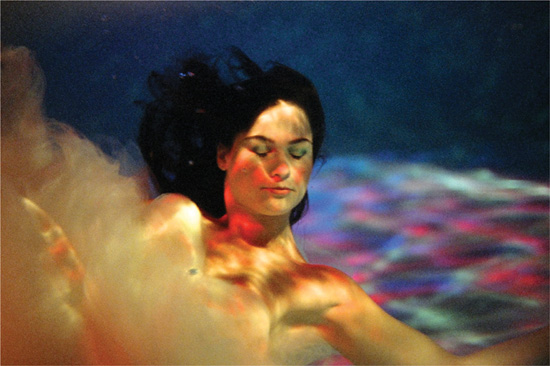
Projection Shoot
For this shoot, you will need a model and a projector. This is kind of like taking a double exposure, but captured at the same time. You will be photographing two images overlapping at the same time. It’s a cool way to get something very different and very sexy at the same time.
All you need to do is project an image of some previous photograph onto a wall and then have your model stand in the path of the projection. You will need to do this in a fairly dark room so that the projector is your main light source. You will get a shadow the farther she is from the wall, and the image will be wrapped around her. If she leans on the wall, the image will be in perfect focus, wrapped onto her with no shadow behind her.
Play with different images and poses. Use a light meter to get a good reading. Expose for the projected image on some frames and for the model on others.
Shot with Fujicolor Press 800. I rated the film at 500 and developed normally. The film was actually about a year expired, but I was very happy with the results.