
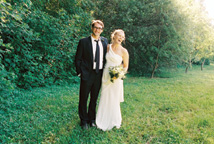
10 Weddings on Film
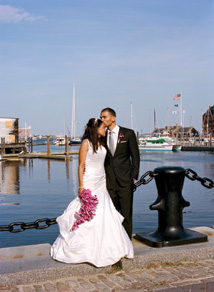
Weddings: They are my life and passion. Photographing the most important day in a couple’s life is no easy task, and it’s not for the faint-hearted. Weddings are exciting—full of little and big moments and pure, raw emotion. My goal is to capture that emotion and record the events of the day. I choose to do this on film.
A Little Background
My first camera was a film camera. I learned on film, ate it up, and fell in love with it. This was way before digital was in any way affordable. I got into weddings simply by being asked to shoot them. One day in high school, I was called to the vice-principal’s office. I thought I was going to get detention or something, but instead he asked whether I would shoot his son’s wedding. He had seen my work in the local newspapers, as well as what I was doing in photography club, and he wanted me to photograph his son’s big day. So I said I would.
That was my first wedding. I shot it all on film with a Canon Elan II and a Rebel G, using my Vivitar flash. I actually don’t remember a lot from the day, but I do know they loved the photos. After that, I shot one more wedding on film before making the jump to digital (along with everyone at the newspaper office). I still shot some film, but not a lot—mostly personal projects. I didn’t start shooting weddings full time until 2006, and I was all digital at that point.
I shot a lot of weddings, and all the time I was trying to make my photos look like film in Photoshop. Why didn’t I just take the blue pill and stay with film? I guess I was caught up in the digital hoopla, like most photographers, and was listening to all the sales reps instead of my heart.
Fast-forward to 2009, when Kodak launched some new films—Ektar 100, soon to be followed by new Portra films. I picked up a Lomo camera and started shooting rolls of color and black-and-white film at my weddings. Then I got an XPan and started shooting more film. Soon I ordered a Canon 1N and a Canon 1V and was shooting all film. My digital camera was just sitting in my bag. So I sold it. I sold all my digital gear and went 100 percent film by 2010. It was quite freeing.
No longer was I stuck looking at my LCD screen after every photo or forced to Photoshop the images to make them pretty, film-like, or even black and white. I do everything in the camera. If I want black and white, I shoot the BW film I want. If I want saturated color, I shoot Ektar. If I want great latitude indoors, I shoot Portra 400 or Fuji Superia 400. There is a film for everything.
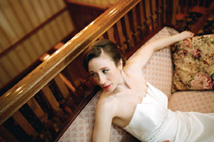
And skin tones are awesome. I don’t have to smooth my brides’ faces with Photoshop brushes anymore. I make them look pretty in camera. Film just gives skin a smooth look, and if I overexpose a little, I can burn out any harshness on a person’s skin and get a pastel look.
NOFEAR
Always shoot with more than one body if it’s a major gig. A lab can ruin a roll of film. It’s very unlikely, but I always take a few backup shots on a second body and roll of film, just in case.
With that said, I don’t recommend going out and shooting a wedding on film unless you have a good knowledge of what you’re doing. You need to know your gear, its limits, and what film you’ll be using. There are no second chances at a wedding. Once a moment is over, it’s over. Shooting weddings on film is easier than shooting digital, yes—if you know what you’re doing.
“I shot a lot of weddings, and all the time I was trying to make my photos look like film in Photoshop.”
How I Shoot a Wedding on Film
Here’s what I bring to a wedding, plus or minus some gear depending on the wedding location and lighting scenario:
“There are no second chances at a wedding.”
◆ Two Nikon F5s.
◆ A Nikon F3 with a bulk 250 back (I use this only when I need to shoot high-speed movie film)
◆ An XPan
◆ A Horizon Perfekt Lomo camera
◆ A Canonet QL17
◆ Three Nikon Speedlights
◆ PocketWizards
◆ An 85mm 1.4 D lens
◆ A 28mm 1.8 Sigma D lens
◆ A 50mm 1.8 D lens
◆ A Pentax 645 with 220 and 120 backs
◆ A 75mm f/2.8 SMC lens
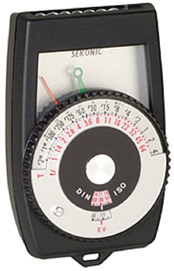
◆ A Sekonic light meter
◆ Various video lights and colored gels
I typically shoot with one F5 on each shoulder—one fitted with the 85mm lens and the other with the 28mm lens. I sometimes load each with a different film, but sometimes I use the same film to make things easier. In my pockets I keep film, a light meter, and a lens cloth. Sometimes I keep a third fun camera around my neck, such as the XPan or Lomo Horizon.
For the most part, I use my Sekonic light meter to get the lighting and exposures done for a room, but I rely on the great spot- and matrix-metering modes in the F5s once I know how they are reading the light of the room based on the Sekonic readings. Or sometimes when I can’t pre-meter a room, I let the F5 do all the metering for me, and I spot-meter for the shadows with color negative film and for the highlights with BW film. I do use matrix metering and matrix fill flash as well when the action calls for it.
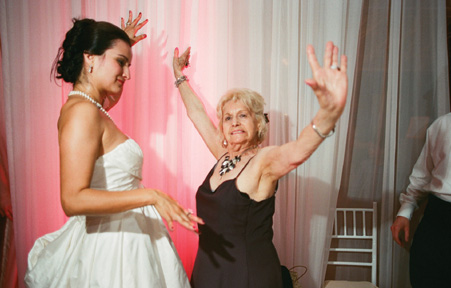
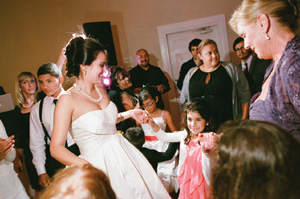
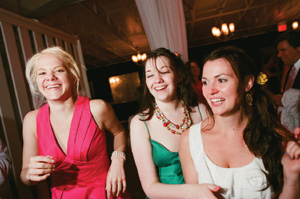
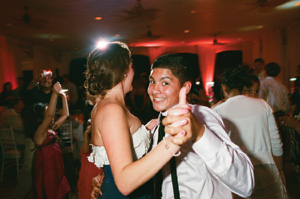
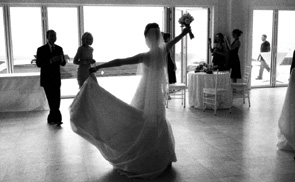
For flash at a wedding, I use manual metering and manual flash output. This might seem difficult, but it’s not. Just try it first. I set the power up and down on my flash, telling it what ISO I am shooting and what f-stop I’ve set, and the flash reads out the distance for the given exposure. I usually check this with my Sekonic light meter. In general, my SB80DX flash set to 1/64 power with Fuji 400 film loaded lets me shoot my 28mm lens at f/2 with people three to five feet from me. This is how I shoot dancing at a wedding.

When people are moving toward me or for fast-action shots, I set the flash to TTL mode and dial in the power compensation setting—usually – 1 for direct and +1 for bounced. The great thing with flash on film is that even if you pump out too much power, you’ll still get a great image. Overexposing film is fine—you won’t lose anything. This is in contrast to digital, where flash has to be perfect or you’ll clip out or lose the highlights.
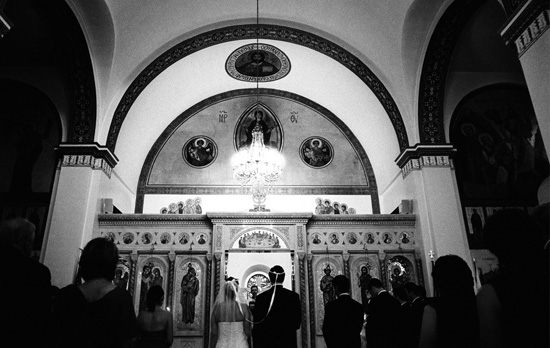
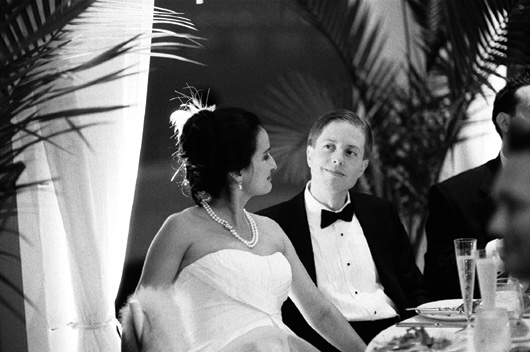
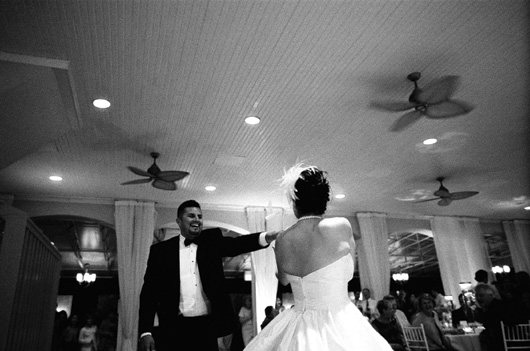
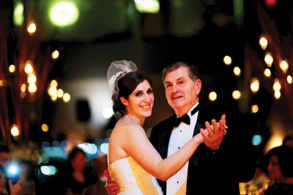
I love to shoot the reception in black and white. I just love the way it makes a wedding look. Most of my weddings are in older, relatively dark Boston hotels, so shooting BW works well in that it creates a timeless look. BW also eliminates the need to balance for the wacky up-lighting that is all the rage right now. At many weddings, the room is lit in all purples; BW makes people look normal, not like Smurfs! I like to shoot mostly HP5 Plus or Tri-X film at 1600 for the reception, with a few rolls of Delta 3200 for some mood shots. With BW, be sure to spot meter and expose correctly, because it has slightly less tolerance than color negatives.
“The great thing with flash on film is that even if you pump out too much power, you’ll still get a great image.”
I like to shoot receptions in black and white.
For portraits, I generally like to pull out my Pentax 645 and get really detailed and amazing shots. The 645 format allows me to get larger images with a different perspective than 35mm. Just holding the 645 camera and viewing through it is a different ballgame than using the 35mm. You will start to see things differently and hence shoot in a different style. I like to open my lens, shoot really wide open, and get shots that are all about the couple. That’s what I look for when shooting 645—I look for the real people.
For general coverage and action shots, I use my F5 with autofocus. Trying to keep up with all the fast movements at a wedding in manual focus or 645 doesn’t work for me. My personal style doesn’t allow for it, but I do recommend trying it—perhaps it will be a good fit for you. You can use 645 or 6×6 to photograph receptions and wedding action; you just need practice. I happen to like autofocus and all the high-tech features of my F5 too much to shoot medium format all day. I can also load 35mm faster, and I have more 35mm gear than 645 gear, so it works for me. But how you want to shoot is up to you.
Portrait shots taken with my 645.
I use 35mm for general coverage and action shots.
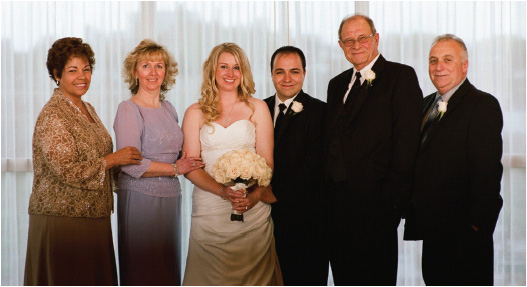
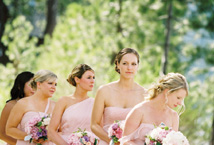
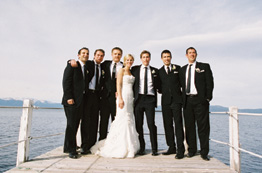
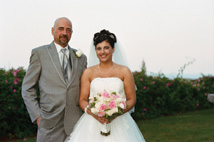
Family group shots are something that I find very important. Most families don’t get together very often, so getting good group shots to create lasting memories is something I take pride in. But not every venue or wedding has a glorious view or grassy fields to use as a backdrop. Sometimes I just get a room with a window or curtain, and I have to make that work. For this, I try to use a 50mm or an 85mm lens for smaller groups and the 28mm lens for larger groups.
I like to load 100 or 160 film and then add flash if needed to light the group. I carry my studio strobes to many weddings, particularly when I know there will be a lot of large group shots that need to be lit.
I try to shoot at least f/2.8. I don’t want people to be blurry, but sometimes I have to shoot wide open, so I try to get everyone on the same focal plane as much as possible. If I’m shooting outdoors, it’s easy, but when I’m in a dark hotel, I sometimes need to rearrange a room to get the angles I want. By the way, don’t be afraid to move things around if the light is better in one area than another. People won’t remember you making a mess, but they will remember if you don’t get them a shot with their grandmother. The light meter comes in very handy for group shots—meter for the shadows and shoot.
Family group shots—some done in hotel lobbies and some done outdoors, but all worthy of being printed and placed on a desk or wall.
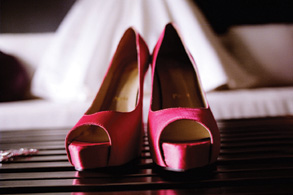
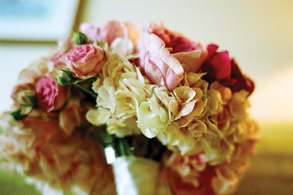
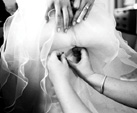
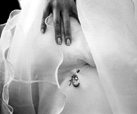
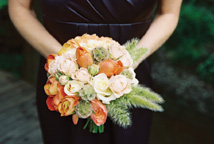
Shooting the details of a wedding is pretty simple, too. I usually load 400-speed Superia film in the camera, switch to center-weighted metering, and shoot. I like to use my 28mm lens because it has a macro setting, so I can take really detailed shots. I also like to use my 85mm or 200mm to capture images that show the room in depth and compress it. A wide-angle table shot is not as nice to me as a shot of the tables taken from farther away with the 85mm or 200mm.
You have a lot of flexibility with how you can take detail shots.
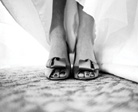


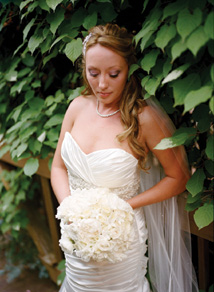
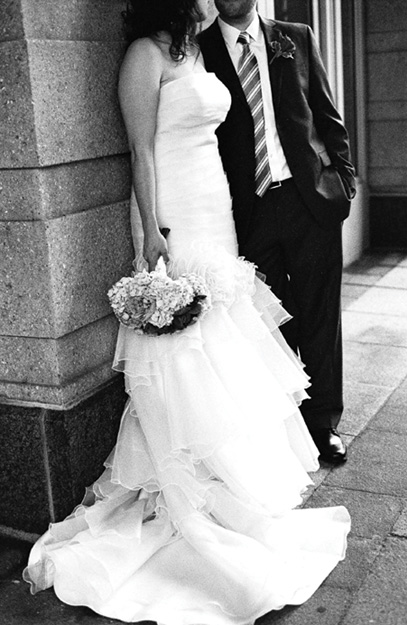
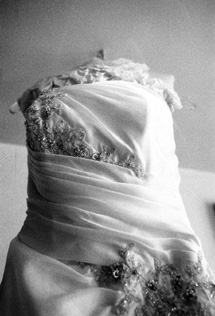
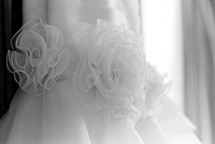
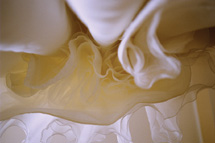
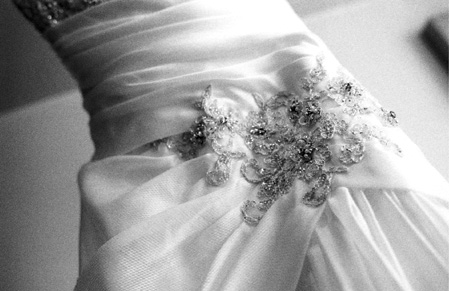
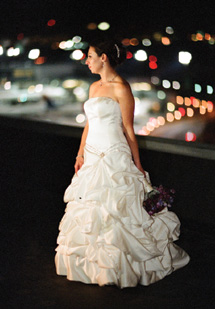
“Be sure to photograph the dress both in detail and in full length.”
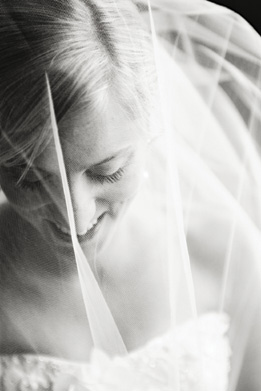
When I shoot a bride’s dress—in color or BW—I use center-weighted metering and then overexpose one stop. If I don’t overexpose one stop, the camera will try to make the dress gray in the image, so I need to compensate. Shooting the dress can be fun, because most dresses have unique and well-crafted details. Be sure to photograph the dress both in detail and in full length.
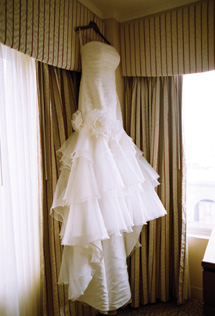
A bride’s dress is extremely important to the story of her wedding day—don’t forget to shoot it. I usually move the dress to where I think it will look best if it’s not already hanging. Sometimes I find the dress hanging in a closet in the bag it came in. In these cases, I ask permission before moving it. Dresses can cost thousands of dollars, so you should always take care and precaution.
I talk a lot about taking meter readings, and I want to be sure you know how I do this. How you use your light meter and how you hold it can drastically affect your exposure readouts. I hold the meter in hand and set it for the ISO I want to meter. For example, if I’m shooting Portra 400 outside in shade or open light, I like to shoot it at 200, so I set the light meter at 200. Next, I make sure the bulb is full out. I then stand in the direction I’m shooting, hold it about 45 degrees down, and take a reading. I take three or four readings and then get the average exposure I want to use. If I’m metering for a shaft of light or direct sunlight, then I hold the meter up and let the light hit it directly. I don’t want people in my shots to get raccoon eyes, so I meter for the shadow by holding the meter slightly down. This allows me to overexpose a little and get great shadow detail.
The best thing to do is experiment. Get the film you want to use, get out your light meter, and see how it reacts to the different ways you meter.
A light meter.
Ingrid’s Turn: How I Shoot a Wedding on Film
Joe works a little differently from me at a wedding. Here’s my bag of goodies:
◇ Four Canon EOS-3 bodies
◇ A Diana Mini
◇ Two Canon flashes
◇ Little softbox for flash
◇ Flash bracket
◇ A 17–35mm EF Canon lens
◇ A 100mm macro Canon lens
◇ A 35–70mm EF Canon lens
◇ A 70–200mm Canon EF lens with IS
◇ A Sekonic 508 light meter
◇ Extra batteries
◇ A tripod
◇ Mints
◇ Maybe my Mamiya RZ if the client requests it and pays extra
◇ Maybe my Fuji Instax if the client requests it and pays extra
All my camera gear fits into one rolling bag. I keep a little black bag on me with film and an extra 2CR5 battery.
I shoot with one camera on each arm. One has black-and-white film, and the other has color. I normally only shoot Portra 400 or Fuji NPH 400 along with Kodak BW400CN. I rate the film the same all day. I never have to think about changing exposure; I keep my film rated at about 200 all day and into the evening. When I need more light, I use a tripod and a slower shutter speed.
I use flash only when I have to: in dark churches during the processional and recessional and during the reception for dancing, cake, and toasts if there isn’t enough available light. I only use on-camera flash. One light, and I rarely bounce. I like the paparazzi look of pop flash and think it creates a nice feel for nighttime party shots. I tend to shoot more black-and-white film with my flash and leave my color film for ambient tripod scenic shots of the reception.
I like to keep my equipment and process as simple as possible on the wedding day. That way, I can just let my intuitive side take over and be the watcher and journalist, which allows me to create the images I like for my clients. I rarely use medium format for weddings because it slows me down too much. I love the way it looks, but it doesn’t fit well with my approach.
As a wedding photographer, you need to have a wide range of photographic abilities. You need to understand portraiture, editorial, and journalistic approaches, as well as have a talent for food, still lifes, and fast motion. Light changes constantly at a wedding, which is one reason why film’s wide latitude is extra security, in case you don’t expose perfectly. I’m fairly quick at switching the settings on my camera when a bride walks from shade into full sun, but there are times when it doesn’t happen. Color negative film seems to make that four-stop difference okay, at least when you’re overexposing.

Lomo at a Wedding
In addition to getting all the normal coverage of a wedding, I like to put down the F5 and Pentax and shoot with my Lomo or Canonet to get more vintage, less perfect shots of the wedding. Using a less-than-stellar lens and camera can yield images that contain lots of power and emotion. Shots don’t need to be perfect all the time. I sometimes prefer the less sharp, slightly out-of-focus shots from my Canonet over my F5 shots. Giving a unique look to your work is very important, so don’t be afraid to try new things. I stress the word “try,” because you should always try things before putting them into play at a wedding. Get the kinks out first.
My Lomo camera captures great vista shots and creates a cool curvature all its own. Know your gear—learn it inside and out, and with enough practice, the tech part of using the gear will become second nature so that all you’ll be concerned with is looking for the next moment or shot.
“Shots don’t need to be perfect all the time.”
Some Canonet QL17 and Horizon Perfekt shots at weddings. These shots aren’t perfect, but I love them.
You don’t have to shoot with a state-of-the-art camera at a wedding. Sometimes the look you get from a toy or an older, not-as-sharp camera can be just as good. You don’t always have to shoot the best film, either. Film is divided into pro and consumer types, but that doesn’t mean you have to shoot all pro film at a wedding. I love the look I get from some consumer films, and sometimes shooting pro film won’t get me the look I want.
I also like to cross-process film and shoot it in a Holga or one of my Lomo cameras, such as my Horizon, and get totally wacky and different views of what I’m photographing. No one else with a digital camera will get the same look as I will if I shoot some expired slide film and develop it as C41. I’ll have a really surreal and unique look that no one else will capture. Just try it.
NOFEAR
Try expired film. You may be able to get good deals on it. Just keep it refrigerated and try it out on an unpaid gig before you use it for something important.
I like to get some cross-processed shots, too, for a unique look.
For the record, I wouldn’t shoot an entire wedding this way, but I love to shoot a few rolls here and there to get something different—something that will stand out and make people wonder how I shot it. Of course, there are plenty of Photoshop filters that can give you the same look, but I’d rather just do it in camera.
Expired Film
Many camera stores will sell expired film at discount rate. This film is usually a few months or a few years old. Most film is fine for a few years after it has expired if it was well cared for—that is, not left in the heat or left to rot in high humidity. If you buy some, just shoot a test roll or two and see how it looks. You may need to overexpose it to compensate for the film’s age, but other than that, it should be fine.
Video Light at a Wedding
I love using video lights at a wedding to add flavor or just to add light to a scene. Many weddings take place at night, and sometimes ISO 3200 isn’t enough. For locations such as these, I pull out three video lights that I have with me at all events. I have two types: tungsten and LED daylight.
I use the tungsten Sunpak lights when I’m shooting BW film or tungsten movie film, or sometimes just to warm up a cool colored scene. These lights are great, and they spotlight perfectly.
Images shot using my Sunpak lights.
My LED lights are my new favorites. Daylight-balanced and running off of AAA batteries, these lights are 45 watts each and can be attached to other LEDs to make a larger panel light. I love to use these diffused—by that I mean that I take a napkin or paper towel and tape it over the light to diffuse it.
Both of these lights can make the difference between me nailing a shot or missing it. For dancing shots, I have my assistant hold the light up and spotlight the dancers. This way, I have light to photograph and focus with. Without the lights, it would just be dark, whether I was using digital or film.
Video lights also help illuminate details at a wedding. I have used them to light the rings, the cake, table settings, and even the dress. Sometimes you just need more light, and video lights bring that for you. They also allow you to mold the light how you want it, because you can see its look on a subject in real time—unlike with flash, with which you won’t see the lighting until you get your film back from the lab.
“Both of these lights can make the difference between me nailing a shot or missing it.”
Images shot with LED lights.
Flash
Just because I use video lights, that doesn’t mean I don’t use flash. I have a love/hate relationship with flash. I love that it can light a scene for me, bring light to dark, and help fill in shadows and light group shots. I know it’s a great tool, but I try to shoot without it as much as possible. I like dark, moody images, and flash can indeed light a photo, but it can also flatten it and make it boring. Flash can also let the viewer of the image become more aware of the camera in the photo. That said, I do use flash when I have to.
The simplest reason to use flash is when you need to add some clean fill light to a portrait. If I’m doing portraits in really dappled or shady lighting, and I want to get rid of under-eye shadows or just give more contrast to a dull scene, then I put on my flash—TTL at – 1/3 stop—and shoot based on my handheld meter’s exposure for the shadow areas on the person’s face.
Portraits taken with direct flash.
Direct TTL flash on subjects moving toward the camera.
“I have a love/hate relationship with flash.”
I also use flash on camera with the head 45 degrees over my shoulder and the power set to a manual setting based on the ceiling height, film speed, and aperture. I know that at 1600 speed, I can bounce my flash straight over my head with a Sto-Fen on it to bounce some light forward and be able to shoot at 1/3 at f/1.4 and capture a well-lit person two to three feet from me.
TTL comes in very handy when I’m shooting in a dark location and when the subjects are moving toward me. For example, when a bride and groom are being welcomed into a reception or are exiting a large church, I usually place the flash on TTL and shoot, knowing the D lens will transmit the distance of the bride and groom to the flash to obtain good exposure. I wouldn’t have the time to calculate or to keep changing settings when action is happening like that, and TTL is my only and best option.
Note: Always test your flash with your gear before using it at a real event or shoot. Try it with all your gear to find out whether there are any compatibility issues, a sync problem, or a general error. Watch out for shutter sync problems and rear curtain sync issues.
Sync issues. I got these on half a roll of film when I decided to use flash off camera with PocketWizards and not my normal off-camera shoe cord. My F5 was set to rear curtain sync, so the signal to fire came too late, and the shutter didn’t allow the flash to expose the entire image, hence the black or semi-dark areas on the bottom.
Traveling with Film Gear
As a film shooter, you need to be aware of how to travel with film and its associated gear. Never, ever check your film with your luggage. It will be ruined. No question. Pack all your gear into a carry-on bag. I use a bag called “airport security”; it’s a single bag that fits all major airlines’ carry-on size requirements, from little commuter shuttles to 747s.
I take two 35mm bodies, three lenses, and my flashes, as well as one Lomo camera and my Pentax 645. I pack all my film into a Ziploc bag. At the TSA checkpoint, I have all my film hand-checked. I don’t let any of it get X-rayed. Supposedly films lower then ISO 800 will be fine, but I don’t care—I don’t want any of my film to get hit with radiation. This means I have to get to the airport with a little extra time so that TSA personnel can check my film. I then stow it back in my camera bag and load it in the overhead compartment on the plane when I board.
When I fly on planes that can’t fit my camera bag as a carry on, I let them stow my gear at the gate, which means I pick it up at the gate and not at the baggage carousel. And I take the Ziploc bag with the film in it on board with me. I never let the film leave my side.
My camera bag and gear.
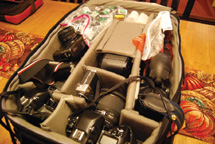
“Never, ever check your film with your luggage.”
These bags will keep your film dry when you travel to different climates. Make sure to let your bagged film rolls get to the ambient area temperature before you open them or take out the film; otherwise, condensation could form and ruin your shots.
Traveling to foreign countries is different. I’ve traveled to Jamaica, Mexico, and Italy and have been able to get my film hand-checked, but on my last trip to Mexico, the security personnel would only hand-check some of my film—the rest had to go through the scanner. Everything turned out okay, but I made sure all the film above 1600 was hand-checked. Only the 400 and below film went through the scanner.
When traveling abroad, be sure you know the limits of what you can bring in for gear, or you may be fined or forced to have your gear held. In Mexico, I was allowed to bring two camera bodies, so that’s what I did. It’s no fun to get somewhere for a gig and then have all your gear taken. Trust me—I’ve heard plenty of horror stories.
Above all, be careful when traveling with your gear. There are thieves everywhere who would love to take your camera.
Staying Organized While Shooting
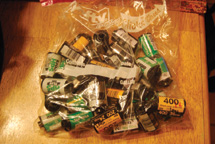
At a wedding, I shoot many films and treat them all differently. At any point during the wedding, I may have five to eight rolls of film in my pocket, some shot and some unshot. Some I’m pushing, others I’m cross-processing, and some just need to be processed via ECN2 process instead of the normal C41 color process. With all of this going on, it would be a total nightmare if I didn’t keep track of what was what.
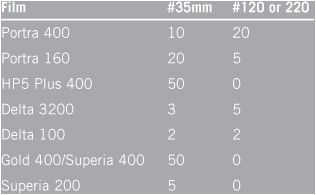
I use two tools to keep track of everything: a Sharpie marker and a Ziploc bag. As I shoot the rolls, I mark them with any special instructions—push/pull/cross/ECN2—and then toss them into a Ziploc. After the wedding, I sort everything and make a film sheet (see Table 9.1) listing what films are in the bag, how they were shot, and what I want the lab to do to them. I toss the list in the bag along with the film.
Table 9.1 Film Chart
Mark your film as you shoot it (or mark it before you shoot it) and then sort it after the wedding. Try to keep everything together, and you won’t lose anything. Very little is scarier than trying to sleep after a wedding and wondering whether you lost a roll.