
9 Ingrid’s Turn: Prints
Ah, prints. Do we really even have a photograph without a print? Some may argue no. The printing process is the final step in creating a photograph, and along with the variables of exposure and development in a negative, you have a similar set of rules in the printer’s darkroom. Printing is just as integral a part of photography as taking images. You have to understand basic concepts such as exposing the paper correctly and then developing the latent image for the correct amount of time. The printing process can enhance or hinder the final outcome of your vision. If you choose to do your own printing, you will have the most control as you complete the steps it takes to make a print. Some people entrust the printing to a lab instead. Either way, in the next few pages you will discover some of your many options. Your choices are what make the art. The final step is the creation of a tangible work: a photo.
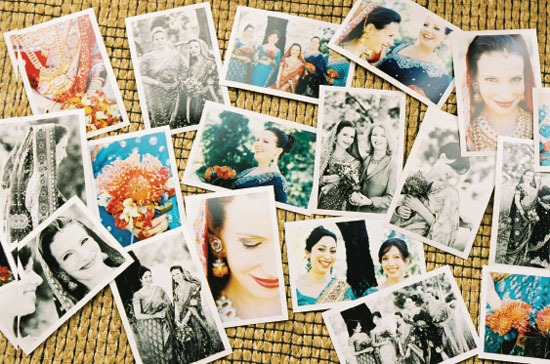
I find that the experience of looking at an image on a screen is different from looking at it on a wall or in someone’s hand. I like things tactile and concrete, so a print feels more real to me. Some of my favorite childhood memories are of looking through old family photo albums of birthdays, long-past vacations, and deceased grandparents. When the analog camera was the norm for an American family, rolls of film were dropped off at photo-development places, and happy customers would exit with envelopes of 36 glossy images. The images weren’t always in focus, they weren’t always exposed right, and they weren’t perfect, but they were a reflection of the time. They ended up in shoeboxes, on refrigerator doors, and in our tangible world.
The problem I have with digital is that many images aren’t getting printed. Whole histories are being stored on digital drives (which aren’t always backed up). The images that are printed (those lucky few) are typically the perfect ones, where everyone is pretty and pressed and smiling. Where are the outtake photos that we all know and love?!
I was at a friend’s house the other day, and she had a frame with a running slideshow of images, one after the other. For some reason, the automatic three seconds for which I got to look at each image bothered me. I associated the moving slideshow with the flicker of a TV changing channels. There was no way to slow down, to pause and reflect, or to hold or relive. It was almost as if the past memory was somehow flipped into the current rush of daily life. Instead of bringing me back to a time and place, the sequential motion tricked me into the present. My friend loves the fact that this device takes up little room and stores thousands of images—and I get that. We live in a modern world. My analog heart just doesn’t feel it in quite the same way. I feel that photography is the art and science of stopping time, and I think holding a static print reinforces that singular moment.
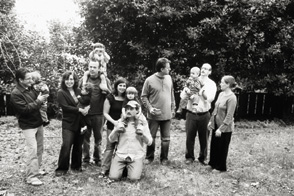
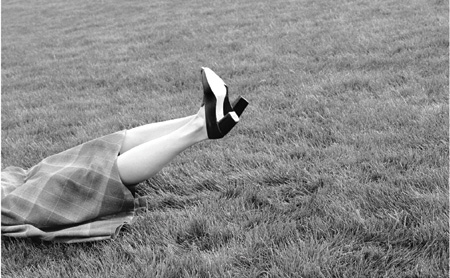
This image isn’t perfect by any means, but it captures a very real snapshot in time!
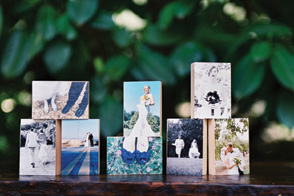
As a wedding shooter, I have a lab do most of my printing for me. Most of my prints are done from film scans now, as opposed to the traditional style C prints, or wet prints, that I would create when doing my own printing. Prints are easy and fairly cheap to make through a professional or consumer lab. You have a large selection of surfaces to choose from, including matte, glossy, metallic, canvas, watercolor, and rag. I have even made prints and mounted them to wood.
Prints mounted to wooden blocks.
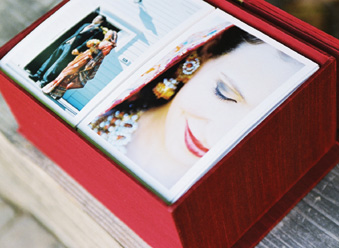
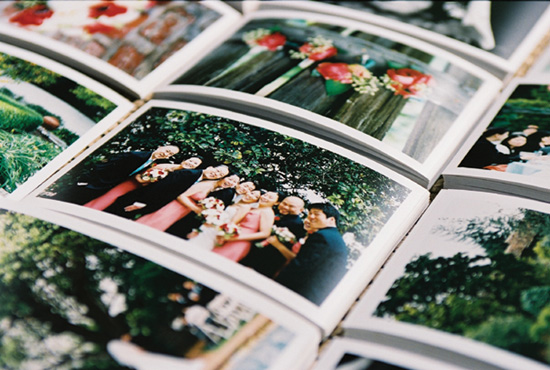
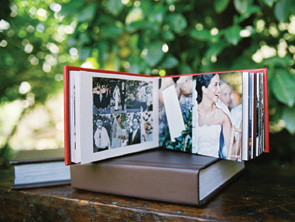
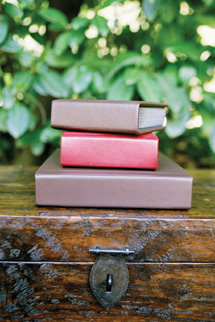
You can have your images made into albums or matted for framing. However you print and make the image into a tactile thing, that is when it truly becomes a photograph.
Albums and matted prints.
The traditional printing process itself is not much different from the exposure and development of the negative. In the technical sense, you have light-sensitive paper, exposed to light through an enlarger and then developed in a chemical process. Each step affects the final result, just as it does with a negative. The labs use machines that expose traditional photographic paper using lasers and then run it through a modified RA-4 developer. Giclée-style prints are done with archival-quality inks sprayed onto paper, with no developer and no exposing with light.
Different Common Print Types
There are a number of different common print types.
◆ Fiber-based B&W prints. These silver-based paper prints come in many textures and tones. Used in gallery exhibits and known for their archival quality, FB prints are considered among the highest-quality prints you can make. They cannot be run though a machine like their less costly RC cousins. Fiber prints need to be “wet” printed in developing trays. B&W chemicals are needed to bring the image to life. Many fine artists who like to tint, tone, or hand-color their images use fiber-based prints.
◆ Platinum print. This print type differs from a traditional silver-based print because instead of the metal being mixed into a gelatin, the platinum lies on top of the paper surface. This results in a matte finish with unparalleled tonal range.
◆ RC B&W print. RC is short for resin-coated. This is also a silver-based print, but with more of a plastic feel. These papers are more affordable and can be run through B&W printing machines. The glossy option on an RC print is very glossy.
◆ Traditional C print. A traditional C print is made using a color enlarger and a negative, which is then run through chromogenic materials and process. The dye layers (cyan, magenta, and yellow) go through a chemical reaction that creates the full-color image.
◆ Digital version C print. This is the same as a traditional C print in the process, but the paper is exposed with an LED. A digital scan is done from the film negative, bringing the hybrid workflow into play. These prints are also known as LightJet prints. Both paper types are silver halide–based and the silver reacting with the dye layers in chemistry results in the color image.
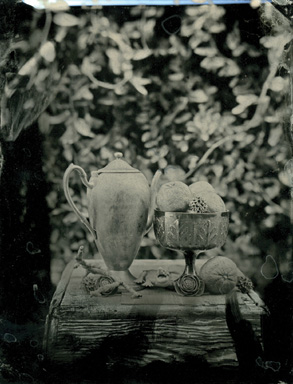
Still Life with Toy Alligator. 2011.
◆ Giclée print. This type of print is made using an inkjet printer. There is no silver halide in this process. The images are made using archival and fade-resistant dyes that are sprayed onto the paper of choice. This option opens up a whole array of different surfaces to print on, which can be exciting to the artist. This type of print is made from a digital file and is one plus to a hybrid workflow between the analog and digital world.
◆ Wet-plate print. Before photographic paper or film was invented, photographers used to put their images onto glass or tin plates. Because the chemicals are fairly toxic and the process is labor intensive, it’s not a very common way to make images now. You start with a piece of glass or tin that is cleaned and coated and then pour a sticky emulsion onto the surface, set it into a silver-sensitive solution, and place the wet plate into a negative carrier. Within 10 minutes, you must take the image and develop it to achieve an image on the tin or glass itself.
So how do you choose? You have your negative or your film scan—now what? I almost always see my images as a finished product before I begin shooting; it’s part of my conceptual process. For example, when I’m shooting something like a wedding, I know that the set of images tells the story. Typically, I will include about 600 prints, all in a small 4×6 size, in my wedding packages. I like to have the lab include a white border around the edges to create an instant frame. It feels a little more vintage, and I like that look for a wedding. This set will include portraits, detail shots, candid photos, and even landscapes. The prints become the story.
I choose to print them as digital C prints because that is the most affordable option, and it makes sense when printing in large quantities. I’m not saying that you couldn’t pick 10 images from a wedding day and do that set on fiber paper, mat them, and frame them—you could! But the look and feel of both options would be very different. A small set of handcrafted prints will feel more precious and would likely be very select images from the day: heirloom photographs. The set of 600 would more likely be flipped through, handled, gifted, and pinned to the office wall. So, when you go into a lab with your images, ask yourself, “What do I want the end result to be?”
Some labs may offer traditional C prints along with the digital versions, but you should expect to pay more. Most images that I have done for my wedding work are digital version C prints, and both the color and black and white images are done on color paper, with the B&W images printed to neutral. A few labs have machines that can do digital prints on true silver-based black-and-white paper.
As a portrait and wedding shooter, I get prints done in bulk (proofs), and because of cost, the most affordable option for me is the machine-run digital C prints. These machines scan the negatives into digital files and then use LED lights to expose the paper. All my images, both B&W and color, are scanned in and then printed on the same paper for a consistent look (which goes through the chromogenic chemicals). I like my B&W images printed to look neutral, but you could also use a little red and yellow shift to get a sepia look.
I also do fine-art projects on the side. I just finished a project involving 4×4 tiles of trees that I now intend to print out on 3.5 feet of metallic paper. So the brightly colored images and the grid I created needed to be big to achieve my end result. I did a series of trees that I had printed onto watercolor paper, and the prints were only 1.5×2 inches. For me, the size of the print and the contrast of the subject (trees are normally so big) created a statement about the work just by choosing the print size.
Let’s Make a Print
Okay, now let’s make a print—either yourself or through a lab. There are a few things to consider:
◆ Size. With a large inkjet printer, you can now make prints of gigantic proportions. You can also make tiny prints and everything in between. There are quite a few “standard” print sizes relative to the dimensions of film negatives. A 4×6 print is proportional to a 35mm negative, for example. Most frame shops are stocked with these standard sizes, too, making it easy to pop an image behind some glass and call it a day. Besides the normal 5×7, 8×10, and 11×14 dimensions, you can crop your image square, long and skinny, wall size, or packet size. The first step is to figure out what you want to do with the print and then make your size choice.
◆ Paper type. I mentioned a few different print types earlier, and in each of those categories are subcategories. Fiber-based paper comes in glossy or matte, as does RC paper. There are different brands of photographic paper: Kodak, Fuji Crystal Archive, and Ilford, to name a few. Epson makes some beautiful papers for inkjet prints. Each of these will give different contrast levels, surface textures, and color or tonal ranges. The best thing to do is look at the paper swatches at your local lab and decide which you like best.
◆ Printing. If you are having someone print your images for you, you might tell them how you like your tones and highlights to look. Are you someone who likes a soft high-key look, or do you like punchy contrast? My biggest pet peeve is when the printer “over prints” my images, and the skin tones get too dark. You really have to communicate with your printer and create a profile to get the best results from your lab. If you’re doing your own prints in a home darkroom or on an inkjet, you will be able to tweak the settings or exposure until you get it right. The look is entirely subjective. Although we don’t go into detail on darkroom printing in this book, when I was in photography school, the darkroom was my favorite place to be. The anticipation after shooting—bringing the negatives to life in a little silver canister and then seeing the print appear under a glowing red light—was the ultimate high, the magical moment. Being in the darkroom, with its chemical smells and water running over your hands, is a very different world from sitting in front of a computer screen using Photoshop. There is nothing quite as beautiful as a true silver-fiber-based print. The tonal quality you get is unmatched. But, I realize that in today’s world, the hybrid workflow makes certain things much easier.
One aspect to the hybrid workflow and printing is that retouching, burning, and dodging (which can be quite a challenge in the darkroom) are made simple at a computer desk. I like the flexibility of prepping image files to print on the computer. You can take the film scans and alter them, just as a traditional master printer would. You might increase the highlights or burn the corners down to focus on one part of an image. You can desaturate a color image or apply sepia tone to a black-and-white shot with a finger stroke or a few keys (as opposed to putting on gloves and messing with toner).

Ultimately, I feel that if you aren’t printing your images, you really don’t have a photograph. You may have an image, but not a true photo. The most important aspect I’d like you to leave this chapter with is that the end result comes from your personal choices—so choose. Choose to print.