
3 Camera Tech and Maintenance
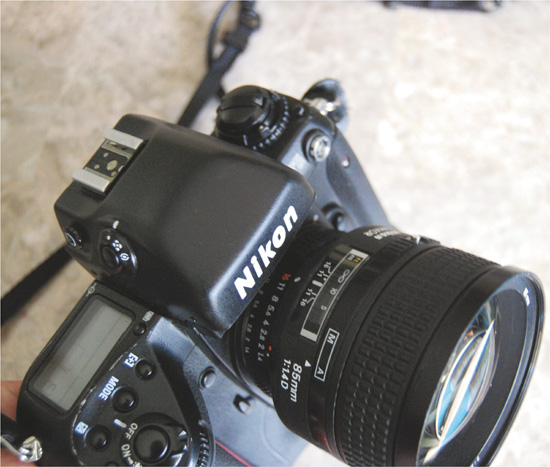
If you shoot digital, you know what dust can do to your images. It can ruin shots or keep you on your computer for hours, cloning them out. The issues are somewhat different with film—dust and dirt can cause scratches on your film, and you don’t want that. So, you need to keep your gear clean. I clean my gear before and after every shoot. Trust me—you should, too.
All you need is a can of compressed air and some cotton swabs. I spray my cameras from the outside first and blow off any dust and dirt. I also spray the film chamber and spooling zone, but not the shutter blades. I spray the mirror and mirror chamber lightly. I then use cotton swabs to remove any gunk or greasy dirt that won’t blow off. I make sure the pressure plate is smooth and clean. Finally, I wipe down everything with a lens cloth.
Many of you coming from digital photography (pro or amateur) can likely skip over the rest of this chapter, which will discuss the different ways cameras meter for exposure, metering modes, and what modes work for various situations. But then again, a refresher course never hurt anyone.
Basic Control
How a camera functions basically comes down to two mechanisms: a shutter and an aperture dial. These two mechanisms are controlled by you or the camera, and they control the light coming into the camera to expose an area of film. How you use these features determines how your photos will look.
The Shutter
There are three major types of shutters:
◆ Moving curtain, like that of the Nikon F3 and Canon AE-1
◆ Leaf shutter, as in a Canonet or a Leica
◆ Blade shutter, like that in modern SLRs, such as the F5 and all the Canon EOS-1 series cameras.
For the most part, each type of shutter operates the same way, with the exception of their use with flash sync speeds. A leaf shutter can sync with flash at any shutter speed, whereas a moving curtain or blade system usually maxes out at 1/250 or 1/125 for flash sync.
The shutter controls the length of time light is allowed to pass through a camera and to the film. It doesn’t do anything else. Shutter speeds range from several minutes to fractions of a second, such as 1/4000th of a second.
If you’re wondering what difference shutter speed makes in terms of your photos, I’ll tell you that it makes a huge difference.
Suppose you want to photograph kids playing or a car going by. You would need to use a fast shutter speed to freeze the action. Use a slow shutter speed, and your moving subjects will be blurry.
Every photo and every subject calls for a different shutter speed. The longer the shutter speed— remember, a longer shutter speeds equals a slower shutter—the more light you allow to enter the camera. If you choose a speed too fast, you might not get enough light for your image. If you choose a speed too slow, you might get blurry images.
“Learn to brace your camera against walls or on tables and columns.”
When hand-holding a camera, try to keep your shutter speed equal to or greater than your lens’s focal length for sharp photos. This helps avoid camera shake caused by you. As general rule, I always try to keep my shutter speed higher than my lens’s focal length so that I don’t get camera shake. For a 20mm lens, for example, I’m fine at 1/20 or 1/15, but at 180mm, I need to be at 1/200 or higher to get sharp images; otherwise, my movements will cause blur. Newer lenses with vibration reduction and image stabilization can compensate for slower shutter speeds. This won’t freeze a moving subject, but it will save your shot from being blurry due to your hand movement. If you’re shooting on a tripod, this is of course irrelevant, because the tripod alleviates camera shake.
When you’re shooting people, speeds of 1/60 or higher are usually fast enough to freeze subjects, but for anyone moving or walking, such as a bride walking down an aisle, I like to use at least 1/125 or higher.
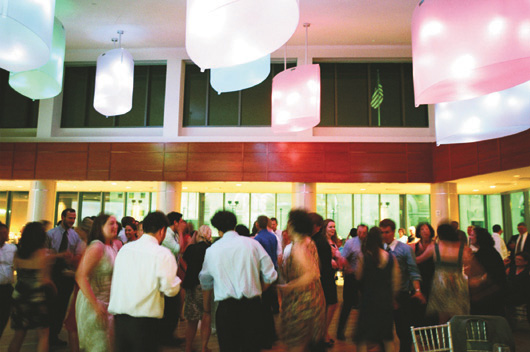
For slower shutter speeds where you want to suck in as much light as you can, be mindful of camera shake—but realize that you don’t always need a tripod. Learn to brace your camera against walls or on tables and columns. I have gotten sharp images with no motion blur at shutter speeds as slow as 1/8 by simply bracing the camera against a wall.
These images may not be tack sharp, as if I were shooting at a higher shutter speed and aperture, but they captured the moment I was shooting. For landscape photographers, you are better off using a tripod and getting the shot perfect. For me, as a wedding photographer, it’s just about getting the moment any way I can. I can’t lug a tripod around a reception with me.
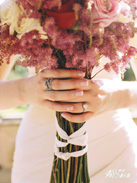
For this shot, I braced my camera on a chair to keep the shot steady. I shot it at 1/8 at f/2 and ISO 400.
Aperture
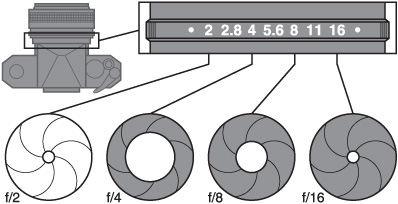
The aperture controls the amount of light that will expose your film. Aperture readings are measured in f-stops. F-stops on most lenses range from f/1.4 to f/22. There are faster lenses that can open up to f/1.0, and some lenses can stop down to f/64. Smaller f-stop numbers correspond to wider apertures, and vice versa. The wider the aperture—for example, f/1.4—the more light is passed through your lens to the film. The smaller the aperture—for example, f/22—the less light you allow to pass through.
The aperture determines your photo’s depth of field. The larger the f-stop (and the smaller your aperture), the larger your depth of field. The smaller the f-stop (and the wider your aperture), the shallower your depth of field.
The effect f-stop has on depth of field or apparent focus is different on every lens. Wide-angle lenses have more depth of field at a given f-stop than telephoto lenses have at the same f-stop, due to the compression created by telephoto lenses. For example, if I were taking a group shot of three rows of people, I could get away with f/4 on a 20mm lens, but on a 50mm or 80mm, I might need f/8 or f/16 to keep the same three rows of people in focus. All you really need to know is that wide-angle lenses have a larger depth of field than telephoto lenses.
If you want to create shots with shallow focus, where your subject is in focus and everything in front of and behind your subject is out of focus, then use small f-stops, such as f/1.8 or wider. If you want images where everything is in focus, from foreground to background, then use large f-stops, such as f/16 or f/22.
This has nothing to do with lens sharpness—the depth of field is what is in apparent focus on a given lens with a given f-stop. Some lenses are not equally sharp across all f-stops; some are sharper when stopped down or when wide open. It depends on your lens and how it was manufactured. Typically, more expensive lenses are sharper at wide-open apertures, such as f/1.4, versus always being sharp at f/2.8.
Fast Lenses versus Slow Lenses
When it comes to describing lenses, many people describe them as being fast or slow. This has nothing to do with how fast a lens can focus automatically or manually; it refers to how wide open it can shoot. Lenses that are f/2.8 or wider, such as the Canon 50mm f/1.0 lens, are referred to as fast lenses because they can shoot in lower light than slower lenses—those with smaller apertures, such as f/3.5, f/4, and higher. This is why Leica lenses cost so much—they are fast and sharp.
NOFEAR
Mix things up! Try shooting things totally opposite of what you normally do. If you always shoot with a zoom, try a prime lens, or vice versa. Try shooting with a wide-angle lens instead of a telephoto.
A slower lens, such as an f/4 lens, needs much more light to expose for an image than, say, an f/1.4 lens would. More light can pass through an aperture of f/1.4 than an f/4. The aperture is a diaphragm ring in the lens that opens and closes.
Aperture ring.
However, just because a lens is fast—say, f/1.4—that doesn’t mean it will be sharp at f/1.4. This is where things can get tricky. The quality of a lens and its sharpness, bokeh, and speed are all independent of the lens’s design. Every lens is different. Some lenses are very soft, and some are very sharp. It’s best to test a lens before buying it—you can rent one or review it online as much as possible. Generally speaking, the more a lens costs, the better it will be overall—but this is not always the case. If you need to shoot in low light, then you will need a fast f/1.4 or f/1.8 lens—but just know that at those f-stops, there may be some vignetting in the image, and it may not be tack sharp.
Vignetting
Vignetting is when your image appears to be brighter in the center and darker around the corners. This is caused from light falloff. When shooting at wide-open apertures, light can be stronger in the center of the image and weaker around the edges and corners. This is typical of shooting on many fast lenses. Vignetting is usually not visible at f/4 or higher.
Bokeh
Bokeh describes the quality of the out-of-focus areas in an image. Good bokeh is considered to be when the out-of-focus areas are soft and milky smooth. Bad bokeh is considered to be harsh and not smooth. This is totally based on your personal opinion, of course. Bokeh is just the quality of the out-of-focus areas in the frame. Whether it’s good or bad is totally up to the viewer.
Metering
Let’s start with the basics. Cameras with meters built in read the light reflected to them through the lens or a meter window and calculate exposure based on 18 percent gray. That means your camera is looking to make your image as close to 18% gray as possible. If you have a pretty diverse image of both light and dark objects, your meter should be fine, but it can easily be tricked if there are objects that are super bright or overly dark in much of the frame. This is why it’s good to know how to meter and what metering options your camera offers.
Film cameras can have several types of metering modes. The most common is center-weighted. In this mode, the camera meters about 40 to 60 percent of the center area of the film frame. This area is usually outlined by a circle in the viewfinder. In center-weighted mode, the camera reads the reflected light from only that area and gives a general exposure. This mode is good for general shooting.
Next is average metering, in which the camera reads the entire frame, averages all of the readings, and creates a general average or middle exposure for the frame. This mode is good for scenes that have the same contrast and look all over, such as a shot of a forest or a mountain, where everything is pretty much the same in the frame. It’s not one of my favorite metering modes, but it’s good to have in case you need it. I prefer matrix/evaluative metering over this mode.
Next is spot metering. I use spot metering 90 percent of the time. In spot mode, the camera reads only the light reflected from the tiny circle in the camera viewfinder for the selected focal point. It ignores everything else in the frame to give you an exact reading of what you have selected. When I’m shooting a model or a bride who is backlit, I can just spot meter for her face and not have to worry about the camera exposing for the bright light behind her, which would result in her being dark or silhouetted. I use spot metering in any situation where I’m trying to meter for a specific region of an image. Sometimes I take multiple spot readings and then average them myself to get a decent exposure. For example, I might take a reading off of a few tree trunks in a forest, and if one tree is f/5.6 and another is f/8, I would likely shoot at f/6.3 or f/7.1
NOFEAR
Want to be sneaky? You don’t always need to look through the viewfinder; you can set a wide-angle lens to a preset focus range and exposure and then just shoot from your hip when you see something in range of you. This way, no one sees you and reacts to you taking a shot.
Taking multiple readings allows you to know where the highlights and shadows fall in your image. With some color films, such as Kodak Portra 400, I take a few spot metering readings and then set my camera for the shadow area of my frame, knowing that the highlight detail won’t be blown out, and I will be able to capture the detail in the shadow area as well. Spot metering allows me to figure this out by simply metering on the desired focus points.
Finally, there is the king of modern metering: matrix/evaluative metering. This metering mode utilizes computer processing by the camera. The frame is divided into many separate regions that the camera reads, and the camera also takes into account the focal point you have selected, the distance to your subject, and even color. It also takes into account thousands of exposures for other images that have been programmed into its memory. In other words, it’s thinking about your photo and not just reading light and averaging reflections.
“I use spot metering in any situation where I’m trying to meter for a specific region of an image.”
A good example of this would be a sunset image. In center-weighted or average mode, the camera would see the sun and place a lot of value on it because of its brightness, which would result in a dark photo. But in matrix mode, the camera will only see the sun as part of the frame and should take into account the dark areas of the image and expose for them, because they take up more area than the sun does. I use this mode for landscapes or for vast room shots, but I don’t use it for portraits or weddings.
Depending on how old your camera is, it could have several metering options and ways of reading the information out to you. Many older cameras with metering systems use a match-stick or needle method. When you look through the viewfinder on these cameras, on one side of the frame you will see aperture or shutter readouts with a needle or stick that goes up or down, depicting the shutter speed or aperture it’s reading. This method is simple, and it works. Most newer cameras will be reading out the aperture and shutter information to you in an LCD in the viewfinder. Many older cameras don’t even have built-in metering. It’s up to you to learn the camera you have and how it works.
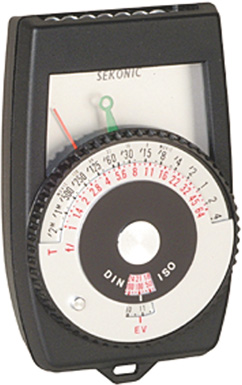
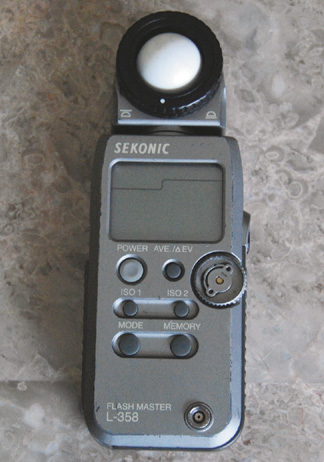
No single metering system is right for every shoot, so learning how to use all of them will allow you to be prepared for any situation. I forgot my Sekonic light meter at a recent wedding and was forced to use the meters in my F5 all night. I changed the metering pattern constantly as the day went on and as what I was shooting changed. The F5 never failed me. I just took into consideration the Sunny 16 rule and paid attention to what I was shooting.
Metering mode icons.

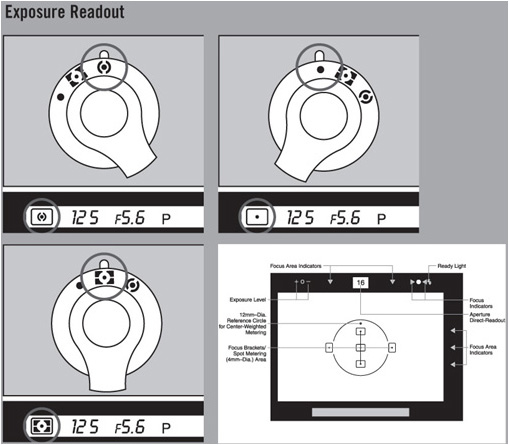
Once the LCD came onto the camera market, metering became a lot easier. Now you can have full exposure data and more displayed in the camera viewfinder. It can be as basic as the shutter speed and/or aperture with a + and − symbol to let you know whether you’re over- or underexposed. Seeing what your camera is metering is a lot easier than just having a + or − symbol on your camera tell you whether your exposure is correct.
“No single metering system is right for every shoot, so learning how to use all of them will allow you to be prepared for any situation.”
Light Meters and Quality of Light

Light is what allows you to capture your images on film. That can be light from the sun, from a camera flash, from room lights, or from any other artificial light source. The point is that you need light. Light molds your subjects—people, buildings, mountains, and vast landscapes. Learning to find the best light or to use and modify the light you have takes a lot of practice and time.
You need to learn to find the best quality and strength of light to fit your needs. All light has qualities—it’s up to you to find the light with the qualities you need. Light can be strong, harsh, warm, cool, weak, soft, or hard. So what do you need it to be?
Whenever you’re doing a shoot—whether it’s a portrait session, a wedding, or just a personal project—you should do some research beforehand. I like to Google where I will be shooting and check out everything around the location via online maps and satellite photos. Then, if I can, I like to go and personally walk around the location at the same time of day that I will be shooting, so that I can get a sense of the actual light there. I don’t always get the chance to do this, though—if not, I just have to go with it and think fast.
This is why a light meter can be your best friend. With it, you can quickly judge the strength of the light, and with your eyes you can judge the quality. In time, you’ll be able to quickly judge the qualities of light, and you can use your meter to judge whether it’s the right light for you or whether you need to move on or modify it.
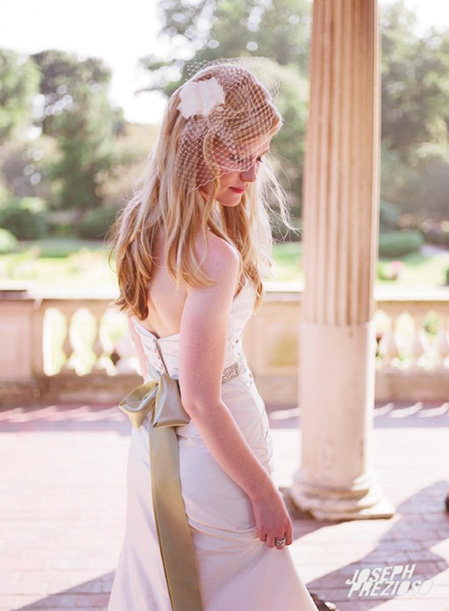
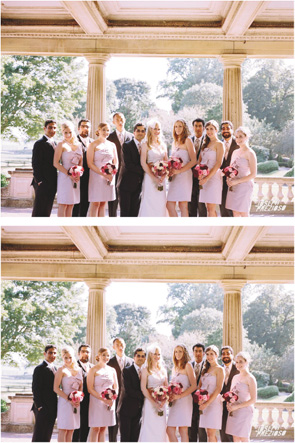
Finding the best light to work with and using that light is not always easy. For example, at a recent wedding I was shooting, we were taken to a rose garden in a park at around 4 p.m. It was summer, and sunset was at about 9 p.m., so the sun was right overhead, creating very harsh and unflattering light. I wanted to show the warmth of the garden and the beauty of the wedding party, but I only had about three minutes to figure out what I wanted to do.
First I looked for shade, but then I looked for shade filled with reflected light from some concrete. I didn’t just want dark shade; I wanted shade with beautiful warm light from the garden and concrete reflected in. I saw a sort of Roman temple that was covered in beige paint and filled with warm light from the garden, and it was out of direct sunlight. It was backlit, and that’s where I decided to shoot the wedding party. The structure was open-walled with Roman columns and a roof, with one wall to a grassy field and the other three to open light. The light was mostly coming in from the front, and the sides were acting as fill lights, bouncing in light from the surrounding plants, so the light was being tinted green but was still warm. I let the warm light wrap around the subjects, backlighting them and creating well-lit shots. I didn’t use flash or any reflectors; I just used my environment to modify my shots. All I had was my camera.
Light meters.
I tell you this to show you that you don’t need a million kinds of flashes, reflectors, or light-modifying tools to get well-lit shots. Just look around, do some homework, and learn to feel the light. To use a Star Wars analogy, light is very much like the Force. It surrounds us and fills our photos with life. Without it, our photos are nothing.
See how the light being reflected from the plants and green surroundings caused a slight green cast? I could have taken it out in post-production, but I liked it.
“[L]ight is very much like the Force. It surrounds us and fills our photos with life.”