
![]()
Persisting JSON: II
The last time I discussed the persistence of JSON, it was strictly from a front-end perspective. However, as promised, this chapter will consider the persistence of JSON from a back-end perspective.
You may be familiar with the terms SQL and MySQL, as they are both rather popular databases. These databases store data in rows, within a table. With the assistance of the SQL, Structured Query Language, data can be extracted from the table and returned to the requesting client. However, what you may not be so familiar with is the term NoSQL databases, which, as you may surmise, refers to a category of databases that do not rely on the SQL query language (or at least not heavily).
NoSQL databases, such as CouchDB and MongoDB, store their data as JSON within individual documents, rather than as rows within a table. Storing data in this fashion has been shown to provide a great amount of scalability, as well as flexibility, compared to traditional SQL databases.
As prominently stated on the CouchDB web site, located at http://couchdb.apache.org, Apache CouchDB™ is a database that uses JSON for documents, JavaScript for MapReduce indexes, and regular HTTP for its API. Because CouchDB leverages the open source technologies of the Web, it itself is an entirely open source project.
Installing CouchDB, as with Node, requires very little effort and is as easy as downloading the appropriate installation package. CouchDB is available for Mac, Windows, and Ubuntu Linux, but this book will only cover the installation on Mac and Windows.
Open your browser to http://couchdb.apache.org/ and scroll down until you find the red Windows (x86) download button. At the time of this writing, the version of CouchDB that will be downloaded is 1.6.1. This will direct you to the Apache Download Mirrors site, which makes a few suggestions pertaining to where you should download the CouchDB setup executable. Unless you have a preference for which mirror you make use of, click the mirror link directly below the words “We suggest the following mirror site for your download.” This will initiate the download. Depending on the browser being used, you may be prompted to run, save, or cancel the download.
When the download has completed, and you are ready to begin the installation, locate the directory for which the download was saved and run the executable. Once the application runs, you’ll be presented with the initial screen of the setup wizard. At this point, feel free to click Continue and accept the Apache license agreement.
The third screen of the installation presents you with the default location for the installation. Unless you have a reason for this to change, continue with the defaulted location by clicking Next. Unless you would like to place the program’s shortcut within a folder other than Apache CouchDB, click Next.
The final screen presents you with two check boxes that have already been checked off. Keep these both active and continue once again by clicking Next, to proceed to the installation screen. The installation screen reflects the chosen configurations for one final review before the installation begins. If you are satisfied with the present settings, click Install.
When the installation has concluded, and you receive the “Completing the Apache CouchDB Setup Wizard” message, you can click Finish. At this point, and only if you left both check boxes selected, CouchDB will already be running. To ensure that the installation has been successful, navigate your browser to the following address: http://127.0.0.1:5984/. You should be presented with similar JSON output shown in Figure 12-1.
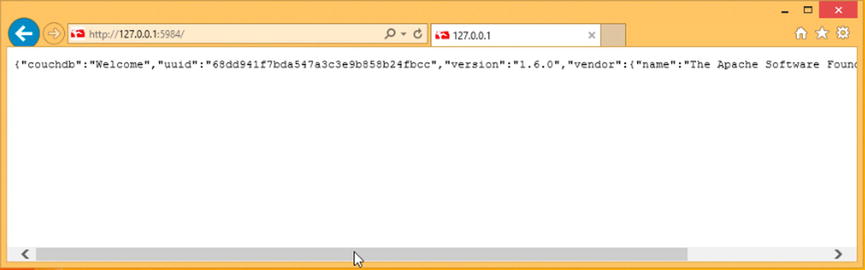
Figure 12-1. Successfully running CouchDB
If you are seeing this message, congratulations; CouchDB has been successfully installed.
Open your browser to http://couchdb.apache.org/ and scroll down until you find the red Mac OS X (10.6+) download button. At the time of this writing, the version of CouchDB that will be downloaded is 1.6.1. This will direct you to the Apache Download Mirrors site, which makes a few suggestions pertaining to where you should download the CouchDB setup executable. Unless you have a preference for which mirror you make use of, click the mirror link directly below the words “We suggest the following mirror site for your download.” This will initiate the download. Depending on the browser being used, you may be prompted to run, save, or cancel the download. Feel free to hit Save.
Once the download has completed, and you are ready to begin the installation, locate the directory for which the download was saved. Locate the Apache-CouchDB file and double-click it to unzip the contents of the archive, to reveal the Apache CouchDB application. The beauty of the Mac installation is that the application is self-contained and ready to run simply by double-clicking the app. As the file is an app, feel free to move the file into the Applications directory before running.
At this point, if you are ready to launch the CouchDB application, go ahead and double-click the Apache CouchDB.app. Now you should have CouchDB running in the background. To ensure that you have successfully launched CouchDB, simply navigate your browser to the following URL: http://127.0.0.1:5984/.
You should be presented with similar JSON output to that shown in Figure 12-2.
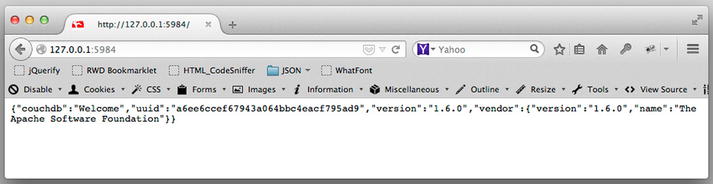
Figure 12-2. Successfully running CouchDB
If you are seeing this message, congratulations; CouchDB has been successfully installed.
Working with CouchDB
What makes CouchDB unique as a database, other than storing data within individual documents, is the fact that its API is nothing more simple than HTTP requests. Whether we’re taking about databases or the documents within them, our ability to receive, update, add, and delete are all made possible via the eight standard HTTP request methods to http://127.0.0.1:5984. As with our Node applications, CouchDB is running a server that monitors all incoming requests on the port 5984. For each incoming request, an appropriate response is provided.
Because the API is nothing more than standard requests, incorporating CouchDB with Node is a piece of cake. Before we begin to incorporate CouchDB with our Node application, let’s first take a look at the interface that accompanies CouchDB.
As was stated earlier, the API of CouchDB is made up entirely of HTTP requests. Rather than requiring new adopters of CouchBD to create an interface of their own to monitor and work with databases instantly, the developers at CouchDB have provided us with a local interface that wraps all HTTP requests for us within a series of visual elements. This interface has been dubbed “Futon.”
Futon is a simple HTML interface that leverages HTTP requests to provide us with an easy way to work with our data. At this point, navigate your browser to http://127.0.0.1:5984/_utils/. Upon your arrival you will be presented with the view shown in Figure 12-3.

Figure 12-3. Futon utilities interface
Each Futon interface is divided into two halves. The left-hand portion of the view is the prominent view and is used to easily work with and create data. The second component, toward the right-hand side of the screen, provides us with an easy way to access a variety of utilities provided by the CouchDB application. From within this column of the Futon interface, you can access documentation, update the configurations for the application, and even run diagnostics.
The view reflected in Figure 12-3 represents the overview interface. Within this view, we are presented with a table of currently existing databases. By default, CouchDB comes preinstalled with two. These are the following: _replicator and _users. While it’s nice that Couch provides us with these, it will be more interesting to work with our own. New databases can be easily created directly from this interface via the Create Database button located just above the table of existing databases.
Constructing Your First Database
Creating our first database via Futon is as easy as can be. Simply click the Create Database button to begin the process. Upon clicking, Futon provides us with a prompt asking for us to label our database. As this chapter will work toward the creation of a guestbook for our Node applications, we will provide the label “guestbook.” Clicking Create will create the database and results in the updated interface shown in Figure 12-4.
![]() Note A guestbook is a way for visitors who arrive at a site to leave their names and possible comments.
Note A guestbook is a way for visitors who arrive at a site to leave their names and possible comments.

Figure 12-4. No documents within guestbook
As identified by the breadcrumbs in the upper-left-hand corner, this interface no longer regards the overview but, rather, our recently created database. This Futon interface provides us with the necessary tools to work with a particular database. In this case, that particular database is our guestbook database.
Here, we would be able to see all JSON documents that have been stored within; however, as we have just created this database, it remains empty for the time being. Let’s add our first piece of content by clicking the button labeled “New Document.” By clicking this button, we find ourselves viewing yet another interface that resembles that shown in Figure 12-5.

Figure 12-5. Overview of a guestbook document
This interface, as illustrated by the breadcrumb, concerns an individual document. Remember that all data is saved individually as a JSON document. By default, each document created is provided with a GUID (Globally Unique Identifier). Because GUIDs are globally unique, the value shown in my figure will undoubtedly be different from the GUID your document has been provided with. Although this view provides you with an input field allowing you to adjust this value, you are generally discouraged from doing so. The reason is that this GUID is the identifier that will be used to locate this file. Depending on how many documents you are expecting to store, you may find yourself running out of proper names to provide each document.
Because the document _id represents the resource itself, if you were to have visited http://127.0.0.1:5984/guestbook/03e68a3bac3fd452bf6b136e76001222, replacing my GUID with yours, you would have made a GET request for the contents of the file we are currently modifying.
As this interface shows, you can see that this view provides us with a few more buttons, such as Save Document, Add Field, and even Upload Attachment. Just below these buttons within the tab labeled “Fields,” resides a singular field and value. From this view, we will be able to provide key/value pairs to our JSON document simply by assigning as many keys and values as we desire.
Utilizing the button labeled “Add Field,” we will add two more fields to this document. Upon clicking Add Field, a new “unnamed” row will appear. Let’s change the name from “unnamed” to “handle.” Next, by hitting Tab, the focus will switch from the Field to the Values column. Within the Value field, provide the string value @CouchDB and hit Enter.
![]() Note It’s important to note that fields should not be provided with double quotes, as they will be applied behind the scenes. Furthermore, all strings provided for Values should always have double quotes.
Note It’s important to note that fields should not be provided with double quotes, as they will be applied behind the scenes. Furthermore, all strings provided for Values should always have double quotes.
Once again, click Add Field and replace the “unnamed” field with that of “message.” Then once again hit Tab, to provide the value of “greetings and salutations” and hit Enter. Last, click the button labeled “Save Document,” to write these changes into the document. CouchDB provides versioning to ensure the ability to roll back to any previous changes. For this reason, you may note that CouchDB has inserted a field on your behalf labeled “_rev.” This simply refers to the current document revision.
While we utilized the Add Field button to include key/value pairs to our document, you could have switched the manner in which we inputted our members by toggling from the Fields view to the Source view. Once within Source view, by double-clicking the presented source, you would note that the presented JSON becomes editable, as shown in Figure 12-6. If you are utilizing the Source route, always make sure that you are providing valid JSON.
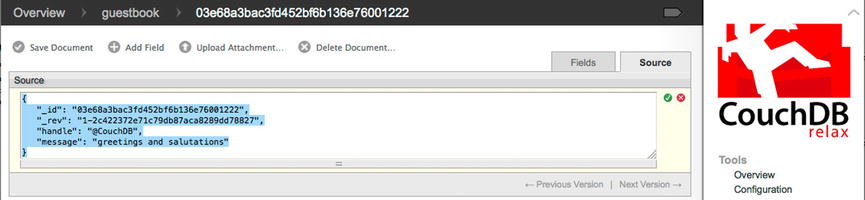
Figure 12-6. JSON Source input field
Congratulations, you have created your very first data entry in the guestbook database. In order to view the JSON text of this entry, click the icon shown in Figure 12-7.
![]()
Figure 12-7. Performing a quick request for the current view
Clicking the button shown in Figure 12-7 is simply an easier way to navigate our browser to the current document similarly, as shown previously. Whether you use the button or physically type in the full URI, you will be presented with the raw JSON, as revealed in Figure 12-8. Figure 12-8 shows our recently created document with accompanying handle and message.
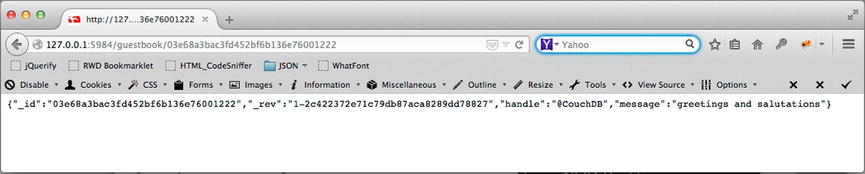
Figure 12-8. JSON revealed for @CouchDB signature
At this point, let’s revisit the overview interface by navigating to http://127.0.0.1:5984/_utils/. This time, arriving at the overview interface lists our guestbook among the default two. From here, we can easily access our guestbook database by clicking the name “guestbook” within the list.
By selecting the guestbook database, the Futon interface drills down from the overview to our guestbook database specifically. The last time we were within this interface, the table possessed zero documents. However, this time, a single document is presented within the table, as shown in Figure 12-9.
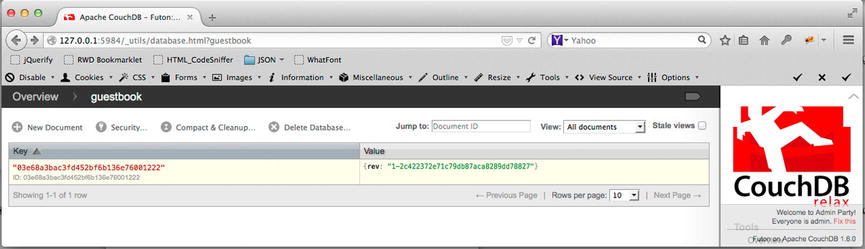
Figure 12-9. All existing documents listed for guestbook
Figure 12-9 shows a two-columned table consisting of the labels “Key” and “Value” and, within it, our recently created document. This can be identified by the GUID we were working with earlier. Furthermore, by clicking the GUID listed in the column labeled “Key,” we can review the individual content retained by that document.
As I stated earlier, Futon, similar to a user-agent, initiates a series of HTTP requests on our behalf behind the scenes. If you were to open up your developer’s toolbar and navigate to the Network tab, you would be able to find a GET request for the following request: http://127.0.0.1:5984/guestbook/_all_docs.
At any point in time, we can query our database for any and all entries it holds, by navigating to the aforementioned URL. As the later portion of the URL, _all_docs, suggests, we should expect to view every saved document pertaining to our guestbook database. Upon your arrival to the preceding URL, you should be presented with something that resembles the following JSON:
{"total_rows":1,"offset":0,"rows":[ {"id":"03e68a3bac3fd452bf6b136e76001222","key":"03e68a3bac3fd452bf6b136e76001222","value":{"rev":"1-2c422372e71c79db87aca8289dd78827"}} ]}
The preceding output displays a complex JSON structure providing an overview of all documents possessed by our guestbook database. Held within the member labeled “rows,” it reveals an array whereby each reflected document can be easily traversed, and its “id” can be obtained. As you recall, this is the identifier by which the server refers to a document.
The resource used before, _all_docs, reflects a unique JSON document. What makes this document unique is that all of its retained data reflects the results for a particular query. That query being the following:
Capture the id and current revision for documents affiliated with our guestbook database. Additionally insert the id as the value of the "key" field.
In the CouchDB nomenclature, all documents that are used to reveal the results of a query are referred to as a view.
Creating Views
Creating a custom JSON representation of the data held by our database is what the CouchDB nomenclature refers to as a view. A view, in its most atomic form, is a JavaScript map function whose signature and implementation reflect the following code:
function( doc ){
  emit( key , value);
}
![]() Note A map function is applied against all elements within a list, to produce a particular result set.
Note A map function is applied against all elements within a list, to produce a particular result set.
The initial parameter doc represents the parsed JSON content of a document, which exists within the database. With a process similar to a JavaScript for loop, each and every document that exists within our database is supplied to this very function. From within the body of the function, and utilizing pure JavaScript, we can analyze the provided JavaScript object to extract particular keys and values to construct a new object that reflects the needs of a particular view. Once we have determined what we wish to provide as a row within this result, we will supply it as the value argument of the emit method. The emit method is a global method provided by CouchDB to capture a key and data value as a row within a particular view.
The great thing about the emit method is that it can be called as many or as few times as you like per document. Additionally, the key provided mustn’t be unique. Unlike a traditional key/value pair, the parameter labeled “key” is used strictly to sort or filter results that are captured within this view. By providing taxonomy, we can obtain all rows that exhibit this particular key.
![]() Note Each call to emit creates a corresponding row in the produced document.
Note Each call to emit creates a corresponding row in the produced document.
While this may sound inefficient, depending on the amount of saved documents within the database, the reality is that it’s only inefficient the very first time this view is queried. Any subsequent request for a view that has previously been run will only be executed against any documents that may have been updated, deleted, or added.
Creating Our First Custom View
Let’s begin to devise our first view. If you are not currently within the guestbook view, navigate your browser to http://127.0.0.1:5984/_utils/ and click the guestbook database. On the right-hand side of the screen, you will see a drop-down menu labeled “View:”, as seen in Figure 12-10. Be sure to select “Temporary view....”

Figure 12-10. Creating a temporary view
Upon your selection, you will be presented with a screen similar to that shown in Figure 12-11.
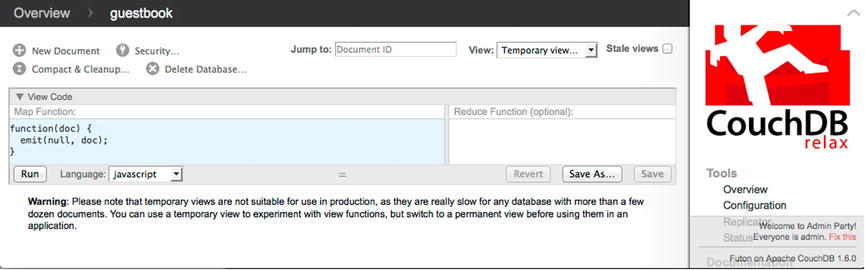
Figure 12-11. An anonymous map function
The interface illustrated in Figure 12-11 is what we will use to design a custom query, a.k.a. a view. On the left-hand side of the screen, just below the label “Map Function,” you can see the anonymous function I was discussing earlier. Utilizing the interface, we can begin reading particular members from the supplied document and begin the retrieval for the rows of our view.
While we have a view that provides the IDs and revisions to all documents, let’s create a view that will output all captured handles and their corresponding message, by updating the map function to reflect the following code (Listing 12-1):
Listing 12-1. A Specific map Function Implementation
function(doc) {
  if(doc.handle){
    emit(doc.handle, { "handle":doc.handle, "message": doc.message, "_id":doc._id} );
  }
}
Listing 12-1 demonstrates an implementation that constructs a view, which will reveal the handles, messages, and the ID of each document within the guestbook database. Furthermore, using a simple condition to determine if a handle does not exist, we can choose whether or not a particular document should be present. With this code in place, click the button labeled “Run” to observe the results of our view.
Clicking Run should reveal a singular row reflecting its findings, as seen in Figure 12-12. As we only have one document in our database, only one document has been supplied to our function. Let’s add a second entry to our guestbook database, but first, let’s save this temporary view as a permanent one. Any temporary view can be converted into a permanent one simply by clicking “Save As...” on the right-hand side of the screen.
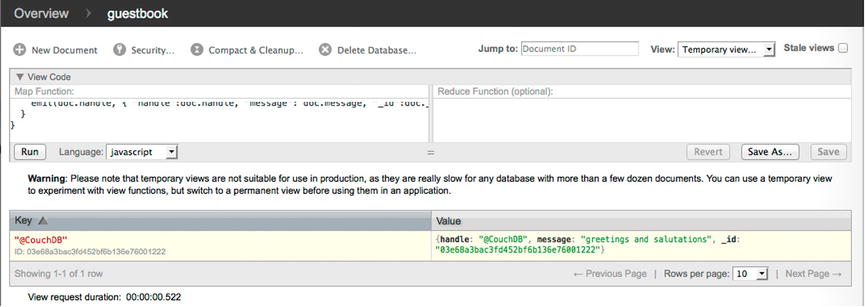
Figure 12-12. Results for our custom query
Clicking this button will bring up a prompt asking for the name of a design document, as well as the unique name for our recently created query (a.k.a. view). At this point, provide the name of a document as _design/guests and provide the view name “signatures,” as shown in Figure 12-13. Once you have entered the appropriate names, click Save. Because everything is saved as a JSON document, you, too, can access the raw JSON for the view we just devised.
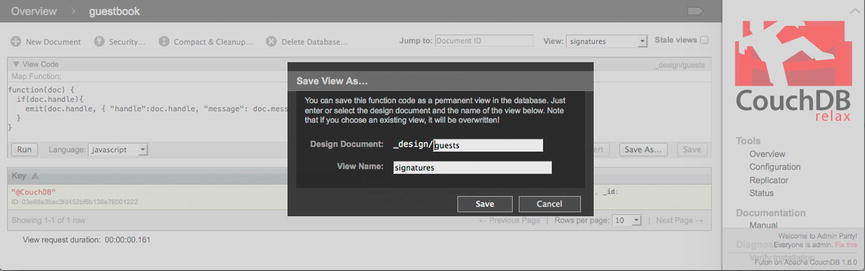
Figure 12-13. Creating a permanent view
The design document labeled “guests” is an example of a string id versus a GUID. Because design documents are more likely to be requested specifically rather than iterated over, it makes more sense to use a name that is easy to remember. Because the name of the resource, “guests,” is the actual name of the file, we can always obtain its raw JSON by simply visiting the following URL: http://127.0.0.1:5984/guestbook/_design/guests.
It is worth noting that all documents pertaining to a view are prefixed with _design/. This denotes a view from an ordinary document.
Once more, let’s get back to our database by navigating your browser once more to http://127.0.0.1:5984/_utils/ and clicking the guestbook database. To create another entry into our database, click New Document. Let’s add a second document, to reflect the handle @apache, and provide it with the following message: “Hello World.” When this is completed, click Save.
At this point, you should now have two entries within the guestbook database. You can easily navigate back to our guestbook database by selecting it from the breadcrumb in the header. Upon your arrival, you should witness the two documents of our database, as revealed in Figure 12-14. You may immediately recognize that the rows of our view no longer resemble the outputted table as previously shown in Figure 12-9.
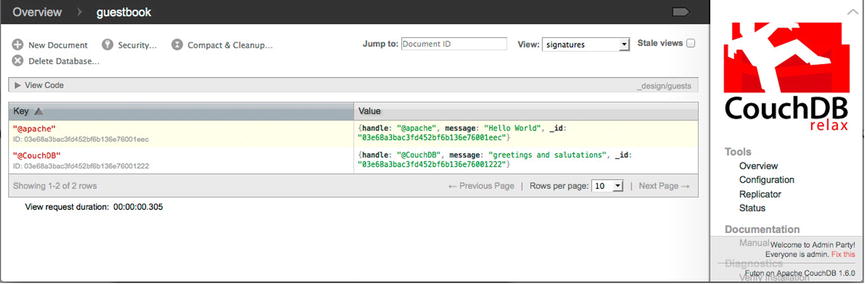
Figure 12-14. Two rows of signatures within the guestbook
This is because the database currently makes use of the “signature” view we recently created. Feel free to toggle between any views by using the drop-down menu in the upper-right-hand corner. For whichever view is selected, choosing the icon shown in Figure 12-14 will initiate an HTTP GET request for the chosen resource. The response will reveal for the chosen query all matches presented in JSON.
No matter how many entries your guestbook DB is provided, you can always obtain the results of your signature view by navigating your browser to the following URL: http://127.0.0.1:5984/guestbook/_design/guests/_view/signatures. Visiting the aforementioned URL reveals the handles, message, and _id for each document that matched our query. Furthermore, because we utilized the key label when emitting our values, we can further filter our search to that of a particular key/value simply by appending a query string parameter to the preceding URL, like so: http://127.0.0.1:5984/guestbook/_design/guests/_view/signatures?key="apache". Appending the key parameter with a string matching our @apache handle returns only the results that match the provided key. It’s important to note that all strings provided to the key parameter must be wrapped in double quotes.
We can even sort our list by providing yet another query parameter. At our disposal for sorting, we can use either ascending or descending. Regardless of which parameter you choose to use, the value which it requires is that of a true or false. Visiting the following URL will present our rows, in alphabetical order: http://127.0.0.1:5984/guestbook/_design/guests/_view/signatures?ascending=true.
Connecting Node and CouchDB
As was stated earlier, CouchDB possesses its own REST API for working with databases, documents, and views. In fact, it’s 100% possible to add/remove documents, views, and databases with nothing other than standard HTTP requests. I hope from what you have previously observed that this will not come as a shock to you.
Because CouchDB’s API is available through the URL, we can both persist and query data from either a browser or server. If we were to work with CouchDB via the client side, we could rely on Ajax, whereas on the server side, we can incorporate the use of an instance of the http.ClientRequest.
It must be made known that because CouchDB runs on its own port, any and all client-side requests beyond those made by Futon will require the incorporation of all appropriate CORS headers. By default, CouchDB does not have these enabled, but it does offer the ability to activate them via the configuration view, shown in Figure 12-15, located at http://127.0.0.1:5984/_utils/config.html. We will discuss how to properly configure CouchDB to enable CORS in Chapter 14.
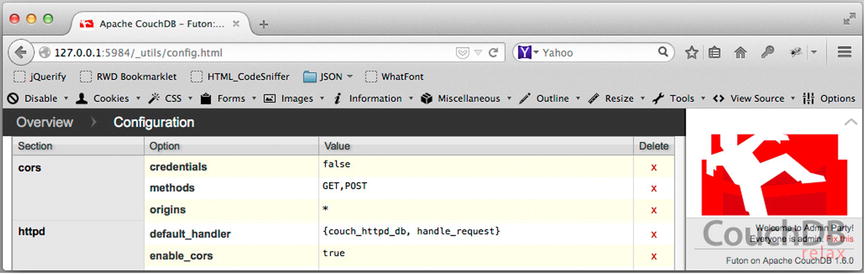
Figure 12-15. CouchDB configuration interface
Simply because the HTTP methods required to work with CouchDB are beyond the scope of this book, for simplicity, we will incorporate CouchDB with Node and use yet another module to streamline such HTTP calls into a simple API. The module that we will be working with is known as Cradle.
Cradle for Node
While Node itself includes a variety of modules, one that it does not ship with is Cradle. Cradle is a third-party, high-level CouchDB client module that has been created to easily and asynchronously work with CouchDB and Node applications. Due to its extremely high-level API, we will remain shielded from the HTTP methods that have not been covered in this book. If you wish to learn more about Cradle, feel free to navigate to its GitHub page: https://github.com/flatiron/cradle.
Installing Cradle is very easy. Simply use the command-line interface to navigate to the top directory, which contains the chapter12 source code. For me, that would be the following locations:
//PC
C:UsersUrZADocumentsAptana Studio 3 WorkspaceBeginningJSONchapter12
//Mac
/Users/FeZEC/Documents/Aptana Studio 3 Workspace/BeginningJSON/chapter12/
Simply type cd, followed by the location of your chapter12 directory, and hit Enter. Next, type in the following command and hit Return on your keyboard:
npm install cradle
This will initiate a download of all required packages for the particular module into a folder labeled node_modules, within the chapter12 directory. If your console outputs a series of lines that all display errors, as shown in Figure 12-16, you will be required to run the same command as the administrator.

Figure 12-16. Cradle installation error
On a Mac, this can be achieved by preceding the aforementioned command with sudo, making the entire command sudo npm install cradle. Once you press Enter, you will be asked for your login password.
On a PC, you will have to close the command prompt and open it from the Start menu. Depending on the version of Windows, you may find within your startup menu two listings for the command prompt; only one is followed by “Admin.” Choose this particular command prompt and retry the preceding command.
If, on the other hand, you do not see the Admin command prompt within your startup menu, right-click on the singularly listed command prompt, to reveal the menu option “run as admin.” Go ahead and run as admin and retry the command.
A successful installation reveals a node_module folder within the specified path, at which point our module is ready to be used.
![]() Note Due to a bug in the latest Node.js Windows installable, Windows users may be receiving the following message: “Error: ENOENT, stat 'C:Users[USER_NAME]AppDataRoaming
pm.” If this is the case, to correct the problem, you will have to type the command mkdir C:Users[USER_NAME]AppDataRoaming
pm, where [USER_NAME] is replaced with the login name of your user.
Note Due to a bug in the latest Node.js Windows installable, Windows users may be receiving the following message: “Error: ENOENT, stat 'C:Users[USER_NAME]AppDataRoaming
pm.” If this is the case, to correct the problem, you will have to type the command mkdir C:Users[USER_NAME]AppDataRoaming
pm, where [USER_NAME] is replaced with the login name of your user.
Incorporating the Cradle Module
Once the Cradle module has been successfully installed into our top-level directory, we can begin working with it by incorporating it into a Node application via require(). Furthermore, as long as the CouchDB server is running, we can use the following snippet of code shown in Listing 12-2 to configure our http.ClientRequest to connect to it.
Listing 12-2. Including and Configuring Cradle with CouchDB
1 var cradle = require('../node_modules/cradle'),
2 var DBConnection = cradle.Connection;
3 var couchDB = new DBConnection('127.0.0.1', 5984, {
4  cache : true,
5  raw : false,
6  forceSave : true
7 });
The code shown in Listing 12-12 simply demonstrates the inclusion of the Cradle module within the Node application, in addition to opening a connection to our CouchDB server. The path provided to the require method reflects the path our node_module folder created, relative to the directory holding our Node application. Once the Cradle object is obtained via the require method, it is assigned to a variable labeled “cradle” and then used to open a connection to the CouchDB server.
Working with Databases
As you will soon come to learn, Cradle possesses an extremely high-level API that allows us to simply and conveniently work with databases and CouchDB. Furthermore, the API that we will be working with is object-oriented. This means that the API is exposed solely as an inherited interface of an initialized object. In this particular case, that object is a database instance. Listing 12-3 demonstrates how to create such a reference.
Listing 12-3. Creating a DB Reference
var gbDataBase = couchDB.database('guestbook'),
The code shown in Listing 12-3 leverages the method labeled “database,” exposed by our couchDB instance, to initialize a Cradle database object. With this object, we will be able to work with documents and views that pertain to this particular database. What is important to understand is that the preceding code is not actually connected to CouchDB at the moment. Remember that HTTP is a stateless protocol. The moment a response is provided, the connection between the client and server are closed. Instead, our gb reference is nothing more than a wrapper that will be used to concentrate requests for a particular database. In this particular case, that database is labeled “guestbook.” Once a reference to a particular database is created, we can reference its exposed API, to begin receiving and sending data between Node and CouchDB.
Cradle Database API
Because CouchDB’s interface is exposed via mere HTTP requests, what will actually occur under the hood of the Cradle API will be a series of HTTP requests to the CouchDB server. However, as Cradle itself is a wrapper, it will perform these low-level tasks on our behalf. This allows us to focus on the five key methods of the API, shown in Table 12-1.
Table 12-1. Methods of a Cradle Wrapper
|
Methods |
Description |
|---|---|
|
create(); |
Used to create a database |
|
exists( callback ); |
Used to determine if a database currently exists |
|
get( id[,id] , [object], callback); |
Used to fetch a particular document |
|
view( id, [object] ,callback); |
Used to query an existing view |
|
save( [id], object , callback); |
Used to save a document to the current database. This can be used to save either a view or an entry. |
The methods shown in Table 12-1 are the sole methods we will be working with in this chapter. Now, if that is not simple enough, then consider the following: four out of the five methods outlined above provide functionality of the sort we have already become familiar with from the previous sections.
create
The first method that we will review is the create method. Use of the create method provides our Node application with the ability to initialize a database within CouchDB. Use of the method is as simple as invoking the method upon a database reference, as seen in Listing 12-4.
Listing 12-4. Invoking the Creation of Our Database Reference
1 //..truncated code
8 var gbDataBase = couchDB.database('guestbook'),
9    gbDataBase.create();
Listing 12-4 invokes the create method upon our existing gbDataBase instance. The code is equivalent to us having pressed the “Create Database...” button within the Futon interface.
Apache CouchDB prevents us from creating a database that possesses the same name as a database that currently exists. Because our CouchDB application is currently in possession of a database labeled “guestbook,” the code from Listing 12-4 silently fails. This can be considered both a good thing and a bad thing. On one hand, it’s great to know that you don’t have to be concerned with possibly overwriting an existing database by mistake. However, on the other hand, you may rather be made aware if a database of the same name exists, so that you can provide a new name to the DB. For that, our DB instance exposes the exists method.
exists
The exists method is an asynchronous method used to determine if a database currently exists. The advantage of such a method is to determine whether a database already exists, lest we insert values to a table we did not intend to.
As an asynchronous method, the invocation of the exists call must be provided with a callback function. It is this function, whose signature reflects that of Listing 12-5, that will be triggered once Cradle has determined whether the database exists or not.
Listing 12-5. Callback Signature of the exists Method
function(err, exists);
As Listing 12-5 reveals, the callback supplied must be capable of receiving two arguments. The first parameter, err, accounts for any error that may have occurred, such as a network error. If no error has occurred, the argument provided will be that of null. The second parameter, exists, indicates whether the given database exists or not. The argument it will be provided if an error is not thrown will be that of a Boolean value.
Using these two parameters, we can determine the appropriate conditions that determine which code blocks to execute, as shown in Listing 12-6.
Listing 12-6. Determining If a Database Exists
 1 //...truncated code
 9 gbDataBase.exists(function(err, exists) {
10  if(err) {
11   console.log('error', err);
12 }else if (exists) {
13   console.log('the guestbook db exists'),
14 }else {
15   console.log('database does not exists.'),
16   gbDataBase.create();
17  }
18 });
Utilizing our gbDataBase reference, Listing 12-6 invokes the exists method exposed by the gbDataBase instance and supplies an anonymous function as the callback (line 9). Upon the callbacks invocation, it will be supplied with either an error instance or that of a Boolean. Utilizing both of these parameters, we can determine whether or not they possess a value to determine what blocks of code should be run.
If there is an error, our application will be provided with the ability to handle it (line 10). If the file exists, we can perform the invocation of another database (line 13). Last, if the database does not exist, we can successfully create it, utilizing the previously discussed create method (line 16).
If you were to execute Listing 12-6 in its totality, you would notice that the following is output in the command line: the guestbook db exists. Of course, this is expected, as we already had created the guestbook database. One good thing about this is that we also have a few documents stored within our guestbook database. This will become helpful when we review the next method in the Cradle interface.
get
The get method, as you may suspect, initiates HTTP requests utilizing the GET request method. The get method is used to obtain documents that are associated with the targeted database in an asynchronous fashion. The method’s signature, as outlined in Table 12-1, reveals that the get method expects to be invoked with a possible three arguments. These arguments represent the document by its ID, an object, and a callback function.
The first parameter, id, can be provided either as a singular identifier or as an array of multiple document IDs supplied as an array. If you recall, a document ID is generally a GUID, such as 03e68a3bac3fd452bf6b136e76001222, unless the document you seek is the result of a design document, in which case, it’s you who must supply the full path to the query you are seeking to utilize, such as _design/guests/_view/signatures.
![]() Note Every document possessed by a database can be obtained by supplying _all_docs as the string.
Note Every document possessed by a database can be obtained by supplying _all_docs as the string.
The second parameter of our get method is that of an object. The object itself represents the provision of optional query string parameters that we wish to accompany the request. Such parameters can be ascending, descending, limit, key, startkey, and, last, endkey, used to manipulate the resulting rows returned by our views.
The first two keys, ascending and descending, are self-explanatory. These parameters are used to sort the set of results in either an ascending or descending manner. The factor that determines whether an item comes before or after depends on the value that established the “key” used with the query. In the case of our guest/signature, the key was each user handle. The value that can be supplied to either of these keys is 1 or 0, whereby 1 equals true and 0 is false.
The parameter limit is used to express the maximum amount of desired results to be returned. This value should be expressed in the form of an integer.
The key parameter, as you may recall, must be provided a value of a string wrapped with double quotes. Providing this parameter can reduce the entire result set to that of a subset of rows whose keys match the value supplied. Providing key="@CouchDB" would result in our signature’s query only displaying one result.
The final two parameters, startkey and endkey are used to return a subset of the original set of results whose keys are determined to exist within the indicated boundaries.
The provision of any query string you choose to apply to the GET request is required to appear as a key/value member of the object. Listing 12-7 demonstrates the use of the optional parameter to establish the use of the limit and key parameters. If you do not plan on using any parameters, just provide null as the value.
Listing 12-7. Query String Parameters Supplied As Members of an object
var queryString = { limit:1, key:"@CouchDB" };
The final parameter that must be provided to get is that of a callback. The callback whose signature can be seen in Listing 12-8 is required to possess two parameters.
Listing 12-8. Callback Signature for get
function(err, res);
Because get is an asynchronous method, it is necessary to provide a callback, so as to be informed when the operation has concluded. Furthermore, as outlined in Listing 12-8, our callback will be provided with an argument for either of the two outlined parameters, err and res. The first parameter, err, will be provided with an instance in the event that an error has occurred. Such an error may be related to network traffic or a server error. On the other hand, if everything is successful, our callback function will be provided with the appropriate JSON response.
Utilizing these two parameters, we can ensure the appropriate body of code is executed, lest we cause our own errors. Listing 12-9 demonstrates a GET request for our all_docs query.
Listing 12-9. Obtaining All Documents for the Target DB
 1 var cradle = require('../node_modules/cradle'),
 2 var DBConnection = cradle.Connection;
 3 var couchDB = new DBConnection('127.0.0.1', 5984, {
 4  cache : true,
 5  raw : false,
 6  forceSave : true
 7 });

 8 var gbDataBase = couchDB.database('guestbook'),

 9 gbDataBase.exists(function(err, exists) {
10  if (err) {
11   console.log('error', err);
12  } else if (exists) {
13   console.log('the guestbook db exists'),
14  } else {
15   console.log('database does not exists.'),
16   gbDataBase.create();
17  }
18 });
    /*obtain all documents*/
19 gbDataBase.get('_all_docs', { limit:1 }, function(err, res) {
20  if (err) {
21     console.log('error', err);
22  } else if (res) {
23     console.log(res);
24  } else {
25     //.. do something else
26  }
27 });
Listing 12-9 demonstrates the use of the get method to obtain a particular document from the guestbook database. In this particular case, that document is a query for all documents. Furthermore, we have chosen to limit the returned results to a maximum of one document. Running the preceding Node application results in the following output:
[ { id: '03e68a3bac3fd452bf6b136e76001222',
    key: '03e68a3bac3fd452bf6b136e76001222',
    value: { rev: '2-d91c1f744fe10e74dc5a2e8f23c13315' } } ]
As you can see, we have received a single result from the original set of results. Because we could potentially be working with a vast amount of results, CouchDB conveniently inserts each JSON result within an array structure, so that it can be easily traversed. As I hope you may be able to witness, the preceding output is no longer JSON but, rather, a JavaScript object. You can note this is the case, owing to the missing double quotes that would otherwise surround the keys if it were JSON. What this means is that we don’t have to attempt to parse the returned JSON text, as Cradle has already performed this for us. Therefore, the response provided can immediately be traversed, and its members accessed. Let’s remove the limit parameter and output only the ID of each row. Listing 12-10 outlines in bold the changes to our get method.
Listing 12-10. Logging the ID of Each Returned JSON Document
 1 //..truncated code
    /*obtain all documents*/
19 gbDataBase.get('_all_docs', { limit:1 }, function(err, res) {
20  if (err) {
21   console.log('error', err);
22  } else if (res) {
23      var len = res.length;
24       for (var i = 0; i < len; i++) {
25          console.log(res[i].id);
26       }
27  } else {
28   .. do something else
29  }
30 });
Listing 12-10 traverses each of the indexes within the provided JavaScript array until all have been reached. With each value obtained, we log out the corresponding ID, resulting in the following output below:
03e68a3bac3fd452bf6b136e76001222
03e68a3bac3fd452bf6b136e76001eec
_design/guests
As you can see from the output, our guestbook database is currently in possession of three documents, two of which possess GUIDs as their identifiers, and one of which utilizes a string. Knowing what is currently retained within our database and what was outputted, we could easily deduce that these two GUIDs represent our two guestbook entries, while the latter represents our query. However, now that we have obtained the resulting identifiers, we could easily obtain the values retained by each ID with subsequent use of the get method.
view
While the results of a view can be obtained via get, a simpler method is to use the view method. Because view actually wraps get, it invites us to provide a more succinct path to our query. As I mentioned within the section on get, a design document can be obtained by specifying a full path, such as the following: '_design/guests/_view/signatures'. However, this path can appear rather long and be cumbersome to work with.
With view, you have the ability to query a view simply by omitting _design and _view from the preceding path, resulting in the more succinct path guest/signatures. Each design document and its view can easily be fetched by simply joining the two names together with a forward slash. You may recall “Design Document” and “View Name” as the titles of fields shown in Figure 12-13.
The view method possesses a few more behaviors that can improve efficiency, but they are beyond the scope of this book. However, aside from those unmentionables, the view method continues to function in precisely the same manner as get. It continues to require the object parameter for added query parameters, and last, because it is an asynchronous function, it requires a callback function whose signature is the same as that provided to get. At this point, let’s query our guestbook database for any and all signatures left behind (see Listing 12-11).
Listing 12-11. Querying Our DB for All Signatures
var cradle = require('../node_modules/cradle'),
var DBConnection = cradle.Connection;
var couchDB = new DBConnection('127.0.0.1', 5984, {
 cache : true,
 raw : false,
 forceSave : true
});

var gbDataBase = couchDB.database('guestbook'),

gbDataBase.exists(function(err, exists) {
 if (err) {
  console.log('error', err);
 } else if (exists) {
  console.log('the guestbook db exists'),
 } else {
  console.log('database does not exists.'),
  gbDataBase.create();
 }
});

/*obtain an existing view*/
gbDataBase.view('guests/signatures', null, function(err, res) {
 console.log(res);
});
Listing 12-11 reveals in bold the latest change to our running base code. Rather than using the get method exposed by our gbDataBase instance, we opt for the more succinct method of defining our path with view. Running the preceding Node application results in the following output:
[ { id: '03e68a3bac3fd452bf6b136e76001eec',
    key: '@apache',
    value:
     { handle: '@apache',
       message: 'Hello World',
       _id: '03e68a3bac3fd452bf6b136e76001eec' } },
  { id: '03e68a3bac3fd452bf6b136e76001222',
    key: '@CouchDB',
    value:
     { handle: '@CouchDB',
       message: 'greetings and salutations',
       _id: '03e68a3bac3fd452bf6b136e76001222' } } ]
The preceding code outputs the two presently saved signatures and messages provided by both @apache and @CouchDB. Because view leverages the get method, we can opt to provide our request with the addition of query string parameters. Listing 12-12 demonstrates a query that filters the preceding results with the use of the key parameter.
Listing 12-12. Filtering All Signatures for a Particular Key
//.. truncated code

/*obtain an existing view*/
gbDataBase.view('guests/signatures', {key:"@CouchDB"} , function(err, res) {
    console.log(res);
});
Listing 12-12 replaces the null primitive with that of an object whose sole member is that of the key parameter. The preceding code will result in the HTTP GET request for the following URL: 127.0.0.1:5984/guestbook/_design/guests/_view/signatures?key="@CouchDB". By providing a key, the result set will be filtered there by returning a subset of results whose keys match those of "@CouchDB". Running the preceding listing outputs the following:
[ { id: '03e68a3bac3fd452bf6b136e76001222',
    key: '@CouchDB',
    value:
     { handle: '@CouchDB',
       message: 'greetings and salutations',
       _id: '03e68a3bac3fd452bf6b136e76001222' } } ]
As you can see, the output displayed only reveals a signature left by the handle @CouchDB. If it just so happened that @CouchDB signed our guestbook more times, all of those results would be returned.
With that being said, the next method will provide us with the ability to create more documents.
save
The save method, as the name suggests, allows us to save documents for the targeted database. As its signature reveals in Table 12-1, the save method anticipates three parameters: id, object, and callback.
The first parameter, id, is used to provide an identity to the document being created. As you have undoubtedly witnessed, any and all documents have a corresponding ID. These are usually generated as GUIDs by CouchDB; however, they can also represent the name of a design document. To keep things flexible, save enables us to opt in to supplying an ID as the first parameter. If an ID is not provided, CouchDB will generate it automatically. If, however, an ID is provided, it will replace the ID that will have been generated by CouchDB.
If the document being created represents a view, you will be required to supply an appropriate ID. Remember: All views must be prefixed with _design/ in order for CouchDB to differentiate between ordinary documents and design documents.
The second parameter that will be supplied to save is that of the document’s content. If we were to re-create our initial document with save, it would be provided with the following object:
{
   "handle": "@CouchDB",
   "message": "greetings and salutations"
}
Providing ordinary document content is fairly straightforward. On the other hand, if we were to re-create our “signatures” view, the object that would be required reflects the one following:
views: {
 signatures: {
  map:"function(doc) {emit( doc.handle, {handle:doc.handle, message:doc.message, _id:doc.id}); }";
 }
};
Because a design document will be saved as its own JSON document, it is necessary to use the members that define its content appropriately. While at a glance this might be confusing, the reality is that this will always be the format for constructing a map function.
Note the complex structure of the preceding object. All design documents begin with a key labeled views, where views represents the top-level object and is used to reference yet another complex structure.
The complex structure of views consists of any number of object members, in which each member represents an individual query. In the preceding outline, the member signatures represents a possible query associated with our view.
Each query references an object whose only allowable members are the following two: map and reduce. While both map and reduce can be used simultaneously, this chapter does not make use of the reduce member and, therefore, it has been omitted. We will be working exclusively with map.
The member map holds a string value whereby that string can be evaluated by CouchDB to produce our actual query.
The final parameter of the save method is that of a callback. As an asynchronous method, save requires a callback to invoke when the operation has concluded. As outlined in Listing 12-13, the callback provided should possess the following parameters: err and res.
Listing 12-13. Callback Signature for save
function(err, res);
Depending on whether an error has occurred, the err parameter will either be supplied with an object or a null primitive. Furthermore, if an error has not occurred and the response is successful, we will be able to reference that response via the res parameter. Using these two parameters, we can ensure that the appropriate body of code is executed, lest we cause our own errors.
Creating Documents via Cradle
Having learned how to work with the save method, let’s attempt to create some new documents, beginning with yet another guestbook signing, as seen in Listing 12-14.
Listing 12-14. Creating a Document via Cradle
1 //..truncated code

/*signing of our guestbook*/
19  gbDataBase.save({
20   handle : "@CouchDB",
21   message : "welcome and thank you",
22  time : new Date()
23   }, function(err, res) {
24    if (err) {
25     console.log('error', err);
26    } else if (res) {
27     console.log(res);
28    }
29 });
Listing 12-14 demonstrates the implementation required by Cradle to create a new document for our guestbook database. As you can see, we opted out of providing this document with a specific ID. As I have previously stated, it’s often best to allow this value to be generated by CouchDB.
The body of our document has been devised to possess a user’s name and message, in fields labeled “handle” and “message.” In addition to the previous fields, this document also possesses a field that reflects the time of its creation. While our previous documents lack this “time” field, it is one of the benefits of using NoSQL databases over SQL databases. I will discuss this in more detail shortly.
![]() Note Cradle methods require the provision of an object that will be stringified prior to its transmission to CouchDB, where it will be encapsulated within a document as JSON.
Note Cradle methods require the provision of an object that will be stringified prior to its transmission to CouchDB, where it will be encapsulated within a document as JSON.
Last, we have provided a callback to be notified as to whether the document has been successfully created or not. Running Listing 12-14, should no network issues be present, will result in the following output:
{ ok: true,
  id: '03e68a3bac3fd452bf6b136e760064b4',
  rev: '1-66821f76618071e197e2c3aa79ecf722' }
As you can see, upon the creation of a document, CouchDB responds with the details of that newly created document. As signified by the ok field and its value of true, we can rest assured that CouchDB has successfully stored our document, in which case, we would be able to see it through the Futon interface.
Upon navigating your browser to http://127.0.0.1:5984/_utils/database.html?guestbook/_design/guests/_view/signatures, CouchDB will present you with three signatures. Sure enough, as seen in Figure 12-17, our most recent document appears within the signature results. Furthermore, the inclusion of the new field, time, did not have any negative impact on our signature query. Because our query did not anticipate a field labeled as “time,” that value, whether it exists or not, has no bearing on that particular function.
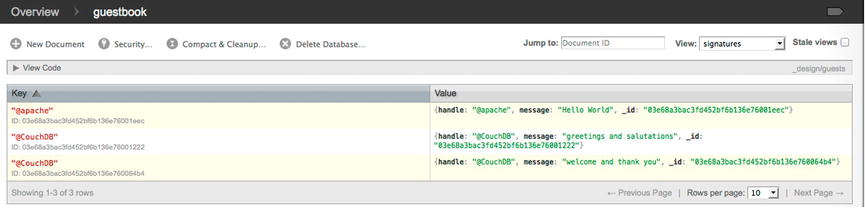
Figure 12-17. Cradle document successfully created in CouchDB
The last time we visited the preceding URL, only two documents were presented. Upon this query, as discussed early on in this chapter, any new changes are resubmitted to the anonymous function and accounted for as a row within the provided results.
Now that we have more than one result whose key is that of @CouchDB, let’s revisit our ability to filter results for an identified key simply by appending ?key="@CouchDB" to the preceding URL. Upon receiving a response to http://127.0.0.1:5984/guestbook/_design/guests/_view/signatures?key="@CouchDB", you will find yourself presented with two rows.
SQL databases that make use of tables to store data require all fields that will be used for a project to be made known up front, so that a column can be used to retain that value. This behavior requires that all data utilize each predetermined field. If a value for those fields is not specified, a default value must be provided, lest there be an error while running a query.
On the other hand, NoSQL databases do not rely on tables to store data. Instead, they store data in individual documents, like those we have been working with. Because each document represents its own body of data, it can possess any variety of fields it chooses.
Creating Design Documents via Cradle
As we have just recently stored a document that makes use of the time in which it was created, we should devise a query that can map all documents for our guestbook database into their own view. One thing we will have to keep in mind is that if an object does not possess the time field, we must make certain not to populate our view with the current document. Such a query is reflected in Listing 12-15.
Listing 12-15. Creating a Design Document to Possess Multiple Views
 1 //..truncated code

19 /*saving of a view*/
20 gbDataBase.save('_design/guests', {
21  views : {
22   sigTime : {
23    map : "function( doc ){ "+
24                "if(doc.time){" +
25                  "emit(doc.handle,{ handle:doc.handle, time:doc.time, message:doc.message });" +
26                "}" +
27            "}"
28   },
29   signatures : {
30    map : "function(doc) {" +
31              "emit(doc.handle,{ handle:doc.handle,message:doc.message });" +
32           "}"
33   }
34  }
35 }, function(err, res) {
36  if (err) {
37   console.log('error', err);
38  } else if (res) {
39   console.log(res);
40  }
41 });
Listing 12-15 outlines in bold the key elements of our new design document. The first item I will discuss is that saving a design document with the name of a document that exists will overwrite the original content of that document. In the preceding listing, I am opting to save the current design document with the name of an existing one, in order to show you that you can have multiple views within a design document.
Using the save method and the required complex structure for a design document, this view will be used to provide two queries regarding our guestbook. These two queries are signatures and sigTime. The view signatures is, in fact, the same query used previously; however, as this update will be overwriting the existing _design/guests document, we must provide this view in addition to our sigTime, lest it be deleted. However the view sigTime reflects an entirely new query, which will be used to create a view to reveal only documents that possess the time field.
As you can see within the lines of 24 and 26, our map function determines if the document supplied does indeed possess a field labeled time. Only if the field is present will our function emit a new row for this view. Running, Listing 12-15, should no network issues be present, will result in the following output:
{ ok: true,
  id: '_design/guests',
  rev: '2-b0723b44888089eeecf790a1c3e37824' }
You may be able to note that the result returned is no different than that we received when saving an ordinary document. However, what is different, aside from the IDs, is that as this file has been updated, its revision now reflects version 2.
Now that we have two views, let’s visit our Futon interface once again and take a moment see the results it provides. Figure 12-18 reveals our two views within the drop-down menu at the top-right-hand side of the interface.

Figure 12-18. sigTime and signatures successfully created as queries of guests
As you can see from Figure 12-18, both queries reside under the same document ID, yet either can be used to provide its own set of results. Feel free to toggle between the two views and note how the results vary.
EXERCISE 12-1. PERSISTING INCOMING DATA
In Chapter 11, you learned how to receive, authorize, and process incoming JSON. Using a form along with Ajax, we have been posting users’ first and last names to our Node application. Up until now, we have not been retaining those names. In fact, all we have been doing is returning the extracted values as the entity body of the request. Using Cradle, create a new database labeled “visitors” and retain all incoming names.
Last, provide the incoming request with the response supplied by CouchDB with each use of the save method. You can compare your code with that of Listing 12-16.
Hint: Remember that Cradle provides all response as JavaScript objects. However, a response can only be supplied as a string.
Listing 12-16 leverages the code in Listing 11-3 from Chapter 11 and incorporates the changes discussed in this chapter. The additions from this chapter appear in bold.
Listing 12-16. Incorportaing Cradle with an Existing HTTP Node Application
/*require*/
var cradle = require('../node_modules/cradle'),
var http = require('http'),

/*HTTP*/
var server = http.createServer();
server.addListener('request', requestHandler);
server.listen(1337, '127.0.0.1'),

/*Cradle*/
var DBConnection = cradle.Connection;
var couchDB = new DBConnection('127.0.0.1', 5984, {
 cache : true,
 raw : false,
 forceSave : true
});
/*create visitors database*/
var gbDataBase = couchDB.database('visitors'),
    gbDataBase.create();

/* handle incoming requests */
function requestHandler(request, response) {

 if (request.method === "POST") {
  var incomingEntity = '';
  var data;

  request.addListener('data', function(chunk) {
   incomingEntity += chunk;
  });

  request.addListener("end", function() {
   if (request.headers['content-type'].indexOf("application/json") > -1) {
    data = JSON.parse(incomingEntity);
   } else if (request.headers['content-type'].indexOf("application/x-www-form-urlencoded") > -1) {
    data = parseQueryStringToObject(incomingEntity);
    return;
   }
   saveToDB(data, response);
  });

 } else if (request.method === "GET") {
  if (request.url === "/index.html") {
   response.statusCode = 200;
   response.setHeader("Content-type", "text/html");
   response.write('<!doctype html>'),
   response.write('<html lang="en">'),
   response.write('<body>'),
   response.write('<form action="formPost" method="POST" onsubmit="return ajax();" content="application/x-www-form-urlencoded">'),
   response.write('First-Name:'),
   response.write('<input name="fname" type="text" size="25"/>'),
   response.write('Last-Name:'),
   response.write('<input name="lname" type="text" size="25"/>'),
   response.write('<input type="submit"/>'),
   response.write('</form>'),
   response.write('<script>'),
   response.write('function ajax(){'),
   response.write('var xhr = new XMLHttpRequest();'),
   response.write('xhr.open("POST", "formPost");'),
   response.write('xhr.onload=function(){ alert(this.responseText);};'),
   response.write('xhr.setRequestHeader("Content-Type", "application/json");'),
   response.write('xhr.setRequestHeader("Accept", "application/json");'),
   response.write('var input = document.getElementsByTagName("input");'),
   response.write('var obj = {'),
   response.write('fname : input[0].value,'),
   response.write('lname : input[1].value'),
   response.write('};'),
   response.write('xhr.send(JSON.stringify(obj));'),
   response.write('return false;'),
   response.write('}'),
   response.write('</script>'),
   response.write(' </body>'),
   response.write('</html>'),
   response.end();

  } else {
   response.statusCode = 204;
   response.end();
  }
 } else if (request.method === "OPTIONS") {
  response.statusCode = 200;
  if (request.url === "/formPost") {
   response.setHeader("Access-Control-Allow-Origin", '*'),
   response.setHeader("Access-Control-Allow-Headers", 'Content-Type, Accept,
        Accept-Language,Accept-Encoding, User-Agent, Host, Content-Length, Connection, Cache-Control'),
   response.setHeader("Access-Control-Allow-Methods", 'GET, POST, OPTIONS'),
  }
  response.end();
 }
 console.log("response=-end");
};
console.log('Server running at http://127.0.0.1:1337/index.html'),

var saveToDB = function(obj, response) {
 gbDataBase.save(obj, function(err, res) {
  response.setHeader("Access-Control-Allow-Origin", "*");
  if (err) {
   response.statusCode = 500;
   console.log('error', err);
  } else if (res) {
   response.statusCode = 200;
   var stringResponse = JSON.stringify(res);
   response.setHeader("Content-Type", "application/json");
   response.setHeader("Content-Length", Buffer.byteLength(stringResponse, 'utf8'));
   response.write(stringResponse);
  }
  response.end();
 });
};

var parseQueryStringToObject = function(queryString) {
 var params = {}, queries, temp, i, l;
 // Split into key/value pairs
 queries = queryString.split("&");
 // Convert the array of strings into an object
 for ( i = 0, l = queries.length; i < l; i++) {
  temp = queries[i].split('='),
  params[temp[0]] = temp[1];
 }
 return params;
};
Summary
This chapter demonstrated the persistence of JSON from the perspective of the server. In contrast to persisting data via the client, as we achieved in Chapter 7, persisting data on the server can offer a whole lot more advantages.
For starters, visitors cannot delete their data simply by clearing cache or deleting their cookies. As the database resides behind HTTP requests, our application can safeguard the data from specific requests, thereby offloading the control of what is saved/deleted to our application. Additionally, because all data is being retained in a centralized location rather than on visitors’ browsers, we can perform unique queries to organize our data and make connections between those using our applications.
CouchDB is a convenient way in which we can construct a document-oriented database. Furthermore, because the content within each document is JSON, our applications are more flexible than those of traditional SQL databases.
Key Points from This Chapter
- CouchDB is a NoSQL database.
- NoSQL databases store their data as JSON within individual documents.
- CouchDB leverages the power of JSON and JavaScript to create a powerful and open source database.
- CouchDB’s API is simply HTTP requests.
- Futon is a wrapper that allows us to get up and running with CouchDB immediately.
- A query in CouchDB is referred to as a view.
- A document that contains a view is referred to as a design document.
- The emit function populates a new row.
- emit can be called as many or as few times per document as you like.
- Cradle is a Node module that can be installed to wrap all HTTP requests.