
Electron’s shell functionality assists developers with helpful ways to interact with the desktop environment. The methods within shell are designed as shortcuts to assist us in identifying and opening that files our application cannot (and should not) open itself. Your application can open files in the background, which is usually how you can use shell. But you may wish to allow your users to open files themselves by giving them access to a File ➤ Open menu. You may wish to open files with your application for various reasons: to open saved preference files saved by the application, to open a user’s files saved earlier by the application, or to load data for your application saved as flat files (JSON or text files). Also, keep in mind that the Renderer Process of your application is essentially a Web browser, so you can load any HTML files. When your Electron application creates or references files or URLs, the people who use your applications expect the application to assist them with locating and opening those files or URLs. With shell, Electron makes these tasks easy for developers and users.
Best Practice: While Electron’s shell functions are available in both the Main and Renderer processes, we recommend that you use it in your Main process so that you can better control its use. Use Inter-Process Communication (IPC) as a bridge between your Renderer process and Main process to make these functions work.
In this chapter, we’ll start with the Electron Quick Start project and add the Electron shell methods beep, showItemInFolder, openItem, and openExternal.
Getting Started
As with each of these examples, we start off using the Electron Quick Start project. We will use git clone to create a new copy of the quick start in a new folder, in this case named electron-shell-example.
Open terminal and navigate to the folder where you would like to place your code:
git clone https://github.com/electron/electron-quick-start electron-shell-exampleChange your active directory to electron-quick-start:
cd electron-shell-exampleInstall the dependencies:
npm installReset Git:
git init
Now that you have our example project installed, type npm start into your terminal application just to make sure the application loads and runs as expected.
Let’s take a moment to modify this package.json file and match our own by updating some nodes.
Change the name node to “electron-shell-example.”
Change the version number to “0.0.1” since we are just starting out.
In the description let’s use something like “A sample Electron application to demonstrate shell features.”
Remove the repository node. If you decide to put your results in a repository you can change or re-add this node with the correct address.
Keywords can be “Electron,” “shell,” and “example.”
“author”: Your name goes here.
Let’s change the “license” node to “MIT”.
Now that we have our electron-shell-example project created and have made certain that it runs, let’s start making some changes to the code.
Making the System Alert Sound
Let’s begin with the most simple of the shell methods, shell.beep – which prompts the computer to make the system beep sound. Open the main.js file in the root of the project and add this line to the top of your file:
const { shell } = require('electron') This syntax, using the module name shell inside curly braces, gives you access to Electron’s shell package and now you can add the methods by referencing the shell variable. Let’s give that a try.
At the bottom of your createWindow method, add the shell.beep call:
function createWindow () {// Create the browser window.mainWindow = new BrowserWindow({width: 800, height: 600})// and load the index.html of the app.mainWindow.loadURL(url.format({pathname: path.join(__dirname, 'index.html'),protocol: 'file:',slashes: true}))// Open the DevTools.// mainWindow.webContents.openDevTools()// Emitted when the window is closed.mainWindow.on('closed', function () {// Dereference the window object, usually you would store windows// in an array if your app supports multi windows, this is the time// when you should delete the corresponding element.mainWindow = null})shell.beep()}
Let’s test this out by opening the Terminal application and entering npm start to load our application. Did you hear the beep? Cool, right? OK, maybe not so cool, but it works. If you did not hear the beep, please make sure that your computer’s sound is not muted or that you don’t have headsets that you are not wearing plugged in. We’d use shell.beep if we wanted to get the user’s attention along with something like making the dock icon bounce. Using the system’s beep can be annoying, so be responsible and use it sparingly.
Let’s take shell.beep one step further and add it to the renderer.js file, too, like so:
// This file is required by the index.html file and will// be executed in the renderer process for that window.// All of the Node.js APIs are available in this process.const { shell } = require('electron')shell.beep()
Now, run npm start in Terminal and you should hear two beeps: one from the Main process and one from the Renderer process. Like we said earlier, we don’t believe using shell.beep in the Renderer process is a good idea - we like keeping our system integration in the Main process - but we wanted to make sure you know how to do it if you found a proper use case.
Showing Files in the Operating System
Let’s move on to something more practical like revealing a file in the user’s operating system. This is a fairly practical feature that your application may need. Suppose as part of a process in your application a file is generated, and you would like to present that file in its containing folder. This is the method you would use to make that happen.
Before we start, make sure that you remove both of the shell.beep calls we just created because, like we just said, beeping can be annoying.
First, let’s create a new text file so we can test out this method. In your code editor, create a new file on the root of the project and name it test.txt and place some text inside of it, say, “shell is swell.”
Now that we have a test file we can use shell.showItemInFolder. In your main.js file, update the code inside the createWindow method to look like this:
let filePath = app.getAppPath() + '/test.txt'shell.showItemInFolder(filePath)
In this code we’re using the Main process app package’s getAppPath method to get the application path so that we can locate our test.txt file. We add ‘/’ and the file name so that the filePath variable becomes a string representing the file we would like to use. The leading ‘/’ is important because getAppPath does not end in a “/” and without it, the path will be incorrect and the file will not be found. We pass the filePath variable in the next line as the path argument for our showItemInFolder method.
Before you start the application again, make sure to check if the folder you want to open isn’t already open so you aren’t disappointed in the results. Now, when you run npm start from Terminal, you will see the folder and file, as shown in Figure 10-1.
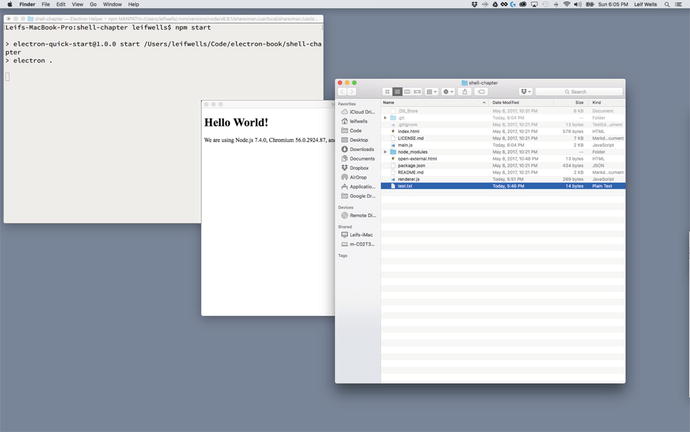
Figure 10-1. This image shows shell.openItemInFolder opening a folder and highlighting a file in the Mac OS X Finder
Please notice that the correct folder is open and the correct file is selected, highlighting it to the user. Mission accomplished!
Opening Files with the Operating System
Now that we’ve located a file in our operating system, let’s build off that feature to open that file using shell.openItem method. This method allows you to open files in the assigned application for the file type. For instance, suppose your application creates a text file for the user. To open that file for the user, you would use shell.openItem. We’re going to continue using the test.txt file for this example, and in our system the file will open in the default text editor on Mac OS X.
Update your code with the following highlighted updates:
let filePath = app.getAppPath() + '/test.txt'shell.openItem(filePath)
Now, run npm start in Terminal and you will see this method in action (Figure 10-2).
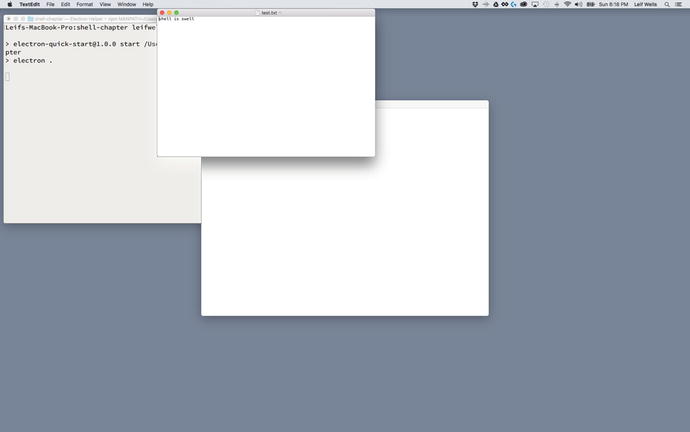
Figure 10-2. This image shows shell.openItem opening a text file with the system’s default text editor, TextEdit
Notice that our Electron application has opened our text file with TextEdit. This is useful for common system text and image files, files that already have an assigned default application. One common file type that shell.openItem doesn’t work well with is HTML files. That is where shell.openExternal comes in. Best practice for opening a file with an external application should require user interaction. If the user hasn't used the File ➤ Open menu item or a specific button in your Renderer Process, let the user know a file will be opened.
Opening HTML Files with the Operating System
Opening HTML files in Electron is a little tricky. You see, Electron is essentially a browser so opening an HTML file using shell might be a little confusing: are we opening the HTML file in Electron or in a browser? If you open an HTML file in your current Chromium window, your application will disappear while you could provide a back button, and restarting your application from the point you left may be difficult. So, shell.openItem doesn’t open HTML files. We need to use shell.openExternal and it will open in your default browser.
Before we start this example, we need to create another file on the project root, this time naming it test.html and entering the text “test html file” into the file. In this example, we’re not actually using a file coded in HTML, just a file with the .html file extension.
Now we can update the main.js file to match the following following code:
let filePath = 'file:///' + app.getAppPath() + '/test.html'shell.openExternal(filePath)
In this code we’ve added two lines. In the first line we’re creating the variable filePath but this time we are creating a string in the URL format prefixing it with “file:///” so that our browser understands that this file is on our file system and not on a server somewhere on the Internet. If we want to open a URL online, we could set this string to a typical URL like https://electron.atom.io/ or any real address.
Best Practice: An Electron application has full access to the user’s system just like any desktop application. As a Web developer, working with the imbedded security of a browser may make you ill-prepared to work in the desktop environment. Follow security guidelines for desktop application development for the platforms on which your application will be running. Do no harm.
Run the npm start command in Terminal to see the file opened by your browser. See how our simple HTML file is opened and displayed in Chrome, our default browser (Figure 10-3).
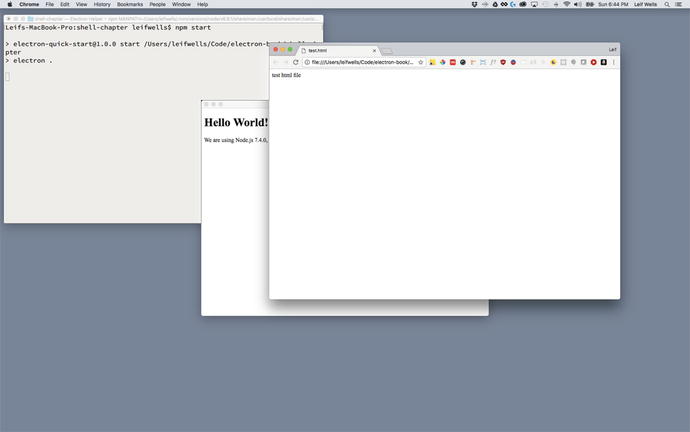
Figure 10-3. This image shows the result using shell.openExternal to open an HTML file
There are some caveats to this scenario, though. If you are going to use shell to open HTML file, we recommend that you limit the HTML file to use simple syntax and be careful of using external CSS and image files without doing proper testing in multiple browsers on target platforms. Each browser handles “file:///” addresses a little differently, so if you keep things simple this might work for you.
Summary
In this chapter we took a look at a few of the methods that are part of Electron’s shell package: shell.beep - a simple command to make the system beep sound occur; shell.openItemInFolder – the method that allows your application to display a file in the user’s operating system; shell.openItem – the method to use when you want your application to open a file with the default application for that file type; and shell.openExternal – the method that opens files and Internet URLs. These shell methods could be necessary for any application. We recommend using shell in the Main process to keep your system integration in one place.