
Now is it time to turn our attention to how to transform your Electron application into one that can be easily be distributed. Throughout this book, we have simply been using the stand-alone version of Electron and having it load our collection of HTML and JavaScript files. The de facto solution to take your project’s files and create a stand-alone native application is a, npm package aptly called electron-builder. In this chapter, we will look at configuring our application so we can build our stand-alone applications.
We recommend creating a test application to work through setting up the process and exploring the differences that various parameters can have. By exploring with a simple application, you can initially ignore any additional requirements that your actual application might have.
If you are not familiar with Electron Builder, it supports the following:
Building and Packing your Electron application for macOS, Windows, and Linux.
Support Code Signing of the application,
Generates Auto Update ready applications,
Installing Electron Builder
To install Electron Builder simply run
npm install electron-builder --save-devOnce this package is installed, we can begin modifying our package.json file and our directory structure to support using Electron Builder. Let’s start with the easy one, the directories.
Adjusting your Build Directories
Electron Builder is going to look for various build assets within a directory named build. If you have a directory named this already, you will need to adjust your existing build process. Electron Builder tends to be a bit rigid about directory structure and asset names.
Another directory you will want to create is the dist directory. This directory will serve as the location of the outputs from running electron builder.
Finally, create another directory named app. Although you don’t have to do this, we recommend keeping your actual application within its own directory named app. Move the index.html, main.js and renderer.js files into this new directory, as shown in Figure 15-1.
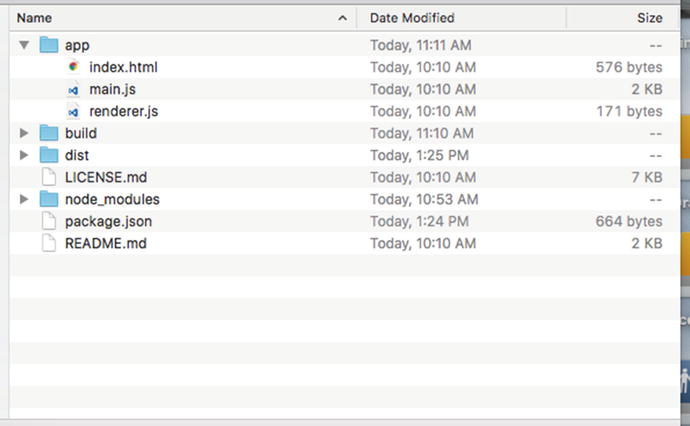
Figure 15-1. The revised directory structure
Updating the package.json file
Electron Builder is controlled through setting properties in the package.json file and executing npm scripts. Let’s add in the script that we will call to perform our build. Within the scripts object, we will add our dist script. This script will execute the build command for us. It is here we can define our target platforms and architectures (see tables below)
Build Platforms | Description |
|---|---|
--mac, -m, -o, --macos | Build for macOS |
--win, -w, --windows | Build for Windows |
--linux, -l | Build for Linux |
Build Architectures | Description |
|---|---|
--x64 | Build for x64 |
--ia32 | Build for ia32 |
So, to build for all three platforms and architectures our script will be:
"scripts": {"start": "electron .","dist": "build -mwl --x64 --ia32"}
Before we continue defining additional build parameters, we may need to perform some additional installations. If you are developing on a Mac, it is possible to build for both Windows and Linux. Unfortunately, the converse does not apply.
Building for Windows on macOS
To create a Windows executable on a macOS computer, you need to install the following two packages: Wine and Mono. If you are not familiar with these packages, Wine is a free implementation of Windows on Unix, and Mono is an open source implementation of Microsoft's .NET Framework. To install them, we will use Homebrew, another software package manager. Don’t worry, it should already be installed on your Mac. From the command line, enter:
brew install wine --without-x11brew install mono
Once these two packages have been installed, which can take a few minutes, you can now build Windows-friendly Electron apps.
Building for Linux on macOS
To build an Electron app for Linux on macOS install these two packages:
brew install gnu-tar graphicsmagick xzbrew install rpm
With those installations in place, we can turn to defining the actual build parameters for each platform.
Configuration Options
Within our package.json file, we will be adding our build configuration options. Here is a bare minimum script:
"build": {"appId": "com.your-company.electron-app-name","copyright": "Copyright © 2017 YOUR-NAME","productName": "My Electron App","electronVersion": "1.4.1","mac": {"category": "public.app-category.developer-tools"},"win": {"target": ["nsis"]},"linux": {"target": ["AppImage","deb"]}}
Let’s look at each parameter in more detail.
appId
This is a reverse domain notation identifier for your application. It is used as CFBundleIdentifier for MacOS and as Application User Model ID for Windows. If none is supplied, electron builder will default to com.electron.${name}. This serves as the unique ID for your application.
copyright
The copyright information that is displayed in the applications information window. If none is provided it will default to Copyright © year author.
productName
Unlike the name property, this value can include spaces and other special characters. This will be the displayed name of the application. If none is provided, the name value is used.
electronVersion
If you want to specify exactly with version of Electron you want to package, set this value. It is recommended that you define this value; otherwise you may package your application with a later version of Electron than the version you may have been developing against.
mac
This is where we will set macOS specific options. We will explore additional options later in this chapter. In this example, we define the category that our application would be sorted by. For the complete list of valid entries, see Apple’s documentation at https://developer.apple.com/library/ios/documentation/General/Reference/InfoPlistKeyReference/Articles/LaunchServicesKeys.html#//apple_ref/doc/uid/TP40009250-SW8 .
windows
This is where we will set Windows-specific options. We will explore additional options later in this chapter. For this example, we are defining the target build to be the NSIS (Nullsoft Scriptable Install System) format.
linux
This is where we will set Linux specific options. We will explore additional options later in this chapter. For this example, we are we are defining the target build to be the AppImage and Debian formats.
Since we moved our entry point to our app, we need to adjust the value of the main property:
"main": "./app/main.js"Testing Our First Build
With our package.json file saved, from the command line run npm run dist. In the terminal you will see the following output, as shown in Figure 15-2:
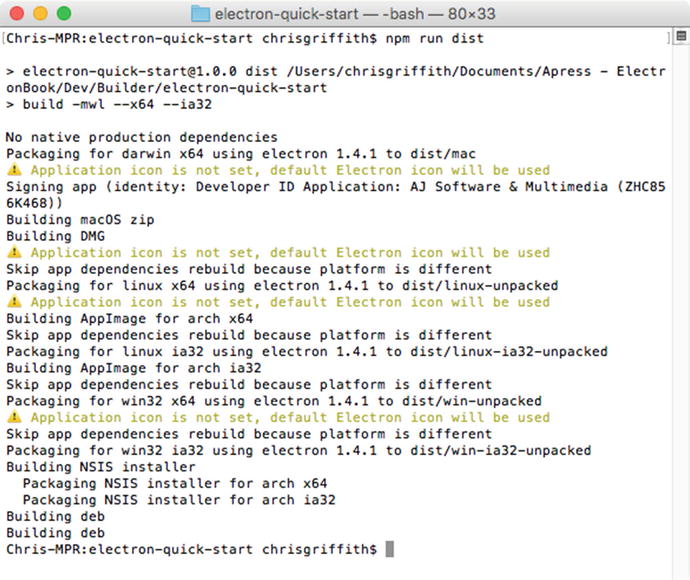
Figure 15-2. Initial build output
Go ahead and open the dist directory and you will see the various outputs from our build process, as shown in Figure 15-3.
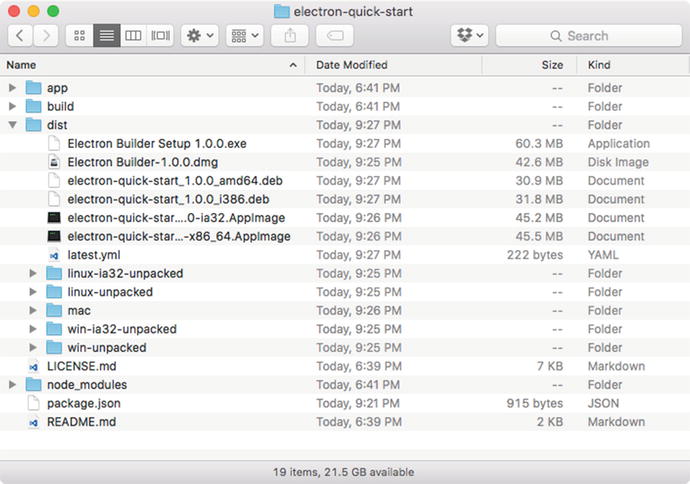
Figure 15-3. The dist folder contents
Since the Electron binaries for each platform were not installed, electron builder will automatically download them. Once they are downloaded to the dist directory, future builds will not need to perform this task, unless you remove those files. Go ahead and try out the packaged sample app for your platform(s).
For macOS user, double-click on the Electron Builder-1.0.0.dmg. This will display the default app install window for us (see Figure 15-4). Copy our new Electron Builder app into our Applications folder.
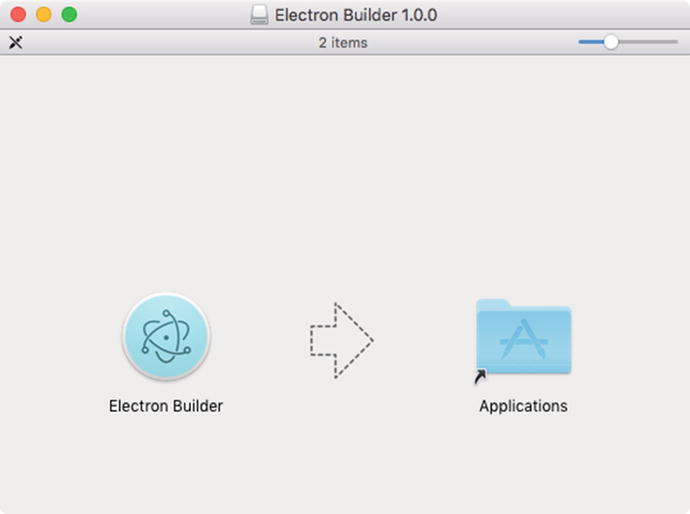
Figure 15-4. The default OSX installer window
If you launch it, you will see the same app that you have been playing with throughout this book.
For Windows users, double-click the Electron Builder Setup 1.0.0.exe file to install the Electron Builder app.
For Linux users, use either .deb or .AppImage file for your system.
With our initial test build completed, let’s move on to making the actual application a bit more polished.
Configuring the App Icon
As you saw during the build, the process informed us that “Application icon is not set, default Electron icon will be used.” Let’s address this issue. By default, electron builder will look for these resources with the build directory. The macOS app icon is built from the icon.icns that we need to include. This file is a collection of six icons, each at a different size:
16px
32px
128px
256px (OS X 10.5+)
512px (OS X 10.5+)
1024px (OS X 10.7+)
There are several online icon generators that you can use, such as https://iconverticons.com/online/ .
For our Windows app, we need to include an icon.ico file. This only needs to include a 256x256 pixel icon.
The Linux icon set will be generated automatically based on the macOS icon.icns file.
Configuring the macOS DMG
Often developers will provide a custom background image for the macOS install window. This is done by providing a custom background image. Figure 15-5 shows a sample of this type of customization.
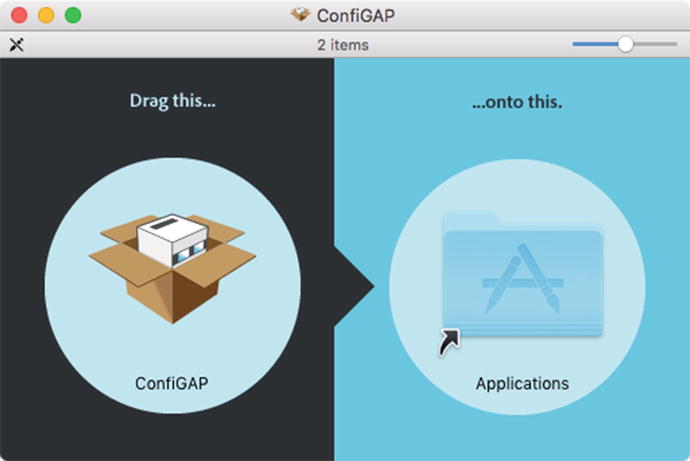
Figure 15-5. The ConfiGAP install window with the custom background image
Electron Builder can use either a file named background.png or background.tif. The default size of this image is 540x380. You can change the size of the background to another value; however, you will need to adjust the location of your app’s icon and the Applications folder alias icon. To do this you need to use the contents property. This array should contain the x and y locations of each element, the Applications alias, and the app itself.
Another adjustment you can make is the size of the icons that are displayed within the installer window by setting the icon-size. As a reference, the default size is 80 pixels.
We can also change the virtual drive that is created when a user double-clicks the dmg file. Both the name and icon are settable using the title and icon properties, respectively.
Here are the dmg properties for the ConfiGAP dmg:
"dmg": {"title": "ConfiGAP Installer","background": "./build/background.png","icon": "./build/installer.icns","iconSize": 128,"contents": [{"x": 388,"y": 160,"type": "link","path": "/Applications"},{"x": 128,"y": 160,"type": "file","path": ""}]}
If you do not want to supply an image, you can set the background color through the backgroundColor property.
Configuring the Windows Installer
The Windows Installer can also be customized for a better user experience. There are two styles of Windows installers, referred to as either one-click (see Figure 15-6) or ‘boring’ by the Electron Builder documentation. All these options are defined with the nsis properties object. There are several properties that you will want to define for either type of installer:
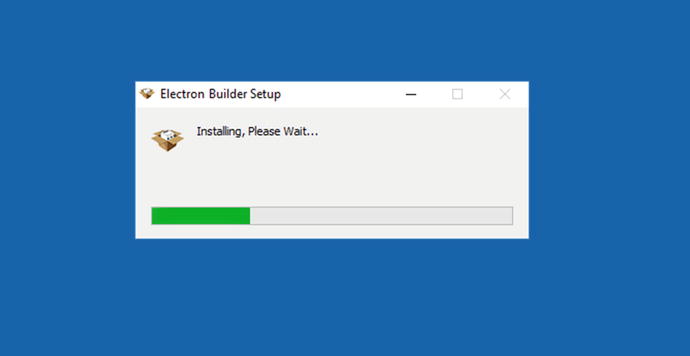
Figure 15-6. One-Click Installer Dialog
installerIcon
This is the icon that is shown within the install dialog. The default file is named installerIcon.ico.
installerHeaderIcon
This is the icon that the final installer will use once built. It will default to build/installerHeaderIcon.ico or application icon. This is used by the one-click installer only.
artifactName
This is the name of the installer file itself. By default, it will be the ${productName} Setup ${version}.exe.
If you want to use the boring installer, then set the oneClick property to false. When using this style of installer there are several other properties that you will want to configure:
installerHeader
This is the 150 x 57 bmp graphic that is shown in the upper right of the installation screen (see Figure 15-7).
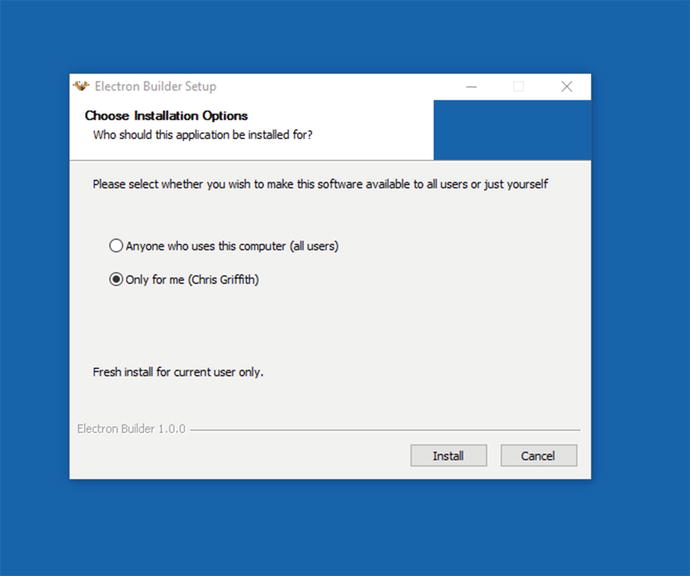
Figure 15-7. The position of the header graphic in the installer window
installerSidebar
This is the 164 x 314 bmp graphic that is shown along the left of the installation complete screen (see Figure 15-8).
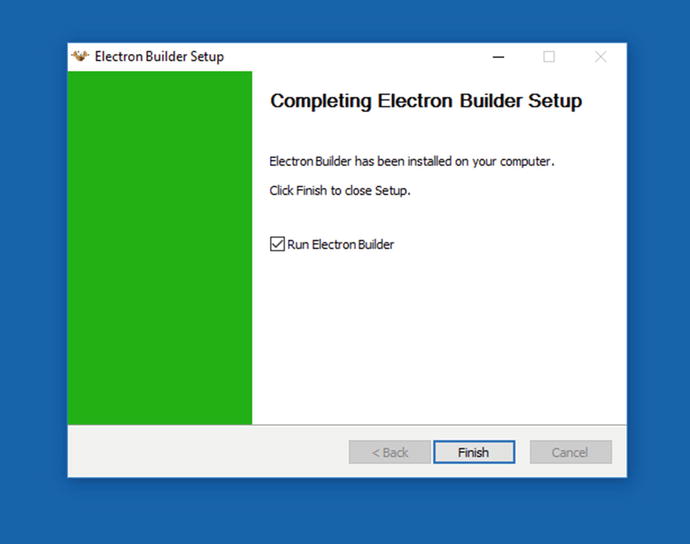
Figure 15-8. The position of the sidebar graphic in the installer window
uninstallerSidebar
This is the 164 x 314 bmp graphic that is shown along the left of the uninstallation start screen (see Figure 15-9).
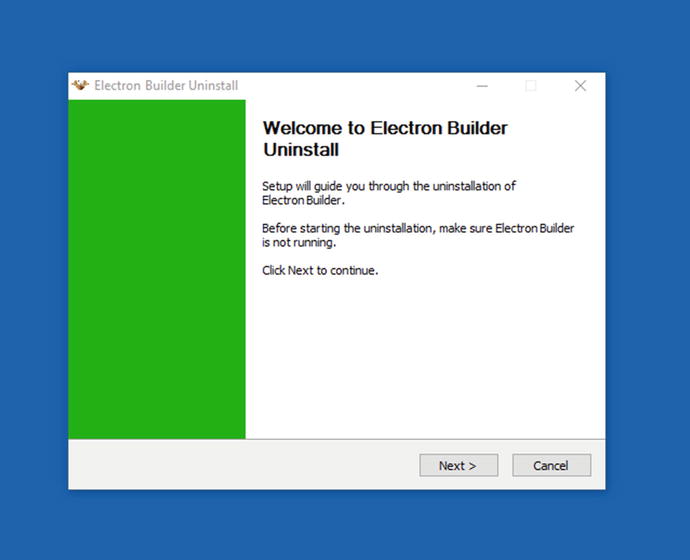
Figure 15-9. The position of the sidebar graphic in the uninstaller window
Here is a sample for a one-click installer:
"nsis" : {"oneClick": true,"artifactName": "Electron Builder Setup.exe","installerIcon": "./build/installerIcon.ico","installerHeaderIcon": "./build/installerHeaderIcon.ico"}
and for a boring installer:
"nsis": {"oneClick": false,"artifactName": "Electron Builder Setup.exe","installerIcon": "./build/installerIcon.ico","installerHeader": "./build/installerHeader.bmp","installerSidebar": "./build/installerSidebar.bmp","uninstallerSidebar": "./build/uninstallerSidebar.bmp"}
There are several other properties that you can define for either NSIS-based installer. To learn more about them, visit https://github.com/electron-userland/electron-builder/wiki/Options#NsisOptions .
Summary
In this chapter we have touched on the major elements you need to include in your package.json file in order to package and build releasable Electron applications. We also looked at some of the supporting assets that are needed to create professional-looking installers. We urge you to take the time and review all the additional options available from this solution. Visit https://github.com/electron-userland/electron-builder/wiki/Options for more information. There are so many other parameters that you can set when building your stand-alone Electron application.
In the next chapter, we will look at how to support auto-updating our applications.