We are frequently asked what a makerspace in an elementary school should do and what equipment it can include. Elementary students have always made things, and just as the ability to make a typed report has migrated younger, so too can professional-looking art pieces. What makes sense will largely depend on the school style, budget, and similar factors that are not universal. In this chapter, we give you some anecdotal information and resources developed by early adopters.
Chapters 8 and 10 give you some ideas that might work for younger students. What we will focus on in this brief chapter are some special considerations for younger students and makerspaces that serve them, and their use of 3D printing in particular.
What Is Realistic?
There are four hurdles to a successful 3D print. You need to figure out what you are trying to make. Then you need to create the CAD file and figure out the slicing settings and print orientation. Finally, you will manage the actual printing process and any post-processing. Typically, elementary students will only go to the point of creating a CAD file, although in Chapter 8 you can read about examples of students painting prints.
Most 3D printers are designed primarily for the adult market, or at least are recommended for age 13 and over. Generally speaking, this feels about right to us. Most schools designate a staff person, a teacher, or (if they have one) a makerspace manager to deal with the equipment. In some cases this falls to the school librarian. If the school is K-12, though, older students may be able to undergo some extra training and earn a defined role in a makerspace—perhaps managing the queue of jobs to 3D printers, doing quality control on CAD files, or slicing the files.
Another thing to consider is whether 3D prints can be part of a larger fabrication project. Maybe a project is mostly cardboard, but a decorative or functional part is made with a 3D printer. Having students think about what tool to use for what job is a key part of the real-life design process, but too often we see teachers trying to find a reason to use a 3D printer and constructing an artificial project. It is better, if possible, to let an organic design need create a use case for a 3D printer (or any tool).
The right project prompt is important, too. It should be neither too specific nor so broad that students do not know where to start. This is a natural way to fit design into other subjects (for example, illustrating part of a story, or solving a problem a character encounters in a story). Chapter 7 looks at these issues for teachers generally, and you may find some further insights there.
Tip
If you are interested in reading blogs with real stories of life in educational making, particularly for the younger set, you might enjoy Lucie deLaBruere’s journal, at http://createmakelearn.blogspot.com . Lucie often collaborates with Rodney Batschelet, whose work you can read about and see in Chapter 8 (we appreciate their suggestions). John Umekubo’s eponymous website, https://johnumekubo.com , is another elementary-focused source of maker-educator news and practical ideas.
Design
The maker movement has resulted in the democratization of CAD tools, discussed in depth in Chapter 6. Tinkercad ( www.tinkercad.com ) and Morphi ( www.morphiapp.com ) are common choices for the younger set. Tinkercad has the virtue and problem that it is entirely web based, but it is free and always adding new features. Morphi is a downloadable app, available at a modest price per student.
Younger students, though, tend to make unprintable designs in Tinkercad. Often, they will have pieces of “one part” hovering over one another or poking below the level of the platform. A discussion of basic design constraints, at an age-appropriate level, can help. (Have a large, flat base, avoid overhangs, be sure features are not too small, and so on.) We have found that pictures of “the right way” to design something for 3D printing (or any fabrication technology), along with what happens when things are created “the wrong way,” to be valuable to learners of all ages.
Tinkercad used to operate purely by dragging, dropping, and adding and subtracting prefabricated shapes, but it has now added a “Scribble” function. This allows you to do a limited amount of freehand drawing, such as Joan’s name on the side of the roof in Figure 11-1, and add these freehand parts to other shapes.
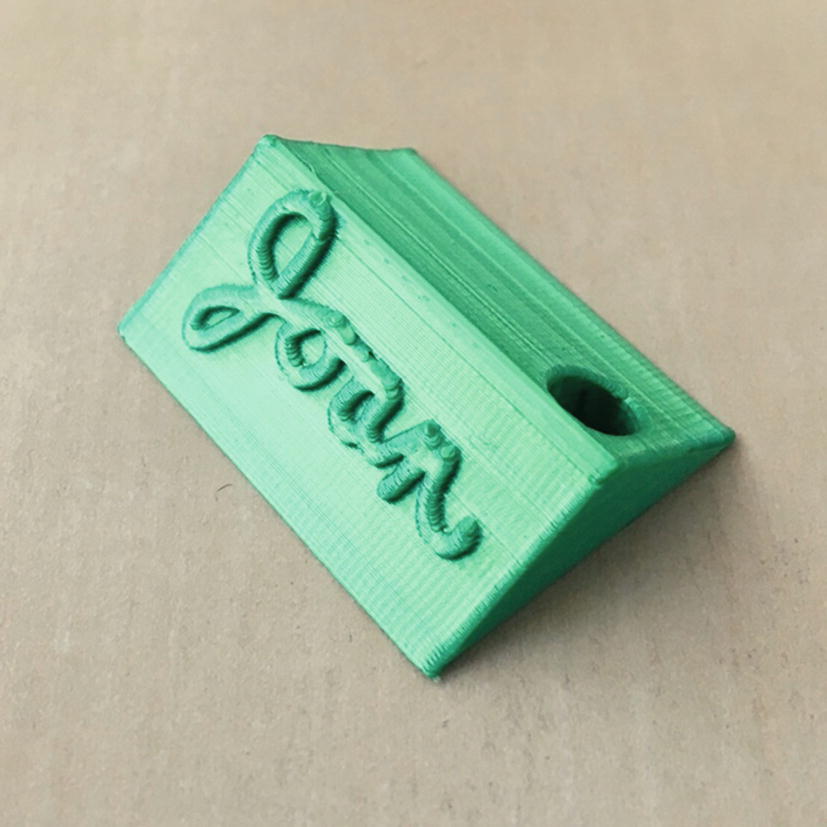
Demonstration of the Scribble functionality in Tinkercad
Tip
If you are running the makerspace, you will want to come up with a policy about what acceptable use of school 3D printers is. Classwork only? If not, do teachers give permission? Are they only allowed to print their own designs, or can they pull down things from Thingiverse and print them (or have them printed)? Who pays for filament? We talk about these issues more in Chapter 7. In an ideal world, teachers will want to make prints to demonstrate concepts, and priorities will need to be set up.
Teaching Coding
Teaching CAD can be part of teaching coding. Tinkercad has recently added Codeblocks, which are based on Scratch blocks. This feature, in beta as of this writing, is a way to tie in coding and design.
At a more sophisticated level, OpenSCAD (also discussed in Chapter 6) enables you to develop models based on code rather than drag-and-drop objects. It may not be appropriate for the average elementary student, however; it is a C-like language (a family of languages that also includes Java and Python) and requires being able to handle coding at that level.
Summary
Elementary-level students will most likely be involved in the front end of the 3D printing process (design and CAD) and possibly in the post-processing (painting). In-between there will likely be a need for some support for slicing and running the prints, and for other steps that may need more grown-up equipment. Using the design process as training for later hands-on work might be a realistic way to go, too.