In this chapter, you will take a detailed look at how you can avoid being hacked by a sniffer; in addition, you will learn how you can exploit SQL injection flaws and take over database servers. Crackers break into systems by injecting malformed SQL queries that map out the database column names. This is known as SQL mapping, with SQL injection being the technique by which they obtain this information. When you have a good grasp of SQL mapping, you can defend your system from such attacks.
There are a few good sniffing tools available in Kali Linux. You can also build your own sniffing and SQL injection tool using Python’s library.
This chapter starts with sniffing and spoofing. You will learn about the transmitted protocols and packets and how the sniffers can poison them. You will also how to prevent such sniffers.
After that, you will learn what types of services are available to guard against sniffing, from database fingerprinting to data fetching from the database.
Sniffing and Spoofing
Suppose you are logging into a web site where no encryption is used; in such a case, your username and password are vulnerable. Someone can capture the network traffic between you and the web site and discover your credentials. This is sniffing.
Spoofing, on the other hand, refers to some kind of identity change; in other words, the attacker pretends to be someone else within the network traffic . Let’s suppose you are computer A. Nevertheless, you send a command pretending to be computer B. This is useful, for example, when you want to generate network packets to pretend to be someone else. People will think that computer A has generated this packet, but in reality, computer B actually generated it. This is an example of spoofing.
In DNS spoofing, someone changes their own IP address to the victim’s IP address while sending a packet.
SniffJoke is a Linux application that can handle your TCP connection by delaying it, modifying it, and finally injecting it with fake packets inside your transmission.
Kismet is a wireless network detector, sniffer, and intrusion detection system that can do many things.
Wireshark is another great network protocol analyzer that lets you inspect network activities at a microscopic level. The Wireshark project started in 1998, and it continues to be successful because of the contributions of networking experts throughout the world. It captures packets on the live system, but the offline analysis is available thereafter. One of the great advantages of Wireshark is its multiplatform availability.
In the following sections, you will take a close look at these tools and see how they work. As usual, Python will help when you do the sniffing jobs. You will then learn about Scapy, a Python program that enables the user to send, sniff, dissect, and forge network packets. You can capture either packets or frames with these sniffer tools. You can also display data using these tools.
Packing and Unpacking with Python
In the following code, you will see how you can build a server that packs data and sends it while it is bound to a port and at the same time accepts a connecting IP address. On the other side, the client receives the packet and unpacks the data in the raw binary form.
# struct pack method passes two parameters - format string and values
message = struct.pack('hhl', 1, 2, 3)
connection.send(message)
connection.close()
Let’s try to understand the code. What is happening here exactly?
Binary data is stored in files, or you can get the binary data from the network. The struct module in Python generally refers to conversations between Python and C structs, and it is represented by Python byte objects. While describing the layout of the C structs, it uses format strings. The conversion is to Python values or from Python values; you can also use format strings.
In the client-side code, you usually receive the data and unpack it.
The pack method of struct returns a bytes object containing the values 1, 2, 3, ...; it is packed according to the format string fmt. The unpack method unpacks from the buffer, and the results are displayed in a tuple even if there is exactly one item.
The following are more examples on a terminal using Python 2.7:
//code of struct pack methods
ss@ss-H81M-S1:~$ python2.7
Python 2.7.6 (default, Nov 23 2017, 15:49:48)
[GCC 4.8.4] on linux2
Type "help", "copyright", "credits" or "license" for more information.
>>> import struct
>>> struct.pack('b', 1)
'x01'
>>> struct.pack('i', 1)
'x01x00x00x00'
>>> struct.pack('q', 1)
'x01x00x00x00x00x00x00x00'
>>> struct.pack('d', 1)
'x00x00x00x00x00x00xf0?'
>>> struct.pack('x', 1)
Traceback (most recent call last):
File "<stdin>", line 1, in <module>
struct.error: pack expected 0 items for packing (got 1)
>>>
Sometimes exceptions are thrown. For example, the string size may not match.
In the following code, b stands for a signed char in C, in Python it is an integer, and the packed value in bytes is 1. Inspect this line and the output in the next line.
>>> struct.pack('b', 1)
'x01'
The C type i represents an integer, in Python it is also an integer, and the packed value is 4 bytes.
>>> struct.pack('i', 1)
'x01x00x00x00'
Please read Python’s documentation for further details about this.
Why Wireless Media Is Vulnerable
Now you have an idea of how you can display the packet data. Some sophisticated sniffer tools can intercept this data and display it in its original form such as an e-mail or document. To reiterate, the term packet has a direct reference to the data at layer 3, which is also called the network layer of the OSI model; we have seen it in our “Network” chapter. The term frame refers to data at layer 2, or the data link layer. Frames have MAC addresses inside them. Packets have IP addresses inside them.
Usually, all host-to-host network communication is based on the TCP/IP data communications model. This model maps to the OSI model, which has seven layers of data communication.
By now, you can guess that the goal of a sniffer is to obtain important information sent from a target system.
When data travels over the network, the header information is added to the beginning of the data. There are two types of header data: an IP header contains the source and destination IP addresses, and the MAC header contains the source and destination MAC addresses. IP addresses are necessary for routing traffic to the correct IP network. MAC addresses ensure one thing: that the data is sent to the correct destination network. Delivery to the correct host is also ensured in such cases.
In a normal situation, a host gets the data intended for it. It will never receive data intended for another host. However, a sniffer can receive data not intended for it.
The two types of sniffing are passive and active.
Passivesniffing listens to and captures traffic. It is especially useful in a network connected by hubs (WiFi). Passive sniffing is hard to detect.
Activesniffing launches Address Resolution Protocol (ARP) spoofing; it is also called a traffic flooding attack against a switch to capture traffic. The active type is detectable.
In cases of hubs or wireless media, all hosts on the network can see all the traffic, and this makes the life of a sniffer much easier. A passive sniffer can capture traffic going to and from all hosts connected via the wireless media.
The switch works in a different way. It sends data according to the MAC address. It is organized, and it maintains a MAC table of all the systems and port numbers to which it is connected. For this reason, switches are always safer than hubs. However, this is not foolproof. Using a span port or port mirroring may enable all data to be duplicated to another port.
Protocols are always susceptible to sniffers if they are not encrypted. By using a sniffer, you can easily capture protocols such as HTTP, POP3, Simple Network Management Protocol (SNMP), and FTP. Username and passwords can be extracted from sniffing.
In normal cases, any system will read and respond to the traffic sent directly to the MAC address. However, changing a network interface card (NIC) to promiscuous mode changes the game completely.
Many hacking tools change the system-dependent NIC to promiscuous mode. In promiscuous mode, the NIC reads all traffic and sends it to the sniffer. Many hacking tools also incorporate a specially designed promiscuous mode driver that facilitates the sniffing process.
ARP Poisoning Is a Threat
The Address Resolution Protocol plays a major role while data travels over a network. To reach one host, another host needs the MAC address, although the IP address is the first necessity. ARP translates the IP address to the MAC address to help the host get to the proper address. If the host has a past conversation record with another host, it first searches its ARP cache to find the MAC address. If it has not done that, it asks for the IP address first through the ARP broadcast.
What an attacker does is simple. An attacker sends a fake or spoofed ARP message to the Ethernet LAN. These frames contain false MAC addresses that are enough to confuse network devices like switches, and this allows the packets to be sniffed. Alternatively, they can be sent to unreachable addresses in a denial-of-service (DoS) attack. These methods are known as ARP spoofing or poisoning.
SniffJoke Prevents Poisoning
To avoid such poisoning, there is a good tool called SniffJoke. You can open this terminal-based sniffer countermeasure application from the Sniffing and Spoofing category in Kali Linux.
If you want to open it as a user, it will crack a joke first.
//code as a Kali Linux user
pg@kali:~$ sniffjoke
SniffJoke is too dangerous to be run by a humble user; go to fetch daddy root, now!
Therefore, you need to issue the su command and become the root user. You may try to send some packets to your IP address like this. Sending packets through SniffJoke is safer because it is basically a connection scrambler. Its main purpose is to prevent packet sniffers from reassembling the network sessions of the user. It uses a local fake tunnel to manage the packets; while doing this, it doesn’t disturb the kernel. The usage of SniffJoke is a bit cryptic, and you won’t find any documentation. However, that can make SniffJoke a good countermeasure to prevent sniffing since the bad guys don’t have any documentation either.
If you can place a PHP script on a web server protected by a secured protocol, you can run the sniffjoke-autotest command against it, and you can identify the evasion techniques being used. While running the code on your virtual Kali Linux server, it creates a series of configuration files. According to the SniffJoke GitHub page, the PHP script looks like this:
Now go to the segmentation folder and get the listing there. First, you will see the iptcp-options.conf file. This contains option sections within the TCP header (IP and TCP together). When a host (a personal computer) initiates a TCP session, the host negotiates the IP segment size.
Finally, take a look at the sniffjoke-service.conf file.
In the sniffjoke-service.conf file, you can uncomment the ipblacklist.conf file that contains the destination IP addresses to be ignored. If you uncomment the ipwhitelist.conf file, it lists the destination IP addresses to be covered by SniffJoke in the future. The iptcp-options.conf file contains the working IP and TCP option combinations that I have just explained.
Now after editing the configuration files, you can run SniffJoke like this:
//code for running SniffJoke
root@kali:~# sniffjoke --location home
The tool will run in the background and update the default gateway so that all packets are routed through it for manipulation and you can prevent sniffing.
SniffJoke is a good countermeasure to prevent sniffing; however, because of the unavailability of any official documentation, it does not have a lot popularity among security people.
Analyzing Protocols Using Wireshark
Another good protocol analyzer is Wireshark. Just type Wireshark in the Kali Linux terminal to open the software. You can start capturing packets through it.
In addition, if you open the browser and browse any web site, the packets are shown automatically in the Wireshark GUI (Figure 9-2).
Figure 9-2
Wireshark is running and capturing traffic
You can save all the traffic captured, before closing the Wireshark, using the File ➤ Save option.
Figure 9-3 shows all the traffic captured on this interface through Wireshark. If you look at the protocols closely, you will find that there are many protocols such as TCP, HTTP, SMT, and so on. If you browse any HTTPS-enabled web site, it will immediately start showing in the interface.
Figure 9-3
Wireshark has captured all the traffic
By learning the protocols, you can do all the necessary scanning later. The basic purpose here is to capture the network traffic for later scanning, and in addition you can try to understand how ARP spoofing might start at this point.
Sniffing Packets Using Scapy
How can you send, sniff, dissect, and forge network packets? The answer is Scapy. This is a Python program that comes with Kali Linux. Through Scapy you can probe, scan, and even attack a network. The interactive packet manipulation capability of Scapy has made it a powerful tool in the sniffer business. For scanning, tracerouting, probing, unit tests, attacks, or network discovery, Scapy is ideal, and it can be compared to other great sniffing tools such as hping, arpspoof, arp-sk, arping, p0f, and even Nmap, tcpdump, and tshark.
Let’s see how Scapy works. Open your virtual Kali Linux terminal and type the following:
scapy
Let’s see a few methods that Scapy uses, shown here:
//code using Scapy
>>> lsc()
arpcachepoison : Poison target's cache with (your MAC,victim's IP) couple
arping : Send ARP who-has requests to determine which hosts are up
bind_layers : Bind 2 layers on some specific fields' values
bridge_and_sniff : Forward traffic between two interfaces and sniff packets exchanged
corrupt_bits : Flip a given percentage or number of bits from a string
corrupt_bytes : Corrupt a given percentage or number of bytes from a string
As you see in the previous code, many things look achievable using Scapy; you can sniff the exchanged packets, you can corrupt a packet, and you can poison ARP and other things.
Now let’s sniff some packets and try to understand how network layers work. On the Scapy terminal, just type this command:
//sniff using scapy
>>> packets = sniff(filter="icmp", iface="eth0")
It will not generate anything because Scapy starts sniffing the packets on this interface. You need to ping your IP address so that the packets can be captured. Open another window of your Kali Linux terminal and start pinging.
//code for pinging
root@kali:~# ping 192.168.2.2
PING 192.168.2.2 (192.168.2.2) 56(84) bytes of data.
64 bytes from 192.168.2.2: icmp_seq=1 ttl=63 time=0.147 ms
64 bytes from 192.168.2.2: icmp_seq=2 ttl=63 time=0.155 ms
64 bytes from 192.168.2.2: icmp_seq=3 ttl=63 time=0.162 ms
64 bytes from 192.168.2.2: icmp_seq=4 ttl=63 time=0.154 ms
64 bytes from 192.168.2.2: icmp_seq=5 ttl=63 time=0.159 ms
64 bytes from 192.168.2.2: icmp_seq=6 ttl=63 time=0.151 ms
64 bytes from 192.168.2.2: icmp_seq=7 ttl=63 time=0.154 ms
64 bytes from 192.168.2.2: icmp_seq=8 ttl=63 time=0.156 ms
^C
--- 192.168.2.2 ping statistics ---
8 packets transmitted, 8 received, 0% packet loss, time 7008ms
rtt min/avg/max/mdev = 0.147/0.154/0.162/0.015 ms
These ping statistics show that eight packets were transmitted, eight were received, there was 0 percent packet loss, and the time taken was 7008 ms. Now you can go back to the second terminal where you have Scapy open. Here is the output of the packets:
//the number of sniffed packets
>>>
>>>
>>> packets
<Sniffed: TCP:0 UDP:0 ICMP:16 Other:0>
You clearly see that through ICMP I have captured 16 packets. Let’s learn more about it. Now you can close the second ping terminal. In the Scapy terminal, issue the following command so that you can use the show() method. The output will show all the packets that have been captured so far.
//showing captured packets
>>> packets.show()
0000 Ether / IP / ICMP 10.0.2.15 > 192.168.2.2 echo-request 0 / Raw
0001 Ether / IP / ICMP 192.168.2.2 > 10.0.2.15 echo-reply 0 / Raw
0002 Ether / IP / ICMP 10.0.2.15 > 192.168.2.2 echo-request 0 / Raw
0003 Ether / IP / ICMP 192.168.2.2 > 10.0.2.15 echo-reply 0 / Raw
0004 Ether / IP / ICMP 10.0.2.15 > 192.168.2.2 echo-request 0 / Raw
0005 Ether / IP / ICMP 192.168.2.2 > 10.0.2.15 echo-reply 0 / Raw
0006 Ether / IP / ICMP 10.0.2.15 > 192.168.2.2 echo-request 0 / Raw
0007 Ether / IP / ICMP 192.168.2.2 > 10.0.2.15 echo-reply 0 / Raw
0008 Ether / IP / ICMP 10.0.2.15 > 192.168.2.2 echo-request 0 / Raw
0009 Ether / IP / ICMP 192.168.2.2 > 10.0.2.15 echo-reply 0 / Raw
0010 Ether / IP / ICMP 10.0.2.15 > 192.168.2.2 echo-request 0 / Raw
0011 Ether / IP / ICMP 192.168.2.2 > 10.0.2.15 echo-reply 0 / Raw
0012 Ether / IP / ICMP 10.0.2.15 > 192.168.2.2 echo-request 0 / Raw
0013 Ether / IP / ICMP 192.168.2.2 > 10.0.2.15 echo-reply 0 / Raw
0014 Ether / IP / ICMP 10.0.2.15 > 192.168.2.2 echo-request 0 / Raw
0015 Ether / IP / ICMP 192.168.2.2 > 10.0.2.15 echo-reply 0 / Raw
Now it is clear why the earlier output showed 16 packets. I have captured packets through the virtual Kali Linux terminal. It is much easier to get the individual packets by dissecting the Python tuple through an index. Let’s see packet 3.
A captured packet consists of many things. The first is the IP address: 192.168.2.2. Later the src (or source key) has the same value. You can also learn the protocol being used; here it is icmp, or Internet Control Message Protocol. You also have the MAC address: 52:54:00:12:35:02 and dst adapter address. You also have the sum of the correct digits that are compared later (0x2baa).
You should now understand how network layers and sniffers work together. There are many other tools available, however, and most of them are open source and free. So, go ahead and test them individually to see how they work in VirtualBox.
SQL Injection
There are several hacking techniques available for exploiting weaknesses in applications. SQL injection is one of them.
Note
Structured Query Language (SQL) is the language of databases and is used to retrieve and alter data in a database.
In badly written programs, some parameters can leave weaknesses in the application. Through HTML forms, malformed SQL queries are injected into the web interface, and through them crackers can try to map the system.
SQL injection and buffer overflow are such techniques that crackers use to exploit those vulnerabilities. Usually, data is stored in a temporary place called a buffer, and sometimes the extra data overflows cause areas of weakness that a hacker can exploit.
SQL injection is possible through user input fields. Almost every web site uses forms to take input from the users. Users enter a username and password and perform a search for a keyword. Sometimes these username and password input fields are not sanitized or remain unverified. So, a web site develops vulnerabilities as far as SQL injection is concerned.
Sometimes, crackers can exploit these vulnerabilities causing a shutdown of the system.
For that reason, developers should take SQL injection or buffer overflow countermeasures by utilizing proper and secure programs. A penetration tester must have adequate knowledge of how to detect and exploit SQL injection flaws.
A good tool to use is sqlmap. It is an open source penetration testing tool, and it automates the process of detecting and exploiting those flaws. It takes over the database servers and finds the internal data.
Detecting SQL Injection Vulnerabilities
How can you detect whether an application has vulnerabilities? It is easy to find out. You can check it by studying the URL and passing in some extra data. For example, suppose a company allows people to access employee details. A URL for accessing the president’s page might look like this:
By adding conditions to the SQL statement and evaluating the web application’s output, you can determine whether this web site has vulnerabilities. In most cases, the SQL statement used by the company database might look like this:
//SQL statement used for injection
SELECT id, name, description FROM employee WHERE ID = 1
Quite naturally, the database servers respond by returning the data for the first employee. The web page CSS styling will format the response into a good-looking HTML page.
As a penetration testing expert, you can try to inject an extra Boolean-based TRUE condition into the WHERE clause. Suppose you make a request like this:
http://company.com/employee.php?ID=1AND1=1
In addition, the database servers execute the queries like this:
//executing queries in database
SELECT id, name, description FROM employee WHERE ID = 1 AND 1=1
If this request returns the same employee ID, the application has SQL injection vulnerabilities. This is because the user’s input has been interpreted as SQL code. It should not have happened that way. If the site were secure, it would have rejected the request. In that case, it would treat the user’s input as a value, and the requested value combination, 1AND1=1, at the end of the URL would result in a type mismatch.
You can use sqlmap to ascertain whether a web application has vulnerabilities.
How to Use sqlmap
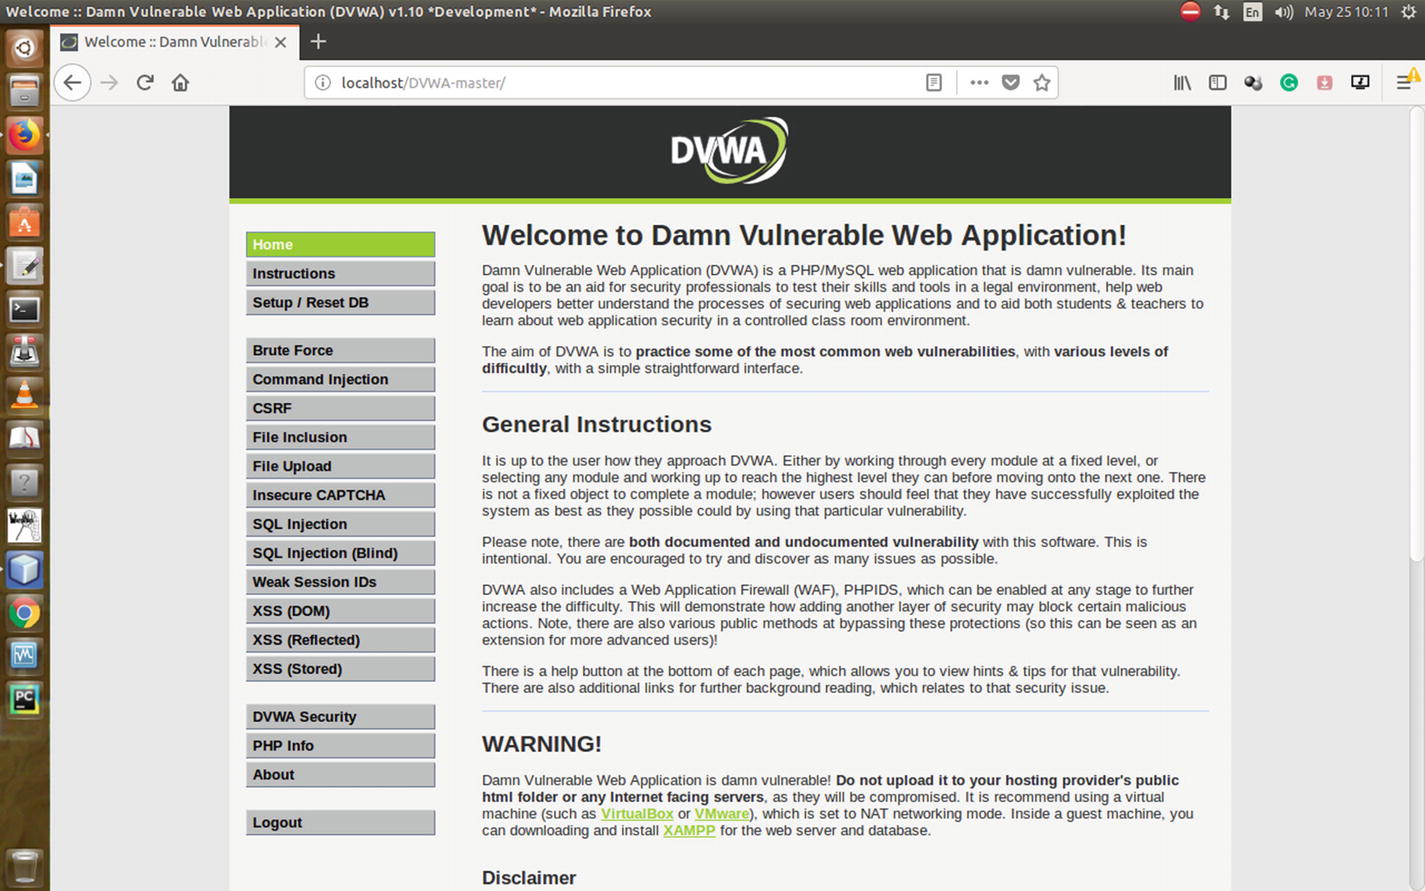
To test sqlmap, you can get help from the DVWA web site, which is a PHP/MySQL web application that was created to be vulnerable. You can download this web application to your local server and run tests on it. The application is actually not as vulnerable as it claims; however, you can try to break it by injecting some poison into it. This is a safe, legal practice.
Before you start using sqlmap, remember one important thing: you cannot and should not use it on any live system without getting permission from the proper authorities. Therefore, the main purpose of DVWA is to help security professionals test their skills and tools in a legal environment.
I will now show how you can do that. First, go the DVWA web site and download the zipped application folder. If your host machine is Windows, then the best bet is to use XAMPP to run the localhost web server. In any Linux distribution, you can upgrade your PHP version to 7.*. If your local web Apache2 web server runs perfectly, it looks like Figure 9-4.
Figure 9-4
Localhost running on a host machine
The next step is to install DVWA application on your local server (Figure 9-5). At the first go, it shows you many discrepancies in your PHP configuration.
Figure 9-5
DVWA web application setup check
Once you have managed those discrepancies, the application will guide you to the login page (Figure 9-6). In the username input field, provide admin, and in the password field provide password. Now you can log in to the DVWA secured web application.
Figure 9-6
DVWA login page
Before testing vulnerabilities, you need to check whether your MySQL database server is working well.
You can install mysql in any Debian Linux distribution with this command:
//code to install mysql on Linux
sudo apt-get install mysql-client-core-5.5
sudo apt-get install mysql-server
It will give you output like this:
//output of installation of mysql
Reading package lists... Done
Building dependency tree
Reading state information... Done
The following packages were automatically installed and are no longer required:
Next, you need to tweak some parts of the system’s php.ini file to run DVWA locally. Now you can safely reset the database through the DVWA application so that it creates a database called dvwa in your MySQL server.
It is wise not to use your virtual Kali Linux local Apache2 server to run DVWA. You should use your host system to do that. In the case of Kali Linux, it uses MariaDB instead of MySQL, so the DVWA application might not act properly in your virtual Kali Linux. However, you can learn how to create a database on the Kali Linux terminal.
If you issue the mysql command on your Kali Linux terminal, it outputs this:
//mysql command output in Kali Linux
root@kali:/var/www/html/DVWA-master# mysql
Welcome to the MariaDB monitor. Commands end with ; or g.
Your MariaDB connection id is 48
Server version: 10.1.29-MariaDB-6 Debian buildd-unstable
Copyright (c) 2000, 2017, Oracle, MariaDB Corporation Ab and others.
Type 'help;' or 'h' for help. Type 'c' to clear the current input statement.
Now you can create a database here by using a SQL command like this:
//code for creating database
MariaDB [(none)]> create database dvwa;
Query OK, 1 row affected (0.00 sec)
MariaDB [(none)]> grant all on dvwa.* to dvwa@localhost identified by 'xxx';
Query OK, 0 rows affected (0.00 sec)
MariaDB [(none)]> flush privileges;
Query OK, 0 rows affected (0.00 sec)
In addition, you can create a users table by issuing these commands:
//creating "users" table in Kali Linux MariaDB DVWA database
This will create the database and tables, but the advantage of the DVWA application is that it comes with its own database. It already has a few users like this:
Now you can open your Kali Linux Applications listing and run sqlmap. It has full support for six SQL injection techniques: boolean-based blind, time-based blind, error-based, UNION queries, and out-of-band.
You can issue a command like this to test the vulnerabilities of your locally hosted DVWA web site:
[10:37:30] [INFO] testing 'Oracle AND time-based blind'
[10:37:30] [INFO] testing 'Generic UNION query (NULL) - 1 to 10 columns'
[10:37:32] [WARNING] GET parameter 'user_token' does not seem to be injectable
[10:37:32] [CRITICAL] all tested parameters do not appear to be injectable. Try to increase values for '--level'/'--risk' options if you wish to perform more tests. If you suspect that there is some kind of protection mechanism involved (e.g. WAF) maybe you could try to use option '--tamper' (e.g. '--tamper=space2comment')
You can see that there are several other options available in sqlmap. You can append the --level option to 5. That is the maximum value it can take; the default value is 1. The --risk option can be appended, and the maximum value is 3; the default value is 1. The level option depends on what type of system you are using sqlmap on.
Brute-Force or Password Attacks
In the Kali Linux hacking tools listing, you won’t see any category named Brute-Force Attacks, although there is a category called Password Attacks. They are same and share common tools such as TCH-Hydra (in short Hydra), Findmyhash, John the Ripper, and many more.
The phrase brute force means the illegal effort of breaking into the back end of a system to get the username/password combination. It could consist of trial-and-error methods; it could be a planned effort, with well-structured, automated attacks using bots.
There are inherent risks involved in password-based authentication. A brute-force attacker might break into your system; sometimes they make an educated guess because people often use their own names, their children’s names, locations, and so on. Many organizations are waking up, lately, to this grim reality and are starting to use biometric or two-factor authentication to avoid such risks.
Web services like Gmail and others also offer two-factor authentication. In places like banks, it is mandatory to use a one-time password (OTP) that comes to a mobile handset. In some cases, where two-factor authentication is not available, using a strong password might come to help. However, often people avoid that just because it is hard to memorize. They make another mistakes, as well, such as storing passwords in a text file in their system.
Crackers write simple Python scripts to carry out thousands of these break-in attempts against web sites and sometimes gain access.
In this example, I will show how easy it is to break in to the hashed password if you use a simple password like the initials of your name. I first use the Findmyhash tool to show how you can break the MD5 hash.
First, find an MD5 hash generator web site. There are plenty.
I have used my initials (ss) to generate a hashed password (Figure 9-7). It comes out as 3691308F2A4C2F6983F2880D32E29C84. This looks quite formidable, but it is actually not.
Figure 9-7
MD5 hash generator web application
Let’s try to break this hash; open your Kali Linux terminal and type this code:
Analyzing with digitalsun.pl (http://md5.digitalsun.pl)...
... hash not found in digitalsun.pl
Analyzing with drasen.net (http://md5.drasen.net)...
... hash not found in drasen.net
Analyzing with myinfosec (http://md5.myinfosec.net)...
... hash not found in myinfosec
Analyzing with md5.net (http://md5.net)...
... hash not found in md5.net
Analyzing with noisette.ch (http://md5.noisette.ch)...
... hash not found in noisette.ch
Analyzing with md5hood (http://md5hood.com)...
... hash not found in md5hood …
Finally, it cracks the hash, and it displays the output on the terminal as well. It is like this:
//cracking the MD5 hash using "findmyhash"
Analyzing with rednoize (http://md5.rednoize.com)...
... hash not found in rednoize
Analyzing with md5-db (http://md5-db.de)...
... hash not found in md5-db
Analyzing with my-addr (http://md5.my-addr.com)...
***** HASH CRACKED!! *****
The original string is: ss
The following hashes were cracked:
----------------------------------
3691308f2a4c2f6983f2880d32e29c84 -> ss
root@kali:~#
Now you understand the risks of using a simple word as a password!
In the next brute-force/password-cracking example, I will use the TCH-Hydra tool and show how easy it is to find out a password from a text file stored on the system.
In the previous section, you learned how to install the DVWA web site on your local machine. You are running that web site, and you know there is a user called admin who has a password such as password.
However, as an admin, I have made a mistake; I have stored all my password listings in a text file called passlist on my system.
The cracker somehow has come to know that, and he is using Hydra to get that listing. Here is the code that he has used to extract all the passwords I have stored in a file:
1 of 1 target successfully completed, 6 valid passwords found
Hydra (http://www.thc.org/thc-hydra) finished at 2018-05-26 12:52:37
As you can see, Hydra finds the desired password in my text file, and it shows right at the top. Now the cracker can use the username and password combination and log in to the remote system.
What have you learned from this? When two-factor authentication is not available, the best line of defense against a brute-force attacker is to have a strong username and password combination (with alphanumeric characters, special characters, and capital letters). Even more important, you should not store the password listing on your system. Keep your password in your memory.
No brute-force or password-attack technology has been discovered so far that can break into your memory! Therefore, that is the safest place. As a penetration tester, you need to explain those points to your clients.