
Chapter Summary
In this chapter we bring together what we’ve done so far: build activity, source control, and unit testing and frame it within the context of Continuous Integration/Continuous Delivery (CI/CD).
When Done, You Will
Understand what CI/CD is.
Understand what a CI/CD Pipeline is.
Setup Azure DevOps with GitHub to act as our CI/CD pipeline.
Automatically Build, Test, and Package our API solution using Azure DevOps.
Prepare for Deployment to Azure.
What Is CI/CD?
To talk about CI/CD is to talk about a pipeline of work” or, if you prefer another analogy: a production line, where a product (in this instance working software) is taken from is raw form (code1) and gradually transformed into working software that’s usable by the end users.
Clearly, this process will include a number of steps, most (if not all) we will want to automate.
It’s essentially about the faster realization of business value and is a central foundational idea of agile software development. (Fret not, I’m not going to bang that drum too much.)
CI/CD or CI/CD?
Don’t worry, the heading is not a typo (we’ll come on to that in a minute).
CI is easy; that stands for Continuous Integration. CI is the process of taking any code changes from one or more developers working on the same piece of software and merging those changes back into the main code “branch” by building and testing that code. As the name would suggest, this process is continuous, triggered usually when developers “check-in” code changes to the code repository (as you have already been doing with Git/GitHub).
The whole point of CI is to ensure that the main (or master) code branch remains healthy throughout the build activity and that any new changes introduced by the multiple developers working on the code don’t conflict and break the build.
CD can be a little bit more confusing. Why? We’ll you’ll hear people using both the following terms in reference to CD: Continuous Delivery and Continuous Deployment.
What’s the Difference?
Well, if you think of Continuous Delivery as an extension of Continuous Integration, it’s the process of automating the release process. It ensures that you can deploy software changes frequently and at the press of a button. Continuous Delivery stops just short of automatically pushing changes into production though; that’s where Continuous Deployment comes in.

Continuous: integration, delivery, and deployment
So Which Is It?
Typically, when we talk about CI/CD, we talk about Continuous Integration and Continuous Delivery, although it can be dependent on the organization. Ultimately, the decision to deploy software into production is a business decision, so the idea of Continuous Deployment is still overwhelming for most organizations.
In this book though, we’re going to go all out and practice full-on Continuous Deployment!
The Pipeline

The DevOps Pipeline

The DevOps "loop"

Our Focus
What Is Azure DevOps?
Dashboards: For example, Red–Amber–Green (RAG) status of your pipeline, team members, etc.
Boards: Allows you to capture and plan your work using methodologies like Scrum and Kanban.
Repos: You can commit code (like we have done with GitHub) direct to Azure DevOps own repository.
Pipelines: The automated CI/CD pipeline and our focus for Azure DevOps.
Test Plans: End-to-end testing traceability for entire solutions.
Artifacts: Package management, Artefact repo, etc.
In this chapter we are going to be focusing exclusively on the “Pipeline” feature and leave the other aspects untouched. As interesting as they are, to cover these would require a separate book and is outside our scope.
Alternatives
Bamboo
Team City
Werker
Circle CI
That list is by no means exhaustive, but for now, we’ll leave these behind and focus on Azure DevOps.
Technology in Context
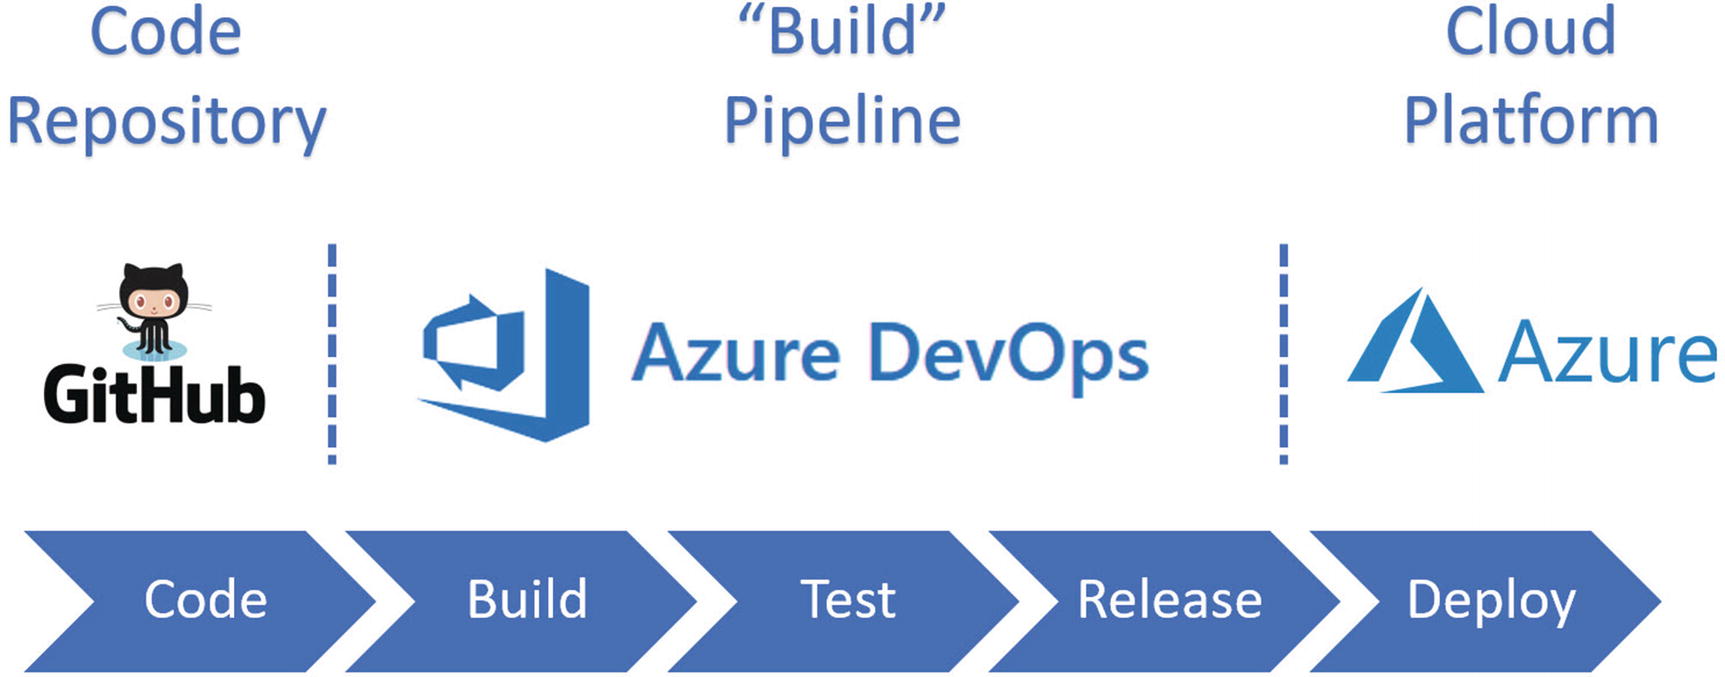
The Technology mix we'll be using

Alternate technology mix
So, our mix could look like the following.

Non-Microsoft mix
Going further, you can even break down the Build ➤ Test ➤ Release ➤ Deploy, etc. components into specific technologies. I’m not going to do that here.
- 1.
The relevant sequencing of technologies in our example.
- 2.
Make sure you understand the importance of the code repository (GitHub) as the start point.
- 3.
Be aware of the almost limitless choice of technology.
OK, enough theory; let’s build our pipeline!
Create a Build Pipeline

Azure DevOps landing page
![]() When working with both Azure and Azure DevOps, one thing I’ve noticed is that the user interfaces can change rapidly. At the time of writing this (May 2020), the screenshots are correct and current, but just be aware that given the nature of these products, they can change from time to time.
When working with both Azure and Azure DevOps, one thing I’ve noticed is that the user interfaces can change rapidly. At the time of writing this (May 2020), the screenshots are correct and current, but just be aware that given the nature of these products, they can change from time to time.
For the most part, these changes will be so small as to be inconsequential, for example, instead of “Create Project,” it becomes “New Project.” Other changes, while more significant, should still be easy enough to navigate through.

Create New Project

Name the project and select Public Visibility
You select the same “visibility” setting that your GitHub repo has (recommend Public for test projects).
Version Control is set to Git – this is the default.

Select Pipelines
- 1.Create pipeline.
 Figure 12-12
Create a new Pipeline
This first thing that it asks us is: “Where is your code?”
Well, where do you think?

GitHub is our code source
Be careful to select GitHub, as opposed to GitHub Enterprise Server (which as the description states is the on-premise version of GitHub).
If this is the first time you’re doing this, you’ll need to give Azure DevOps permission to view your GitHub account.

You'll be asked to authenticate to GitHub
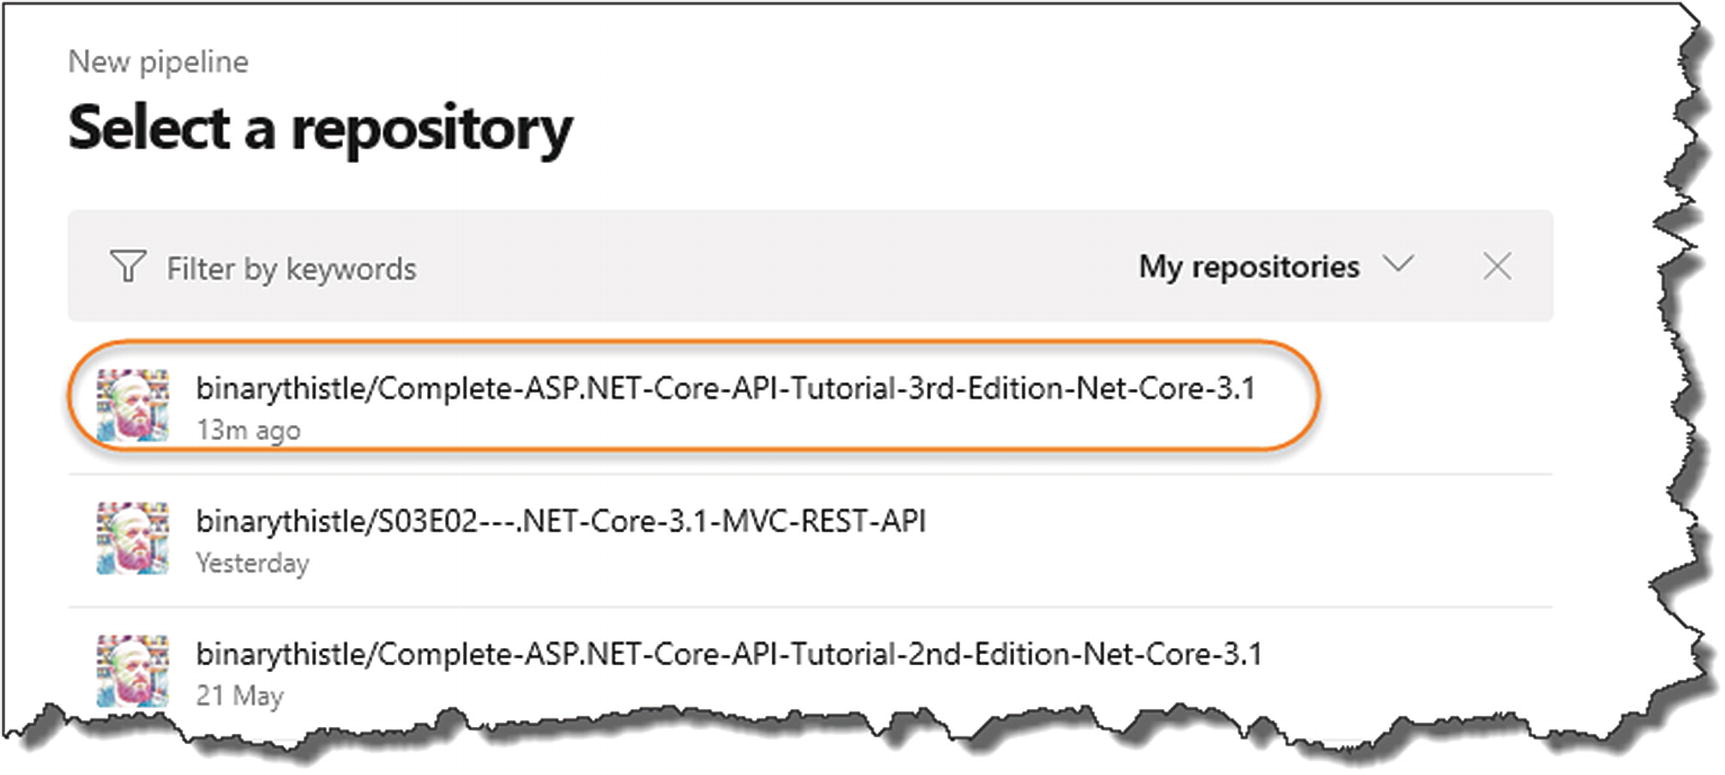
Select the relevant API Repository

Pipeline Templates – we'll create our own
![]() Some readers have reported an additional step appearing here (that I cannot replicate) requesting that you approve and install Azure Pipelines. If you see this, I’d suggest you approve and proceed.
Some readers have reported an additional step appearing here (that I cannot replicate) requesting that you approve and install Azure Pipelines. If you see this, I’d suggest you approve and proceed.
All this step will do is preconfigure the azure-pipelines.yml file for you (more on this next, but it’s basically the instructions for our CI/CD pipeline). We are going to create our azure-pipelines.yml file from the ground up so it doesn’t really matter which one you choose as we’ll be overwriting it. Anyway, select an option and continue.
![]() This is one of the areas of Azure DevOps that appears to change a lot! I have at times in my career suggested using one of the off-the-shelf configurations as shown in Figure 12-16, but they seem to change so much that I felt a safer, more stable bet would be to create our own from the ground up.
This is one of the areas of Azure DevOps that appears to change a lot! I have at times in my career suggested using one of the off-the-shelf configurations as shown in Figure 12-16, but they seem to change so much that I felt a safer, more stable bet would be to create our own from the ground up.

Example Azure-pipelines.yml
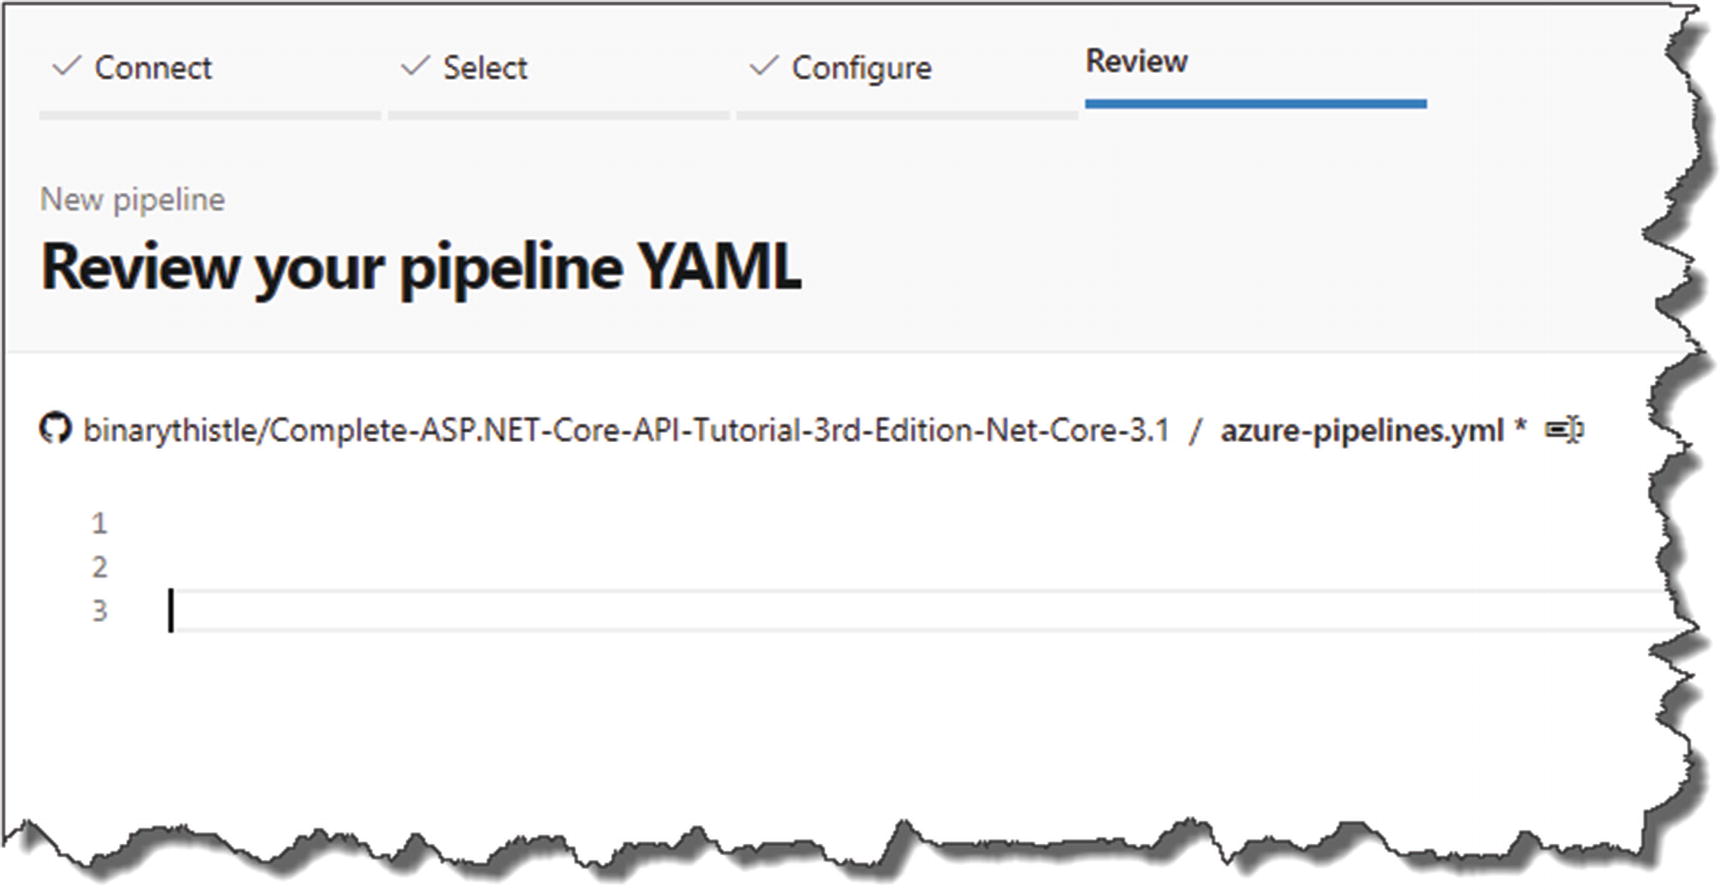
Empty Azure-Pipelines .yml
We are now going to add the first step to our file, which is simply to build our API Project. Before we do that, please read the warning below on formatting YAML files!
![]() YAML files are white case-sensitive, so you need to ensure the indentation is absolutely spot on! Thankfully the in-browser editor will complain if you’ve not indented correctly.
YAML files are white case-sensitive, so you need to ensure the indentation is absolutely spot on! Thankfully the in-browser editor will complain if you’ve not indented correctly.

Our Build Step
- 1.
The trigger point for the pipeline (GitHub).
- 2.
The image we will be performing the pipeline activities with.
- 3.
Setup a variable to specify the build configuration.
- 4.
A script task that performs a dotnet build for “Release.”
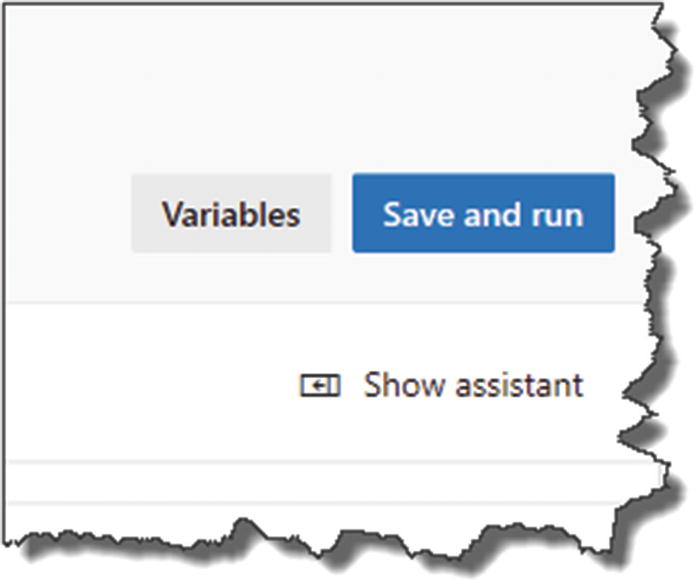
Manual Save and run
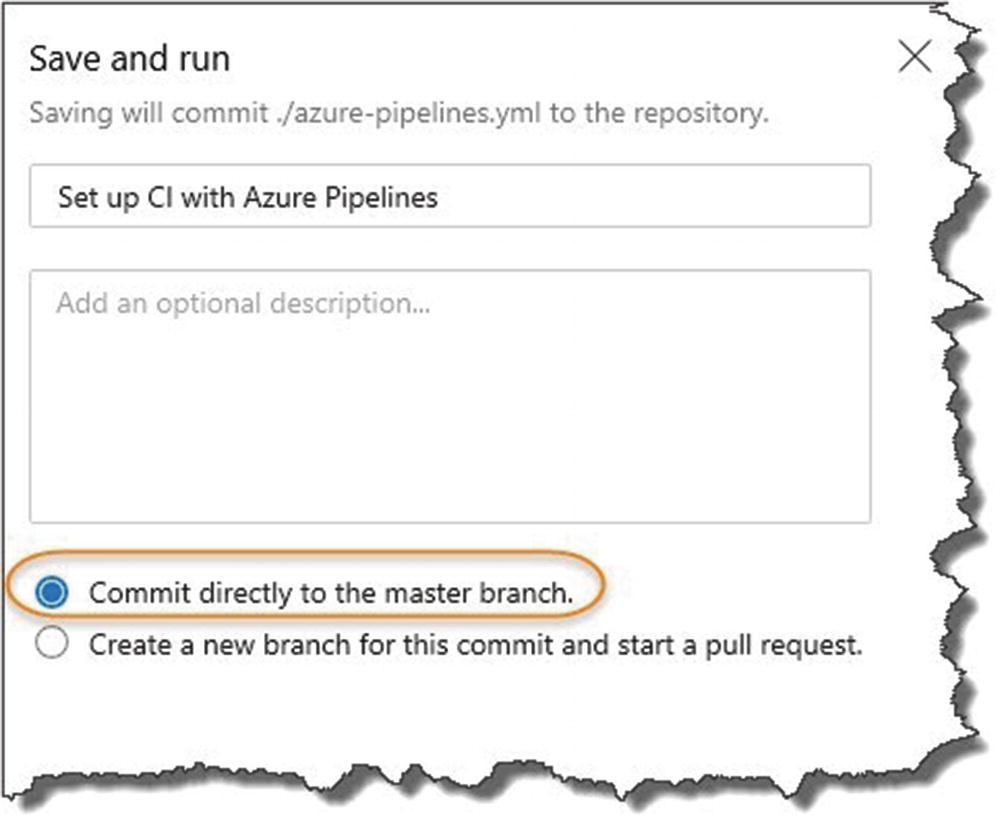
Commit the Azure-pipelines.yml to our GitHub repo
This is asking you where you want to store the azure-pipelines.yml file; in this case we want to add it directly to our GitHub repo (remember this selection though as it comes back later!), so select this option and click Save and run.
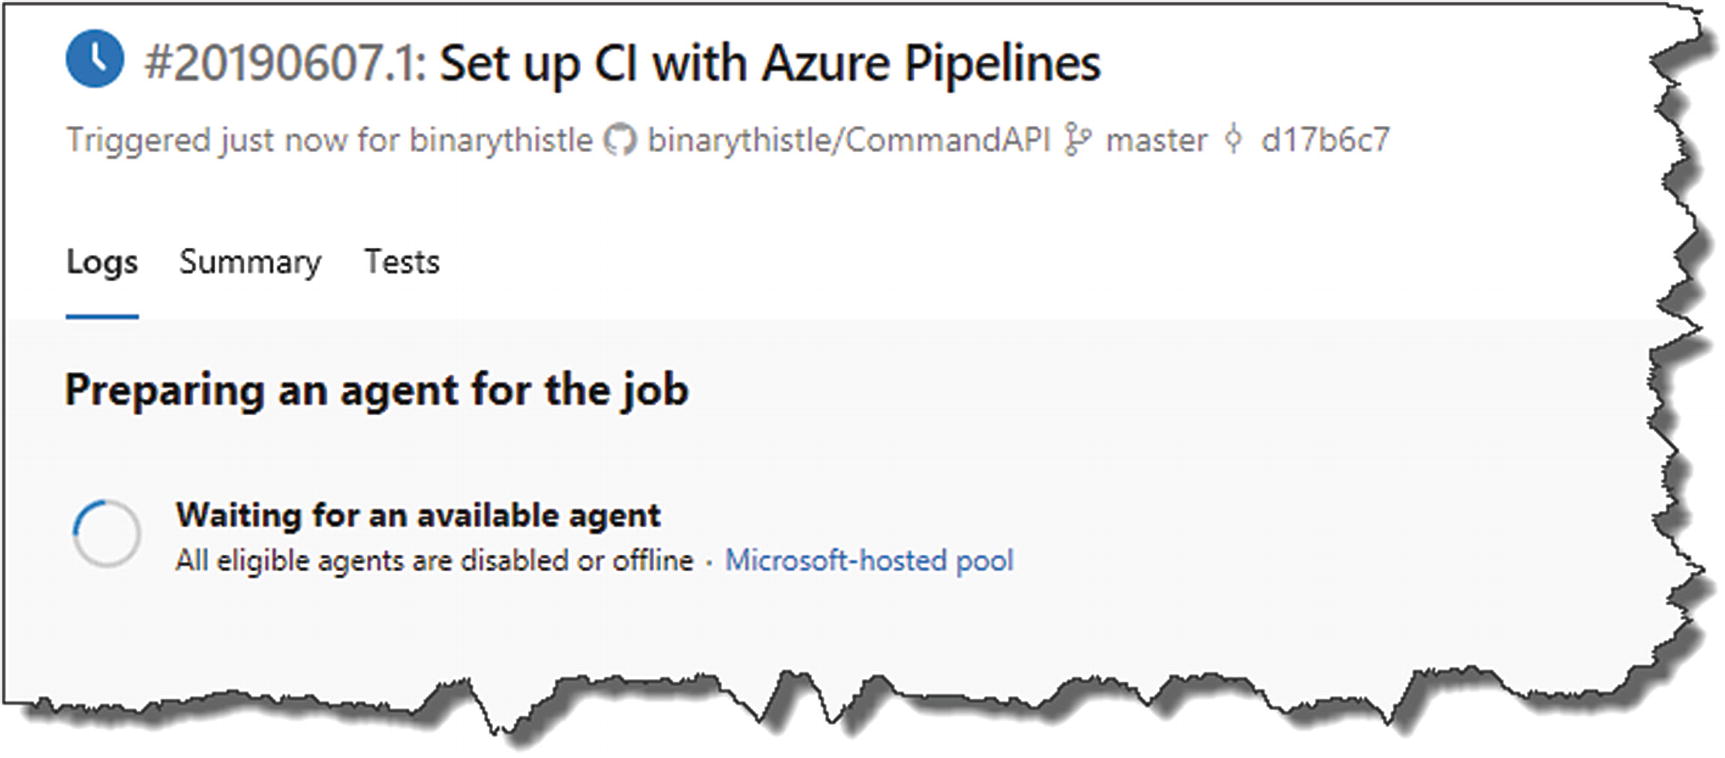
Job Preparation on Azure DevOps

In-progress Job

Successful completion
What Just Happened?
We connected Azure DevOps to GitHub.
We selected a repository.
We said that we wanted the pipeline configuration file (azure-pipelines.yml) to be placed in our repository.
We manually ran the pipeline.
Pipeline ran through the azure-pipelines.yml file and executed the steps.
Our Solution was built.
Azure-Pipelines.yml File

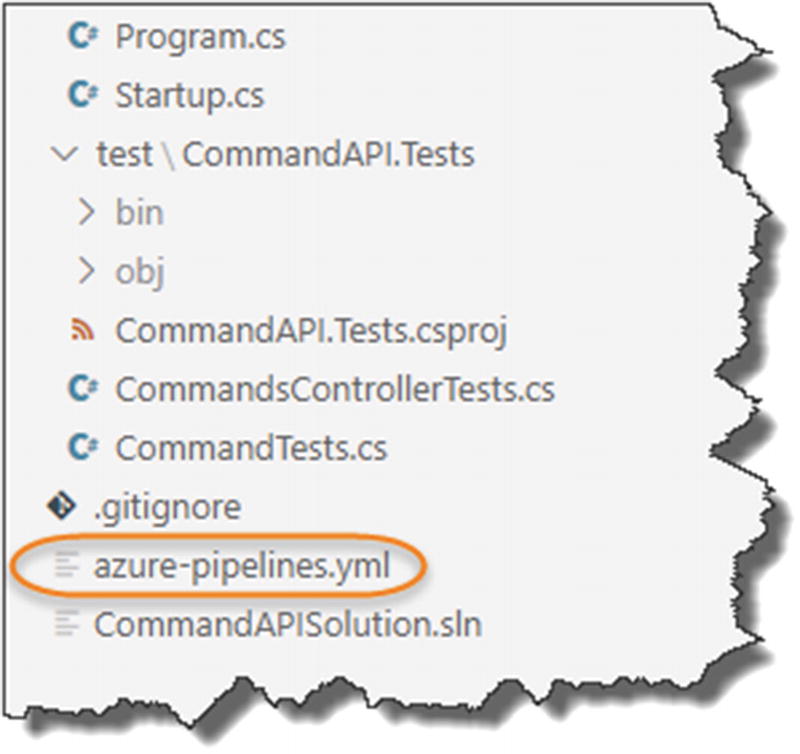
azure-pipelines.yml is in our repo
You’ll see that the azure-pipelines.yml file has been added to our repo (this is important later).
I Thought We Wanted to Automate?
One of the benefits of a CI/CD pipeline is the automation opportunities it affords, so why did we manually execute the pipeline?
Great question!
We are asked to execute when we created the pipeline that is true, but we can also set up “triggers,” meaning we can configure the pipeline to execute when it receives a particular event.

Navigating back to Azure-pipelines.yml

Edit the pipeline
- 1.
Click the Ellipsis.
- 2.
Select Triggers.

Select our Triggers

Check if Pipeline triggers are enabled for GitHub commit
You can see that the automation trigger is enabled by default (we have also configured this in the azure-pipeline.yml file), so now let’s trigger a build! But how do we do that?
Triggering a Build

Some random change
git add .
git commit -m “Added a reminder to clean up code”
git push origin master

Our Local and Remote Repos are out of sync
What does this mean?
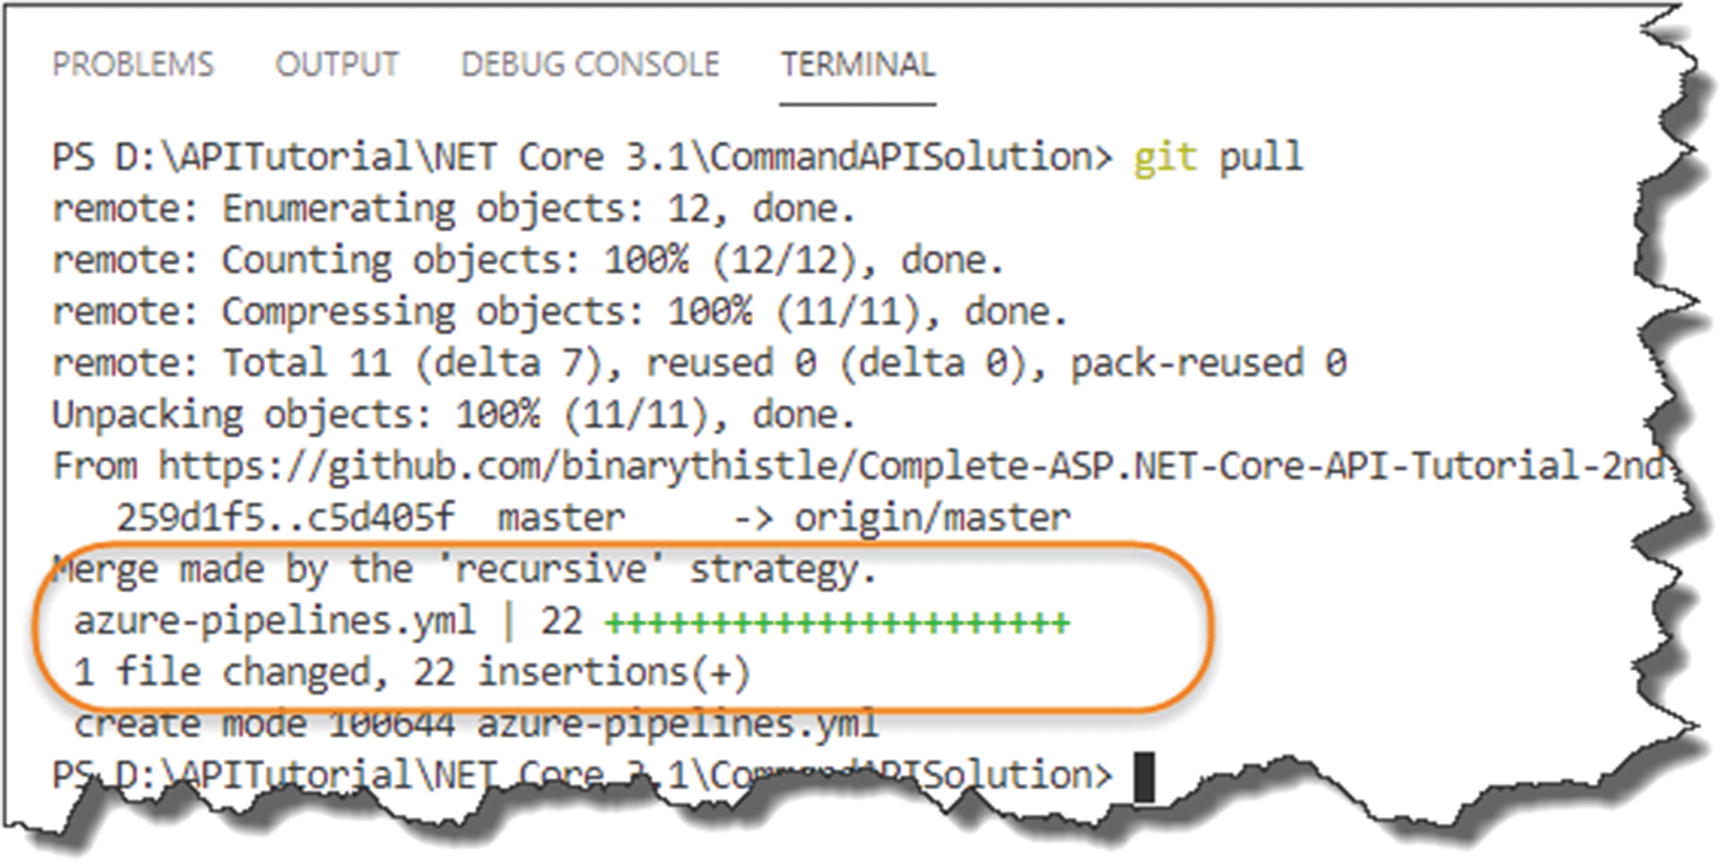
Pull down the azure-pipelines.yml
We have azure-pipelines.yml locally now

Auto-triggered build
A new build has been queued to start – this time triggered by a remote commit to GitHub!
Once it starts, all being well, this should succeed.
We are getting there, but there is still some work to do on our build pipeline before we move on to deploying – and that is ensuring that our unit tests are run – which currently they are not.
Revisit azure-pipelines.yml

Our azure-pipelines.yml
This is of course the code we added before; you’ll notice it doesn’t perform any testing or packaging steps, yet.
Another VS Code Extension
- 1.
Directly in the browser (we’ve already done this)
- 2.
In VS Code
The advantage that editing in the browser had was that it gave you some Intellisense-like functionality where it suggested some code snippets, etc. However, Microsoft has now released a VS Code extension to provide similar functionality in VS Code, so we’re going to install and use that (it means we do all our coding in the one place).

Azure Pipelines Extension for VS Code
Install it, and then open azure-pipelines.yml file that we just pulled down from GitHub.
Running Unit Tests

The pipeline we'll be building
You’ll see the suggested sequencing is Build ➤ Test ➤ Release, so let’s add that task to our azure-pipelines.yml file now.

Testing step added

Pipeline triggered again

Testing step has succeeded

More detail on testing

Testing Dashboard
Very nice! Indeed, this is the type of Information Radiator that you should make highly visible when working in a team environment, as it helps everyone understand the health of the build and, if necessary, take action to remediate any issues.
Breaking Our Unit Tests
Now just to labor the point of unit tests and CI/CD pipelines, let’s deliberately break one of our tests.
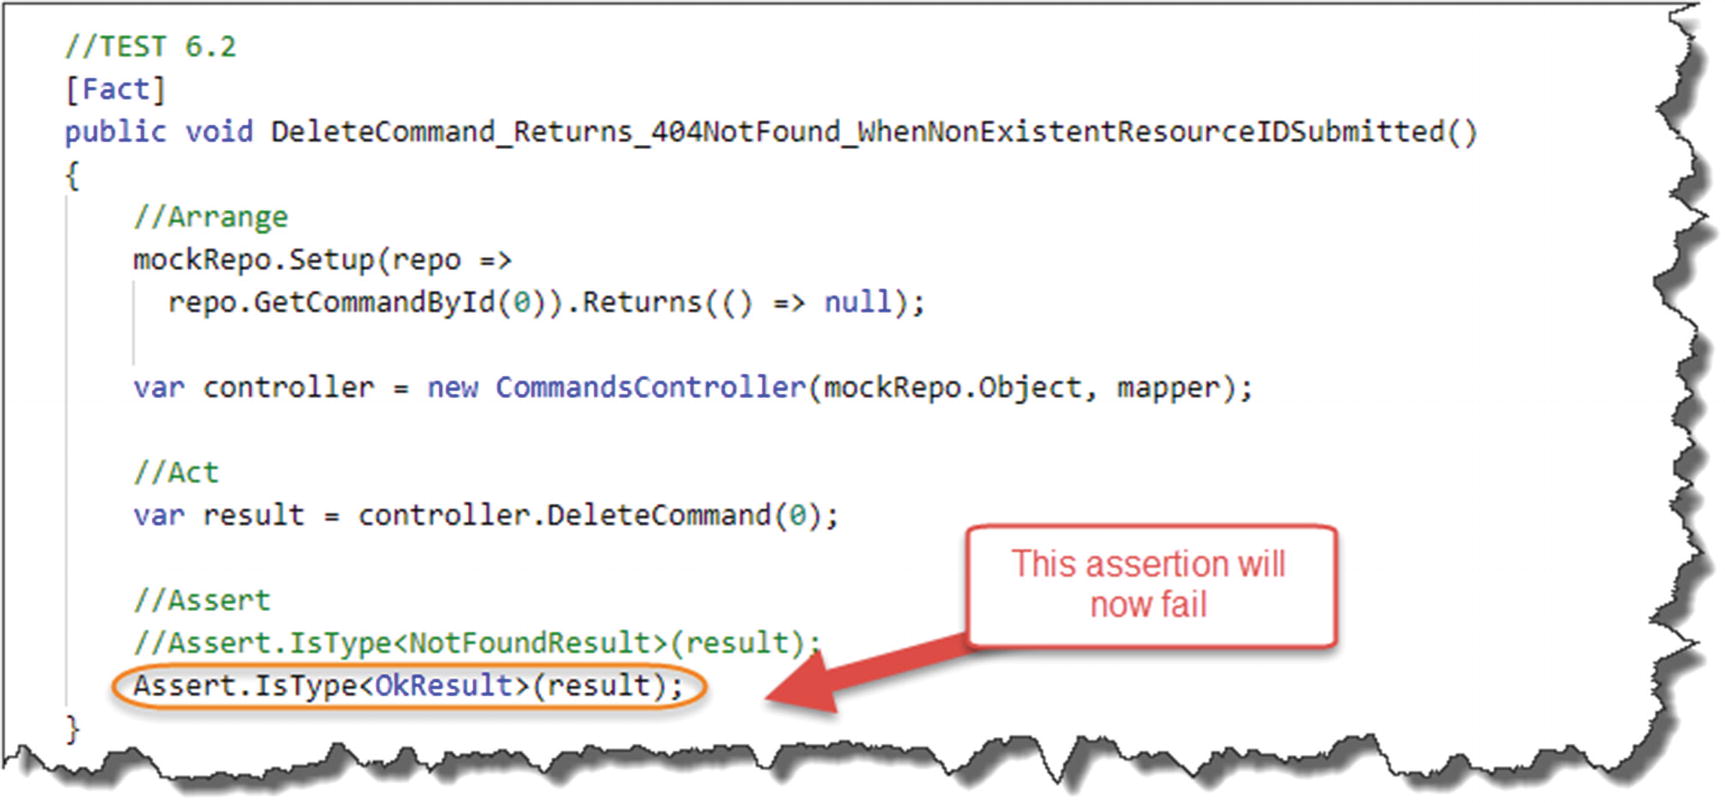
Break our unit test

Test has failed locally
Now under normal circumstances, having just caused our unit test suite to fail locally, you would not then commit the changes and push them to GitHub! However, that is exactly what we are going to do just to prove the point that the tests will fail in the Azure DevOps build pipeline too.
In this instance, we know that we have broken our tests locally, but there may be circumstances where the developer may be unaware that we have done so and commit their code; again this just highlights the value in a CI/CI build pipeline.
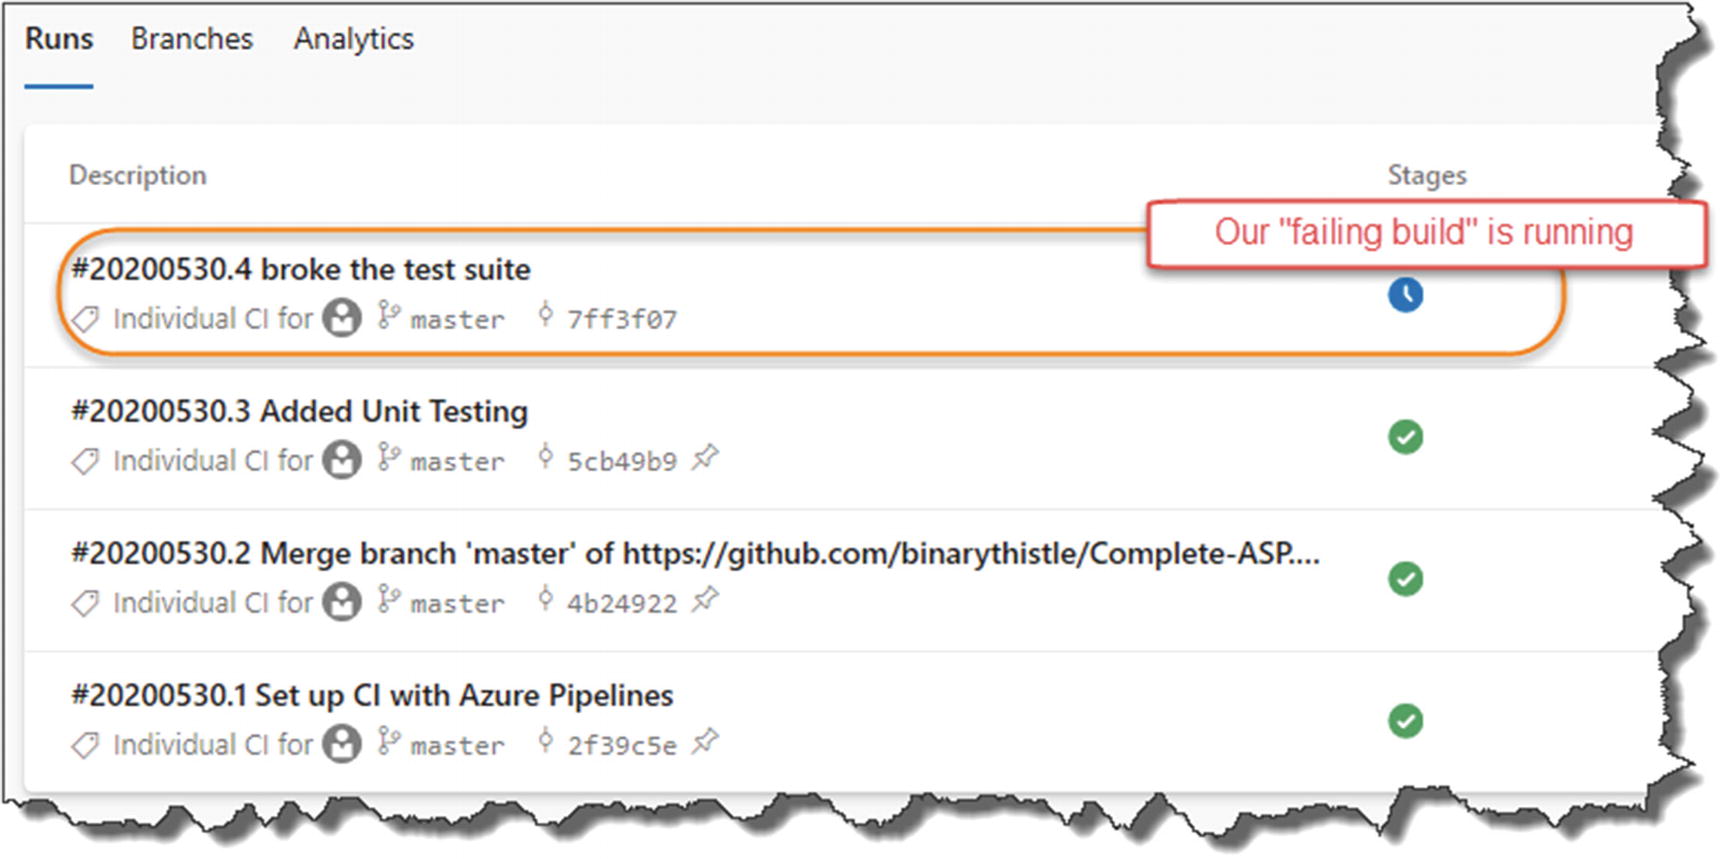
In-progress Pipeline (it will error out)

Failed!

Detail of failures

Dashboard represents the failure
Testing – The Great Catch All?
Now, this shows us the power of unit testing in that it will cause the build pipeline to fail and buggy software won’t be released or even worse deployed to production! It also means we can take steps to remediate the failure.
So conversely, does this mean that if all tests pass, you won’t have failed code in production? No, it doesn’t for the simple reason that your tests are only as good as, well, your tests. The point that I’m making (maybe rather depressingly) is that even if all your tests pass, the confidence you have in your code will only be as good as your test coverage – ours is not bad at this stage though – so we can be quite confident in moving to the next step.
Before we do that though, revert the change we just made to ensure that all our unit tests are passing and that our pipeline returns to a green state.
![]() Do not progress to the next section without ensuring that all your tests are passing!
Do not progress to the next section without ensuring that all your tests are passing!

Make sure you fix your pipeline before continuing
Release/Packaging

Revisit our pipeline

Package and publish steps
A dotnet publish command is issued for our CommandAPI project only.3
The output of that is zipped.
The zipped artifact is published.
![]() Ensure that you put in the following line:
Ensure that you put in the following line:
publishWebProjects: false
When researching this, I spent about 2-3 hours trying to understand why the packaging step was not working – it was because of this! The default is true, so if you don’t include that, the step fails. ARGHHHH!

Steps shown in the running Job
![]() Excellent work! You have completed the: build, test, and release steps of our pipeline using Azure DevOps.
Excellent work! You have completed the: build, test, and release steps of our pipeline using Azure DevOps.
Wrap It Up
Setup a CI/CD pipeline on Azure DevOps
Connected Azure DevOps to GitHub (and ensured CI triggers were enable)
Added: Build, Test, and Packaging steps to our azure-pipeline.yml file
We are now almost ready to deploy to Azure!