
Chapter Summary
In this chapter we’ll go over some high-level theory on the Model–View–Controller (MVC) pattern, detail out our API application architecture, and start to code up our API controller class.
When Done, You Will
Understand what the MVC pattern is
- Understand our API application architecture, including concepts such as
Repositories
Data transfer objects (DTOs)
Database contexts
Add a controller class to our API project.
Create a Controller Action (or API Endpoint if you prefer) that returns “hard-coded” JSON.
Place our solution under source control.
Quick Word on My Dev Setup
I have VS Code open and running.
In VS Code I have opened the CommandAPISolution solution folder.
This displays my folder and file tree down the left-hand side (containing both our projects).
I’m also using the integrated terminal within VS Code to run my commands.
- The integrated terminal I’m using is “PowerShell” – you can change this; see info box in the following.
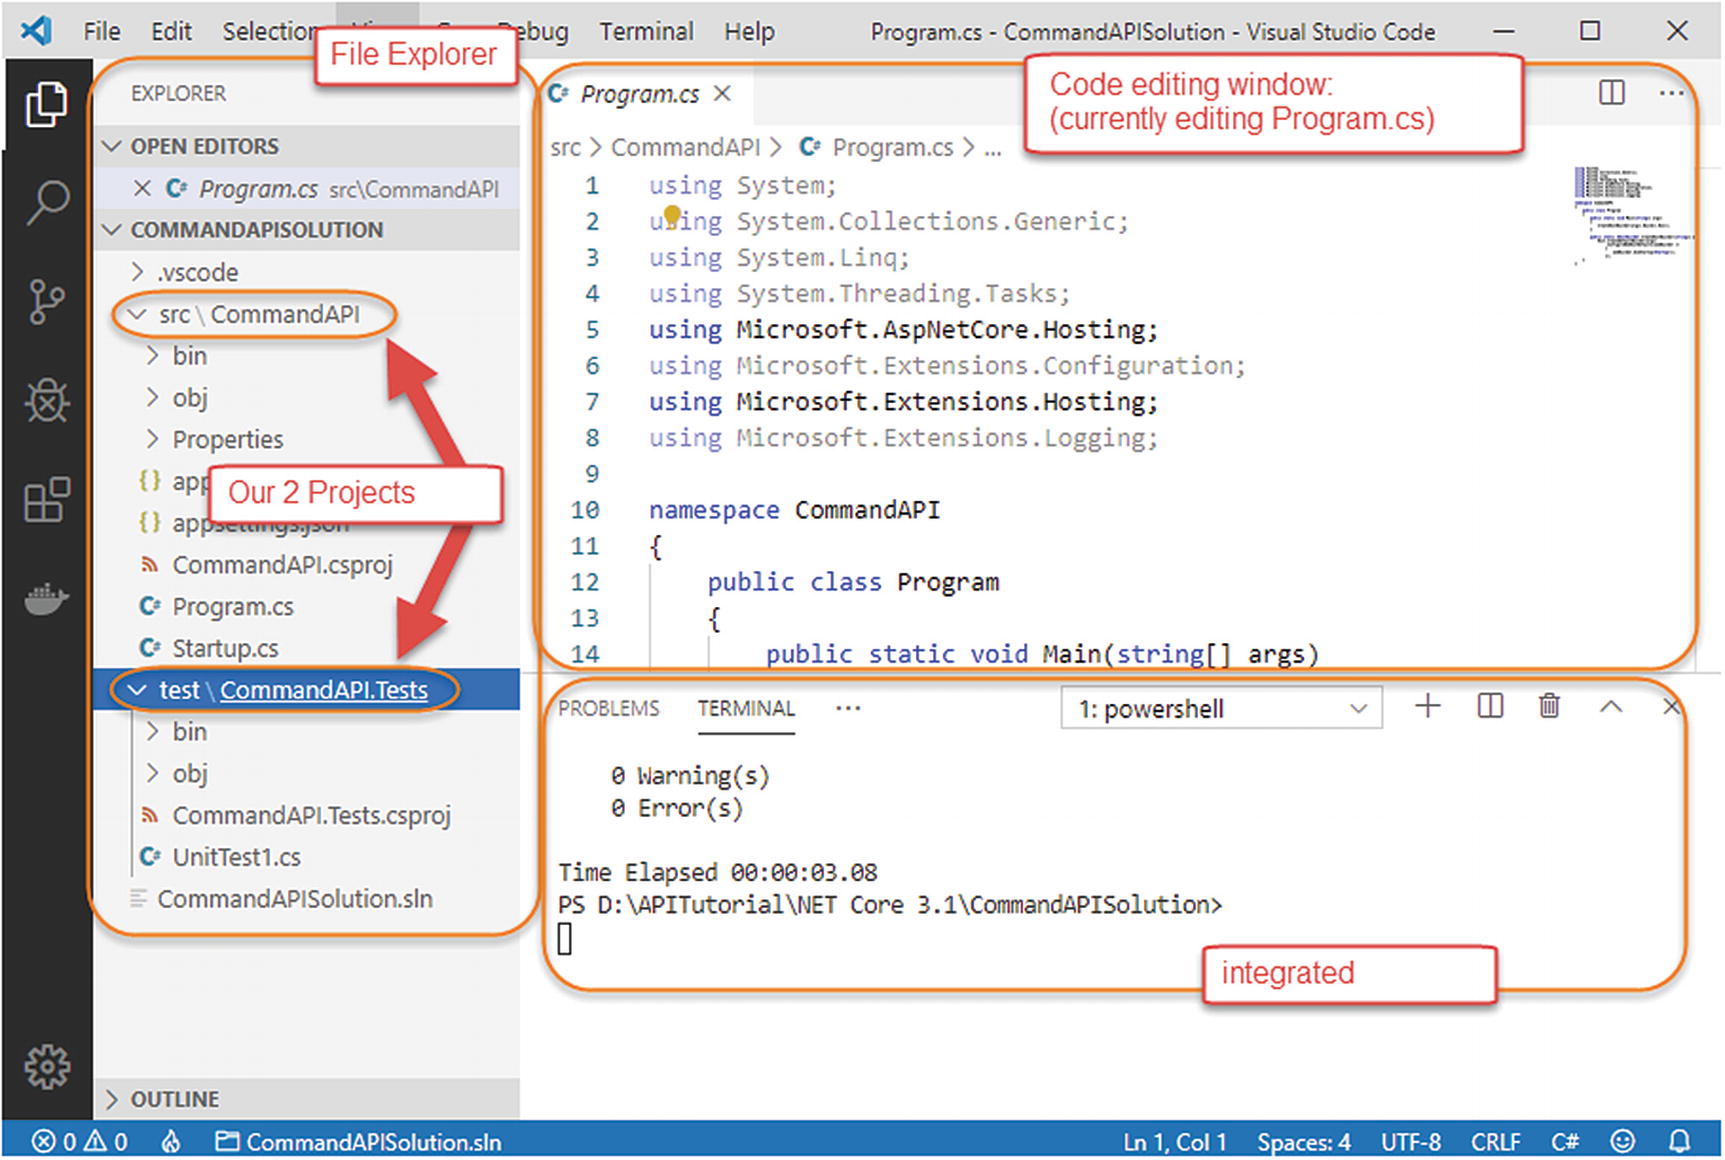 Figure 5-1
My VS Code setup
- 1.
In VS Code hit “F1” (this opens the “command palette” in VS Code).
- 2.
Type shell at the resulting prompt, and select “Terminal: Select Default Shell.”
- 3.
You can then select from the Terminals that you have installed.
Start Coding!
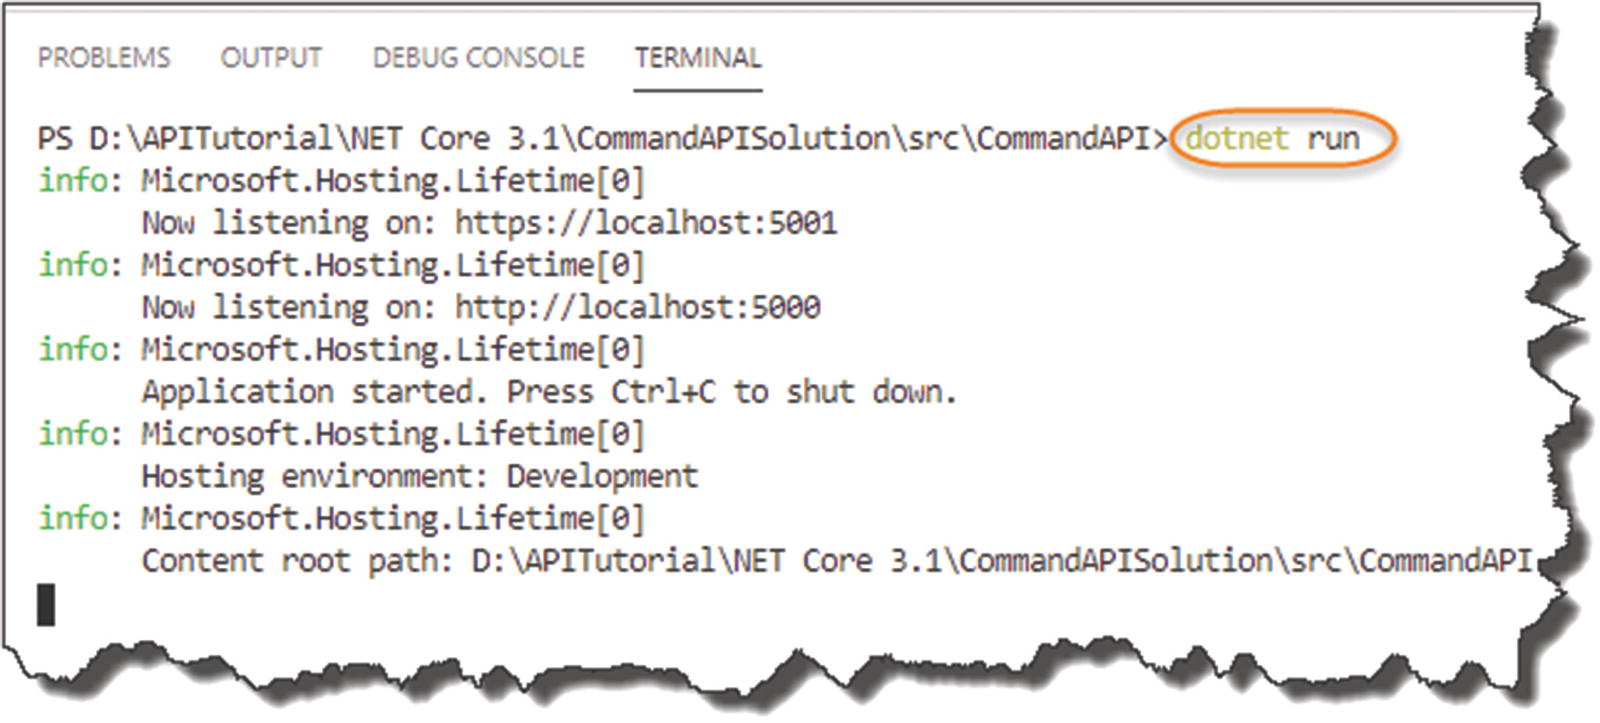
Running our API for the first time
You can see that the webserver host has started and is listening on ports 5000 and 5001 for http and https, respectively.
![]() To change that port allocation, you can edit the launchSettings.json file in the Properties folder; for now though there would be no benefit to that. We’ll talk more about this file when we come to our discussion on setting the runtime environment in Chapter 8.
To change that port allocation, you can edit the launchSettings.json file in the Properties folder; for now though there would be no benefit to that. We’ll talk more about this file when we come to our discussion on setting the runtime environment in Chapter 8.
If you go to a web browser and navigate to
http://localhost:5000

Hello World!

Where our greeting comes from
![]() For those of you that have worked with any of the 2.x versions of the .NET Core Framework (for those of you that haven’t, you can ignore this), this will look slightly different to what you may have seen before. As opposed to
For those of you that have worked with any of the 2.x versions of the .NET Core Framework (for those of you that haven’t, you can ignore this), this will look slightly different to what you may have seen before. As opposed to
app.UseEndPoints
You would have seen
app.Run(async)
The previous version of the framework would also make use of
services.AddMvc(): In our ConfigurerServices method
app.UseMVC(): In our Configure method
Further discussion on the differences between versions 2.x and 3.x of the .NET Core Framework can be found here: https://docs.microsoft.com/en-us/aspnet/core/migration/22-to-30.
- 1.
Registers services to enable the use of “Controllers” throughout our application. As mentioned in the info box, in previous versions of .NET Core Framework, you would have specified services.AddMVC. Don’t worry; we cover what the Model–View–Controller (MVC) pattern is below.
- 2.
We “MapControllers” to our endpoints. This means we make use of the Controller services (registered in the ConfigureServices method) as endpoints in the Request Pipeline.
![]() The code for the entire solution can be found here on GitHub:
The code for the entire solution can be found here on GitHub:
https://github.com/binarythistle/Complete-ASP-NET-3-API-Tutorial-Book
Now, navigate to the same URL in a web browser (http://localhost:5000), and we should get “nothing.”
Call the Postman
Now is probably a good time to get Postman up and running as it’s a useful tool that allows you to have a more detailed look at what’s going on.
So, if you’ve not done so already, go to the Postman website (www.getpostman.com), and download the version most suitable for your environment, (I use the Windows desktop client, but there’s a Chrome plugin along with desktop versions for other operating systems).
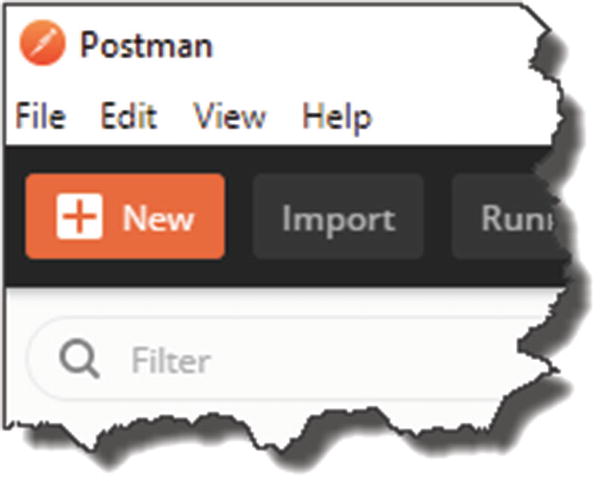
Start a New Request in Postman
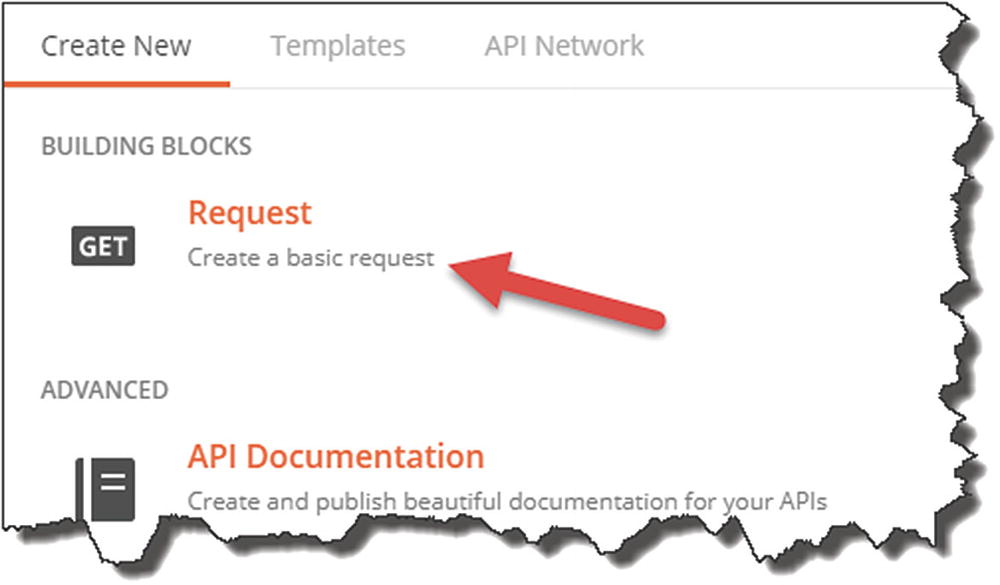
Create a basic request
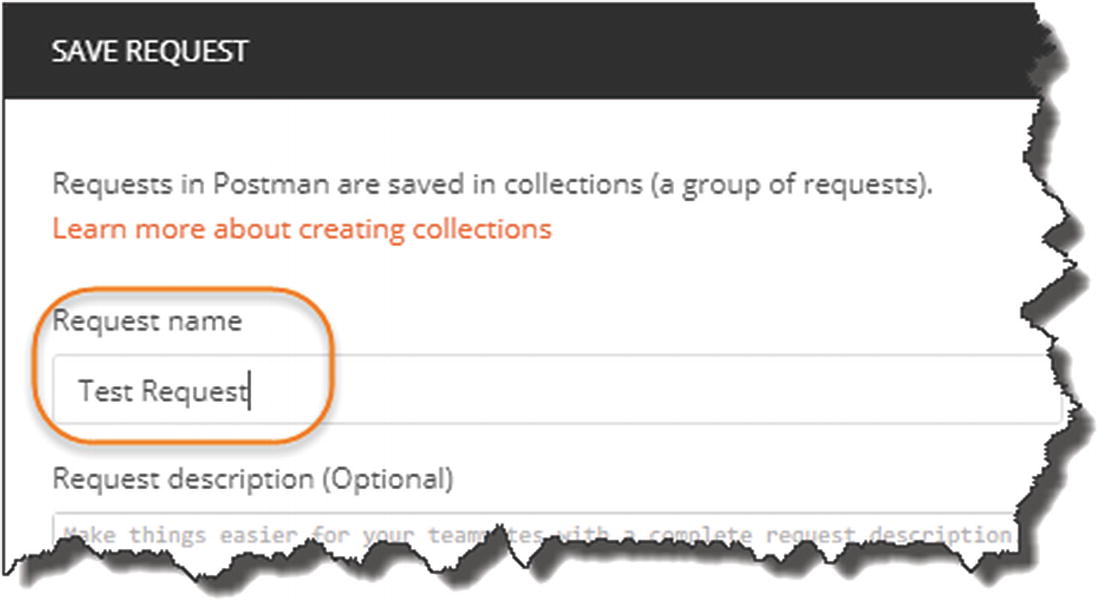
Name your request
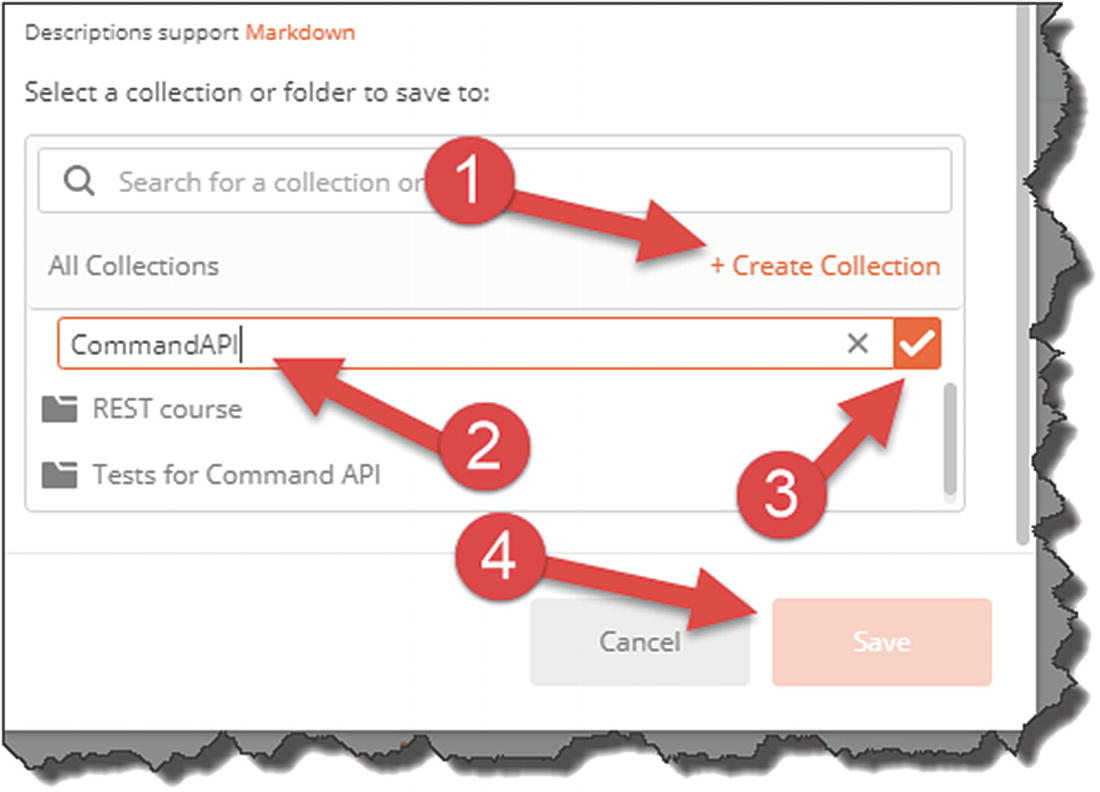
- 1.
Click “+ Create Collection.”
- 2.
Give it a name, for example, “CommandAPI.”
- 3.
Select OK (the tick), and ensure you select your newly created collection (not shown).
- 4.
Click Save to Command API.
Request Collection

GET Request results in Postman
If you’ve clicked Send, then you should see a response of “404 Not Found”; clicking on the headers tab, you can see the headers returned.
We’ll return to Postman a bit later, but it’s just useful to get it up, running, and tested now.
What have we broken?
We’ve not actually broken anything, but we have taken the first steps in setting up our application to use the MVC pattern to provide our API endpoint.
What Is MVC?
- 1.
There are already 1000s of articles on MVC.
- 2.
MVC theory is not the primary focus of this tutorial.
I won’t go into too much detail. Again, I feel you’ll learn more about MVC by building a solution, rather than reading long textual explanations. I think when we cover off the Application Architecture below, things will make much more sense though.
Model–View–Controller
Put simply, the MVC pattern allows us to separate the concerns of different parts of our application:
Model (our Domain Data)
View (User Interface)
Controller (Requests and Actions)

Our API Application Architecture
It’s also worth noting, in case it wasn’t clear, that the MVC pattern is just that – an application architecture pattern – it is agnostic from technical implementation. As this happens to be a book about a particular technology (.NET Core), we cover how .NET Core implements MVC; however, there are other implementations of the MVC pattern using different frameworks and languages.
Models, Data Transfer Objects, Repositories, and Data Access
You’re probably happy enough with the concept of a Model – it’s just data, right? Yes, that’s simple enough. So, looking at the architecture diagram in Figure 5-10, you’re then wondering what’s a DTO, a Repository, and a DB Context. And I don’t blame you – I struggled with the distinction between these concepts too at first. In fact, we could leave out DTOs and Repositories from our solution and it would work without them. So why include them at all? Great question; let me try and explain.
First, let me answer the “what” before I answer the “why.”
What’s the Distinction?
Model: Represents the internal domain data of our application (the “M” in MVC).
Data Transfer Objects (DTOs) : Are the representations of our Domain Models to our external consumers, meaning that we don’t expose internal implementation detail (our Models) to external concerns. This has multiple benefits as we’ll discuss later.
Data Access (aka DB Context) : Takes our Models and represents (or “mediates”) them down to a specific persistence layer (e.g., PostgreSQL, SQL Server, etc.). Going forward, I’ll refer to our Data Access class as a “DB Context” which is a technology-specific term taken from “Entity Framework Core” – don’t worry; more on that later in Chapter 7.
Repository : Provides a technology agnostic (or persistence ignorant) view of our permanently stored data to our application.
So, what do you take from this? The main concept (which is repeated throughout the book) is that we should be decoupling implementational detail from the interface or contract we want to provide to consumers. But why is that a good thing?
Why Decoupling Is Good?
Security: We may not want to expose potentially sensitive data contained in our implementation (think our Model) to our external consumers. Providing an external representation (e.g., a DTO) with sensitive information removed addresses this.
Change Agility: Separating out our interface – which should remain consistent so as not to break our “contract” with our consumers – means we can then change our implementation detail without impacting that interface. We then have the confidence to react quickly to market demands without fear of breaking existing agreements. We’ll demonstrate this concept more when we come onto using dependency injection and our repository.
Bringing It Together
Chapter 5: Create a Controller to manage all our API requests (see our CRUD actions in Chapter 3).
Chapter 6: Create a Model to internally represent our resources (in this case our library of command-line prompts)
Chapter 6: Create a Repository to provide a technology agnostic view of our persisted data.
Chapter 7: Leverage Entity Framework Core to create a DB Context that will allow us to persist our Model down to PostgreSQL.
Chapter 9: Create DTO representations of our Model for external use.
Let’s wrap our architectural overview there (again, don’t worry – we’ll deep dive these concepts later) and move on to creating our Controller.
Our Controller

Controllers Folder in our API Project
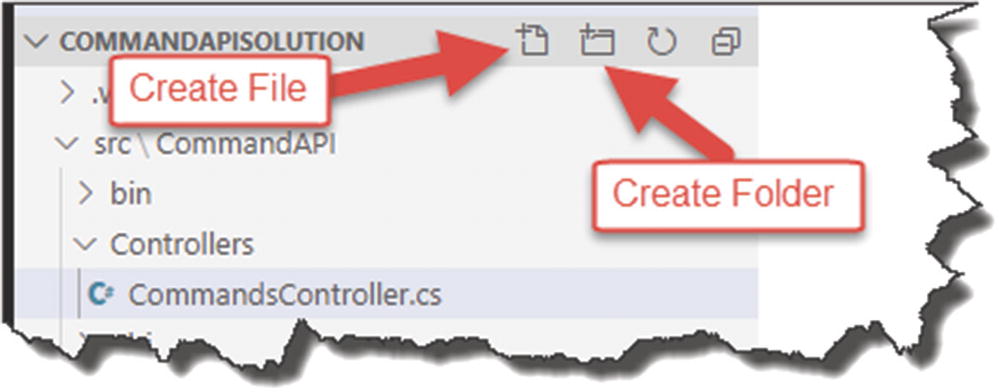
Inside the Controllers folder you just created, create a file called CommandsController.cs .
![]() If you’re using VS Code, you can create both folders and files from within the VS Code directory explorer. Just make sure when you’re creating either that you have the correct “parent” folder selected.
If you’re using VS Code, you can create both folders and files from within the VS Code directory explorer. Just make sure when you’re creating either that you have the correct “parent” folder selected.
File and folder creation in VS Code

Our directory structure
Ensure that you postfix the CommandsController file with a “.cs” extension to denote it’s a C# file.
Both the folder and naming convention of our controller file follow a standard, conventional approach; this makes our applications more readable to other developers; it also allows us to leverage from the principles of “Convention over Configuration.”
Now, to begin with we’re just going to create a simple “action” in our Controller that will return some hard-coded JSON (as opposed to serializing data that will ultimately come from our DB). Again, this just makes sure we have everything wired up correctly.
![]() A controller “Action” (I may also refer to it as an endpoint) maps to our API CRUD operations as listed in Chapter 3; our first action though will just return a simple hard-coded string.
A controller “Action” (I may also refer to it as an endpoint) maps to our API CRUD operations as listed in Chapter 3; our first action though will just return a simple hard-coded string.
Again, if you don’t fancy typing this in, the code is available here on GitHub: https://github.com/binarythistle/Complete-ASP-NET-3-API-Tutorial-Book
We’ll come onto what all this means next, but first lets’ build it.
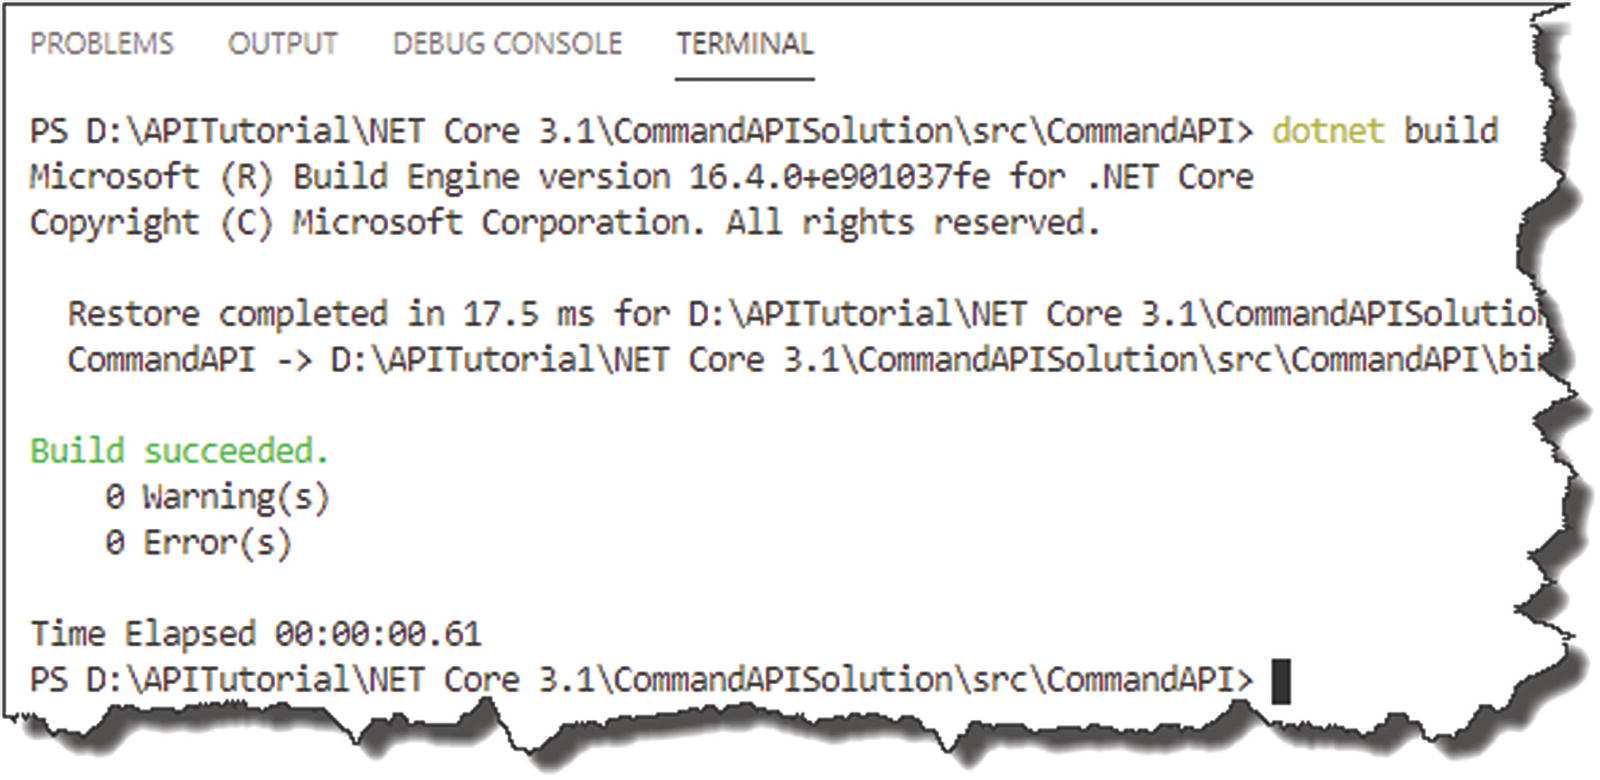
Successful API run
Now, run the app.
![]() I’m deliberately not going to detail that command going forward now; you should be picking this stuff up as we move on. If in doubt, refer to earlier in the chapter on how to run your code (as opposed to building it as we’ve just done).
I’m deliberately not going to detail that command going forward now; you should be picking this stuff up as we move on. If in doubt, refer to earlier in the chapter on how to run your code (as opposed to building it as we’ve just done).
Go to Postman (or a web browser if you like), and in the URL box, type
http://localhost:5000/api/commands
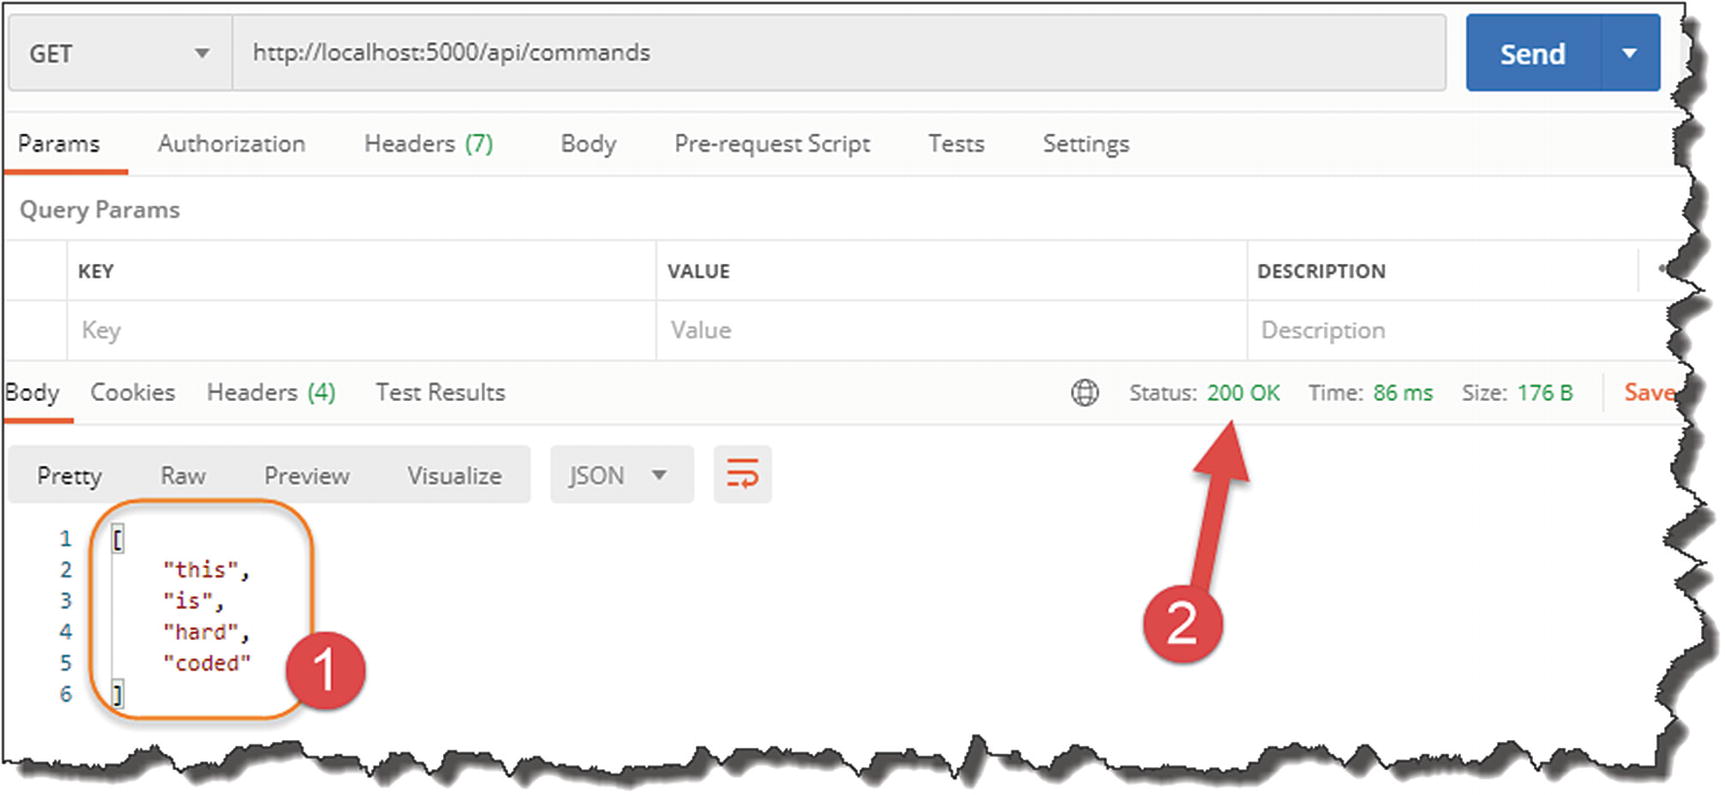
Our first API endpoint response
- 1.
This is the hard-coded json string returned.
- 2.
We have a 200 OK HTTP response (basically everything is good).
I guess technically you could say that we have implemented an API that services a simple “GET” request! Excellent, but I’m sure most of you want to take the example a little further.
Back to Our Code
Deep dive on our first controller action
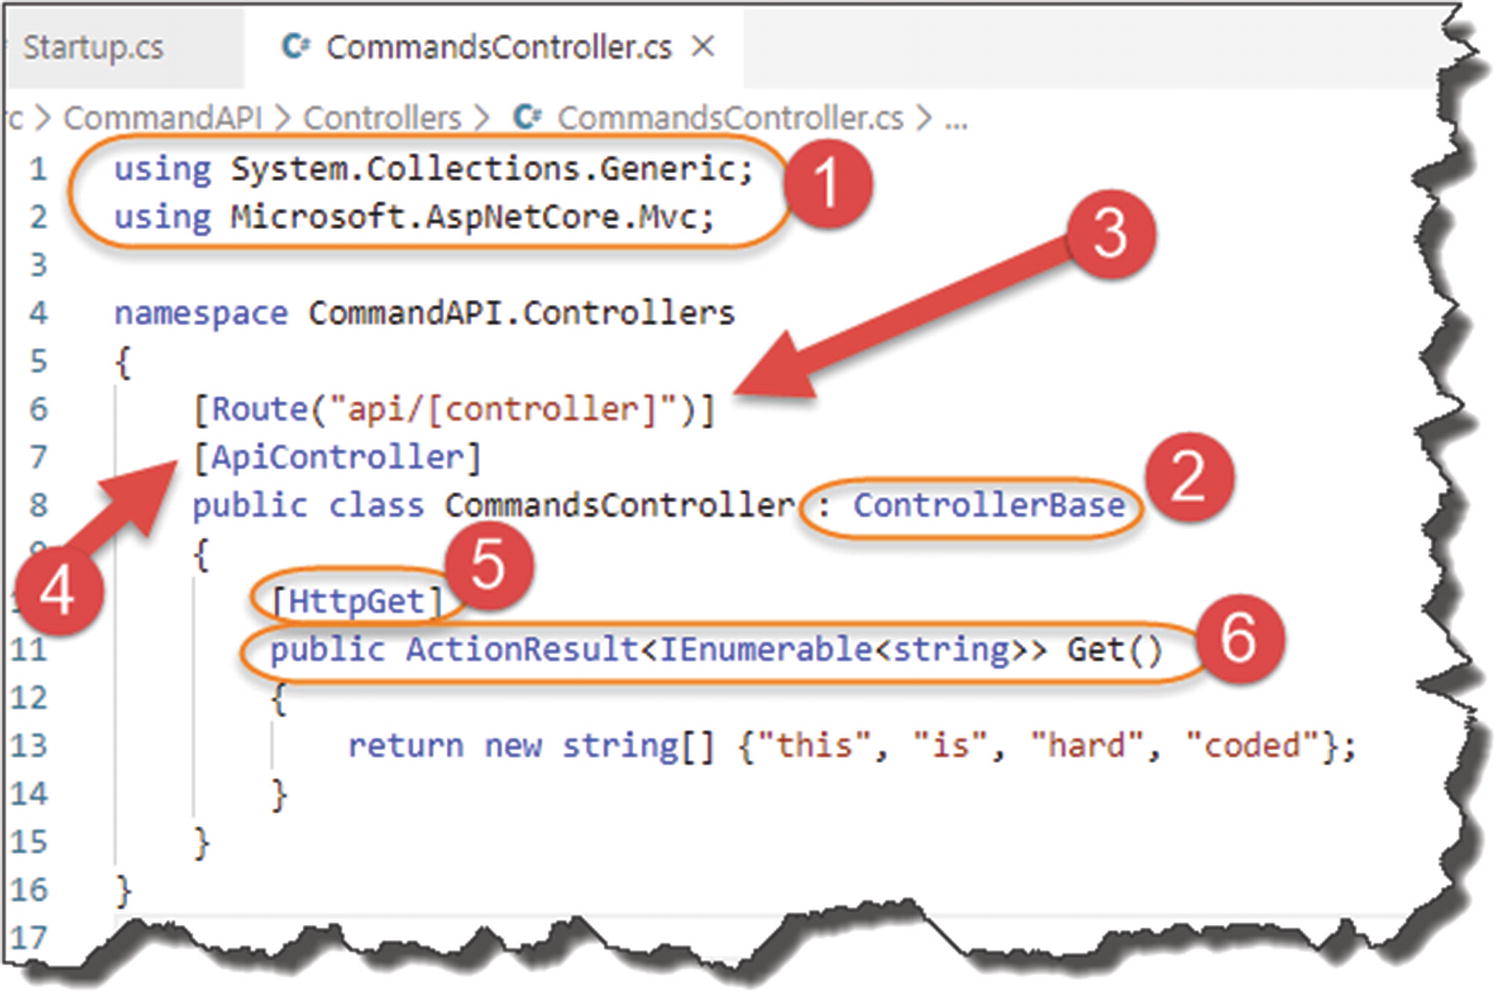
1. Using Directives
System.Collections.Generic (supports IEnumerable)
Microsoft.AspNetCore.Mvc (supports pretty much everything else detailed below)
2. Inherit from Controller Base
3. Set Up Routing
where we use the route pattern /api/<controller_name> following the main part of the URI.
![]() You’ll notice that when we talk about the name of our controller from a route perspective, we use “Commands” as opposed to the fuller “CommandsController”.
You’ll notice that when we talk about the name of our controller from a route perspective, we use “Commands” as opposed to the fuller “CommandsController”.
Indeed, the name of our controller really is “Commands”; the use of the “Controller” postfix in our class definition is an example of configuration over convention. Basically, it makes the code easier to read if we use this convention, that is, we know it’s a controller class.
![]() We have specified our route using the [controller] “wildcard,” which dynamically derives that segment of the route from the name of our controller (minus the “Controller” portion) as we’ve explained before. So, in our case, this gives us the route:
We have specified our route using the [controller] “wildcard,” which dynamically derives that segment of the route from the name of our controller (minus the “Controller” portion) as we’ve explained before. So, in our case, this gives us the route:
api/commands
What this means is that if you change the name of your Controller for whatever reason, the route will change also. This may have quite unexpected consequences for our consumers, in effect breaking our contract - so be careful!
You can “rectify” this behavior by hardcoding the name of your route as so it would become
[Route("api/commands")]
I’ll leave the semi-dynamically declared route for now as I think that is what you’ll most likely see out there in the field, but feel free to change to the hard-coded approach if you’re more comfortable with that.
4. APIController Attribute
Attribute Routing
Automatic HTTP 400 Error responses (e.g., 400 Bad Request, 405 Not Allowed, etc.)
Default Binding Sources (more on these later)
Problem details for error status codes
It’s not mandatory to use it but highly recommended, as the default behaviors it provides are really useful; for a further deep dive on this, refer to the Microsoft documentation.4
5. HttpGet Attribute
Cast your mind back to the start of the tutorial, and you’ll remember that we specified our standard CRUD actions for our API and that each of those actions aligns to a particular http verb, for example, GET, POST, PUT, etc.
Decorating our first simple action with [HttpGet] is really just specifying which verb our action responds to.
You can test this by changing the verb type in Postman to “POST” and calling our API again. As we have no defined action in our API Controller that responds to POST, we’ll receive a 4xx HTTP error response.
![]() As mentioned before, the Verb Attribute (e.g., GET) in combination with the route (e.g., api/commands) should be unique for each action (endpoint) within our API.
As mentioned before, the Verb Attribute (e.g., GET) in combination with the route (e.g., api/commands) should be unique for each action (endpoint) within our API.
If you take a look back to our full list of the API endpoints in Chapter 3, you’ll notice that this is indeed the case.
6. Our Controller Action
This is quite an expansive area,5 and there are multiple ways you can write your controller actions. I’ve just opted for the “ActionResult” return type which was introduced as part of .NET Core 2.1.
In short, you’ll have an ActionResult return type for each API CRUD action, so we’ll end up with six by the time we’re finished.
Synchronous vs. Asynchronous?
In the recent example, our controller actions are synchronous, meaning that when they get called by a client (e.g., Postman), they will wait until a result is returned and in doing so occupy a thread (think of a thread as a small slice of a CPU’s time). Once a result is returned, that thread is then released (back to a thread pool) where it can be reused by some other operation.
The problem with synchronous operations is that if there is enough of them (think a high traffic API), eventually all the available threads will be used from the thread pool, blocking further operations from running. That is where asynchronous Controller Actions would come in.
An asynchronous controller action will not wait for a long-running operation (e.g., complex Database query or call over the network) to complete and will hand the thread back to the pool while it waits. When the long-running operation does eventually have a result for us, a thread is reacquired by the controller action to complete the operation.
In short, asynchronous operations are really about scalability and not (as is sometimes claimed) speed. Just using an asynchronous controller action does nothing to improve the time the I/O operation (e.g., database query) takes to complete. It does, however, improve the situation where we may run out of threads (due to blocking) which has positive implications for scaling. There is also some nice usability implications when applied to User Interface design (have you ever used an application that “freezes” when performing a long-running operation?).
I did debate whether to use asynchronous controller actions in our example; however, in keeping with the “Thin and Wide” approach of the book, I thought it would introduce unnecessary complexity that would detract from the core thrust of the book, so I have omitted for now.
This section has already taken up enough space, so let’s move on!
Source Control
OK this has been quite a long chapter, and we’ve covered a lot of ground. Before we wrap it up, I want to introduce the concept of source control.
What is source control?
- 1.
Tracking (and rolling back) changes in code
- 2.
Coordinating those changes when there are multiple developers/contributors to the code (referred to as Continuous Integration; we’ll deep dive into this in Chapter 12)
Requirements Traceability: Ensuring that the changes relate back to a requested feature/bug fix.
Release Notes: Wrapping up our changes so we can publish new release notes for our app.
Rolling Back: If we know what changed (and we broke something), we can either (a) fix it or (b) roll back the change – a source control system allows us to do that.
On top of tracking changes, the other primary reason for using a source control solution is to coordinate the changes to the codebase when multiple developers are working on it. If you’re the only person working on your code, you’re not going to really conflict with yourself (well not usually anyway). What about when you have more than one person making changes to the same codebase? How can that happen without things like overwriting each other’s changes? Again, this is where a source control solution comes in to play – it coordinates those changes and identifies conflicts should they arise.
Git and GitHub
Now, there are various source control solutions out there, but by far the most common is Git (and those based around Git), to such an extent that “source control” and Git are almost synonyms. Think about “vacuum cleaners” and “Hoover” (or perhaps now Dyson), and you’ll get the picture.
What’s the difference?
You can have running on your local machine to track local code changes
You can have running on a server to manage parallel, distributed team changes
GitHub (probably the most well-recognized – and now acquired by Microsoft)
Bitbucket (from Atlassian – the makers of Jira and Confluence)
Gitlabs
We’re going to use both Git (locally on our machine) and GitHub as part of this tutorial (as mentioned in Chapter 2).
Setting Up Your Local Git Repo
If you followed along in Chapter 2, you should already have Git up and running locally; if not, or you’re unsure, pop back to Chapter 2, and take a look.
This should initialize a local Git repository in the solution directory that will track the code changes in a hidden folder called .git (note the period “.” prefixing “git”).

Untracked files in our new Git Repo
.gitignore file
Before we start to track our solution files (and bring them under source control), there are certain files that you shouldn’t bring under source control, in particular, files that are “generated” as the result of a build, primarily as they are surplus to requirements (they’re not “source” files’!).
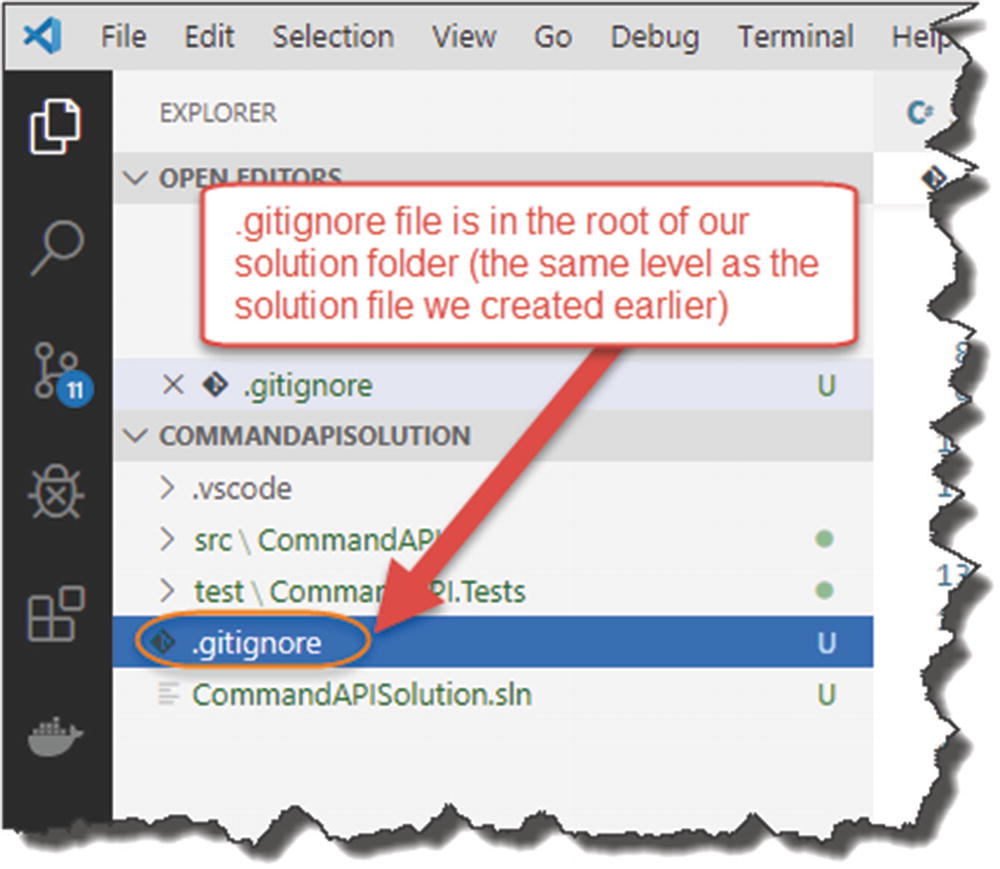
Our .gitignore file

Untracked .gitignore file
Track and Commit Your Files

Tracked Files ready for Commit
These files are being tracked and are “staged” for commit.

Committed Files

No further changes have occurred
![]() Good job! We have basically placed our solution under local source control and have committed all our “changes” to our master branch in our first commit.
Good job! We have basically placed our solution under local source control and have committed all our “changes” to our master branch in our first commit.
![]() If this is the first time you’ve seen or used Git, I’d suggest you pause reading here and do a bit of Googling to find some additional resources. It’s a fairly big subject on its own, and I don’t want to cover it in depth here, mainly because I’d be repeating noncore content.
If this is the first time you’ve seen or used Git, I’d suggest you pause reading here and do a bit of Googling to find some additional resources. It’s a fairly big subject on its own, and I don’t want to cover it in depth here, mainly because I’d be repeating noncore content.
I will of course cover the necessary amount of Git to get the job done in this tutorial; further reading is purely optional!
The Git website also allows you to download the full Pro Git ebook; you can find that here: https://git-scm.com/book/en/v2
Set Up Your GitHub Repo
Push to from our local machine.
Link to an Azure DevOps Build Pipeline to kick off the build process.

GitHub Landing Page
Create a GitHub Repository
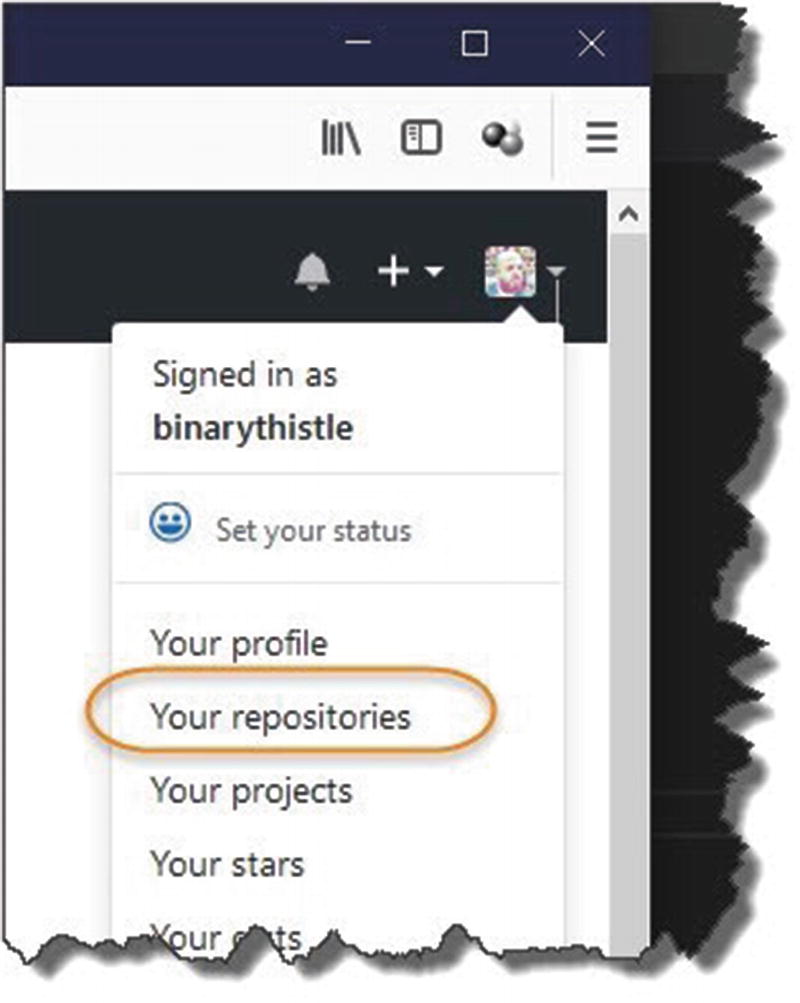
Select your repositories

Create your repository
Give the repository a name (I just called mine CommandAPI, but you can call it anything you like), and select either Public or Private. For this tutorial, I strongly recommend selecting Public, primarily as that’s the option I’ve developed this tutorial with – and I know it works with the later sections of the book. Indeed, the option you select here is important as it has impacts when we come to set up our CI/CD pipeline in Chapter 12.

GitHub repository created

Add remote repo and push your local repo
![]() You may get asked to authenticate to GitHub when you issue the second command: git push -u origin master.
You may get asked to authenticate to GitHub when you issue the second command: git push -u origin master.
I’ve had some issues with this on Windows until I updated the “Git Credential Manager for Windows”; after I updated, it was all smooth sailing. Google “Git Credential Manager for Windows” if you’re having authentication issues, and install the latest version!
So What Just Happened?
Well, in short
We “registered” our remote GitHub repo with our local repo (first command).
We then pushed our local repo up to GitHub (second command).
The first command line only needs to be issued once; the second one we’ll be using more throughout the rest of the tutorial.
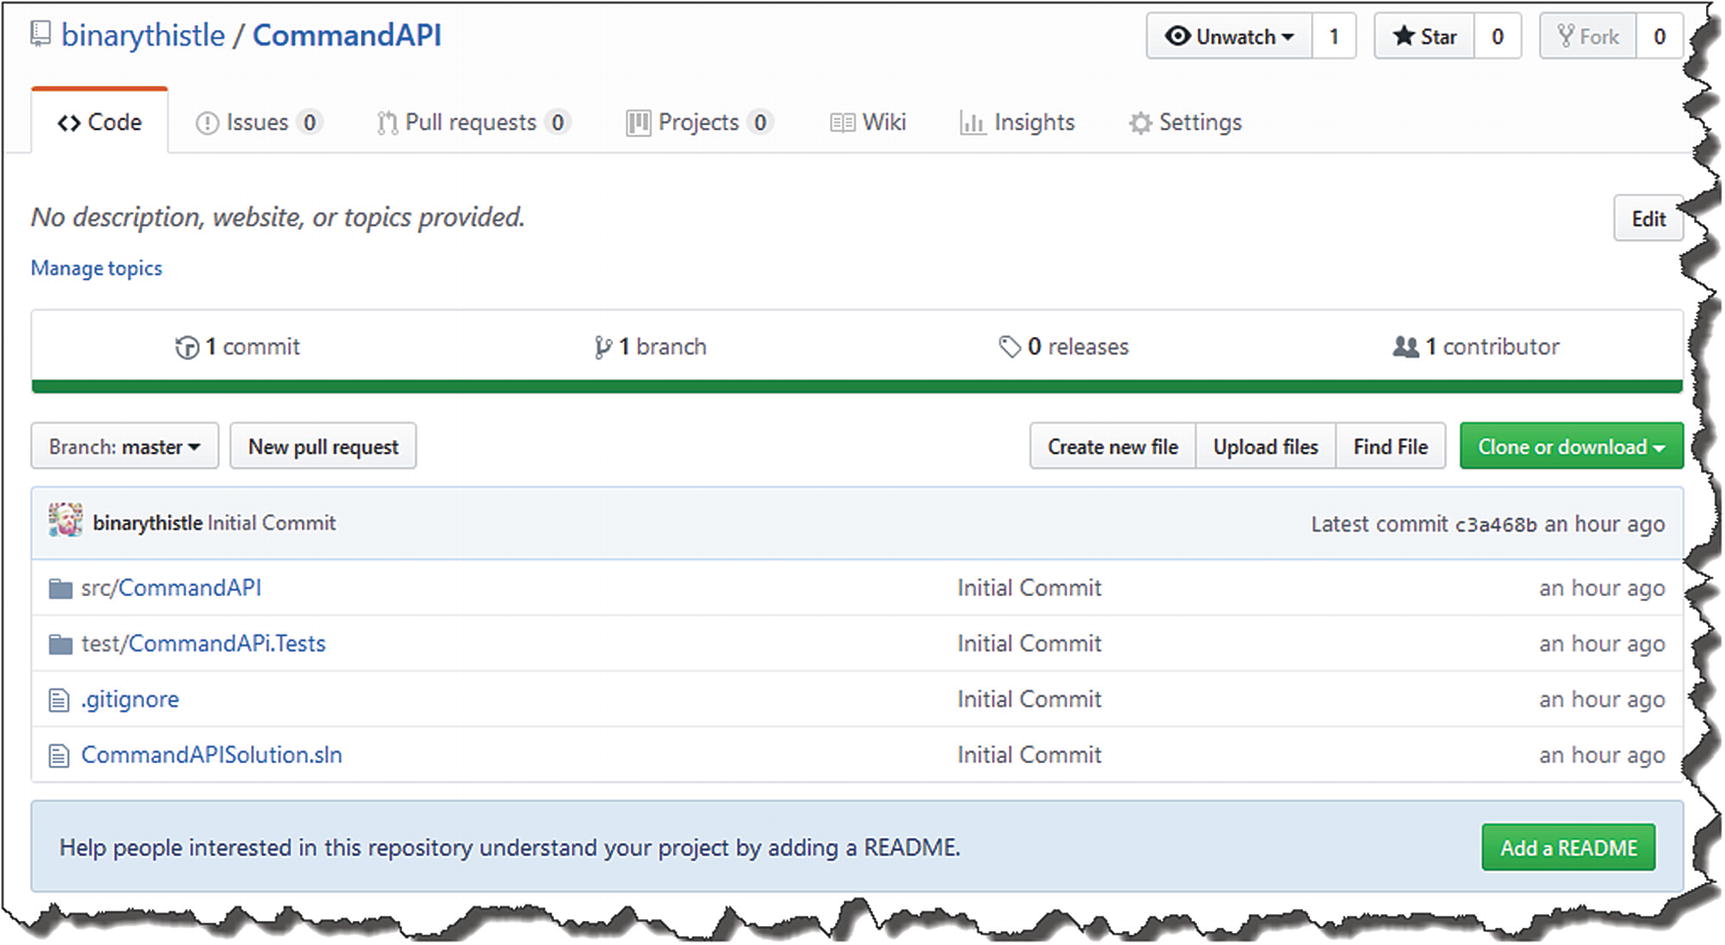
Our code is now on GitHub
You’ll notice “Initial Commit” as a comment against every file and folder – seem familiar?
Well that’s it for this chapter – great job!