
9
PAINT COLORFUL BUBBLES WITH YOUR MOUSE!

In the next three chapters, we’ll build BubbleDraw, an interactive, animated drawing app that lets the user draw floating, bouncy, colorful bubbles with their mouse in the desktop version and with their fingers in the mobile version!
The first version of the BubbleDraw app will look like Figure 9-1, with each bubble in a different random color. It will let the user draw bubbles of random colors whenever they click and drag the mouse on the app window. The user will also be able to change the size of the bubbles by scrolling the mouse wheel up and down or by using a scroll gesture on a trackpad or touchscreen.

Figure 9-1: The BubbleDraw app lets the user draw randomly colored bubbles using the mouse.
We’re going to use an object-oriented programming approach to build the BubbleDraw app. The variables, functions, loops, and conditional statements you’ve learned so far are known as procedural programming. Procedural programming involves writing programs step-by-step in a linear fashion, sort of like following a recipe. Object-oriented programming uses all of these concepts, but it allows us to program much larger and more complicated applications by breaking a big software project into smaller pieces called objects.
As an example, a bubble is an important entity in the BubbleDraw app, so bubbles might become objects as we begin to code this app. First, we’ll tackle the problem of defining what a bubble is. Second, we’ll figure out a way to store information on lots of bubbles and how to draw the bubbles on the screen. Finally, we’ll add the ability to click and drag the mouse to create bubbles. Instead of writing separate pieces of code to control each bubble individually, we’ll write one piece of code that applies to all bubble objects.
We’ll begin with two source code files: one for the app window called BubbleDraw and one for the drawing canvas called BubblePanel. The app window will extend a familiar class, JFrame, and the drawing canvas inside the window frame will use a new kind of GUI container called a JPanel. By building two separate files, we’ll be able to reuse the drawing canvas in a GUI app in Chapter 10. Let’s start coding!
Creating the BubbleDraw Project Files
In Eclipse, go to File ▸ New ▸ Java Project and create a new project folder for the BubbleDraw app. Name the project BubbleDraw and click Finish.
Expand the BubbleDraw project folder in the Project Explorer pane, right-click the src folder, and select New ▸ Class. Create a class called BubbleDraw for the app window, with javax.swing.JFrame as the superclass, and under Which method stubs . . . select the public static void main(String[] args) checkbox. Then click Finish.
Next, we’ll create the BubblePanel drawing canvas. Right-click the src folder and select New ▸ Class. Name this class BubblePanel, with a superclass of javax.swing.JPanel. Click Finish.
Using these classes, we’ll create a reusable BubblePanel canvas that we can expand and put into other apps. The BubbleDraw frame will be a container that displays the BubblePanel.
Building the BubbleDraw Frame
Let’s begin by setting up the main app window in the BubbleDraw.java source code file. Click the BubbleDraw.java tab at the top of the content pane in Eclipse, and you’ll see the following code has already been filled in:
import javax.swing.JFrame;
public class BubbleDraw extends JFrame {
public static void main(String[] args) {
}
}
The app window runs in a JFrame, like our previous GUI apps did. In this app, we need the window to display the drawing canvas, our BubblePanel. We won’t add any other GUI components to this first version of the app.
We want to create a JFrame window and add setup code for the frame as we have in previous chapters, but we’ll also add a BubblePanel to the frame for our drawing canvas. The complete BubbleDraw class will look like Listing 9-1:
import javax.swing.JFrame;
public class BubbleDraw extends JFrame {
public static void main(String[] args) {
➊ JFrame frame = new JFrame("Your Name's BubbleDraw App");
➋ frame.setDefaultCloseOperation(JFrame.EXIT_ON_CLOSE);
➌ frame.getContentPane().add(new BubblePanel());
➍ frame.setSize(new java.awt.Dimension(600,400));
➎ frame.setVisible(true);
}
}
Listing 9-1: The BubbleDraw class
Start by creating a new JFrame with a title bar at the top ➊. Put your own name in the title string. Next, set the default close operation so that the app exits when the user closes the window ➋. Then add the code to open a new BubblePanel drawing canvas as the content inside this frame ➌. The last two lines set the size of the window ➍ and make it visible ➎.
Save the BubbleDraw.java file and run it once. You’ll see a gray Java frame with "Your Name's BubbleDraw App" in the title bar. We’ll build the logic for the BubblePanel drawing canvas next.
Creating a Class for Bubbles
Switch to the tab for the BubblePanel.java file. This file will contain all the logic for drawing bubbles on the screen. Our first task will be creating a Bubble class to store each bubble’s color, size, and location on the screen.
Defining a Bubble
The reason for building a class is quite practical: in the older, procedural approach to programming, we would need a separate variable for each bubble’s x- and y-coordinates, size, and so on. For example, we’d need a bubble1x variable for the first bubble’s x-location, as well as bubble1y, bubble1size, and bubble1color variables for that bubble. That wouldn’t be so bad, but what if we drag the mouse for a few seconds and wind up with a thousand bubbles? We would need 4,000 variables just to keep track! Instead, we can use properties inside a class to store those values for each bubble.
Before we start writing code, let’s define what a bubble is. As shown earlier in Figure 9-1, a bubble is a colorful, filled circle, and bubbles can be different sizes and in different locations.
All of those features are attributes of bubbles in this app. In object-oriented programming, we use the nouns and adjectives that describe an object to build a list of attributes when we create a new class. Attributes are stored as class variables.
Besides attributes, a class can also contain methods. A method is a type of function associated with a specific class. Methods enable a class to do something. Think about what we want the bubbles in the drawing app to do. We need to create a bubble whenever the user clicks or drags the mouse. We’ll also draw a bubble every time the screen refreshes. The verbs—like create and draw—will help us identify the methods we need in our bubble class.
When we capture all of those attributes and methods into a single class, we can describe any bubble we might want to show on the screen. This is how a coder solves problems with object-oriented programming: by breaking big applications into smaller pieces, creating classes by asking questions about what the program contains, and then identifying methods and attributes by asking what each object of a new class should do and what kind of information it needs.
Let’s begin writing the Bubble class. We’ll do this inside the BubblePanel class, as BubblePanel is the only place we need to draw bubbles. Start coding your Bubble class before the closing brace at the end of BubblePanel, as follows:
import javax.swing.JPanel;
public class BubblePanel extends JPanel {
private class Bubble {
}
}
We usually make internal and helper classes private to keep other programs from accessing them directly. So, to make Bubble an internal class accessible only from a BubblePanel, we declare it as private. This technique, called encapsulation, means that the BubblePanel class hides its inner workings from other classes. Encapsulation is one of the core principles of object-oriented programming, and it’s a best practice worth following because it means we can change the way the Bubble class works internally and know for certain that we won’t break other parts of the code. Since Bubble is declared as private, we know that there isn’t any code outside of the BubblePanel class that depends on it. This is especially important for bigger applications that contain a large number of classes and are worked on by many programmers.
BubblePanel will rely on the Bubble class to store information on individual bubbles as the user draws on the screen. A bubble has an (x, y) location on the screen, a size, and a color, so we can make these attributes as variables inside Bubble. The x- and y-coordinates of the bubble’s location and the size of the bubble can all be stored as integer values:
import javax.swing.JPanel;
public class BubblePanel extends JPanel {
private class Bubble {
private int x;
private int y;
private int size;
}
}
Here we make two separate variables called x and y to store the bubble’s coordinates, as well as a size variable. These attributes are private, so only the Bubble class itself can change those values directly. We encapsulate all the data a bubble should have inside the Bubble class, and we interact with bubbles using the methods in that class only.
As mentioned earlier, each bubble in our app can have its own color. The java.awt library has a Color class that handles RGB (red-green-blue) color values to reproduce any color that we can display on our monitor. We’ll talk a bit more about RGB when we actually write the code to control bubble colors later in the chapter, so for now just import the java.awt.Color class at the top of the file and add an attribute called color to the Bubble class, like so:
import java.awt.Color;
import javax.swing.JPanel;
public class BubblePanel extends JPanel {
private class Bubble {
private int x;
private int y;
private int size;
private Color color;
}
}
Now that we’ve added the four attributes we want each bubble to have (x, y, size, and color), we can start building the behaviors, or functions, of a bubble to give values to these attributes. We’ll do that by adding methods inside the Bubble class.
Designing a Bubble’s Methods
The Bubble class will have two actions, which we’ll turn into methods: creating a bubble and drawing a bubble on the desktop screen.
Methods that create objects have a special name: constructors. A constructor sets up an object by assigning values to the object’s attributes. When we assign values to the attributes inside a constructor, we’re initializing them. For the Bubble class, we want to initialize the x, y, size, and color attributes of an individual bubble.
Building the Constructor
A constructor method begins with the keyword public, followed by the name of the class and a pair of parentheses. If there are any parameters you want to pass in as you set up an object, you place those inside the parentheses. We want to assign each bubble its x, y, and size values when it is created, so the constructor for the Bubble class looks like Listing 9-2.
private class Bubble {
private int x;
private int y;
private int size;
private Color color;
➊ public Bubble(int newX, int newY, int newSize) {
➋ x = newX;
➌ y = newY;
➍ size = newSize;
}
}
Listing 9-2: The Bubble class constructor
Each bubble’s coordinates and size will be determined by the user, so we want to pass the x- and y-coordinates and a size as integer values to the Bubble() constructor as each new bubble is created. These values are the three parameters we pass to the Bubble() method and are called newX, newY, and newSize ➊. Later in the code, when we handle the user creating bubbles, we’ll be outside the private Bubble class. That means we won’t have direct access to the bubble’s attributes, so we can’t just assign values to the x, y, and size attributes of each bubble. In order to get around that, we assign the attributes values through the Bubble() constructor, which takes the input from the user; assigns the input values to newX, newY, and newSize; and then assigns the user input values to the bubble’s attributes at ➋, ➌, and ➍.
We also want each bubble to have a random color. Because the color will be random, we don’t need to pass it to the constructor using a parameter. Instead, we can create the color inside the constructor.
We’ll need to generate random RGB color values to create a color for each bubble. RGB works by combining different amounts of red, green, and blue light on your computer monitor to produce different colors. In programming, each of these three colors is represented by an integer between 0 (none of the color) and 255 (the maximum amount of the color possible). To make a color, we need to get three integers between 0 and 255, separate them with commas, and group them together between parentheses. For example, pure red has an RGB value of (255, 0, 0), meaning full red, no green, and no blue. Yellow is (255, 255, 0) in RGB, meaning full amounts of red and green, but no blue. In total, there are over 16 million RGB color values that can be created this way.
We’ve generated random numbers with the Math class’s Math.random() method before when we needed a single number, but in the BubbleDraw app, we’ll need three random numbers (one for each part of RGB), so let’s look at a new way to generate random values.
The java.util.Random class contains several useful methods, including nextInt(), which will let us instantly generate a random integer up to a certain size without having to do additional math or rounding. To use the Random class, we’ll have to import it first, at the top of the BubblePanel.java file:
import java.util.Random;
import java.awt.Color;
import javax.swing.JPanel;
Because Random is a class, we need to create a new object or variable of the Random type to access its functions. Add the following line inside the top of the BubblePanel class:
import java.util.Random;
import java.awt.Color;
import javax.swing.JPanel;
public class BubblePanel extends JPanel {
Random rand = new Random();
private class Bubble {
This line creates a random number generator called rand that will allow us to generate random integer or floating-point values quickly. We’re encapsulating rand by putting it at the top of the BubblePanel class so that we can generate random numbers both in the drawing window and in the inner Bubble class, but not outside a BubblePanel.
To create a random color in Java, we can use the constructor for the java.awt.Color class that we imported earlier. The constructor will accept three integer arguments between 0 and 255 for the red, green, and blue values to create a color.
Add the following code to the Bubble() constructor method:
public Bubble(int newX, int newY, int newSize) {
x = newX;
y = newY;
size = newSize;
color = new Color( rand.nextInt(256),
rand.nextInt(256),
rand.nextInt(256) );
}
We use the new keyword with the constructor for the Color class to create a new color, and each of the RGB color values will be a randomly generated integer between 0 and 255. Every time you call the nextInt() method, it generates a new random integer between 0 and the maximum integer you pass it. Here, we want random color values from 0 to 255, so we pass it 256 because nextInt() generates an integer up to, but not including, the upper bound passed to it.
Coding the Method to Draw a Bubble
Now that each bubble has an (x, y) location, a size, and a random color, let’s add the ability to draw bubbles on the screen. To draw colorful graphics on the screen, we’ll import the java.awt.Graphics class. This Graphics class contains methods such as setColor() to choose a paint color, drawRect() to draw a rectangle, and fillOval() to paint a filled-in oval on the screen, just to name a few. We’ll use fillOval() to draw our circles, so add the following import statement to the top of the BubblePanel.java file:
import java.awt.Graphics;
import java.util.Random;
import java.awt.Color;
import javax.swing.JPanel;
Next, let’s add a draw() method to the Bubble inner class, below the Bubble() constructor:
private class Bubble {
private int x;
private int y;
private int size;
private Color color;
public Bubble(int newX, int newY, int newSize) {
--snip--
}
public void draw(Graphics canvas) {
➊ canvas.setColor(color);
➋ canvas.fillOval(x - size/2, y - size/2, size, size);
}
}
The draw() method accepts one parameter, a Graphics canvas called canvas. Inside the draw() method, we call the setColor() method on canvas ➊ to set the drawing color to the color stored in the color variable of the bubble we’ll draw. At ➋, we call fillOval() to paint a filled-in circle on the screen. The fillOval() method takes four parameters, the x- and y-coordinate of the upper-left corner of a bounding box in which we’ll draw the oval, followed by the width and height of the box. Think of the bounding box as an invisible rectangle at that (x, y) location with the given width and height and the oval as a balloon that will be blown up until it touches all four sides of the box (see Figure 9-2). By setting the same width and height for the box to make it square, we’ll end up with a circle instead of an oval.
Because our ovals are actually circles, the width and height are the same value—the size of the bubble in pixels we stored in the size attribute. At ➋, we want the bubble to be centered on the (x, y) location the user clicked, so we adjust the upper-left corner of each bubble by subtracting half the size (size/2) from each of the x and y values.

Figure 9-2: The fillOval() method takes four parameters, the upper-left corner’s xand y-coordinates, followed by the oval’s width and height.
With the addition of the draw() method, we now have a complete Bubble class that can remember the location, size, and color of a bubble. The class methods we made can be used to create new bubbles and draw them on the screen. It’s time to add logic to the BubblePanel class to use those methods to create and draw bubbles whenever the user clicks and drags on the screen.
Storing Bubbles in an ArrayList
We need a way to store all the bubbles the user creates when they click and drag around the screen. Java’s libraries contain several useful data structures, which are classes for storing groups of objects.
The java.util.ArrayList is a dynamic data structure. That means it not only stores a collection of objects but can also grow or shrink depending on the needs of the program. For the BubbleDraw app, we can’t predict how many bubbles the user will draw, so a dynamic data structure like an ArrayList is the perfect option for storing all the bubbles a user could create. An ArrayList is a flexible way to store things when you don’t know how many items you’ll need in advance. A regular array in Java has a fixed size, but an ArrayList can keep adding new bubbles every time the user clicks.
First, let’s import java.util.ArrayList at the top of the BubblePanel.java file so we can access ArrayList data types:
import java.util.ArrayList;
import java.awt.Graphics;
import java.util.Random;
import java.awt.Color;
import javax.swing.JPanel;
Next, we need to declare an ArrayList that will hold objects of the Bubble class. Inside the BubblePanel class, add the following declaration:
public class BubblePanel extends JPanel {
Random rand = new Random();
ArrayList<Bubble> bubbleList;
The ArrayList data structure can accept a type specifier inside the angle brackets, < and >, to tell Java what type of objects the ArrayList will hold. An ArrayList can hold any type of object, but the ArrayList we’re declaring, bubbleList, will contain only objects of the Bubble class.
Next, let’s take care of one additional variable, size, for the default bubble size:
public class BubblePanel extends JPanel {
Random rand = new Random();
ArrayList<Bubble> bubbleList;
int size = 25;
This size variable sets a starting size for bubble diameters in pixels. I picked 25 pixels, but you can choose a larger or smaller starting size if you’d like.
Adding a Constructor to the BubblePanel Class
We’ve declared bubbleList to be a dynamic ArrayList of Bubble objects, so let’s add a constructor to the BubblePanel class to initialize bubbleList and set the background color of the drawing window.
Just as we saw in the Bubble inner class, the constructor for the BubblePanel class uses the format public plus the name of the class, followed by a pair of parentheses:
public class BubblePanel extends JPanel {
Random rand = new Random();
ArrayList<Bubble> bubbleList;
int size = 25;
public BubblePanel() {
}
Notice that we end the constructor with open and close parentheses, because the constructor is a method. Inside the constructor, we initialize bubbleList to get it ready to store a flexible ArrayList of Bubble objects. We also set the background color of the drawing window to black:
public BubblePanel() {
➊ bubbleList = new ArrayList<Bubble>();
➋ setBackground(Color.BLACK);
}
NOTE
Although I recommend a black background for the app, the images in this book show a white background for readability.
Just as in the declaration of bubbleList, when we construct a new ArrayList at ➊, we can specify the type of object we want to store in angle brackets: <Bubble>.
At ➋, we can use the setBackground() method directly because BubblePanel is extending JPanel, and we’ve seen that JPanel objects have a background color. We’re setting the background to the color constant Color.BLACK from the Color class we imported earlier. This constant has an RGB value of (0, 0, 0).
Now, when we start the BubbleDraw app and create a BubblePanel drawing canvas, we’ll begin with an empty list of bubbles and a black screen background.
Save your changes so far. In the next section, we’ll fill that window with colorful bubbles!
Adding a Method to Draw on the Screen
Next, we need to add a method to paint all the bubbles in bubbleList to the drawing screen.
All of the GUI components in the javax.swing toolkit, including the JPanel we extended for the BubblePanel drawing screen, have a paintComponent() method that draws that component on the screen. We’re going to modify, or override, the default paintComponent() method to make the BubblePanel draw all the bubbles in bubbleList.
First, we need to declare the paintComponent() method. Because we’re overriding the paintComponent() method that already exists in JPanel, the parent class of BubblePanel, we have to use the same method signature, or first line of code. That means we have to match the way paintComponent() is declared exactly, as a public void method, with one parameter, of type Graphics:
public class BubblePanel extends JPanel {
--snip--
}
public void paintComponent(Graphics canvas) {
}
We place the paintComponent() method just below the BubblePanel() constructor. Notice that paintComponent() requires a Graphics object, which we call canvas just as in the draw() method we designed for the Bubble class. Any object that draws on the screen can use a Graphics object to color the individual pixels on the computer screen.
Inside this method, we first want to allow the JPanel parent class to clear the drawing screen and do any other setup it normally would before drawing anything else. We do this by calling paintComponent() from the parent class:
public void paintComponent(Graphics canvas) {
super.paintComponent(canvas);
}
The keyword super tells Java to call the original paintComponent() method from JPanel. This means that all the code in the original paintComponent() method will be pulled into our new one. This is a useful object-oriented programming feature: because we extended the JPanel class to create the new BubblePanel class, we can take advantage of all the functionality already built into JPanel, such as clearing the pixels inside the window when the app opens and preparing the Graphics canvas for drawing colorful graphics. We say that BubblePanel inherits these functions from JPanel.
Once we’ve prepared the canvas, it’s time to loop through the list of bubbles and draw each one on canvas. To accomplish this, we’ll use a for loop in a new way.
You first saw a for loop in Chapter 6, when we wanted to loop through each character in a string to encode secret messages. This time, we’re using a shorter version of a for loop, called a for each statement, that’s specially designed to loop through a list or collection of objects.
Let’s see the working code first, and then I’ll break down the for each statement piece by piece:
public void paintComponent(Graphics canvas) {
super.paintComponent(canvas);
➊ for(Bubble b : bubbleList) {
➋ b.draw(canvas);
}
}
You can read the for each statement at ➊ as “For each Bubble b in bubbleList.” You can tell this is a for each statement instead of a regular for loop, first because of the colon in the middle and, second, because it doesn’t have the three parts we saw in for loops back in Chapter 6: initialization, condition, and update. Java uses the same keyword for and parentheses for both loops, but the for each statement is designed just for collections of objects, such as arrays, ArrayLists, and so on.
For each Bubble b in the ArrayList bubbleList, the loop will call b.draw(canvas) ➋ to draw that individual bubble on the drawing screen. The first time the loop executes, b will point to the first Bubble object in bubbleList, and each time the loop repeats, b will point to the next bubble in the list. Calling b.draw(canvas) tells that bubble to draw itself on the canvas.
This single, short for each loop will draw every bubble in the bubbleList to the screen. The only problem is that we don’t have any bubbles to test. Let’s generate some random bubbles to see the app in action before we move on to creating bubbles with the mouse.
Testing the BubblePanel Class
To test what we’ve done so far, before we add the mouse interaction, we’ll write a test method that draws 100 bubbles of random sizes all over the app window. This will allow us to make sure the app works without writing the final code. This way we can debug any errors in our code early and see a preview of how cool the app will look when it’s finished.
Call the new method testBubbles(). Place it after the paintComponent() method and before the private class Bubble, as shown in Listing 9-3.
public void paintComponent(Graphics canvas) {
--snip--
}
}
➊ public void testBubbles() {
➋ for(int n = 0; n < 100; n++) {
➌ int x = rand.nextInt(600);
➍ int y = rand.nextInt(400);
➎ int size = rand.nextInt(50);
➏ bubbleList.add( new Bubble(x, y, size) );
}
➐ repaint();
}
private class Bubble {
Listing 9-3: Creating the testBubbles() method
At ➊, we declare testBubbles() as public with void as the return type, meaning it doesn’t pass any information back to the program. Then, we use a regular for loop ➋ to go from n = 0 to 99, a total of 100 iterations. That means we’ll create 100 bubbles, and for each bubble, we need an (x, y) location and a size for its width and height in pixels.
We set the pixel dimensions of the BubbleDraw app frame to 600 wide by 400 tall at the beginning of this chapter, so for the bubble’s location, we need an x value between 0 and 600 and a y value between 0 and 400. Inside the for loop, we use the random number generator rand to get a random integer between 0 and 600 and store it in the variable x ➌ for the x-coordinate of the center of the bubble on the screen. Then, we generate a y-coordinate value between 0 and 400 and store it in y ➍. Next, for the size of the bubble in pixels, we generate a random number between 0 and 50 ➎. The last step inside the loop creates a new Bubble object using the random x, y, and size that we just generated, and we add that new Bubble to the ArrayList bubbleList ➏.
Finally, we call the repaint() method ➐. Normally before we draw new computer graphics, we have to clear the screen by drawing an empty, black background, but here repaint() does this for us. Notice that we didn’t have to clear the background of the screen inside the paintComponent() method either; all we had to do was draw the bubbles from bubbleList. The repaint() method takes care of redrawing the background as well as calling paintComponent(), so we’ll call it anytime we want to refresh or repaint the screen.
There’s just one more step to complete before we can test the app—we need to call the testBubbles() method from the BubblePanel() constructor. Add the following line of code to your constructor for the BubblePanel:
public BubblePanel() {
bubbleList = new ArrayList<Bubble>();
setBackground(Color.BLACK);
testBubbles();
}
Save BubblePanel.java and then switch to the BubbleDraw.java tab. Save that file and press the run button in Eclipse. You’ll need to run the file from the BubbleDraw.java tab the first time you compile and run, because BubbleDraw contains the main() method that runs the program. You should see a window full of colorful, randomly placed bubbles, similar to Figure 9-3.

Figure 9-3: Each time you run this version of the BubbleDraw app, the testBubbles() method will draw 100 bubbles on the screen.
If you like the look of the random bubbles, take a little time to play with the numbers in the testBubbles() method. See if you can draw 200, 500, or even 1,000 bubbles instead of 100. Make the bubbles larger, either by generating a larger random number for size or by adding a value to size after the random number is generated. Play with the x and y values to see if you can fit every bubble on the screen instead of having some bubbles cut off at the edges.
Modify the testBubbles() method as much as you’d like; this is a great opportunity to try new things and immediately see the visual effect of each change. We’ll comment out the testBubbles() method in the next section as we add mouse interaction, so you can feel free to experiment with testBubbles() without fear of messing up the rest of the program.
Handling Mouse Events from the User
The goal of the BubbleDraw app is to allow the user to draw bubbles using their mouse. We saw in the last section that the bubble-drawing part is working. Now all we have to do is add the mouse interaction.
We’ll use event listeners to give the app the ability to handle mouse clicks, mouse movement, and even mouse wheel scrolling. We added event listeners to our GUI apps in Chapters 3 and 7 using anonymous inner classes to handle button clicks, sliders, and text field changes; but if we used anonymous inner classes in this app, we would need to make three separate listeners for each type of event, and that would be hard to keep track of. Plus, in two of those events, clicking and dragging the mouse, we want the result to be the same: the app should add bubbles each time the user clicks the mouse on the screen and whenever the user drags the mouse across the screen. It would be much easier to just have one block of code we could attach to both events than to write a listener for one event and copy and paste the code to another. So, to make the app more manageable, we’re going to create a single, named event listener that can respond to all three types of events.
Creating a Reusable Event Listener
Before we can create our event listener, we need to import one additional library, java.awt.event.*, at the top of the BubblePanel.java file:
import java.awt.event.*;
import java.util.ArrayList;
import java.awt.Graphics;
import java.util.Random;
import java.awt.Color;
import javax.swing.JPanel;
Our previous import statements have brought in only one class at a time, but this statement brings in every class in the java.awt.event library. The wildcard character, the asterisk (*), means that we want to bring in all the classes at the top level of java.awt.event, including all the mouse events and listeners, and much more. We could import each class individually as we use it, but importing java.awt.event.* will make the program much easier to write, allowing us to focus on coding instead of switching back and forth to the top of the file every time we need to use another event class.
Next, let’s start coding the private, named inner class to listen for mouse events. We’ll name it BubbleListener, as it will handle all the events related to bubbles in the BubblePanel class. Add this class below your testBubbles() method but above the private class Bubble. Java programmers usually include listener classes near the bottom of the class file, along with any other helper classes—this convention just helps us quickly find the listener code for debugging or modifying the file.
repaint();
}
private class BubbleListener extends MouseAdapter {
}
private class Bubble {
The BubbleListener class extends MouseAdapter, which processes mouse events. Just as when we used the extends keyword to build a new type of JFrame that inherited all the features and functions of its parent class, the BubbleListener will inherit all the mouse event listener features of the MouseAdapter class. This adapter class includes the ability to handle MouseListener events for clicks, MouseMotionListener events for mouse movement, and MouseWheelListener events for scrolling with the mouse wheel or trackpad.
We’ll add these event handlers to the code step-by-step, and we’ll test the app after each addition to see the BubbleDraw app emerge one feature at a time.
Handling Clicks and Drags
When we handle mouse events, we need to complete two steps. First, we have to add code to the BubbleListener to handle the individual event we’re after, like mousePressed(). Then, we have to add the listener to the BubblePanel() constructor so the drawing screen knows to listen for that type of event and call BubbleListener to handle the event when it happens. Let’s do this for the first case, when the user presses the mouse button to draw a bubble.
Listening for Mouse Button Events
There are three events that we can listen for from the mouse buttons:
mousePressed() Occurs when the user presses any mouse button
mouseReleased() Occurs when the user releases the button
mouseClicked() Occurs when the user presses and releases in quick succession
For the BubbleDraw app, we’ll use the mousePressed() handler so that the app will draw a bubble as soon as the user presses the mouse button. The signature for a mousePressed() event handler looks like the following:
private class BubbleListener extends MouseAdapter {
public void mousePressed(MouseEvent e) {
}
}
NOTE
Spelling and capitalization are especially important when you’re writing event handlers because they already have built-in names with specific capitalization. Make sure your mousePressed() method matches this one exactly.
The mousePressed() event handler goes inside the BubbleListener class, and it must be declared as public with a void return type to match the mousePressed() method in the MouseAdapter class. Notice it also takes a parameter of type MouseEvent. All of the mouse events get information about the mouse pointer’s location on the screen when the event happened. The x- and y-coordinates of the mouse event are stored in a MouseEvent object, and we can get those coordinates with the getX() and getY() methods.
The following code adds a bubble to the bubbleList at the location where the user clicked the mouse, and then repaints the drawing screen to make the bubble appear.
private class BubbleListener extends MouseAdapter {
public void mousePressed(MouseEvent e) {
➊ bubbleList.add(new Bubble(e.getX(), e.getY(), size));
➋ repaint();
}
}
At ➊, we create a new Bubble object at the (x, y) location where the user clicked the mouse, e.getX() and e.getY(). The MouseEvent class has several properties and methods for working with mouse events, like finding out which button was pressed and where the mouse is on the screen. As I just mentioned, the getX() and getY() methods tell us the x- and y-coordinates of the mouse event, such as a click or drag. Look back down in the Bubble class, and you’ll see that the constructor method we wrote there required three parameters: int newX, int newY, and int newSize. So, we must pass e.getX(), e.getY(), and size to the constructor to create a new Bubble object. Once the bubble is created, we add it to the ArrayList of bubbles with bubbleList.add().
At ➋, we call the repaint() method to refresh the screen and draw the updated bubbleList to the canvas.
This completes the mousePressed() event handler, but we still need to do one more thing to make the app listen for mousePressed() events and send them to the BubbleListener class. We have to tell the BubblePanel class to add BubbleListener as the listener for mouse events.
In the BubblePanel() constructor, make two changes. First, comment out the testBubbles() line by placing two forward slashes at the front of the line. Second, call the addMouseListener() command to use BubbleListener to process mouse events. The updated constructor is shown here:
public BubblePanel() {
bubbleList = new ArrayList<Bubble>();
setBackground(Color.BLACK);
➊ // testBubbles();
➋ addMouseListener( new BubbleListener() );
}
By commenting out the call to testBubbles()➊, we’ve left it in place in case we want to draw random test bubbles again, but we’ve stopped it from running so that we can test the interactive BubbleDraw app using the mouse. The new line at ➋ tells the BubblePanel to listen for mouse events and to send them to the BubbleListener class when they happen.
With those changes in place, you should be able to run the BubbleDraw app and use the mouse button to place bubbles anywhere you click, as shown in Figure 9-4.
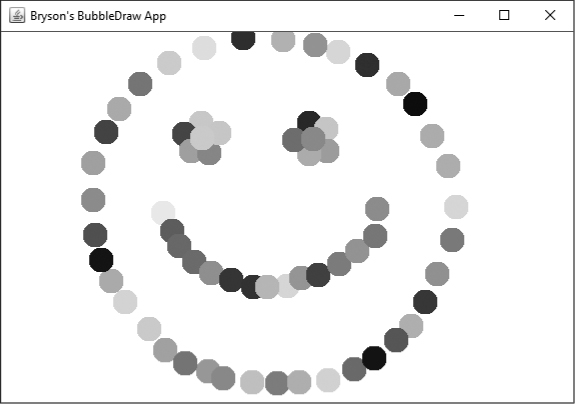
Figure 9-4: After adding the mousePressed() handler and setting BubbleListener as the listener for mouse events in the app, you should be able to draw by clicking anywhere on the screen.
Very cool! You can click repeatedly to draw shapes and patterns on the screen, but it would be easier to drag the mouse to draw bubbles. Let’s address that next.
Listening for Mouse Motion Events
Mouse motion events are a separate type of event from mouse button presses, but they can still be processed in a class that extends MouseAdapter, like BubbleListener. The two types of mouse motion events are mouseMoved() and mouseDragged().
A mouseMoved() event happens anytime the mouse is moved over the drawing window. A mouseDragged() event occurs whenever the mouse is moved while a button is pressed. Since we want to draw bubbles only when the user clicks and drags the mouse, we’ll implement the mouseDragged() event handler in the BubbleListener class first, and then we’ll add a mouse motion listener to the BubblePanel constructor to activate the listener.
Add the mouseDragged() event handler to the BubbleListener class, as shown here:
private class BubbleListener extends MouseAdapter {
public void mousePressed(MouseEvent e) {
--snip--
}
public void mouseDragged(MouseEvent e) {
bubbleList.add(new Bubble(e.getX(), e.getY(), size));
repaint();
}
}
You’ll notice that the code looks almost exactly like the mousePressed() event handler, except for the name mouseDragged(). That’s because they both handle MouseEvents. The mousePressed() method handles events when the user presses a mouse button, and mouseDragged() is called whenever the user drags the mouse. In this app, both events should behave the same way, adding bubbles to bubbleList and calling the repaint() function.
Next, add BubbleListener as the mouse motion listener to the BubblePanel() constructor with the following statement:
public BubblePanel() {
bubbleList = new ArrayList<Bubble>();
setBackground(Color.BLACK);
// testBubbles();
addMouseListener( new BubbleListener() );
addMouseMotionListener( new BubbleListener() );
}
Once again, let’s run the app to test this new event listener. Save your code, press the run button, and click and drag around the app window that appears, as shown in Figure 9-5.
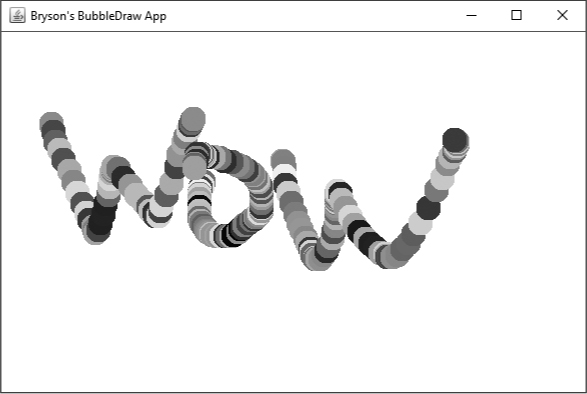
Figure 9-5: Now you can click and drag to draw continuous streams of bubbles!
Impressive, huh? Just by adding two event handlers for mouse button and mouse motion events to the BubblePanel graphics app, we’ve built an interactive, multicolored drawing app in Java.
Bonus: Handling MouseWheel Events
We’ve seen two small but powerful event handlers for mouse button presses and mouse click-and-drag events at work in the app so far, but there’s another event class in MouseAdapter: MouseWheelEvent. Depending on your system, you might have a physical wheel on your mouse or trackpad that you can use to scroll up and down in documents and web pages. Or, you might have a laptop with a trackpad that allows you to scroll using a gesture, such as the two-finger swipe gesture on a MacBook or the vertical swipe along the far-right edge of the trackpad on most Windows laptops.
Java interprets either kind of scroll event as a MouseWheelEvent. We can add a mouseWheelMoved() listener to the BubbleListener to handle mouse wheel events or trackpad scroll gesture events on systems that provide them, as follows:
private class BubbleListener extends MouseAdapter {
public void mousePressed(MouseEvent e) {
--snip--
}
public void mouseDragged(MouseEvent e) {
--snip--
}
➊ public void mouseWheelMoved(MouseWheelEvent e) {
➋ size += e.getUnitsToScroll();
}
}
At ➊, the mouseWheelMoved() method accepts a MouseWheelEvent. At ➋, we get the number of units the mouse wheel scrolled from the MouseWheelEvent e with e.getUnitsToScroll(), and we add this amount to size. The number returned by getUnitsToScroll() can be positive or negative, depending on your operating system and whether the wheel was scrolled up or down.
Lastly, add the mouse wheel listener to the BubblePanel() constructor, just below the previous two listeners:
public BubblePanel() {
bubbleList = new ArrayList<Bubble>();
setBackground(Color.BLACK);
// testBubbles();
addMouseListener( new BubbleListener() );
addMouseMotionListener( new BubbleListener() );
addMouseWheelListener( new BubbleListener() );
}
Save and run the app now, and you should be able to change the bubble size by scrolling your mouse wheel or gesturing up or down on your trackpad, as shown in Figure 9-6.

Figure 9-6: Use your mouse wheel or trackpad to change the size of the bubbles.
The first version of the BubbleDraw app is complete! You can click and drag to draw with multicolored bubbles on the screen, scroll up and down to change the bubble size, maximize the window to draw fullscreen, and more.
What You Learned
You’ve designed a colorful, interactive drawing app though an object-oriented programming approach by creating a Bubble class to capture the features and behaviors of bubbles.
Here are some of the new things you’ve learned in this chapter:
• Building a single app with multiple classes and multiple Java source code files
• Using an object-oriented programming approach to break a problem down into smaller pieces
• Building the Bubble class from scratch, including attributes, methods, and a constructor
• Creating random colors using the java.util.Random and java.awt.Color classes
• Generating random numbers in a given range with Random.nextInt(range)
• Drawing graphics with the java.awt.Graphics class
• Using the paintComponent() method to describe what your app should draw and using repaint() to clear the screen and redraw
• Writing event handlers for mouse events, including clicks, movement, and mouse wheel events
• Using the java.util.ArrayList class to store a dynamic list of objects, such as the bubbles in BubbleDraw
• Adding multiple event listeners to an app using a custom listener class, BubbleListener
Programming Challenges
Try these programming challenge exercises to review and practice what you’ve learned, as well as to expand your programming skills. Visit the book’s website at https://www.nostarch.com/learnjava/ for sample solutions.
#1: No Bubble Too Small
If you scroll the mouse down enough, the bubbles will simply disappear because the size value drops below 0, resulting in a circle that Java can’t draw on the screen. In fact, a size of 2 or smaller will produce bubbles just a single pixel tall, so let’s make sure the value of size stays at least 3 pixels by 3 pixels to keep the bubbles circular.
Add a little logic to the mouseWheelMoved() method in the BubbleListener class in BubblePanel.java to check whether the size variable goes below a value of 3. If so, set size equal to 3 to keep the bubble visible on the screen. Add this new if statement to the end of the mouseWheelMoved() method so that you check the size after it’s changed, not before.
Run the app with the change, and you should be able to scroll the mouse wheel until the bubbles are just a couple of pixels wide, but they’ll no longer disappear. Great work!
#2: PixelDraw!
Add just a little bit of math to the constructor for new Bubble() objects, and you can create a cool, pixelated effect, as shown in Figure 9-7.

Figure 9-7: Changing the location of new Bubbles slightly can create a cool pixel-drawing effect.
Let’s copy the BubbleDraw project folder to make the changes in a new project without messing up the original app. Double-click your BubblePanel .java tab to restore the default view and then, in the Package Explorer, press CTRL-C or ![]() -C to copy the BubbleDraw project folder. Press CTRL-V or
-C to copy the BubbleDraw project folder. Press CTRL-V or ![]() -V to paste a new copy of the folder into your workspace. Change the name of the folder to PixelDraw, as shown in Figure 9-8.
-V to paste a new copy of the folder into your workspace. Change the name of the folder to PixelDraw, as shown in Figure 9-8.

Figure 9-8: You can copy a project folder in the Package Explorer and paste it to create a new copy.
Change the code for the Bubble() constructor inside the private class Bubble as follows.
public Bubble(int newX, int newY, int newSize) {
x = (newX / newSize) * newSize + newSize/2;
y = (newY / newSize) * newSize + newSize/2;
size = newSize;
color = new Color( rand.nextInt(256),
rand.nextInt(256),
rand.nextInt(256) );
}
This new math only alters the (x, y) location of each new bubble because of the way Java handles division of two integer values. Java keeps only the integer, or whole number, result when you divide two integers, so dividing by newSize and multiplying by newSize will make your bubbles appear to be on a grid, as you saw back in Figure 9-7. For example, if newSize is 10 and x is 25, then x divided by newSize would be 25 / 10, which evaluates to 2 in Java. Multiplying by 10 then gives us 20, the location of the bubble on a 10×10 pixel grid. We add newSize/2 to each coordinate to center the dots within the imaginary grid. Remember, scrolling the mouse wheel still changes the size of the bubbles, so you can draw thick, blocky images or fine, pixel-perfect drawings.
If you’d like to make the pixel effect more Minecraft-y, you can make the bubbles into squares. To do so, change the draw() method to fill rectangles instead of ovals by commenting out the fillOval() command and using the fillRect() command instead:
public void draw(Graphics canvas) {
canvas.setColor(color);
// canvas.fillOval(x - size/2, y - size/2, size, size);
canvas.fillRect(x - size/2, y - size/2, size, size);
}
Now you can draw in a pixelated style, as shown in Figure 9-9.

Figure 9-9: Drawing with rectangles instead of ovals creates a pixelated drawing effect.