
8
MAKE SECRET MESSAGES A PHONE APP TO SHARE WITH FRIENDS!

In this chapter, we’ll complete our Secret Messages app experience by building a mobile app version that can send secret messages by text or email and can even post to social media.
The app will look similar to the GUI version in Chapter 7, with labels, text fields, and the ability to slide through different key values to quickly encode and decode messages. You’ll also be able to copy and paste messages from the app into emails and text messages, but by the end of the chapter, you’ll be able to send an email or text directly from the Secret Messages app itself! Figure 8-1 shows the app in action on a real Android device.

Figure 8-1: The Secret Messages encoder/decoder app (left) can send secret text and email messages directly from inside the app, at just the touch of a button (right).
We’ll reuse the working code from the desktop app by keeping the names of the GUI components in the Android version and by taking advantage of Java’s consistent language and structure across multiple platforms.
Setting Up the Mobile GUI
Let’s begin building the Secret Messages app with Android Studio. Android Studio may ask you to perform updates as you open the program, which is usually a good idea. Updating carries a bit of risk, as it can change the look and feel of the program by moving icons or menu items, but the updates also include important new security fixes and the latest Android features.
When you first open Android Studio, you may see the most recent project you were working on—in our case, the Hi-Lo guessing game app. You can close it by selecting File ▸ Close Project.
To begin building the new Secret Messages app, either select File ▸ New Project from inside Android Studio or choose Start a new Android Studio project from the Welcome screen.
Name the new project SecretMessages, save it in your preferred location, and click Next.
On the Target Android Devices screen, choose API 16: Android 4.1 (Jelly Bean) for the Phone and Tablet Minimum SDK, as we did for the Hi-Lo guessing game app, and then click Next. Choose Basic Activity on the Add an Activity screen and click Next. On the Customize the Activity screen, keep all the default names and click Finish.
It may take a moment for the new project to configure and open. When the new project opens, double-click the content_main.xml file under app ▸ res ▸ layout in the Project Explorer on the left. You may need to close a pop-up message about the floating action button (we’ll use that later).
Your screen should look similar to Figure 8-2. (You may have to click the Design tab to see the GUI preview.)

Figure 8-2: The starting view of the app in Android Studio
Designing the Mobile GUI
Now that we have a new project set up, let’s start designing the layout of our app. First, delete the “Hello World!” text shown in the design preview by clicking to select it and then pressing the DELETE key. Then, as we did in the previous app, let’s add a RelativeLayout to hold our GUI elements: in the Palette pane, under Layouts, select RelativeLayout and drag it onto the Preview pane or onto the ConstraintLayout under the Component Tree.
Next, let’s add a title to the top of the app by selecting the TextView widget under Widgets in the Palette. Place the TextView widget at the top center of the screen, change the text to Your Name's Secret Messages App, and then change the textAppearance property in the Properties pane to Material.Large, as I’ve done in Figure 8-3.

Figure 8-3: Add a Large text title to the top center of your app, customizing it with your name.
In the Properties pane, expand textAppearance to find textStyle and click the bold checkbox to make the title text stand out more.
Now, let’s place the EditText text fields for the user’s input message. In the Palette, under Text, select Multiline Text. Zoom in on the design preview and place the text field about 30 dp below the title. Change the text to Secret messages are so cool, aren't they? as shown in Figure 8-4. The escape sequence will add newline characters; these characters don’t show up onscreen, but they represent the new line you get by pressing ENTER on the keyboard. Putting the text across multiple lines shows the user they can enter a multiline message as well.
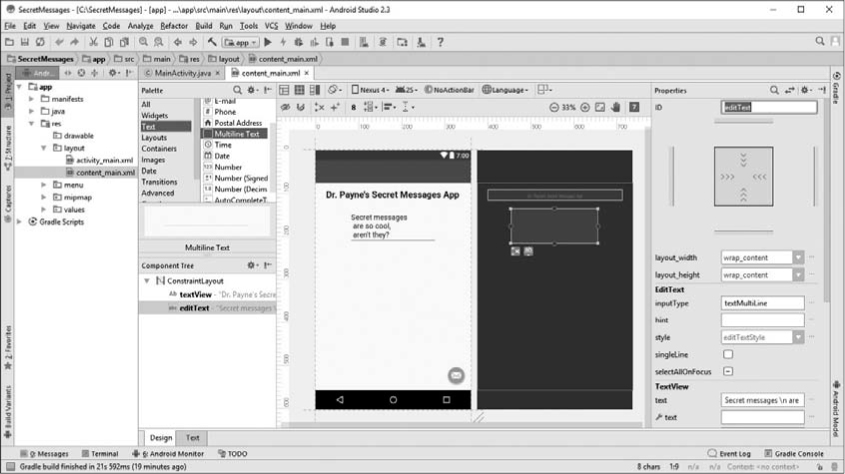
Figure 8-4: Add a Multiline Text field for the user’s input message, using the escape sequence to span multiple lines of text.
You can also change the number of lines of text that a user can see at any one time. Under the expanded Properties pane for the Multiline Text, you can change the lines property to 4, for example. To be able to see the multiline message across all devices, select the textMultiLine checkbox in the inputType property’s drop-down list.
Finally, let’s change the input text field’s id property to txtIn, both to help us use it in the code later and to maintain naming consistency with the GUI desktop version of the app. Now drag the left and right borders of the text field to stretch it to the full width of the app, as shown in Figure 8-5.

Figure 8-5: Change the id of the input text field to txtIn so that we can code with it later.
We’re going to add four components to the middle of the Secret Messages app: a SeekBar for the user to swipe a bar to find a key, a label, a text field to display the secret key, and an Encode/Decode button. The SeekBar will function similarly to the JSlider in the desktop version of the app. Don’t worry if all your components don’t line up perfectly when you first place them—we’ll be able to fix that later.
First, find the SeekBar in the Widgets section of the Palette pane. Place it a comfortable margin, 30 dp or so, below the input text field along the left margin, as shown in Figure 8-6. You can set the top margin manually in the Properties pane by going to View all properties (the left and right double-arrows at the top of the Properties pane). Under Layout_Margin, enter 30dp for the layout_marginTop.
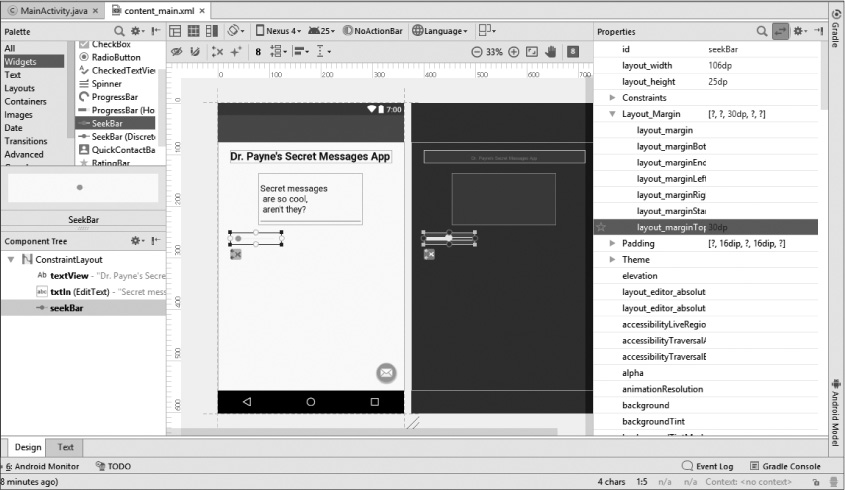
Figure 8-6: The SeekBar will function like the slider in the GUI desktop version of the app, allowing the user to slide among different key values.
Next, add a TextView widget beside the SeekBar to serve as a label for the text field of the user’s secret key value. Change the textAppearance property to Material.Medium and the text property to Key: in the Properties pane.
Then, select a Number text field for the user’s secret key value and center it horizontally, with a text property of 13 or another default key value of your choice. Modify the width of the text field to fit the number comfortably by changing its width property (under View all properties) to approximately 40dp, and then change the id property to txtKey.
With the txtKey text field in place, you should be able to drag the Key: label over to be directly beside it. You should also be able to stretch the SeekBar to fill the gap, as shown in Figure 8-7.
Complete the middle row of the layout by adding the Encode/Decode button. Choose Button under Widgets in the Palette and insert the button along the right margin beside the text field. Change the text property to Encode/Decode.
Finally, create a text field for the output message by copying the txtIn text field and pasting it below the middle row of widgets. Delete the text in the text field, stretch it to the width of the app window, and rename the id property to txtOut.

Figure 8-7: After placing the txtKey text field, adjust the placement of the Key: label and stretch the SeekBar.
That’s it—the finished GUI layout is shown in Figure 8-8.

Figure 8-8: The finished layout for the Secret Messages mobile app
Before moving on, make sure your input text field has an id of txtIn, the output text is txtOut, and the middle text field for the key is txtKey. We’ll need all of these elements to be correctly named in order for the code to work in the next section.
Wiring the GUI to the Java Code
It’s time to connect the GUI layout to the Java source code to begin programming the behavior of the Secret Messages mobile app. Switch to the MainActivity.java file by clicking the tab at the upper left of the main content window.
Add the following five lines directly to the public class MainActivity declaration:
public class MainActivity extends AppCompatActivity {
EditText txtIn;
EditText txtKey;
EditText txtOut;
SeekBar sb;
Button btn;
You may need to press ALT-ENTER or OPTION-ENTER after each line to import the widgets into the Java code.
These five variables point to the GUI components in the visual layout for the app. We can connect these variable names to the actual widgets by adding five lines of code to the onCreate() method, right below the setSupportActionBar(toolbar); statement:
protected void onCreate(Bundle savedInstanceState) {
super.onCreate(savedInstanceState);
setContentView(R.layout.activity_main);
Toolbar toolbar = (Toolbar) findViewById(R.id.toolbar);
setSupportActionBar(toolbar);
txtIn = (EditText)findViewById(R.id.txtIn);
txtKey = (EditText)findViewById(R.id.txtKey);
txtOut = (EditText)findViewById(R.id.txtOut);
sb = (SeekBar)findViewById(R.id.seekBar);
btn = (Button)findViewById(R.id.button);
You can rely on Android Studio’s code assist to autocomplete most of these entries—all you have to do is type the first few characters, then click the entry from the list or press ENTER to accept the code recommendation. It’s faster and will help you avoid common typing errors.
Connecting the Encode Button to the encode() Method
Now that we have the code connected to the components in the GUI layout, we can copy the encode() method from the desktop version of the app from Chapter 7. We’ll paste the method into the public class MainActivity declaration, right below the five lines you added declaring the variables that point to the GUI components in the layout.
Open your SecretMessagesGUI desktop project in Eclipse and highlight the entire encode() method. Copy this code and paste it into the public class MainActivity declaration in Android Studio:
public class MainActivity extends AppCompatActivity {
EditText txtIn;
EditText txtKey;
EditText txtOut;
SeekBar sb;
Button btn;
public String encode( String message, int keyVal ) {
String output = "";
char key = (char) keyVal;
for ( int x = 0; x < message.length(); x++ ) {
char input = message.charAt(x);
if (input >= 'A' && input <= 'Z')
{
input += key;
if (input > 'Z')
input -= 26;
if (input < 'A')
input += 26;
}
else if (input >= 'a' && input <= 'z')
{
input += key;
if (input > 'z')
input -= 26;
if (input < 'a')
input += 26;
}
else if (input >= '0' && input <= '9')
{
input += (keyVal % 10);
if (input > '9')
input -= 10;
if (input < '0')
input += 10;
}
output += input;
}
return output;
}
Now that we have the encode() method in place, we just need to call that method whenever the Encode/Decode button is clicked. We’ll create an OnClickListener for the Encode/Decode button and call the encode() method from there.
Inside the onCreate() method in MainActivity.java, start typing the code btn.setOnCl until a code recommendation list pops up, as shown in Figure 8-9. On the list, choose setOnClickListener().

Figure 8-9: You can rely on code recommendations from Android Studio to autofill code for you, as shown here with the setOnClickListener() for the Encode/Decode button.
After clicking the setOnClickListener() code recommendation, click inside the parentheses of that method and begin typing new OnClickListener, as shown in Figure 8-10, double-clicking the first code recommendation that pops up:

Figure 8-10: Use the code assist once more to fill in the OnClickListener. This time, Android Studio provides several lines of code.
You’ll notice that Android Studio fills in several lines of code for you for the OnClickListener() event handler:
btn.setOnClickListener(new View.OnClickListener() {
@Override
public void onClick(View v) {
}
});
These few lines create an event listener using an anonymous inner class of type View.OnClickListener(), with an onClick() event handler to respond when the user clicks the button.
Next we’ll set up the encode() method. encode() doesn’t care what’s happening in the rest of our code as long as we give it two arguments that are the right data types. This means we don’t have to change encode() to fit our new app, but we do need to set up new values to give it as arguments.
To encode the message the user typed into txtIn, we’ll first need to retrieve the key value they entered into txtKey. Then, we’ll get the string of text the user entered into txtIn. We’ll pass both of those values to the encode() method as arguments and store the encoded result in a variable called output. Finally, we’ll set the text of the txtOut field to the encoded output string output.
Add the following four lines within the braces of the onClick() method:
btn.setOnClickListener(new View.OnClickListener() {
public void onClick(View v) {
➊ int key = Integer.parseInt(txtKey.getText().toString());
➋ String message = txtIn.getText().toString();
➌ String output = encode(message, key);
➍ txtOut.setText(output);
}
});
At ➊, we’ve used the Integer.parseInt() method to convert text from the user into an integer value key. The only difference between this parseInt() and others we’ve used before is that txtKey is followed by two methods: getText() and toString(). In Android, the getText() method on an EditText (that is, a text field) doesn’t return a string directly—it returns a flexible type called Editable. All of the EditText types, from Plain to Password to Number, return an Editable object, because the text inside an EditText is meant to change and be editable by the user. We use the toString() method to turn the text from the EditText into a string that we can parse, to find the number the user entered.
The same is true at ➋: we need both methods, getText() and toString(), to get the input message from txtIn and turn it into a string that we can encode. At ➌, we use the encode() method on the message and key value the user provided to encode the message, then store the result in output. Finally, at ➍, we set the text of the txtOut text field to display the encoded output message.
Now, our app is functional enough for a first test. Let’s run the app in the Android Emulator to see the Encode/Decode button at work.
Testing the App
Save your progress so far. Then, go to Run ▸ Run ‘app’. Select an emulator you set up back in Chapter 4, such as My Nexus 6P, as shown in Figure 8-11.

Figure 8-11: Choosing an emulator
The emulator may take a few minutes to run the first time—remember, you can leave it running while working in Android Studio to avoid the long startup each time you want to run the app. You can also run the app directly on your Android device, as we did in Chapter 4, and skip the emulator if you wish.
When the emulator starts up and the Secret Messages app loads, you’ll see the initial layout, as shown in Figure 8-12 (left). Type in a key value, then press the Encode/Decode button, and you’ll see Android convert the message into ciphertext, as shown in Figure 8-12 (right).

Figure 8-12: The Secret Messages app running on the Nexus 6P Android Emulator (left); clicking the Encode/Decode button creates the encoded text (right).
You can copy and paste between the fields, but the slider/SeekBar doesn’t work yet. The floating action button—the email envelope symbol in the lower right—also doesn’t do anything yet. Don’t worry; we’ll work on those shortly.
Notice there’s one other user experience issue: the encoded message (Frperg zrffntrf...) is underlined because it looks like misspelled text to the computer. To turn off spellcheck, go back to the content_main.xml layout file and select the txtOut text field. Under the Properties pane, expand inputType and select the textNoSuggestions property. You can also turn off spelling suggestions for the txtIn text field, if you’d like, either separately or by selecting both text fields while holding down SHIFT in the layout view and then selecting the textNoSuggestions property. Now rerun the app on the emulator. No more spellcheck!
With this small tweak, we’re ready to bring the SeekBar online so we can slide among different key values easily and quickly.
Working with the SeekBar
We’re going to wire the SeekBar to change the output message whenever the user slides left or right, so we need to modify a few of its properties to get it ready for use.
First, let’s learn a little about the SeekBar widget. You’ve probably seen a SeekBar when playing a video on your mobile device. For example, on a YouTube video the SeekBar shows where you are in a video, and it allows you to skip forward or backward—this is sometimes called seeking.
The SeekBar differs from a JSlider in a few ways. First, a SeekBar can have only positive values. Zero is the minimum, but we can set the maximum to any positive value, like 26. Also, a SeekBar doesn’t show increment marks or labels on the bar itself. This means that if we want to allow our users to use negative key values, we’ll have to use a bit of math to convert positive values to negative so that the user can slide the key value through the range of values from, say, -13 to +13. To do this, we’ll make the SeekBar range from 0 to 26. And we’ll need to update the txtKey field to show the values changing as the user slides the SeekBar to let them know the SeekBar’s current value. Let’s begin by changing some of the properties of the SeekBar in the GUI layout.
Switch back to the content_main.xml layout file and select the SeekBar in the design preview. Under the Properties pane for the SeekBar, find max and progress and change both to 26.
The max property is the maximum value the SeekBar will display. For the Secret Messages app, we need at least 26 values to cover the whole alphabet. We want the range to be -13 to +13 so that encoding and decoding is easy for the user. That would be 27 values total, so we’ll choose 26 as the max (since that makes for 27 values when 0 is included). The progress property is the current value of the SeekBar, similar to the value property of a JSlider. We’ll use the getProgress() method on the SeekBar to get the value the SeekBar is currently pointing to.
Save your changes and then switch back to the MainActivity.java source code file. Inside the onCreate() method, right below the closing line }); of the btn.setOnClickListener() code, begin typing sb.set and use the code recommender to find setOnSeekBarChangeListener(). This will store your SeekBar in the variable sb.
The code for the SeekBar listener is different from that for the Encode/Decode button. We want to listen for more than just click events on the SeekBar. We want to listen for all changes, including the user pressing the SeekBar and sliding it left or right. For that, we need an OnSeekBarChangeListener.
Just as with the button code, though, we’ll use the code recommender to automatically generate the new OnSeekBarChangeListener. Inside the parentheses after sb.setOnSeekBarChangeListener(), begin typing new OnSeekBar and use the code recommendation.
Android Studio will fill in the OnSeekBarChangeListener code with three methods: onProgressChanged(), onStartTrackingTouch(), and onStopTrackingTouch(). We want to use onProgressChanged(), as this will tell us when the user has changed the value of the SeekBar.
The steps we want to program into the SeekBar event listener are similar to the code for the Encode/Decode button, except that we need to calculate the key based on the SeekBar’s value. We also need to show the key in the txtKey field. Add the following lines of code to the onProgressChanged() method:
sb.setOnSeekBarChangeListener(new SeekBar.OnSeekBarChangeListener() {
@Override
public void onProgressChanged(SeekBar seekBar, int progress, boolean fromUser) {
➊ int key = sb.getProgress() - 13;
String message = txtIn.getText().toString();
String output = encode(message, key);
txtOut.setText(output);
➋ txtKey.setText("" + key);
}
At ➊, we create a variable named key. We get the progress value from the SeekBar sb variable, and we subtract 13 from that value. The SeekBar can go only from 0 to 26, so subtracting 13 will give a range from -13 to +13, perfect for encoding and decoding messages. The next three lines are identical to those in the Encode/Decode button event handler code, which get the message, encode the message using the encode() method, and then display the encoded text in txtOut.
The line at ➋ is new. When the user moves the SeekBar slider, we want the txtKey readout to change. Since key is an integer, we add an empty string ("") to it to convert the result to a text string that will be displayed to the user. You could have also used the command Integer.toString(key) to convert the key value into a string using the Integer class’s toString() method, but adding an empty string to an int is just a handy shortcut.
Running the App on the Emulator and on an Android Device
Save your changes and then try running the app again on the emulator. You can now slide the SeekBar left and right and see the ciphertext change immediately with each key value, as shown in Figure 8-13.
It’s been a few chapters since we connected a physical Android device, so let’s review that quickly. First, connect a compatible USB cable between your Android device and your computer. When a pop-up appears asking whether you want to allow USB Debugging, click Yes.

Figure 8-13: The SeekBar is now fully functional, as shown on the Android Emulator, with a key value of 5.
In Android Studio, click the run button, and you’ll see a Select Deployment Target dialog. (You may need to close the app in your emulator window to get the dialog to show up.) Find the entry for the Android device you’ve connected and click OK.
When you run the app on your real Android device, you’ll notice the SeekBar is more responsive, and you have access to a few options when you click certain parts of the app. When you click the ciphertext and choose Select All, a context menu will appear, as shown in Figure 8-14, offering you the option to Cut, Copy, Share, or Assist.
If you click Share, the selected text can be sent via email, text message, chat, Bluetooth, Twitter, Facebook, or any other app you have configured for sharing on your device, as shown in Figure 8-15 (left). With the Share option, you can send encoded messages to anyone from inside the app! You can even email a secret message to a friend who has the desktop GUI version of the Secret Messages app, as shown in Figure 8-15 (right). All they have to do is copy the ciphertext from the email you send them into the Secret Messages GUI app while it’s running, then use the opposite of the secret key to decode the message: for example, -8 would decode a message sent with a key value of 8.

Figure 8-14: The context menu allows you to Cut, Copy, or Share your encoded messages.

Figure 8-15: The Share option allows you to share your message via email, text message, Twitter, Facebook, or any other app you’ve configured for sharing (left). Selecting the email option will automatically create an email message with your encoded text (right).
So now we have a fully functional Secret Messages mobile app that allows us to share our messages by email, text, or social media with anyone.
There’s only one feature left to make our app complete: adding our own custom action to the floating action button. This will enable us to let the user share their messages at the touch of a finger!
Bonus: Customizing the Floating Action Button
So far, we’ve been ignoring the floating action button (also known as the fab icon), the circular email envelope symbol in the lower-right corner of the app screen, shown in Figure 8-16.
The fab icon gives us a way to provide the user with a shortcut to perform a specific action, such as sharing their message via email, text, or social media.

Figure 8-16: The floating action button
Android Studio automatically includes some code for the fab icon that displays a new type of pop-up message—called a “Snackbar” in Android lingo—in the onCreate() method:
FloatingActionButton fab = (FloatingActionButton) findViewById(R.id.fab);
fab.setOnClickListener(new View.OnClickListener() {
@Override
public void onClick(View view) {
Snackbar.make(view, "Replace with your own action", Snackbar.LENGTH_LONG)
.setAction("Action", null).show();
}
});
All we need to do is replace the code in the onClick() method of the fab.setOnClickListener() with code that does what we want.
First, delete the code between the braces of the onClick() method. Next, type the following code into the onClick() method:
FloatingActionButton fab = (FloatingActionButton) findViewById(R.id.fab);
fab.setOnClickListener(new View.OnClickListener() {
@Override
public void onClick(View view) {
➊ Intent shareIntent = new Intent(Intent.ACTION_SEND);
➋ shareIntent.setType("text/plain");
➌ shareIntent.putExtra(Intent.EXTRA_SUBJECT, "Secret Message "+
DateFormat.getDateTimeInstance().format(new Date()));
➍ shareIntent.putExtra(Intent.EXTRA_TEXT, txtOut.getText().toString());
➎ try {
startActivity(Intent.createChooser(shareIntent, "Share message..."));
finish();
}
➏ catch (android.content.ActivityNotFoundException ex) {
Toast.makeText(MainActivity.this, "Error: Couldn't share.",
Toast.LENGTH_SHORT).show();
}
}
});
Now let’s look at what each line does. At ➊, we create an Intent called shareIntent. An Intent in Android is an activity that we want to start or launch, such as email, Twitter, or the camera. The shareIntent uses ACTION_SEND, which means we want to send some information to another app on the Android device.
We set the type of the Intent to text/plain ➋, which is what we need for an email, tweet, or social media post, and then add a subject line to the activity ➌. If the user chooses to share their message by email or via another app that uses a subject line, it will read “Secret Message” plus the date. The DateFormat class will format the date in text form based on your region, like "Dec 7, 2017 4:33:12 PM".
The line at ➍ sends the encoded message from txtOut as the body of an email, tweet, or post, depending on which app the user chooses to share their message through.
Next is a try statement ➎. Lots of things could go wrong when we try to call one app from inside another. What if the user doesn’t have an email app installed? What if the app is busy or the network can’t be reached? The try statement is made for situations like this. The first line of code inside the try statement attempts to start the activity the user selected (like email, text messaging, or Twitter), then passes the information to the selected app, and finally finishes the activity in the next line.
If there’s an error or exception, the catch statement ➏ will display a Toast message (a kind of pop-up) that reads "Error: Couldn't share.".
That’s all we need to get the fab icon working. Remember to import new classes by pressing ALT-ENTER (or OPTION-ENTER) while typing the lines of code. Remember, if Android Studio underlines a new class in red, it’s often because the class hasn’t been imported, so pressing ALT-ENTER (or OPTION-ENTER) will automatically add the correct import statement, just as we did in Chapter 4.
Once you’ve added the code and imported the classes, run the app again.
After you encode a message, hide the keyboard by pressing the down triangle at the bottom of your screen. Then, tap the fab icon on the bottom right of the screen, as shown in Figure 8-17 (left). Select your email app from the apps under Share message..., and the app should start, with a subject line and the encoded message in the body of the email, as shown in Figure 8-17 (right).

Figure 8-17: Pressing the fab icon in the lower right pops up a sharing menu (left). Choosing the email app from the sharing menu automatically creates an email with the secret message as the body and today’s date and time in the subject line (right).
Now we can send secret messages from the app with just the touch of an icon! But to make this app truly worthy of the Google Play Store, we need to give it the ability to receive secret messages from outside the app.
Receiving Secret Messages from Other Apps
Let’s make one last upgrade to the mobile version of the Secret Messages app. We can share, email, or tweet encoded messages from the app, but what if we want to receive text from emails, tweets, and posts without copying and pasting into the app? To address this, we can add our app to the Share list in Android so that other apps can send text directly to the Secret Messages app—and it only takes a few lines of code!
This is an advanced technique, so let’s walk through the process step-by-step. First, open your app’s AndroidManifest.xml file under manifests ▸ AndroidManifest.xml in the Project Explorer pane. The manifest file stores the “shipping” information for your app, much as a ship’s manifest lists all the cargo traveling on the ship. You can declare properties for your entire app and include the details an Android device needs to run the app, just as you can declare the contents of a crate or package when you ship it overseas.
In order to do this, you’ll need to edit some XML. XML files contain tags to label information held in the file. Usually a tag is formatted with its name between angled brackets, like <tag>. In this case, we need to modify the manifest’s intent-filter tag entry, which has information about what data the app will accept. Add the following five lines of XML near the end of your AndroidManifest.xml file, before the </activity> tag:
<intent-filter>
<action android:name="android.intent.action.MAIN" />
<category android:name="android.intent.category.LAUNCHER" />
</intent-filter>
➊ <intent-filter>
➋ <action android:name="android.intent.action.SEND" />
➌ <category android:name="android.intent.category.DEFAULT" />
➍ <data android:mimeType="text/*" />
➎ </intent-filter>
</activity>
</application>
</manifest>
At ➊, we add a new intent-filter to the app. Earlier we used an Intent object to send text out to another app, such as email, Twitter, or Facebook. In this case, we’re creating a filter to receive Intent objects sent from other apps on our phone ➋. (We used Intent.ACTION_SEND in the fab icon code on page 191 to send Intent messages to other apps; here we’re doing the opposite.)
The line at ➌ uses the DEFAULT sharing category to add the Secret Messages app to the list of apps on your phone that you can share with. With the DEFAULT category, your app can receive data from any app. (There are other categories for when you want to filter or restrict the types of apps that can send data to your app. For example, the BROWSABLE category is used by apps that should receive data from only a web browser.) At ➍, we tell Android that the Secret Messages app should receive any kind of text data from other apps. (If you write an app that accepts images as input, your mimeType might be "image/*", or "image/png" for just PNG images. For video, there’s "video/mp4", and so on.)
Finally, we close the intent-filter entry ➎ in your app’s manifest. XML tags need to be closed, which is usually done with a forward slash and the name of the XML tag that’s being closed, as in </intent-filter>. This lets the computer know you’ve completed code for the intent-filter. Save your AndroidManifest.xml file and then open the MainActivity.java file to begin editing the Java source code.
Scroll down inside MainActivity.java to find the onCreate() method. Immediately after the code that connects the GUI components to the variables from txtIn through btn, add the four statements shown here:
protected void onCreate(Bundle savedInstanceState) {
super.onCreate(savedInstanceState);
setContentView(R.layout.activity_main);
Toolbar toolbar = (Toolbar) findViewById(R.id.toolbar);
setSupportActionBar(toolbar);
txtIn = (EditText)findViewById(R.id.txtIn);
txtKey = (EditText)findViewById(R.id.txtKey);
txtOut = (EditText)findViewById(R.id.txtOut);
sb = (SeekBar)findViewById(R.id.seekBar);
btn = (Button)findViewById(R.id.button);
➊ Intent receivedIntent = getIntent();
➋ String receivedText = receivedIntent.getStringExtra(Intent.EXTRA_TEXT);
➌ if (receivedText != null)
➍ txtIn.setText(receivedText);
btn.setOnClickListener(new View.OnClickListener() {
At ➊, we create a variable called receivedIntent to accept the incoming Intent message shared from another app. Then, we get the text from the Intent message by calling the getStringExtra() method ➋. The parts of a message sent by an Intent are referred to as extra data. An if statement ➌ checks to make sure the receivedText variable isn’t null and, if so, changes the text in the txtIn text field at the top of the Secret Messages app to the received text ➍.
Believe it or not, that’s all the work necessary to accept messages shared from other apps into the Secret Messages app! Now, you can not only send encoded messages from the app but also decode messages from email, tweets, and posts directly. Figure 8-18 shows what it looks like to share a message from email to the Secret Messages app for quick decoding.

Figure 8-18: Now the Secret Messages app can send and receive messages back and forth with other apps on your phone, including your email.
Select text in your favorite email app, or in Twitter or Facebook, and press the Share button. The Secret Messages app will appear on the list of apps that accept a shared message. Select SecretMessages as the app to share with, and the selected text will be shown in the input text field of the Secret Messages app. You can encode or decode with ease; just remember you may need to change the key value depending on how the message was encoded.
Congratulations! You’ve built a fully social Secret Messages mobile app. Enjoy it and share it with a friend!
Let’s take a look at the skills you developed in this chapter and try a couple of additional programming challenges.
What You Learned
We reused code in this app from the GUI desktop version of the Secret Messages app, and we added so much more to make this a truly complete mobile app. Here are some of the new things you’ve learned and some of the skills you’ve reinforced in this chapter:
• Writing event handlers for Android components, including buttons, SeekBars, and the floating action button
• Customizing Android GUI components
• Using multiline text inputs in an Android app
• Adding a SeekBar and using it like a slider interface
• Running Android apps on both the emulator and real devices
• Customizing the action of the floating action button
• Creating custom Intent objects to call special activities, including sending data to other apps, from inside an app
• Creating custom Intent filters to receive text (or image or video) data sent from other apps
Programming Challenges
Try these programming challenges to review and practice what you’ve learned, and to expand your programming skills by trying something new. Visit the book’s website at https://www.nostarch.com/learnjava/ for sample solutions.
#1: Creating a Move Up Button
This programming challenge is to create a Move Up ^ button similar to the one in Chapter 7 (Programming Challenge #1 on page 172) that moves text up from the output field into the input field.
Place the Move Up ^ button below the txtOut text field. Then add an event handler that gets the text from the txtOut text field and sets it as the text of the txtIn text field. As an added bonus, you could have the event handler for the Move Up ^ button also change the SeekBar to the opposite of its value. An encryption key of 7 would become -7, the decryption key. The result will be that clicking the button swaps the encoded message up and automatically decodes it!
#2: Changing the SeekBar’s Progress
A second improvement you could make to the user experience would be to change the SeekBar’s progress property whenever the user enters a key value manually in the txtKey field. Give it a try!
HINT
Instead of creating an event handler for the txtKey field, modify the code for the Encode/Decode button to change the SeekBar’s progress to match the value in txtKey + 13—remember the SeekBar goes from 0 to 26, not -13 to +13. One or two lines of code should be all you need.