At this point, we have created a basic combat engine for our game. We can now dive into out-of-combat operations such as the creation of a pause menu screen, where we will be able to view player stats and edit inventory.
In this chapter, we will create the first part of our menu system, which is to design and create a framework for a pause menu. We will cover the following topics in this chapter:
- UMG pause screen initial setup
- UMG background color
- UMG text
- UMG buttons
- UMG inventory submenu
- UMG equipment submenu
- Key binding
- Button programming
For our pause screen, we will need to think about quite a few things regarding the design. As listed in the earlier chapter, the pause screen will give the ability to the player to view party members, equip and unequip equipment, use items, and so on. So we must design our pause screen with that sort of functionality in mind.
To design the pause screen, we will be using Unreal Motion Graphics (UMG), which is a separate portion of UE4 that allows us to design virtual user interfaces without the need for programs such as Adobe Flash. UMG is very intuitive and does not require programming knowledge in order to use it.
To start with, we will navigate to our already created Blueprints | UI folder and create a Widget Blueprint for our pause menu. To do this, right-click on your UI folder and then navigate to User Interface | Widget Blueprint:

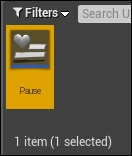
Name the Widget Blueprint as Pause:

The Widget Blueprint will allow you to use UMG to design any user interface; we will be using this widget to design our own UI for the pause menu.
To start designing the pause menu, open the Pause Widget Blueprint by double-clicking on it from within Content Browser. You should see the Designer screen that looks like the following screenshot:

We are first going to create an area for our first screen where we want the pause menu to be. We will first be adding a Canvas Panel that acts as a container to allow several widgets to be laid out within it. This is a great place to start because we will need to feature several navigation points, which we will design in the form of buttons within our pause screen. To add a Canvas Panel, navigate to Palette | Panel | Canvas Panel. Then, drag the Canvas Panel into your Designer viewport (note that if you already have a Canvas Panel in your Hierarchy tab by default, you can skip this step):

You should see a few new things in your pause menu. Firstly, you will see that under the Hierarchy tab, there is now CanvasPanel in Root. This means that in the root of the pause screen is the Canvas Panel that we just added. You will also notice that your Canvas Panel, while selected, contains details that can be seen in the Details tab. The Details tab will allow you to edit properties of any selected item. We will be using these areas of Widget Blueprint frequently throughout our development process.
We now need to think about what sorts of navigation points and information we need on our screen when the player presses the pause button. Based on the functionality, the following are the items we will need to lay out on our first screen:
- Characters along with their stats (level, HP, MP, and experience/next level)
- The Inventory button
- The Equipment button
- The Exit button
- Gold
