
In this recipe, we'll try to mimic the camera and controls that are common in RTS games. The camera will mostly look down on the scene, and aside from basic movement and rotation of the camera, there will also be automatic scrolling when the mouse reaches the edges of the screen.
We're going to set up the camera and camera handling in this recipe. Loading a scene to make sure the camera works as expected would be helpful.
To create an RTS camera AppState object, perform the following steps:
- We start by creating a class that implements the
AnalogListenerandActionListenerinterfaces so that we can receive user input from the mouse and keyboard. We'll use these to control the camera as follows:public class RTSCameraAppState extends AbstractAppState implements AnalogListener, ActionListener{ - Next, we'll define what controls we'll handle. Using an
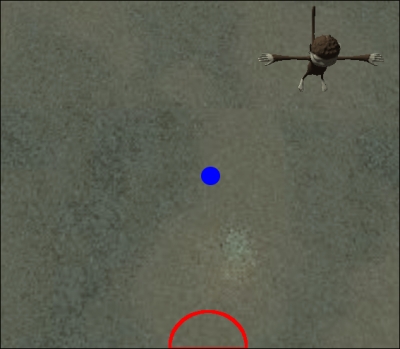
enumwill keep things tidy, so type the following code snippet:public enum InputMapping{ MoveLeft, MoveRight, MoveUp, MoveDown, RotateLeft, RotateRight; }The following screenshot shows you the difference between the camera's position above the ground (half circle) and the camera's focus point (at the center):
- We then set up some things in the
initializemethod. Rather than having a completely top-down perspective, we give the camera a little tilt withlookAtDirectionand a unit vector. Then, we move the camera further away from the ground with thecamDistancevariable. There is a reason we do this and don't simply set the camera's location. By doing it this way, we can more easily get the location the camera is looking at. This will come in handy if we want to add more advanced features:private Vector3f camLocation = new Vector3f(0, 20, 0); private Vector3f lookAtDirection = new Vector3f(0, -0.8f, -0.2f); public void initialize(AppStateManager stateManager, Application app) { this.cam = app.getCamera();cam.lookAtDirection(lookAtDirection, Vector3f.UNIT_Y); camLocation.set(cam.getDirection().mult(-camDistance)); cam.setLocation(camLocation); this.inputManager = app.getInputManager(); addInputMappings(); } - Lastly, add the keys that we'll listen to
inputManager:private void addInputMappings(){ inputManager.addMapping(InputMapping.MoveLeft.name(), new KeyTrigger(KeyInput.KEY_A), new KeyTrigger(KeyInput.KEY_LEFT)); inputManager.addMapping(InputMapping.MoveRight.name(), new KeyTrigger(KeyInput.KEY_D), new KeyTrigger(KeyInput.KEY_RIGHT)); ...[repeat for all keys]... InputMapping.MoveDown.name(),InputMapping.RotateLeft.name(),InputMapping.RotateRight.name()}); } - Now to the
onActionmethod, where any calls to these mappings will end up. Since we have anenum, we can use a switch to see what kind of input it is and set our Booleans accordingly:public void onAction(String name, boolean isPressed, float tpf) { InputMapping input = InputMapping.valueOf(name); switch(input){ case MoveUp: moveUp = isPressed; break; [repeat for all actions] case RotateRight: rotateRight = isPressed; break; } } - Let's have a look at the
updatemethod, where we will put these Booleans to use. Anupdatemethod is called automatically every frame, and we also get to know how much time (in seconds) has passed since the last update, intpf. We start by storing the camera's current location and initialize aVector3fobject, which we'll use for our movement delta as follows:public void update(float tpf) { super.update(tpf); camLocation = cam.getLocation(); Vector3f tempVector = new Vector3f(); - Next, we look to see if any of our
movementBooleans aretrueand apply this totempVectoras follows:if(moveUp){ tempVector.addLocal(0, 0, 1f); } else if(moveDown){ tempVector.addLocal(0, 0, -1f); } if(moveLeft){ tempVector.addLocal(1f, 0, 0); } else if (moveRight){ tempVector.addLocal(-1f, 0, 0); } - To keep the movement speed constant, regardless of the frame rate, we multiply
tempVectorby thetpf, and then we also multiply it by ourmoveSpeedvariable. Then, we add it tocamLocationas follows:tempVector.multLocal(tpf).multLocal(moveSpeed); camLocation.addLocal(tempVector);
- At the end of the method, we set the camera's location to the modified stored location as follows:
cam.setLocation(camLocation);
- If we try
AppStatenow, we would be able to scroll across the scene with our keys. We still have mouse controls and rotation to take care of. - Let's begin with rotation. We will handle it through a method called
rotate. The supplied value is ourrotateSpeedvariable, from which we'll extract aQuaternionrotated around the y axis. We then multiply the Quaternion with the camera's rotation as follows:private void rotate(float value){ Quaternion rotate = new Quaternion().fromAngleAxis(FastMath.PI * value, Vector3f.UNIT_Y); rotate.multLocal(cam.getRotation()); cam.setRotation(rotate); } - Furthermore, we need to make a few alterations to the
updatemethod. First, we look to see whether the user has pressed any of the rotation keys and call therotatemethod:if(rotateLeft){ rotate(rotateSpeed); } else if (rotateRight){ rotate(-rotateSpeed); } - The next piece is a bit trickier, and we perform it just above the line where we multiply
tempVectorbymoveSpeed(highlighted). We multiplytempVectorby the camera's rotation to make sure that we get the movement across the correct axes. Then, since the camera is slightly tilted, we negate any movement along the y axis. The best way to understand what would happen is to probably remove this line and try it out as follows:cam.getRotation().multLocal(tempVector); tempVector.multLocal(1, 0, 1).normalizeLocal(); tempVector.multLocal(tpf).multLocal(moveSpeed); - That's rotation taken care of! It's pretty common in RTS or top-down games to scroll by moving the mouse to the extremes of the screen. So, let's add functionalities for that. The following code snippet should be added in the
updatemethod above the rotation checks:Vector2f mousePos2D = inputManager.getCursorPosition(); if(mousePos2D.x > 0 && mousePos2D.x < cam.getWidth() / 10f){ tempVector.addLocal(1f, 0, 0); } else if(mousePos2D.x < cam.getWidth() && mousePos2D.x > cam.getWidth() - cam.getWidth() / 10f){ tempVector.addLocal(-1f, 0, 0); } if(mousePos2D.y > 0 && mousePos2D.y < cam.getHeight() / 10f){ tempVector.addLocal(0, 0, -1f); } else if(mousePos2D.y < cam.getHeight() && mousePos2D.y > cam.getHeight() - cam.getHeight() / 10f){ tempVector.addLocal(0, 0, 1f); }
The AppState object listens for the input from the player via InputManager and applies it to the application's camera. In just one short class, we've produced an RTS-like camera behavior.
Lastly, in this recipe, we added functionalities to pan the camera if the mouse cursor was near the edges of the screen. We used InputManager.getCursorPosition(), which is a very convenient method that returns the position of the mouse in the screen space. The bottom-left part of the screen has an x,y coordinate of 0,0. The top-left part of the screen has an x, y coordinate that is the same as the height and width of the screen in pixels. The next if statements check whether the cursor is in the 10 percent of the outermost portion of the camera (which in this case is the same as the screen) and modify tempVector accordingly.
That's nice and all, but if we have terrain in our scene, which is not flat, the camera might very well end up below the ground level. How can we remedy this? An easy way is to use ray casting to check for the height of the terrain where the camera is looking. This can be implemented as follows:
- First, we need to make sure the terrain has
CollisionShape:terrain.addControl(new RigidBodyControl(0));
- By supplying
0toRigidBodyControl, we say that it doesn't have any mass (and it won't be affected by gravity, if there were any). Since we're not supplyingCollisionShape,MeshCollisionShapewill be created. Since the terrain is of an irregular shape, a primitive (such as a box) isn't usable. - Next, we need to create a field for the terrain in
AppStateand a setter as well. - To actually find out the height of the terrain, we create a method called
checkHeight, which returns the height as float. - Inside
checkHeight, we shootRay, which originates from the camera's location in the direction the camera is facing. An alternative could be to shoot it down to get the height directly below the camera, as follows:Ray ray = new Ray(cam.getLocation(), cam.getDirection()); CollisionResults results = new CollisionResults();terrain.collideWith(ray, results);
- If we get a result from our ray, we get the
yvalue from the collision point and return it as follows:height = results.getClosestCollision().getContactPoint().y;
- Now, in the
updatemethod, just above the line where we set the location, we call thecheckHeightmethod. Be sure to apply thecamDistancevariable in order to get the correct offset! This is implemented as follows:camLocation.setY(checkHeight() + camDistance); cam.setLocation(camLocation);