
We'll start programming monsters in the same way we programmed NPCs and PickupItem. First, we'll write a base class (by deriving from character) to represent the Monster class. Then, we'll derive a bunch of blueprints for each monster type. Every monster will have a couple of properties in common that determine its behavior. These are the common properties:
- A
floatvariable for speed. - A
floatvariable for theHitPointsvalue (I usually use floats for HP, so we can easily model HP leeching effects such as walking through a pool of lava). - An
int32variable for the experience gained in defeating the monster. - A
UClassfunction for the loot dropped by the monster. - A
floatvariable forBaseAttackDamagedone on each attack. - A
floatvariable forAttackTimeout, which is the amount of time for which the monster rests between attacking. - Two
USphereComponentsobject: One of them isSightSphere—how far he can see. The other isAttackRangeSphere, which is how far his attack reaches. TheAttackRangeSphereobject is always smaller thanSightSphere.
Derive from the Character class to create your class for Monster. You can do this in UE4 by going to File | Add Code To Project... and then selecting the Character option from the menu for your base class.
Fill out the Monster class with the base properties. Make sure that you declare UPROPERTY(EditAnywhere, BlueprintReadWrite, Category = MonsterProperties) so that the properties of the monsters can be changed in the blueprints:
UCLASS()
class GOLDENEGG_API AMonster : public ACharacter
{
  GENERATED_UCLASS_BODY()

  // How fast he is
  UPROPERTY(EditAnywhere, BlueprintReadWrite, Category =  MonsterProperties)
  float Speed;

  // The hitpoints the monster has
  UPROPERTY(EditAnywhere, BlueprintReadWrite, Category =  MonsterProperties)
  float HitPoints;

  // Experience gained for defeating
  UPROPERTY(EditAnywhere, BlueprintReadWrite, Category =  MonsterProperties)
  int32 Experience;

  // Blueprint of the type of item dropped by the monster
  UPROPERTY(EditAnywhere, BlueprintReadWrite, Category =  MonsterProperties)
  UClass* BPLoot;

  // The amount of damage attacks do
  UPROPERTY(EditAnywhere, BlueprintReadWrite, Category =  MonsterProperties)
  float BaseAttackDamage;

  // Amount of time the monster needs to rest in seconds
  // between attacking
  UPROPERTY(EditAnywhere, BlueprintReadWrite, Category =  MonsterProperties)
  float AttackTimeout;

  // Time since monster's last strike, readable in blueprints
  UPROPERTY(VisibleAnywhere, BlueprintReadOnly, Category =  MonsterProperties)
  float TimeSinceLastStrike;

  // Range for his sight
  UPROPERTY(VisibleDefaultsOnly, BlueprintReadOnly, Category =  Collision)
  USphereComponent* SightSphere;

  // Range for his attack. Visualizes as a sphere in editor,
  UPROPERTY(VisibleDefaultsOnly, BlueprintReadOnly, Category =  Collision)
  USphereComponent* AttackRangeSphere;
};
You will need some bare minimum code in your Monster constructor to get the monster's properties initialized. Use the following code in the Monster.cpp file:
AMonster::AMonster(const class FObjectInitializer& PCIP) : Super(PCIP)
{
  Speed = 20;
  HitPoints = 20;
  Experience = 0;
  BPLoot = NULL;
  BaseAttackDamage = 1;
  AttackTimeout = 1.5f;
  TimeSinceLastStrike = 0;

  SightSphere = PCIP.CreateDefaultSubobject<USphereComponent> (this, TEXT("SightSphere"));
  SightSphere->AttachTo( RootComponent );

  AttackRangeSphere = PCIP.CreateDefaultSubobject <USphereComponent>(this, TEXT("AttackRangeSphere"));
  AttackRangeSphere->AttachTo( RootComponent );
}
Compile and run the code. Open Unreal Editor and derive a blueprint based on your Monster class (call it BP_Monster). Now we can start configuring your monster's Monster properties.
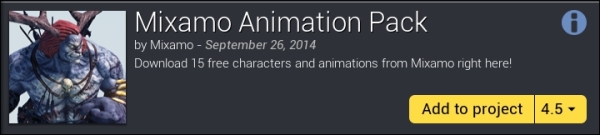
For the skeletal mesh, we won't use the HeroTPP model for the monster because we need the monster to be able to do melee attacks and the HeroTPP model does not come with a melee attack. However, some of the models in the Mixamo Animation Pack file have melee attack animations. So download the Mixamo Animation Pack file from the UE4 marketplace (free).

Inside the pack are some pretty gross models that I'd avoid, but others are quite good
Next, you should add the Mixamo Animation Pack file to your project, as shown in the following screenshot:
Now, create a blueprint called BP_Monster based on your Monster class. Edit the blueprint's class properties and select Mixamo_Adam (it is actually typed as Maximo_Adam in the current issue of the package) as the skeletal mesh. Also, select MixamoAnimBP_Adam as the animation blueprint.
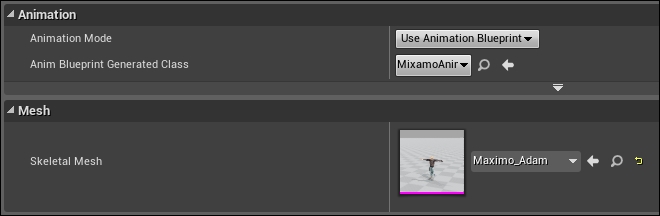
Select the Maximo_Adam Skeletal Mesh and MixamoAnimBP_Adam for Anim Blueprint Generated Class
We will modify the animation blueprint to correctly incorporate the melee attack animation later.
While you're editing your BP_Monster blueprint, change the sizes of the SightSphere and AttackRangeSphere objects to values that make sense to you. I made my monster's AttackRangeSphere object just big enough to be about an arm's reach (60 units) and his SightSphere object to be 25 times bigger than that (about 1,500 units).
Remember that the monster will start moving towards the player once the player enters the monster's SightSphere, and the monster will start attacking the player once the player is inside the monster's AttackRangeSphere object.
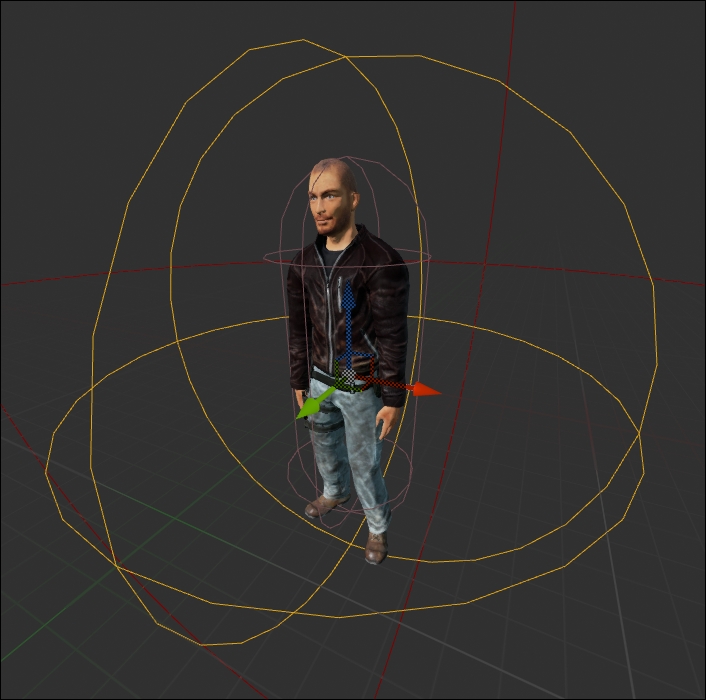
Mixamo Adam with his AttackRangeSphere object highlighted in orange
Place a few of your BP_Monster instances inside your game; compile and run. Without any code to drive the Monster character to move, your monsters should just stand there idly.
In our game, we will add only a basic intelligence to the Monster characters. The monsters will know how to do two basic things:
- Track the player and follow him
- Attack the player
The monster will not do anything else. You can have the monster taunt the player when the player is first seen as well, but we'll leave that as an exercise for you.
Monsters in very basic games don't usually have complex motion behaviors. Usually they just walk towards the target and attack it. We'll program that type of monster in this game, but mind you, you can get more interesting play with monsters that position themselves advantageously on the terrain to perform ranged attacks and so on. We're not going to program that here, but it's something to think about.
In order to get the Monster character to move towards the player, we need to dynamically update the direction of the Monster character moving in each frame. To update the direction that the monster is facing, we write code in the Monster::Tick() method.
The Tick function runs in every frame of the game. The signature of the Tick function is:
virtual void Tick(float DeltaSeconds) override;
You need to add this function's prototype to your AMonster class in your Monster.h file. If we override Tick, we can place our own custom behavior that the Monster character should do in each frame. Here's some basic code that will move the monster toward the player during each frame:
void AMonster::Tick(float DeltaSeconds)
{
  Super::Tick( DeltaSeconds );

  // basic intel: move the monster towards the player
  AAvatar *avatar = Cast<AAvatar>(  UGameplayStatics::GetPlayerPawn(GetWorld(), 0) );
  if( !avatar ) return;

  FVector toPlayer = avatar->GetActorLocation() -  GetActorLocation();
  toPlayer.Normalize();	// reduce to unit vector

  // Actually move the monster towards the player a bit
  AddMovementInput(toPlayer, Speed*DeltaSeconds);

  // At least face the target
  // Gets you the rotator to turn something
  // that looks in the `toPlayer` direction
  FRotator toPlayerRotation = toPlayer.Rotation();
  toPlayerRotation.Pitch = 0; // 0 off the pitch
  RootComponent->SetWorldRotation( toPlayerRotation );
}
For AddMovementInput to work, you must have a controller selected under the AIController Class panel in your blueprint, as shown in the following screenshot:

If you have selected None, calls to AddMovementInput won't have any effect. To prevent this, select either the AIController class or the PlayerController class as your AIController Class.
The preceding code is very simple. It comprises the most basic form of enemy intelligence: simply move toward the player by an incrementally small amount in each frame.
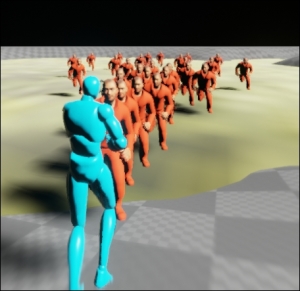
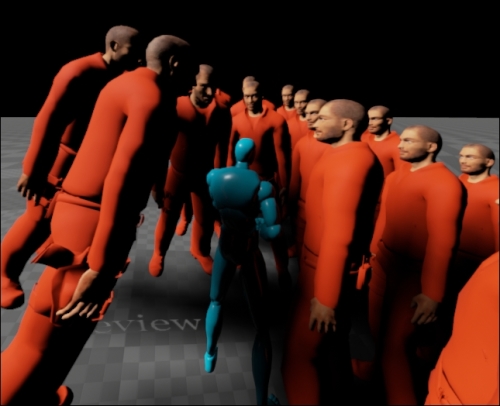
Our not-so-intelligent army of monsters chasing the player
The result in a series of frames will be that the monster tracks and follows the player around the level. To understand how this works, you must remember that the Tick function is called on average about 60 times per second. What this means is that in each frame, the monster moves a tiny bit closer to the player. Since the monster moves in very small steps, his action looks smooth and continuous (while in reality, he is making small jumps and leaps in each frame).
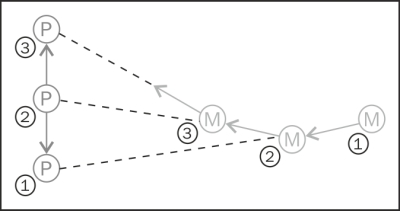
Discrete nature of tracking: a monster's motion over three superimposed frames
Tip
The reason why the monster moves about 60 times a second is because of a hardware constraint. The refresh rate of a typical monitor is 60 Hz, so it acts as a practical limiter on how many updates per second are useful. Updating at a frame rate faster than the refresh rate is possible, but it is not necessarily useful for games since you will only see a new picture once every 1/60 of a second on most hardware. Some advanced physics modeling simulations do almost 1,000 updates a second, but arguably, you don't need that kind of resolution for a game and you should reserve the extra CPU time for something that the player will enjoy instead, such as better AI algorithms. Some newer hardware boasts of a refresh rate up to 120 Hz (look up gaming monitors, but don't tell your parents I asked you to blow all your money on one).
Computer games are discrete in nature. In the preceding screenshot of superimposed sequences of frames, the player is seen as moving straight up the screen, in tiny steps. The motion of the monster is also in small steps. In each frame, the monster takes one small discrete step towards the player. The monster is following an apparently curved path as he moves directly toward where the player is in each frame.
To move the monster toward the player, we first have to get the player's position. Since the player is accessible in a global function, UGameplayStatics::GetPlayerPawn, we simply retrieve our pointer to the player using this function. Next we find the vector pointing from the Monster (GetActorLocation()) function that points to the player (avatar->GetActorLocation()). We need to find the vector that points from the monster to the avatar. To do this, you have to subtract the location of the monster from the location of the avatar, as shown in the following screenshot:
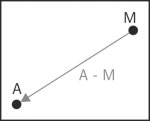
It's a simple math rule to remember but often easy to get wrong. To get the right vector, always subtract the source (the starting point) vector from the target (the terminal point) vector. In our system, we have to subtract the Monster vector from the Avatar vector. This works because subtracting the Monster vector from the system moves the Monster vector to the origin and the Avatar vector will be to the lower left-hand side of the Monster vector:
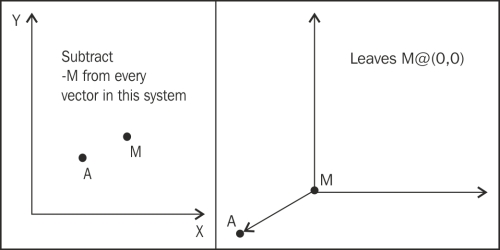
Subtracting the Monster vector from the system moves the Monster vector to (0,0)
Be sure to try out your code. At this point, the monsters will be running toward your player and crowding around him. With the preceding code that is outlined, they won't attack; they'll just follow him around, as shown in the following screenshot:
Right now, the monsters are not paying attention to the SightSphere component. That is, wherever the player is in the world, the monsters will move toward him in the current setup. We want to change that now.
To do so, all we have to do is have Monster respect the SightSphere restriction. If the player is inside the monster's SightSphere object, the monster will give chase. Otherwise, the monsters will be oblivious to the player's location and not chase the player.
Checking to see if an object is inside a sphere is simple. In the following screenshot, the point p is inside the sphere if the distance d between p and the centroid c is less than the sphere radius, r:
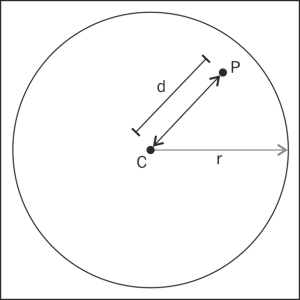
P is inside the sphere when d is less than r
So, in our code, the preceding screenshot translates to the following code:
void AMonster::Tick(float DeltaSeconds)
{
Super::Tick( DeltaSeconds );
AAvatar *avatar = Cast<AAvatar>( UGameplayStatics::GetPlayerPawn(GetWorld(), 0) );
if( !avatar ) return;
FVector toPlayer = avatar->GetActorLocation() - GetActorLocation();
float distanceToPlayer = toPlayer.Size();
// If the player is not in the SightSphere of the monster,
// go back
if( distanceToPlayer > SightSphere->GetScaledSphereRadius() )
{
// If the player is out of sight,
// then the enemy cannot chase
return;
}
toPlayer /= distanceToPlayer; // normalizes the vector
// Actually move the monster towards the player a bit
AddMovementInput(toPlayer, Speed*DeltaSeconds);
// (rest of function same as before (rotation))
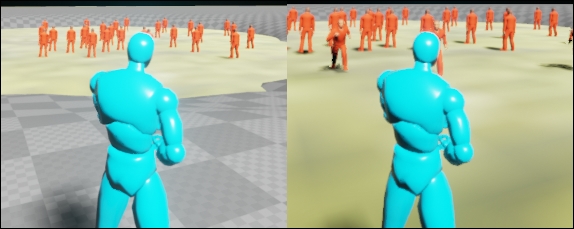
}The preceding code adds additional intelligence to the Monster character. The Monster character can now stop chasing the player if the player is outside the monster's SightSphere object. This is how the result will look:
A good thing to do here will be to wrap up the distance comparison into a simple inline function. We can provide these two inline member functions in the Monster header as follows:
inline bool isInSightRange( float d )
{ return d < SightSphere->GetScaledSphereRadius(); }
inline bool isInAttackRange( float d )
{ return d < AttackRangeSphere->GetScaledSphereRadius(); }
These functions return the value true when the passed parameter, d, is inside the spheres in question.
Tip
An inline function means that the function is more like a macro than a function. Macros are copied and pasted to the calling location, while functions are jumped to by C++ and executed at their location. Inline functions are good because they give good performance while keeping the code easy to read and they are reusable.