
So far, our classes have just been pasted before main(). If you continue to program that way, your code will all be in one file and appear as one big disorganized mess.
Therefore, it is a good programming practice to organize your classes into separate files. This makes editing each class's code individually much easier when there are multiple classes inside the project.
Take class Mammal and its derived classes from earlier. We will properly organize that example into separate files. Let's do it in steps:
- Create a new file in your C++ project called
Mammal.h. Cut and paste the entireMammalclass into that file. Notice that since theMammalclass included the use ofcout, we write a#include <iostream>statement in that file as well. - Write a "
#includeMammal.h" statement at the top of yourSource.cppfile.
An example of what this looks like is shown in the following screenshot:
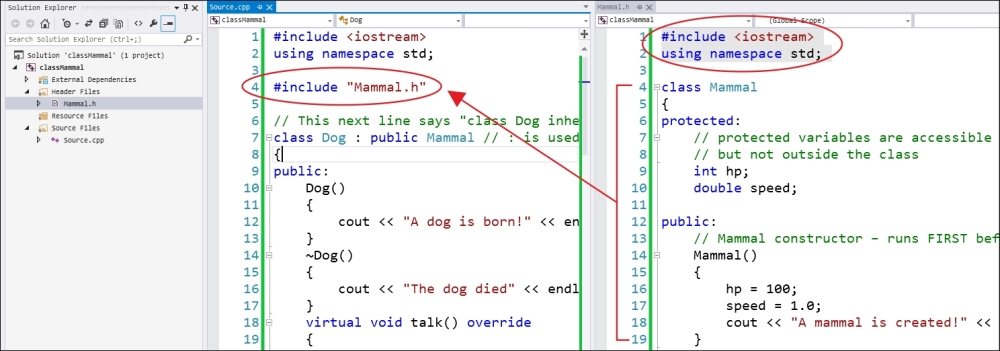
What's happening here when the code is compiled is that the entire Mammal class is copied and pasted (#include) into the Source.cpp file, which contains the main() function, and the rest of the classes are derived from Mammal. Since #include is a copy and paste function, the code will function exactly the same as it did before; the only difference is that it will be much better organized and easier to look at. Compile and run your code at this step to make sure it still works.
Tip
Check that your code compiles and runs often, especially when refactoring. When you don't know the rules, you're bound to make a lot of mistakes. This is why you should do your refactoring only in small steps. Refactoring is the name for the activity we are doing now—we are reorganizing the source to make better sense to other readers of our codebase. Refactoring usually does not involve rewriting too much of it.
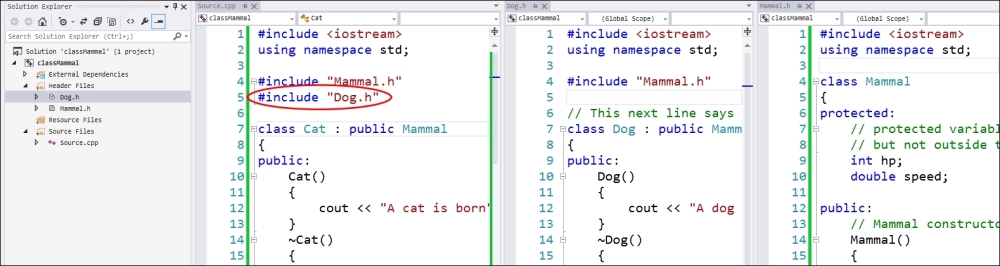
The next thing you need to do is isolate the Dog, Cat, and Human classes into their own files. To do so, create the Dog.h, Cat.h, and Human.h files and add them to your project.
Let's start with the Dog class, as shown in the following screenshot:
If you use exactly this setup and try to compile and run your project, you will see the 'Mammal' : 'class' type redefinition error, as shown in the following screenshot:
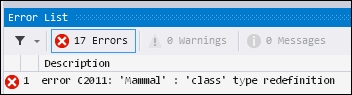
What this error means is that Mammal.h has been included twice in your project, once in Source.cpp and then again in Dog.h. This means effectively two versions of the Mammal class got added to the compiling code, and C++ is unsure which version to use.
There are a few ways to fix this issue, but the easiest (and the one that Unreal Engine uses) is the #pragma once macro, as shown in the following screenshot:
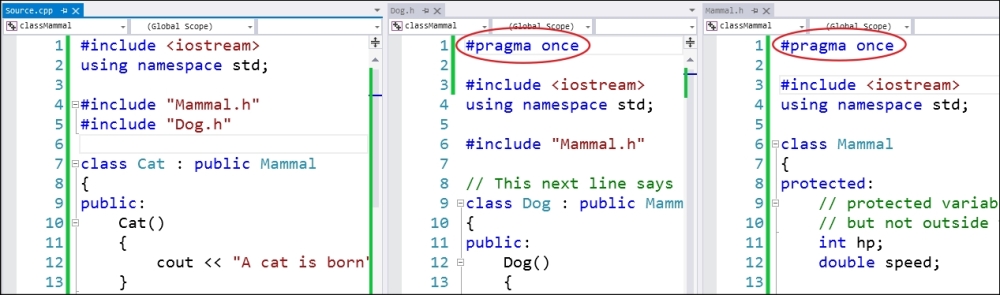
We write #pragma once at the top of each header file. This way, the second time Mammal.h is included, the compiler doesn't copy and paste its contents again, since it already has been included before, and its content is actually already in the compiling group of files.
Do the same thing for Cat.h and Human.h, then include them both into your Source.cpp file where your main() function resides.
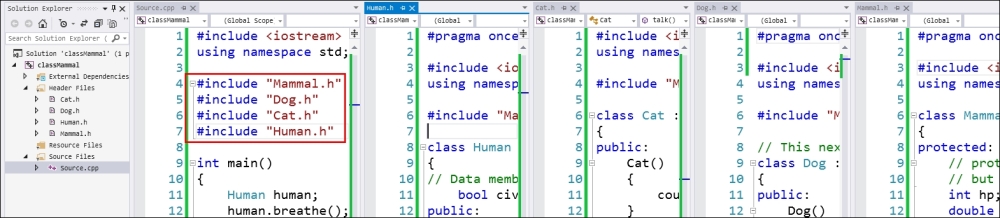
Diagram with all classes included
Now that we've included all classes into your project, the code should compile and run.
The next level of organization is to leave the class declarations in the header files (.h) and put the actual function implementation bodies inside some new .cpp files. Also, leave existing members inside the class Mammal declaration.
For each class, perform the following operations:
- Delete all function bodies (code between
{and}) and replace them with just a semicolon. For theMammalclass, this would look as follows:// Mammal.h #pragma once class Mammal { protected: int hp; double speed; public: Mammal(); ~Mammal(); void breathe(); virtual void talk(); // pure virtual function, virtual void walk() = 0; }; - Create a new
.cppfile calledMammal.cpp. Then simply put the member function bodies inside this file:// Mammal.cpp #include <iostream> using namespace std; #include "Mammal.h" Mammal::Mammal() // Notice use of :: (scope resolution operator) { hp = 100; speed = 1.0; cout << "A mammal is created!" << endl; } Mammal::~Mammal() { cout << "A mammal has fallen!" << endl; } void Mammal::breathe() { cout << "Breathe in.. breathe out" << endl; } void Mammal::talk() { cout << "Mammal talk.. override this function!" << endl; }
It is important to note the use of the class name and scope resolution operator (double colon) when declaring the member function bodies. We prefix all member functions belonging to the Mammal class with Mammal::.
Notice how the purely virtual function does not have a body; it's not supposed to! Purely virtual functions are simply declared (and initialized to 0) in the base class, but implemented later in derived classes.