
In order to create an onscreen representation of the player, we'll need to derive from the Character class in Unreal.
UE4 makes it easy to inherit from the base framework classes. All you have to do is perform the following steps:
- Open your project in the UE4 editor.
- Go to File and then select Add Code to Project....
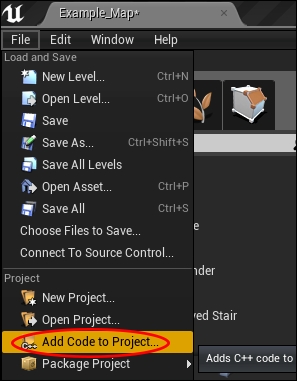
Navigating to File | Add Code To Project... will allow you to derive from any of the UE4 GameFramework classes
- From here, choose the base class you want to derive from. You have Character, Pawn, Actor, and so on, but for now, we will derive from Character:
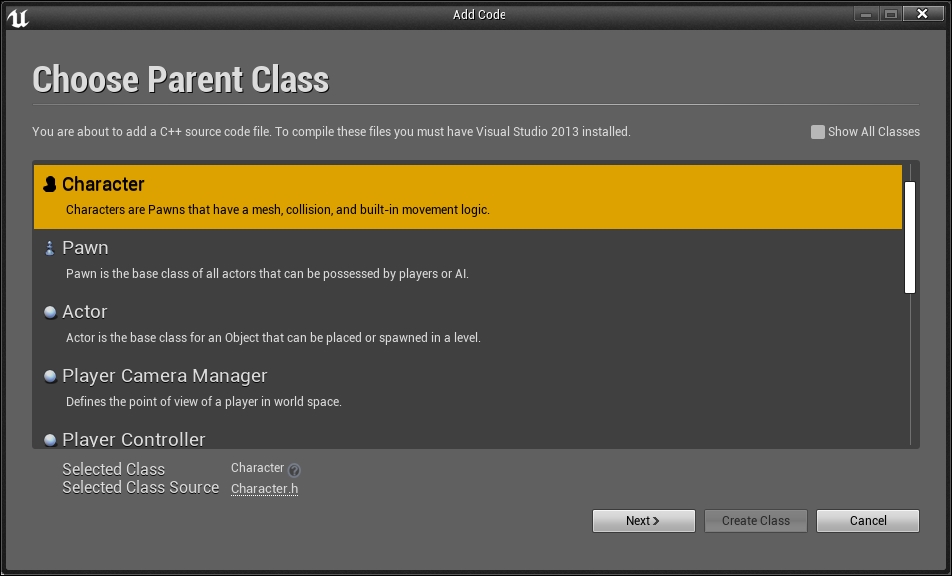
Select the UE4 class you want to derive from
- Click on Next > to get this dialog box, where you name the class. I named my player's class
Avatar.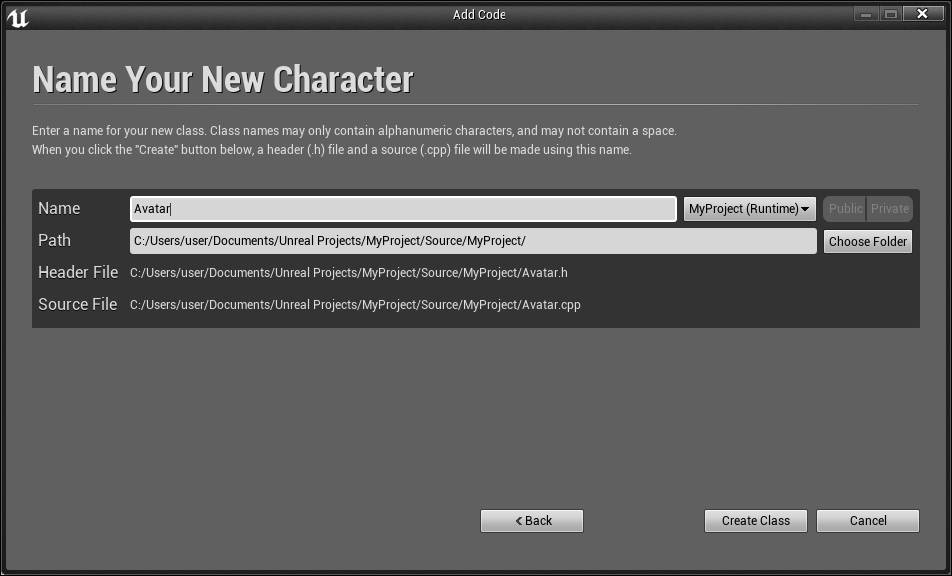
- Finally, click on Create Class to create the class in code, as shown in the preceding screenshot.
Let UE4 refresh your Visual Studio project when it asks you. Open the new Avatar.h file from the Solution Explorer.
The code that UE4 generates will look a little weird. Remember the macros that I suggested you avoid in Chapter 5, Functions and Macros. The UE4 code uses macros extensively. These macros are used to copy and paste boilerplate starter code that lets your code integrate with the UE4 editor.
The contents of the Avatar.h file are shown in the following code:
#pragma once
// Avatar.h code file
#include "GameFramework/Character.h"
#include "Avatar.generated.h"
UCLASS()
class MYPROJECT_API AAvatar : public ACharacter
{
  GENERATED_UCLASS_BODY()
};
Let's talk about macros for a moment.
The UCLASS() macro basically makes your C++ code class available in the UE4 editor. The
GENERATED_UCLASS_BODY() macro copies and pastes code that UE4 needs to make your class function properly as a UE4 class.
Now we need to associate a model with our character object. In order to do this, we need a model to play with. Fortunately, there is a whole pack of sample models available from the UE4 marketplace for free.
To create the player object, we'll download the Animation Starter Pack file (which is free) from the Marketplace tab.
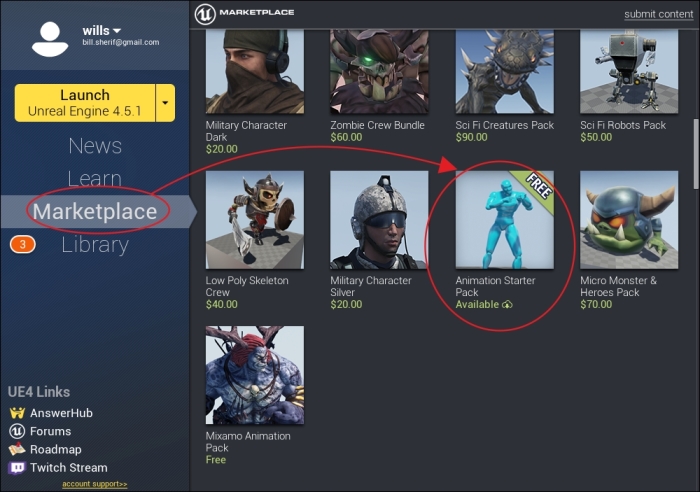
From the Unreal Launcher, click on Marketplace and search for Animation Starter Pack, which is free at the time of writing this book
After you've downloaded the Animation Starter Pack file, you will be able to add it to any of the projects you've previously created, as shown in the following screenshot:
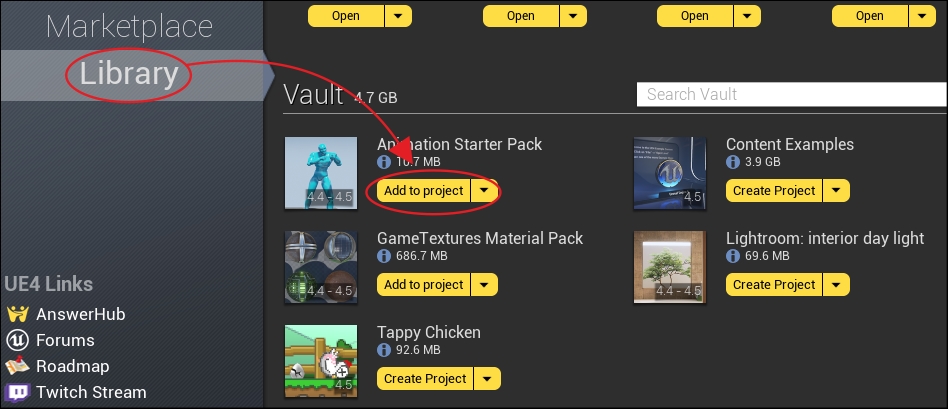
When you click on Add to project under Animation Starter Pack, you will get this pop up, asking which project to add the pack to:
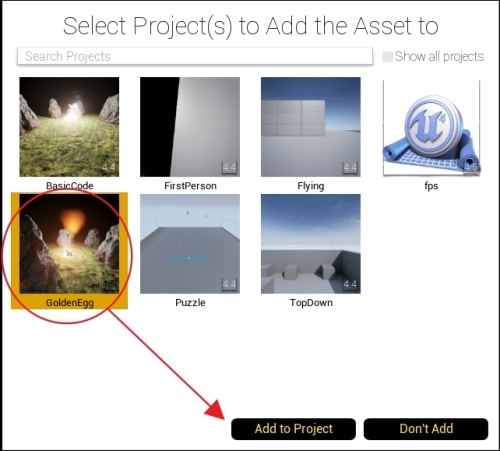
Simply select your project and the new artwork will be available in your Content Browser.
In general, it is considered a bad practice to hardcode your assets into the game. Hardcoding means that you write C++ code that specifies the asset to load. However, hardcoding means the loaded asset is part of the final executable, which will mean that changing the asset that is loaded wouldn't be modifiable at runtime. This is a bad practice. It is much better to be able to change the asset loaded during runtime.
For this reason, we're going to use the UE4 blueprints feature to set up the model mesh and collision capsule of our Avatar class.
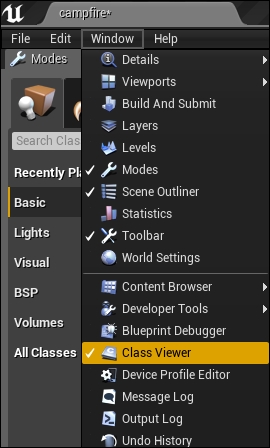
- This is really easy. Open the Class Viewer tab by navigating to Window and then clicking on Class Viewer, as shown here:
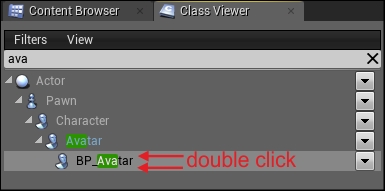
- In the Class Viewer dialog, start typing in the name of your C++ class. If you have properly created and exported the class from your C++ code, it will appear, as shown in the following screenshot:

- Right-click on the class that you want to create a blueprint of (in my case, it's my Avatar class).
- Name your blueprint something unique. I called my blueprint BP_Avatar.
- Now, open this blueprint for editing, by double-clicking on BP_Avatar (it will appear in the Class Viewer tab after you add it, just under Avatar), as shown in the following screenshot:
- You will be presented with the blueprints window for your new BP_Avatar object, as shown here:
- To set up the default mesh, click on the Defaults button at the top. Scroll down through the properties until you come across Mesh.
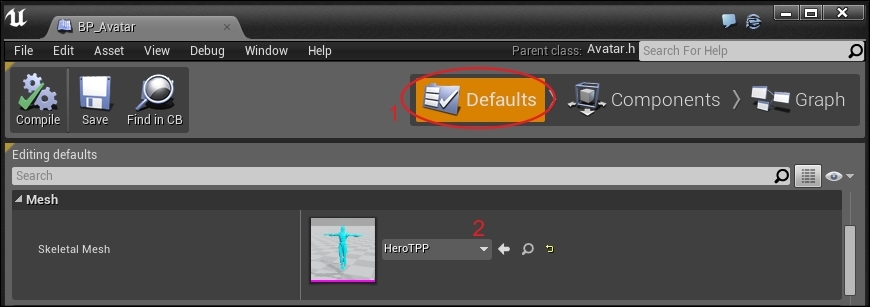
- Click on the dropdown and select HeroTPP for your mesh, as shown in the preceding screenshot.
- If HeroTPP doesn't appear in the dropdown, make sure that you download and add the Animation Starter Pack to your project. Alternatively, you can add the yellow TutorialTPP model to your project if you select Show Engine Content under View Options:

- What about the collision volume? Click on the Components tab in the blueprint editor for your avatar:
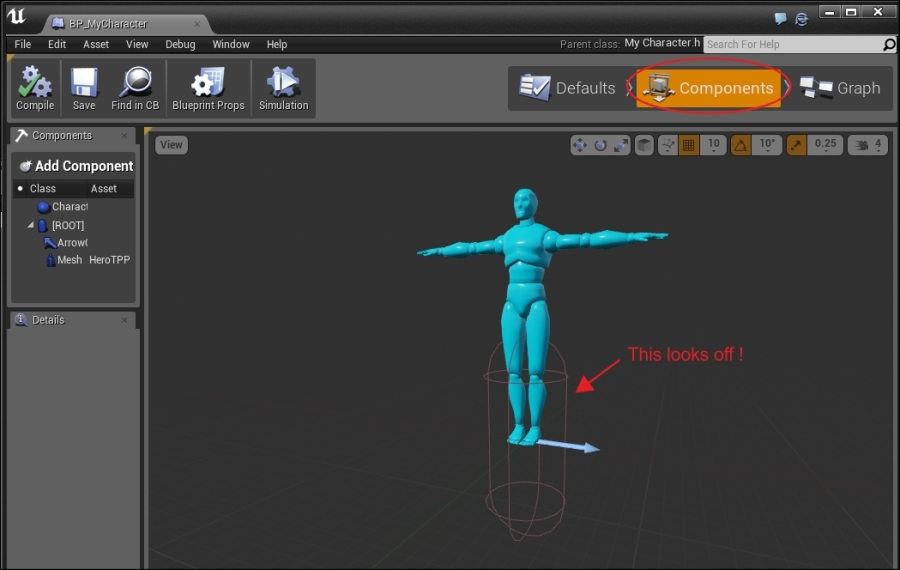
If your capsule doesn't encapsulate your model, adjust the model so that it fits
- Click on the blue Avatar model and press the W key. Move him down until he fits inside the capsule. If the capsule isn't big enough, you can adjust its size in the Details tab under Capsule Height and Capsule Radius, as shown in the following screenshot:
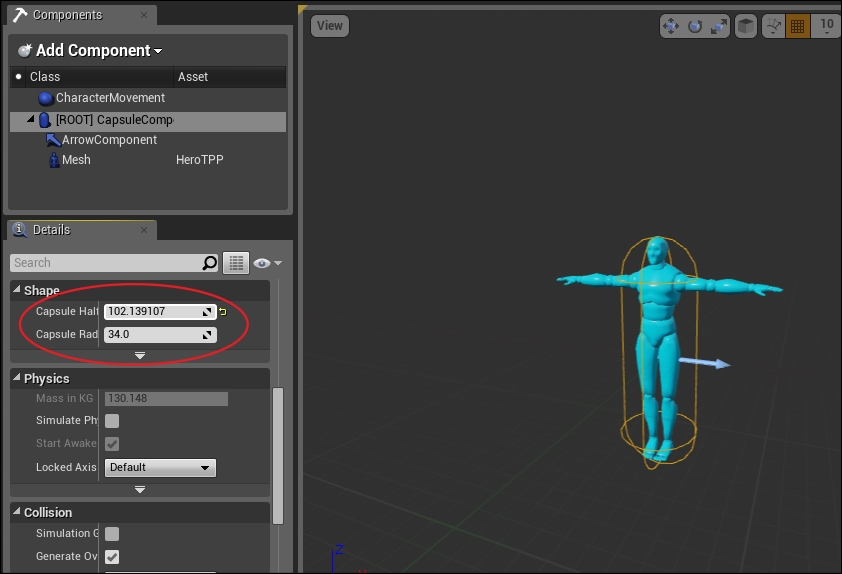
You can stretch your capsule by adjusting the Capsule Height property
- Now, we're ready to add this avatar to the game world. Click and drag your BP_Avatar model from the Class Viewer tab to your scene in the UE4 editor.
Our Avatar class added to the scene, in a T-pose
The pose of Avatar is called the T-pose. Animators often leave their characters in this default pose. Animations can be applied to the character in order to make them change this default pose to something more interesting. You want him animated, you say! Well, that's easy.
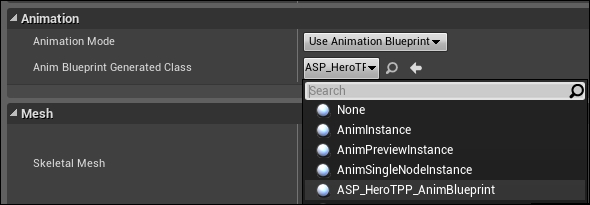
Under the Defaults tab in the blueprint editor, just above Mesh, there is an Animation section where you can select the active animation on your Mesh. If you wish to use a certain animation asset, simply click on the drop-down menu and choose the animation you desire to show.
A better thing to do, however, is to use a blueprint for the animation. This way, an artist can properly set the animation based on what the character is doing. If you select Use Animation Blueprint from Animation Mode and then select ASP_HeroTPP_AnimBlueprint from the drop-down menu, the character will appear to behave much better in the game, because the animation will be adjusted by the blueprint (which would have been done by an artist) as the character moves.
Tip
We can't cover everything here. Animation blueprints are covered in Chapter 11, Monsters. If you're really interested in animation, it also wouldn't be a bad idea to sit through a couple of Gnomon Workshop tutorials on IK, animation, and rigging, such as Alex Alvarez's Rigging 101 class at http://www.thegnomonworkshop.com/store/product/768/Rigging-101.
One more thing: let's make the camera for the Avatar appear behind it. This will give you a third person's point-of-view, which will allow you to see the whole character, as shown in the following screenshot with the corresponding steps:
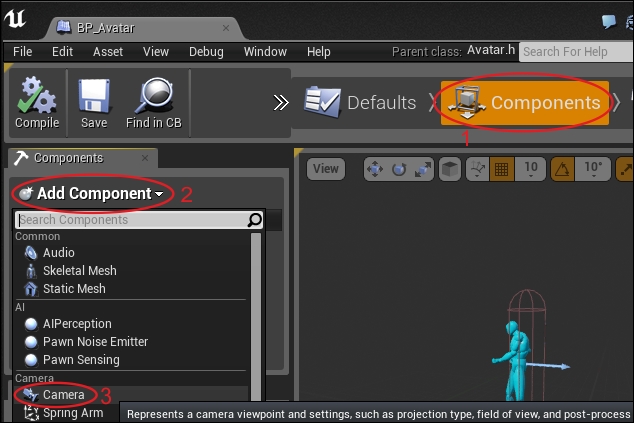
- In the BP_Avatar blueprint editor, click on the Components tab.
- Click on Add Component.
- Choose to add a Camera.
A camera will appear in the viewport. You can click on the camera and move it around. Position the camera so that it is somewhere behind the player. Make sure that the blue arrow on the player is facing the same direction as the camera. If it isn't, rotate the Avatar model mesh so that it faces the same direction as its blue-colored arrow.
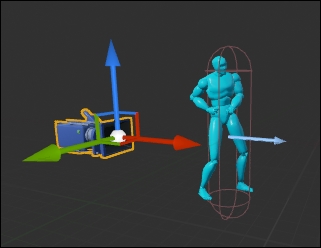
The blue-colored arrow on your model mesh indicates the forward direction for the model mesh. Make sure that the camera's opening faces the same direction as the character's forward vector