You're a first-time programmer. You have a lot to learn!
Academics often describe programming concepts in theory but like to leave implementation to someone else, preferably someone from the industry. We don't do that in this book—in this book, we will describe the theory behind C++ concepts and implement our own game as well.
The first thing I will recommend is that you do the exercises. You cannot learn to program simply by reading. You must work with the theory with the exercises.
We are going to get started by programming very simple programs in C++. I know that you want to start playing your finished game right now. However, you have to start at the beginning to get to that end (if you really want to, skip over to Chapter 12, Spell Book, or open some of the samples to get a feel for where we are going).
In this chapter, we will cover the following topics:
- Setting up a new project (in Visual Studio and Xcode)
- Your first C++ project
- How to handle errors
- What are building and compiling?
Our first C++ program will be written outside of UE4. To start with, I will provide steps for both Xcode and Visual Studio 2013, but after this chapter, I will try to talk about just the C++ code without reference to whether you're using Microsoft Windows or Mac OS.
In this section, we will install a code editor for Windows, Microsoft's Visual Studio. Please skip to the next section if you are using a Mac.
Note
The Express edition of Visual Studio is the free version of Visual Studio that Microsoft provides on their website. Go to http://www.visualstudio.com/en-us/products/visual-studio-express-vs.aspx to start the installation process.
To start, you have to download and install Microsoft Visual Studio Express 2013 for Windows Desktop. This is how the icon for the software looks:
Once you have Visual Studio 2013 Express installed, open it. Work through the following steps to get to a point where you can actually type in the code:
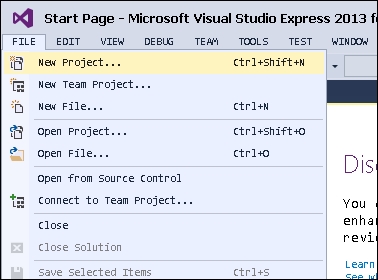
- From the File menu, select New Project..., as shown in the following screenshot:
- You will get the following dialog:
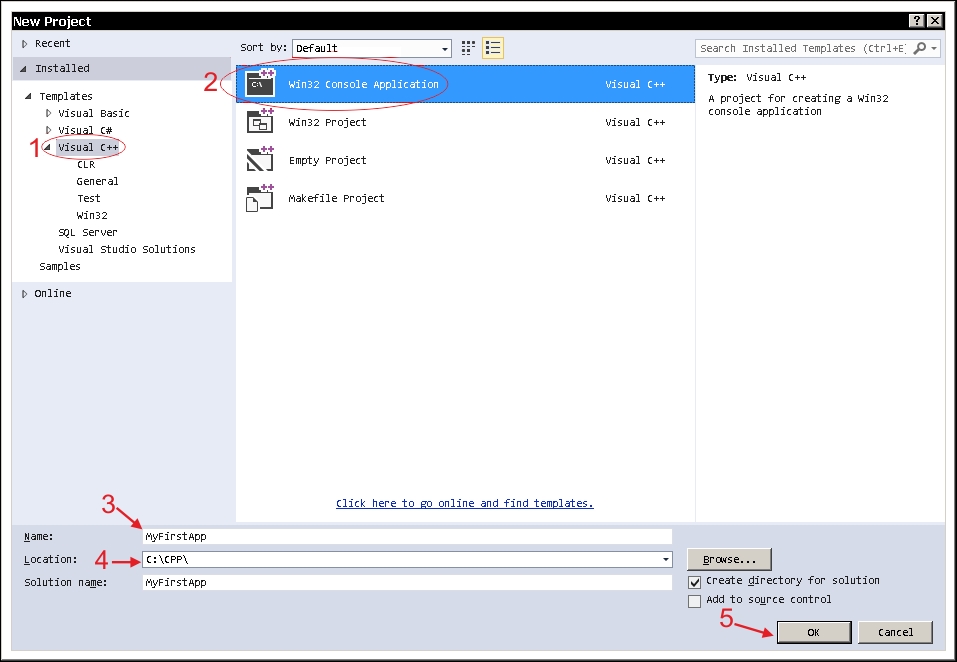
- There are five things to take care of now, as follows:
- Select Visual C++ from the left-hand side panel.
- Select Win32 Console Application from the right-hand side panel.
- Name your app (I used
MyFirstApp). - Select a folder to save your code.
- Click on the OK button.
- After this an Application Wizard dialog box opens up, as shown in the following screenshot:
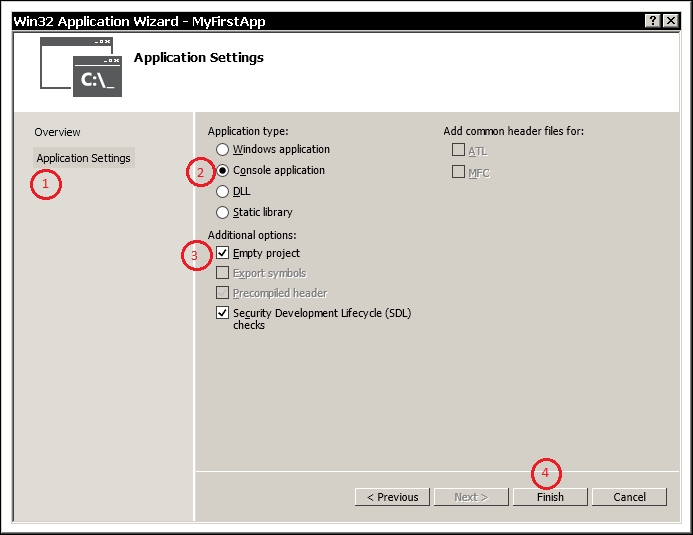
- We have four things to take care of in this dialog box, as follows:
- Click on Application Settings in the left-hand side panel.
- Ensure that Console application is selected.
- Select Empty project.
- Click on Finish.
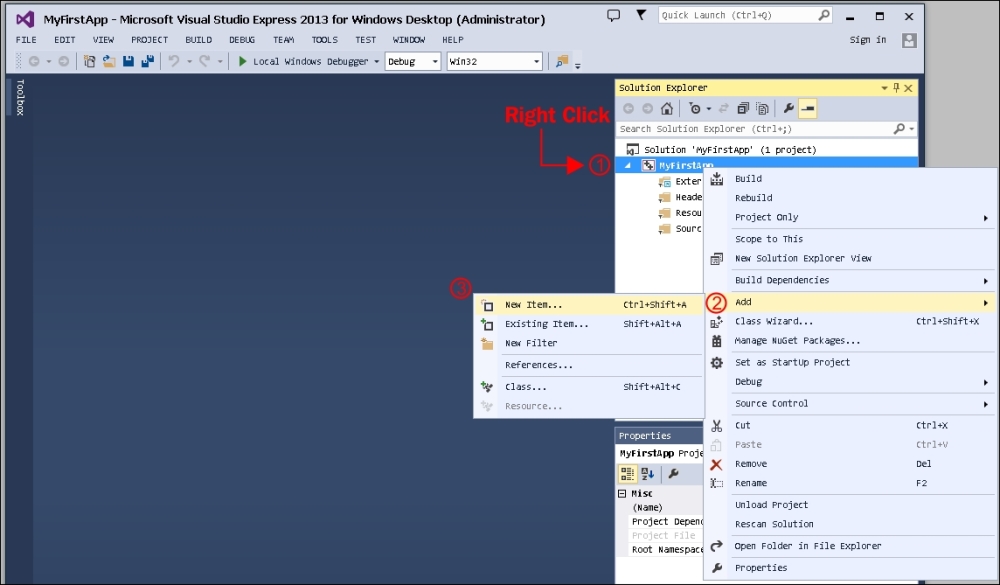
Now you are in the Visual Studio 2013 environment. This is the place where you will do all your work and code.
However, we need a file to write our code into. So, we will add a C++ code file to our project, as shown in the following screenshot:
Add your new source code file as shown in the following screenshot:
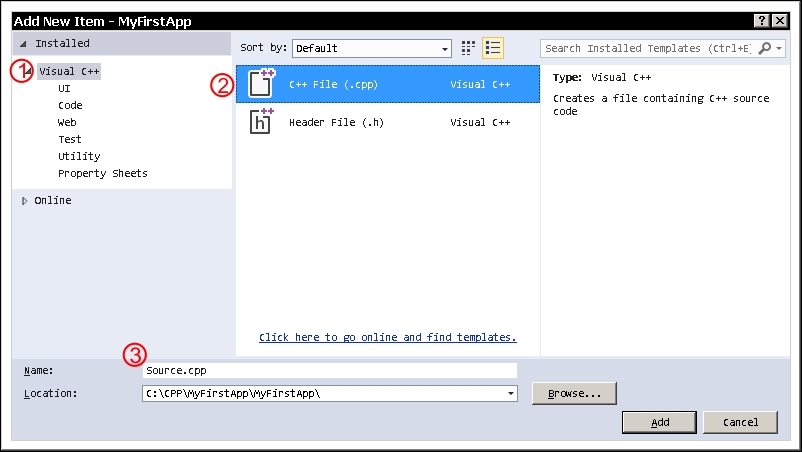
You will now edit Source.cpp. Skip to the Your First C++ Program section and type in your code.
In this section, we will talk about how to install Xcode on a Mac. Please skip to the next section if you are using Windows.
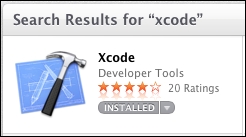
Xcode is available on all Mac machines. You can get Xcode using the Apple App Store (it's free), as shown here:
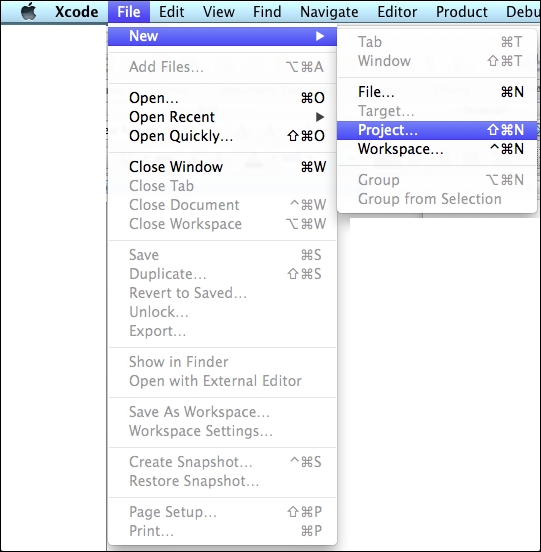
- Once you have Xcode installed, open it. Then, navigate to File | New | Project... from the system's menu bar at the top of your screen, as shown in the following screenshot:
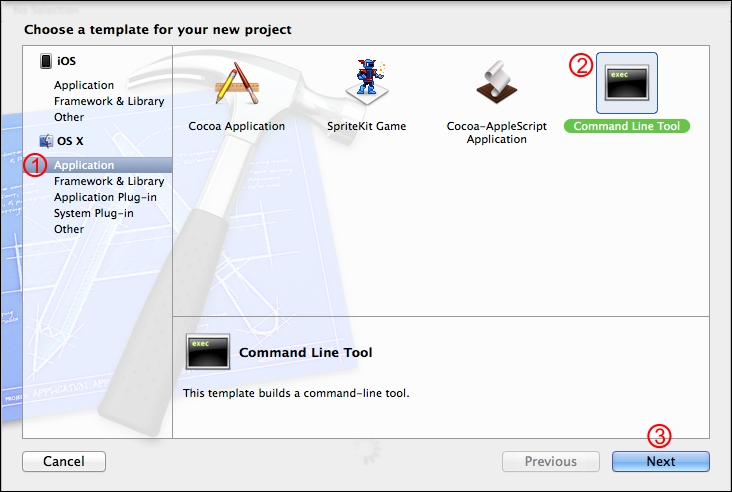
- In the New Project dialog, select Application under OS X on the left-hand side of the screen, and select Command Line Tool from the right-hand side pane. Then, click on Next:
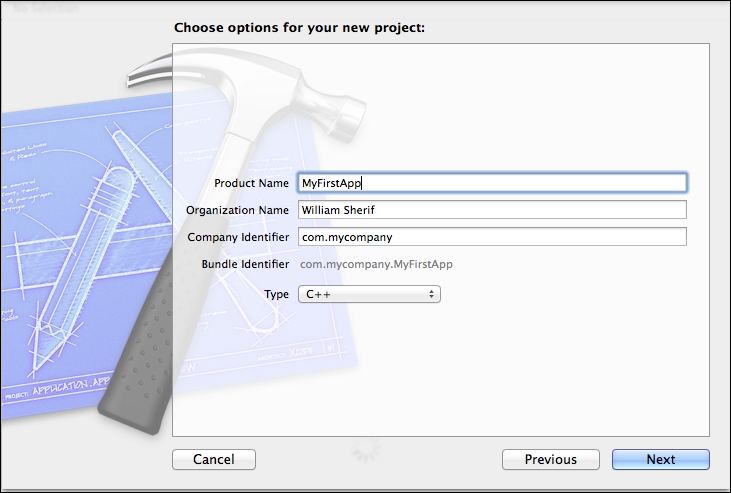
- In the next dialog, name your project. Be sure to fill in all the fields or Xcode won't let you proceed. Make sure that the project's Type is set to C++ and then click on the Next button, as shown here:
- The next popup will ask you to choose a location in order to save your project. Pick a spot on your hard drive and save it there. Xcode, by default, creates a Git repository for every project you create. You can uncheck Create git repository —we won't cover Git in this chapter—as shown in the following screenshot:

Tip
Git is a Version control system. This basically means that Git keeps the snapshots of all the code in your project every so often (every time you commit to the repository). Other popular source control management tools (scm) are Mercurial, Perforce, and Subversion. When multiple people are collaborating on the same project, the scm tool has the ability to automatically merge and copy other people's changes from the repository to your local code base.
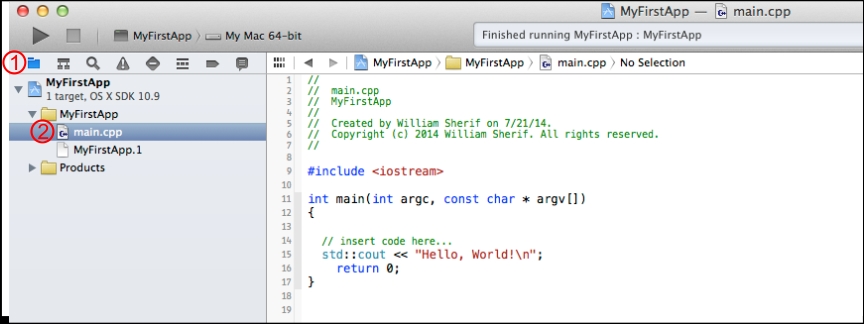
Okay! You are all set up. Click on the main.cpp file in the left-hand side panel of Xcode. If the file doesn't appear, ensure that the folder icon at the top of the left-hand side panel is selected first, as shown in the following screenshot: