
If you have been following the book from the first chapter, then you would know what a game profile is, and how and where to build it. So, first things first, you need to build two profiles for your game: development and distribution. Remember that both of them will be useless if you don't have installed certificates too.
Epic gives you two choices regarding the setup of your game provisioning profiles. So you can put both files in either of these two places:
Engine/Build/IOS/UE4Game.mobileprovision(Your Game Directory) /Build/IOS/(your Game Name).mobileprovision
In the first case, you can place your provisioning profiles directly in the engine directory, but in that case you must name the profile UE4Game. This is not a good idea if you are going to work with more than one game at the same time, as you must keep that naming.
The second method, which I prefer to use, is a per-project method. In this, you place both of your provisioning profiles in your game directory inside the Build/IOS director. You must then name both of your files with the game name, and the distribution one should have the Distro_ prefix.
For example, for the first game project that I'll be building in Chapter 3, Creating a Brick Breaking Game, the game profiles will be:
- Development:
Game / Build/IOS/bricksbreakingPacket. mobileprovision - Distribution :
BricksBreakingGame/ Build/IOS/ Distro_bricksbreakingPacket. mobileprovision
Whenever you run Unreal Engine, the project window pops up giving you the choice to either run an old project or build a new one. There are four major things you should note in this window if you switch to the New Project tab:
- You can select a different directory to build your own projects rather than building them in the
Documents/Unreal Enginedirectory. You just need to click on the small down arrow button next to the project name input field. - There is an option called Include starter content, which should be unchecked, as this choice will add too many blueprints, models, and assets to your project. It is fine to add these if you are going to learn about them, or if you are going to build a game that has the look of those assets. However, during the process of our four games here, we will not need to use those assets, so let's save some space in our project by unchecking it.
- When you are going to give your project a name, ensure that you type the name without spaces and that it has less than 20 characters, otherwise you will get an error. For example, in the first game project, I named the project
BricksBreakingGamerather thanBricks Breaking Game. The engine should give you feedback with a red error if you forget this. - There are many start templates to use to build your game, some of them based on C++ code and the others based on blueprints. Normally, you should select a Blank template (which is the first one), otherwise I'll mention which template we are going to base our game on in the respective chapter.
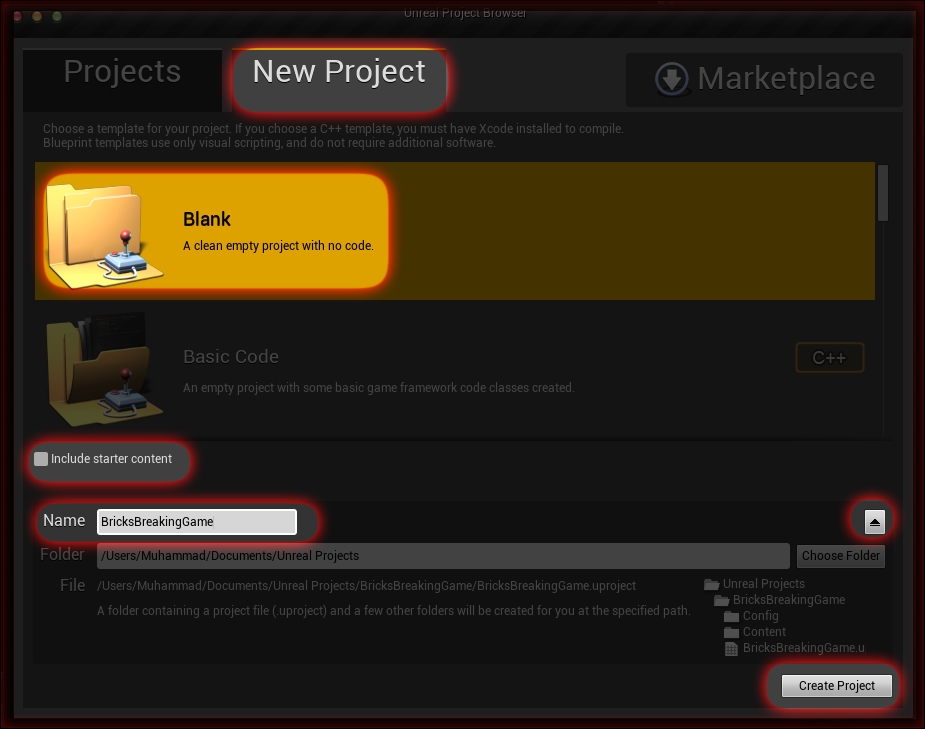
After naming your project and clicking on Create Project, the engine will take a while to set it up and load it. When the editor opens and completes loading, you can navigate to the Edit menu and select Project Settings.
There are some steps that need to be carried out here to make the project ready for iOS development. As you can see, you have different tabs in the left-hand side panel. You can add a project name and company info to your Description screen. You can set up the game levels and the default map in your Maps and Modes screen.
You can make so many changes to your project, but the four most important screens to which we want to make changes should be as follows:
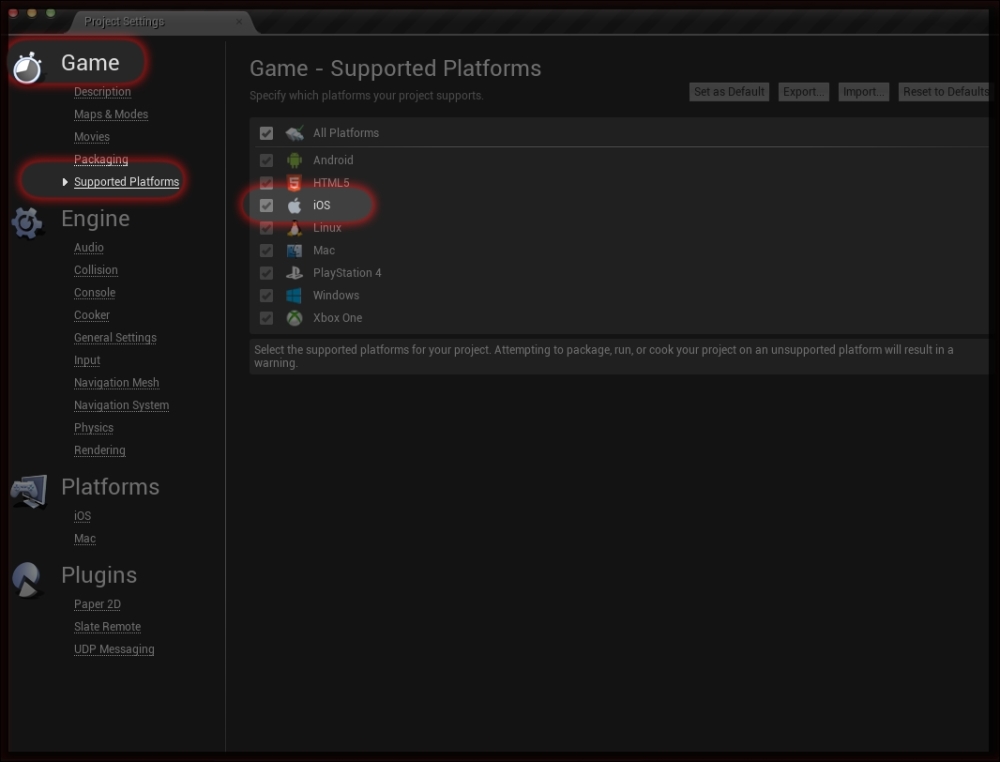
- Supported Platforms: You need to ensure that iOS is supported for the project.
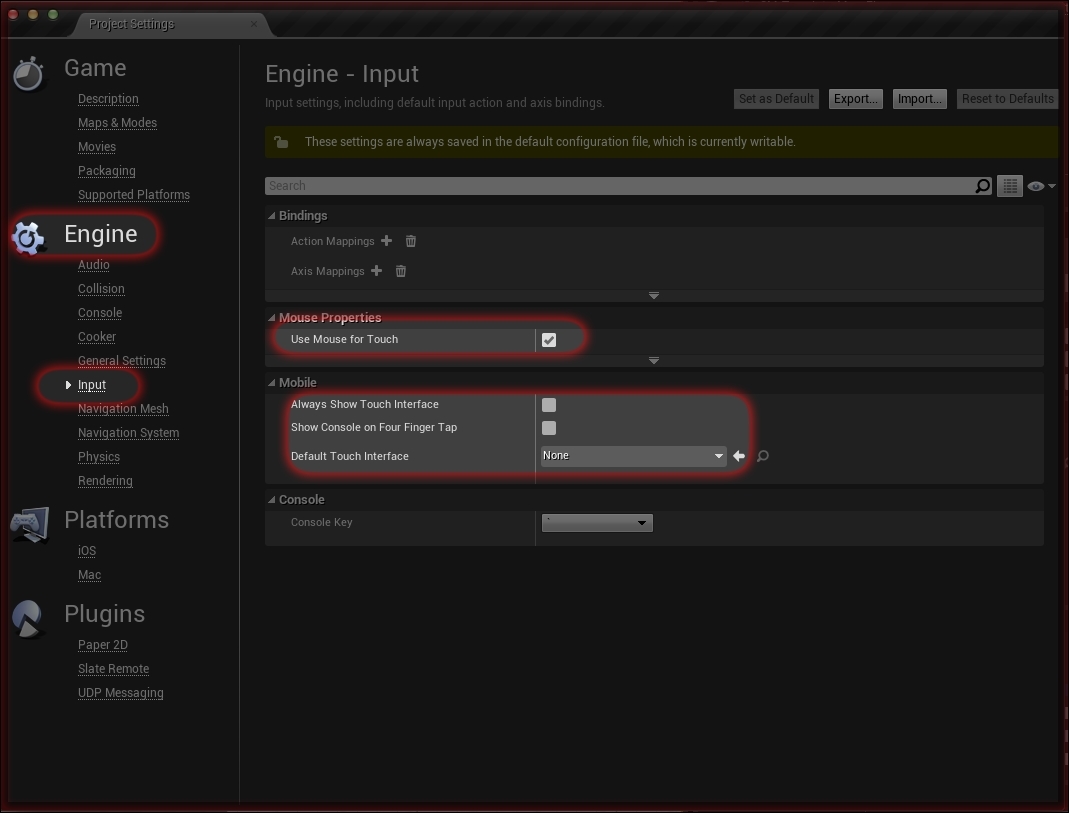
- Input: Ensure that you mark Use Mouse for Touch to enable the mouse clicks to be considered as touch input. Ensure that you disable Always Show Touch Interface and Show Console on Four Finger Tap, and clear Default Touch Interface. If there is a project which has different input configurations, it will be mentioned in the respective project chapter.
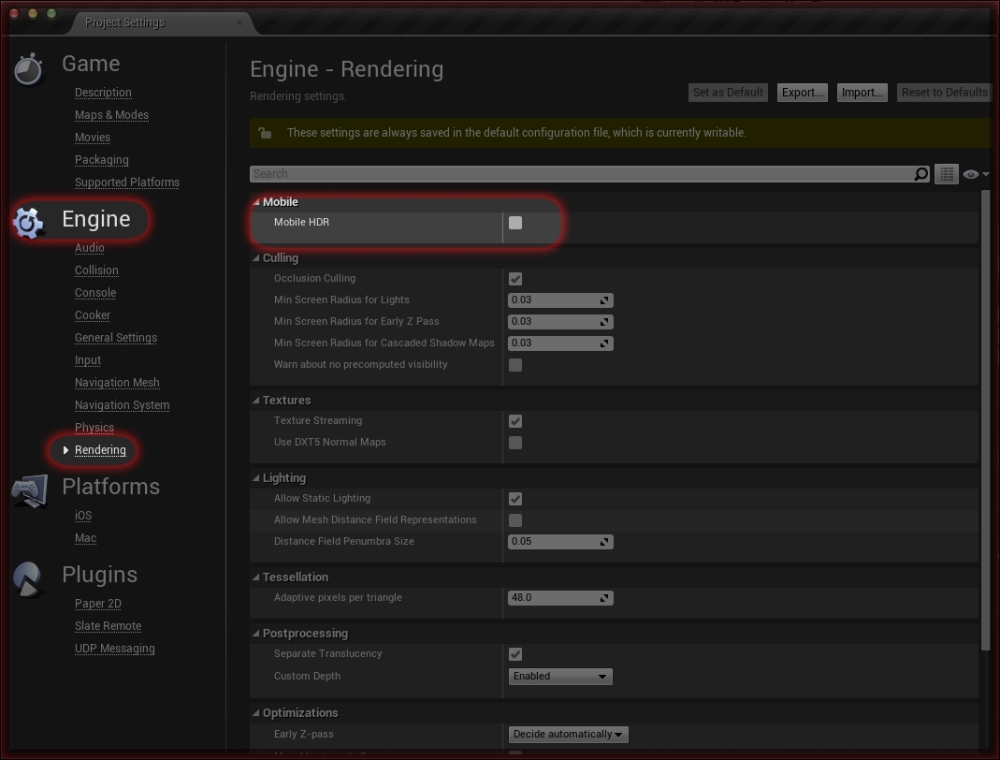
- Rendering: Switch off Mobile HDR, as none of our games will need it. All of our games will be 2D and are not based on light as they are based on shaders.
- iOS: If the game has online features, we will use Enable Game Center Support. However, I prefer to keep it switched off for now, as the online features will be discussed later in Chapter 7, Monetizing your Game. You will now see that all of the iOS options are grayed out and there is a warning message telling you that the project needs to be configured. So click on Configure Now and it will enable everything and make the project match our targeted platform.

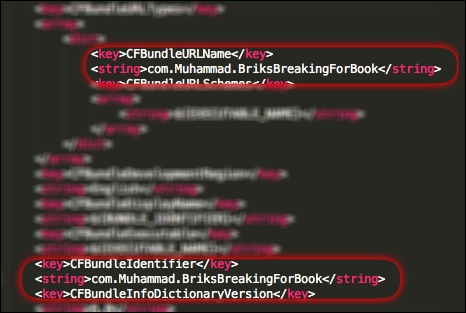
After configuring the project for iOS, you will have an info.Plist file generated for your project. You can either click on the Open PList Folder button or navigate to the GameProject/Build/IOS directory, and you will find a text file with your game's name and the .plist extension. Open this file and change the two string values <key>CFBundleURLName</key> and <key>CFBundleIdentifier</key> to the one you used while building the provisioning profile. In my case, it is com.Muhammad.BriksBreakingForBook. You should have something like this:
Feel free to dig more and investigate the PLIST file. It looks like a small and simple text file, but the fact is that this file can twist your iOS product by 180 degrees. For example, with some tweaks inside the PLIST file you can change the final game executable file name or add a glass effect to the game icon, change the game version number or even switch the game WiFi feature off. In a nutshell, this file is the director and manger that feeds the game/app with all of the information that should distinguish it.