Now it is time to put everything together and start building the connections between all of the blueprints. In fact, it is easier than it looks like, and with that in mind, let's start.
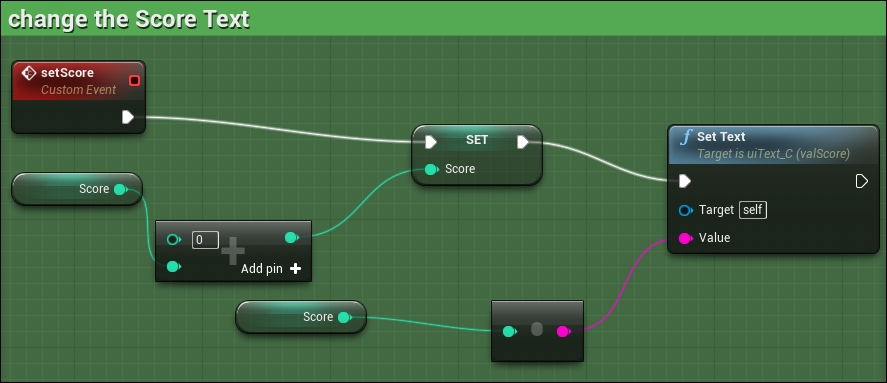
To change the score value, I've added a custom event and called it setScore. This custom event will be working on setting the value of the Score variable by adding 1 to it using the integer + integer node. The final result of the score value will be displayed in the UI using the Set text node. Keep in mind that you can use whatever values you want, as long as you are using the add node. This node will be working on adding the first passed integer value to the second passed integer.
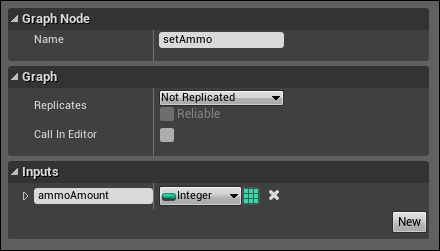
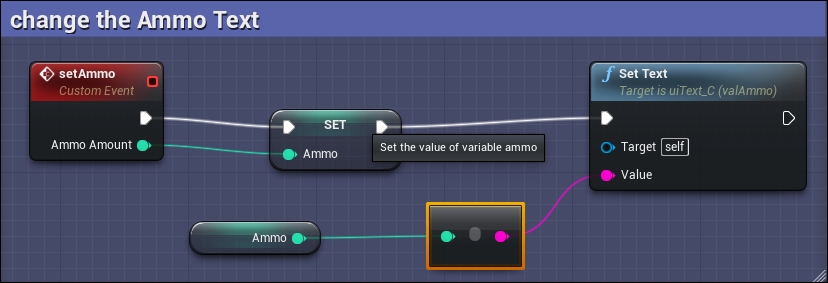
I wanted to follow a new method to change the value of ammo, which is closer to the code environment that I have used over the years. It is called passing parameters. Basically, when I called an event or function, I wanted to send the exact new value directly to it, and then use it to set the ammo text based on the passed parameter. To add this type of parameter passing, I've added a new custom event, called it setAmmo, and after selecting the node in the side panel, I've added a new input to Inputs, set its type to Integer, and set its name to ammoAmount. Now any call to this event will require passing an integer value, otherwise it will use the default which, is set to 0 for now.
Finally, I used the passed ammo value from the AmmoAmount parameter and set it as a string to the Set text node, to change the proper UI text.
I've added two rectangles in the scene to represent walls and gave them a wall tag. Then, I started using OnComponentHit that is caused by the sphere component of the enemy blueprint.
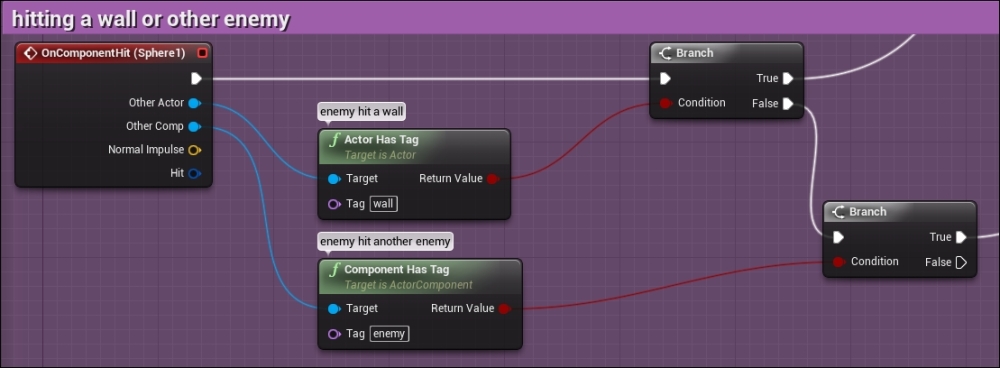
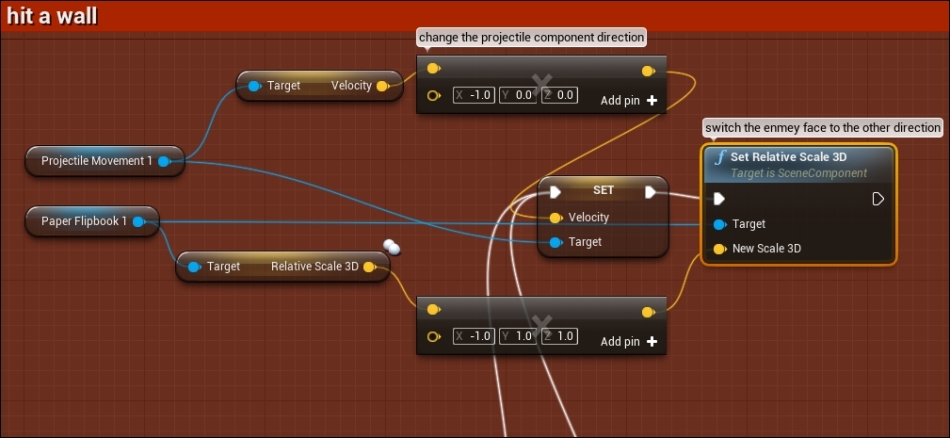
We check whether the enemy hit a wall tagged actor with the Actor Has Tag node, or another enemy tagged component with the Component Has Tag node. If yes, then the enemy changes its movement direction by changing the velocity direction of the projectile component and changing scale of sprite between 1 and -1 to emulate a flip.
Using the Spawn Actor Of Class node on Event Begin Play, I was able to spawn enemies. However, to ensure that it is random and lasts for a while, I set a random value to the RandomValue variable and based on the resulting value, I pick whether to spawn a red or green enemy.
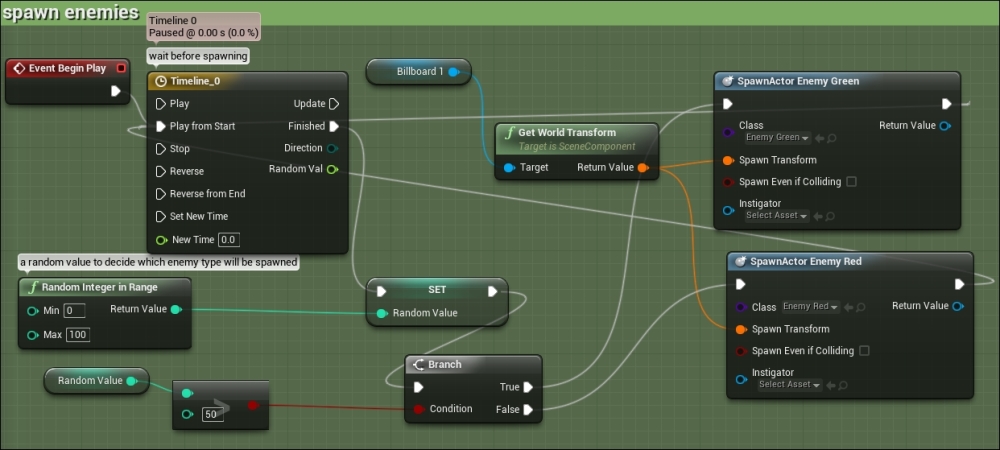
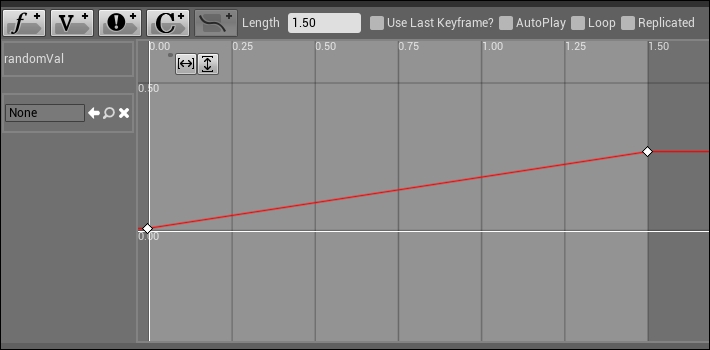
To ensure that it is sort of a loop, I decided to use a new approach, which is the Timeline node. This node controls a value over time. I set its time in its graph to 1.5 seconds, and never cared about the resulting value as I won't be using it, I just made use of the animation duration and forced it to run every time an enemy finishes spawning. With this, I get the following sequence:
- Execute the timeline node.
- The node finishes running.
- Randomize the value of the integer.
- Select an enemy type.
- Spawn the enemy.
- Run the timeline node.
As the Delay node is broken for my current version of Unreal Engine, I had to find a way to ask the bullet to wait for a while after it is spawned and then destroy itself.
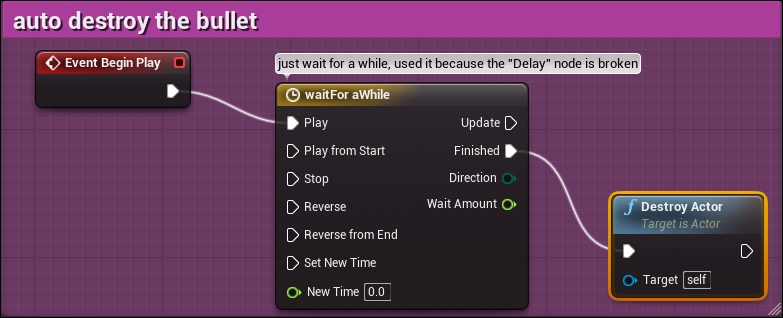
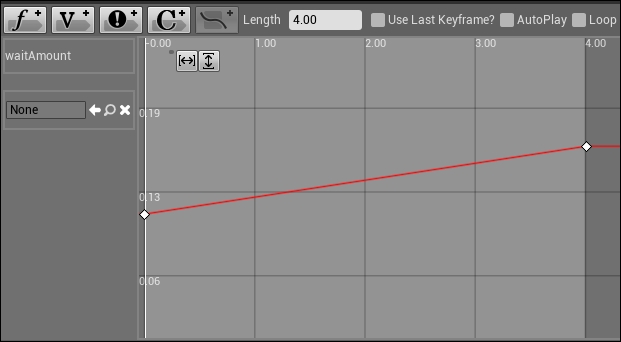
The best and most efficient way to fix the Delay node was using a timeline node and setting its duration to 4 seconds. Then, when the animation finished, I called Destroy Actor.
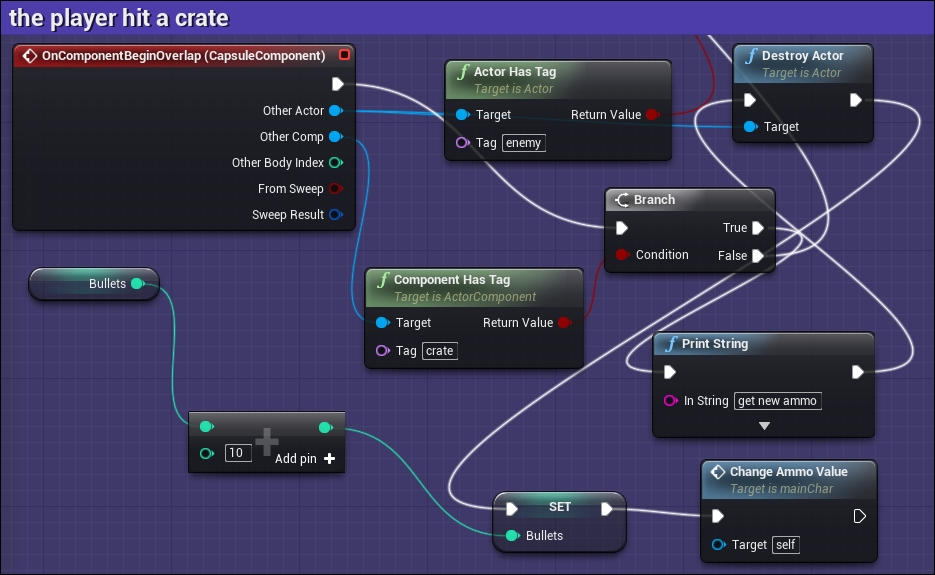
The rest of the calculations of the bullet were done using OnComponentBeingOverlap and checking the overlapped components.
If the overlapped component had an enemy tag then I just called Destroy actor to destroy the parent actor that holds this component. Finally, I used a quick search method such as Get All Actors Of Class to look for the uiText class and called its setScore custom event to add 1 to the score and the UI.

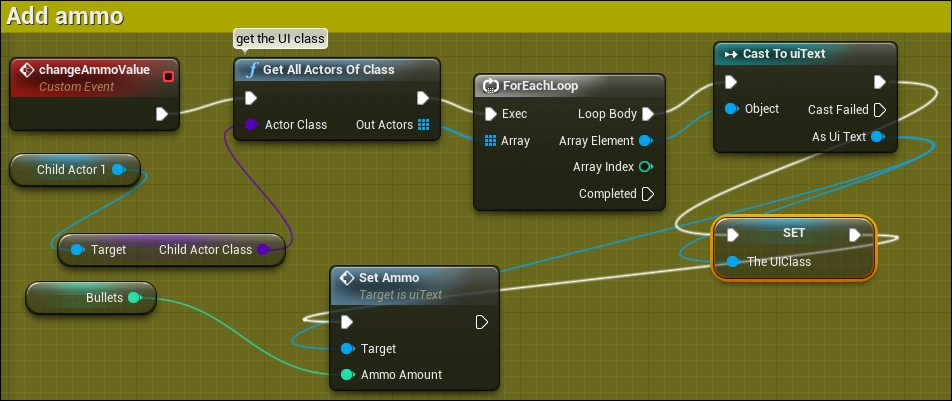
With a custom event named changeAmmoValue, I started looking for uiTextClass using the same Get All Actors Of Class as before and then calling the SetAmmo event. However, as we have set up this event in a way that requires it to pass an integer value, I passed the value of the local variable bullets to it.
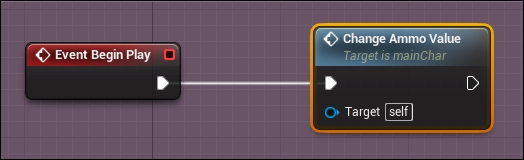
By calling changeAmmoValue on Event Begin Play, I was assured that every time the level is started, the UI will be updated to the default value of the local variable bullets.
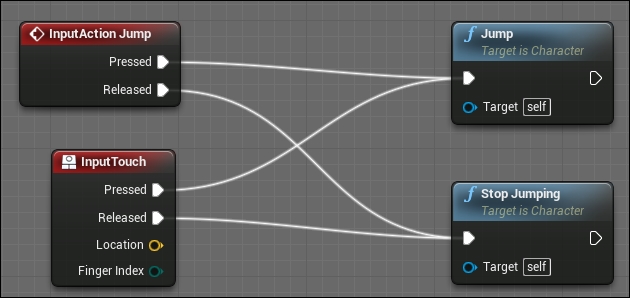
Due to the usage of a character-based blueprint, I was able to simply simulate a jump by calling the Jump or Stop jump function on the controller when I had to.
To ensure that the player can't just shoot continuously, we check the value of the local variable bullets before processing a bullet spawning process. Every time the player presses the shoot button, we make sure that the number of bullets is more than 0 and then call the shoot event to process a bullet and call the changeAmmoValue to reduce the number of bullets.

The shoot event itself is just using the spawnPoint type of billboard component to get a world transform and then using the Spawn Actor of Class node to spawn the bullet blueprint.
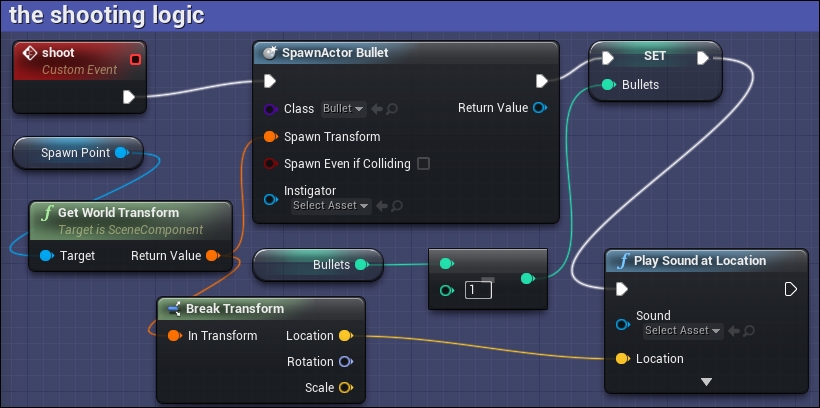
Then it reduces the total number of the current bullets in the local variable bullets by 1 using the integer – integer node, and finally plays a shooting sound at the location of the spawning.
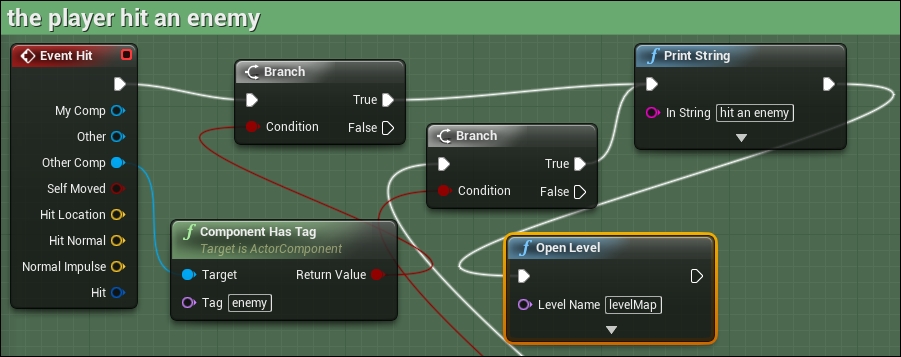
In case the character controller Event Hit gets hit with a component that has an enemy tag, then the level needs to be restarted as the player will die.
However, if the Capsule component of the character controller has been overlapped with a crate that is a tagged component, then I use Destroy Actor to destroy the crate blueprint actor instance, add 10 to the bullet local variable, and call the ChangeAmmoValue event to change the value on the uiText blueprint.