
Chapter 15: Deploying Your Application
This chapter will explain how to deploy your backend and frontend to a server. Successful deployment is a key part of the software development process, and it is important to learn how a modern deployment process works. There are a variety of cloud servers or PaaS (short for Platform-as-a-Service) providers available, such as Amazon Web Services (AWS), DigitalOcean, and Microsoft Azure. In this book, we are using Heroku and AWS, which support multiple programming languages that are used in web development. We will also show you how to use Docker containers in deployment.
In this chapter, we will cover the following topics:
- Deploying the backend
- Deploying the frontend
- Using Docker containers
Technical requirements
The Spring Boot application that we created in Chapter 5, Securing and Testing Your Backend is required (it is available on GitHub at https://github.com/PacktPublishing/Full-Stack-Development-with-Spring-Boot-and-React/tree/main/Chapter05), as is the React app that we used in Chapter 13, Testing Your Frontend (it is available on GitHub at https://github.com/PacktPublishing/Full-Stack-Development-with-Spring-Boot-and-React/tree/main/Chapter13).
Docker installation is necessary, and the following GitHub link will also be required: https://github.com/PacktPublishing/Full-Stack-Development-with-Spring-Boot-and-React/tree/main/Chapter15.
Deploying the backend
If you are going to use your own server, the easiest way to deploy the Spring Boot application is to use an executable Java ARchive (JAR) file. If you use Maven, an executable JAR file can be created using the Spring Boot Maven plugin and adding the following lines of code to your pom.xml file:
<plugin>
<groupId>org.springframework.boot</groupId>
<artifactId>spring-boot-maven-plugin</artifactId>
<configuration>
<executable>true</executable>
</configuration>
</plugin>
Next, we have to build our project using the mvn clean install command. You can run a custom maven command in the Eclipse integrated development environment (IDE) by right-clicking Project in the project explorer, selecting Run as | Maven Build…, and typing clean install in the Goals field. That command creates a JAR file in the target folder, as illustrated in the following screenshot:
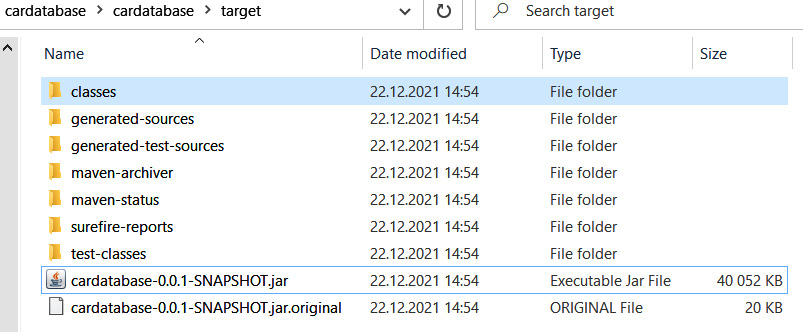
Figure 15.1 – Executable JAR file
In this case, you don't have to install a separate application server, because it is embedded in your JAR file. Then, you just have to run the JAR file using the java -jar your_appfile.jar Java command, as illustrated in the following screenshot:
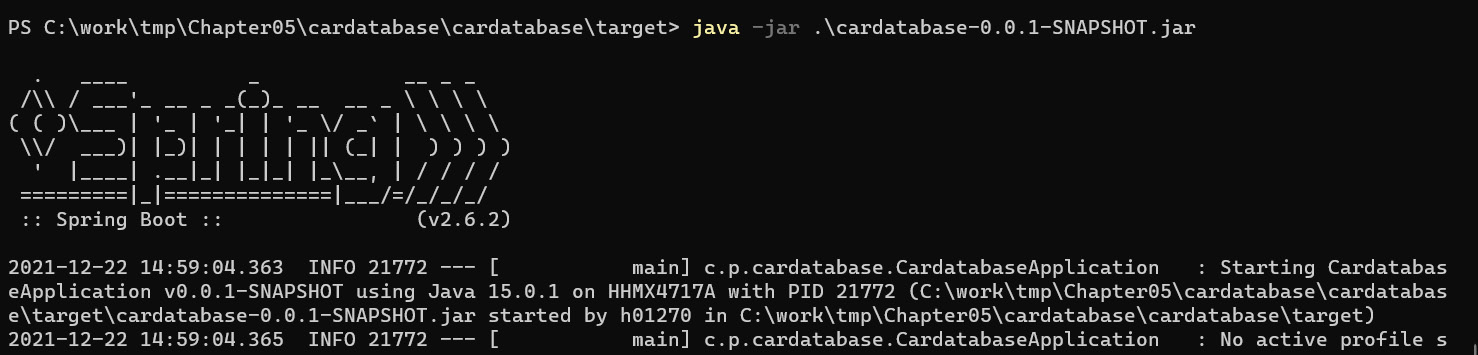
Figure 15.2 – Running the executable JAR files
Nowadays, cloud servers are the principal means of providing your application to end users. Next, we are going to deploy our backend to the Heroku cloud server (https://www.heroku.com/). Heroku offers a free account that you can use to deploy your own applications. With the free account, your applications go to sleep after 30 minutes of inactivity, and it takes a little bit more time to restart the application. However, the free account is sufficient for testing and hobby purposes.
For deployment, you can use Heroku's web-based user interface (UI). The following steps will take you through the deployment process:
- After you have created an account with Heroku, log in to the Heroku website. Navigate to the dashboard, which shows a list of your applications. There is a New button that opens a menu. Select the Create new app option from the menu, as illustrated in the following screenshot:
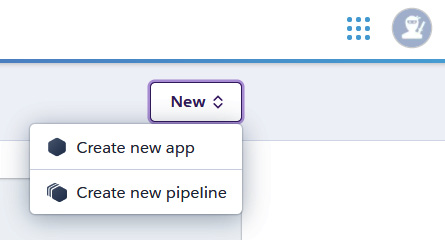
Figure 15.3 – Create new app option
- Name your app, select a region, and press the Create app button, as illustrated in the following screenshot:
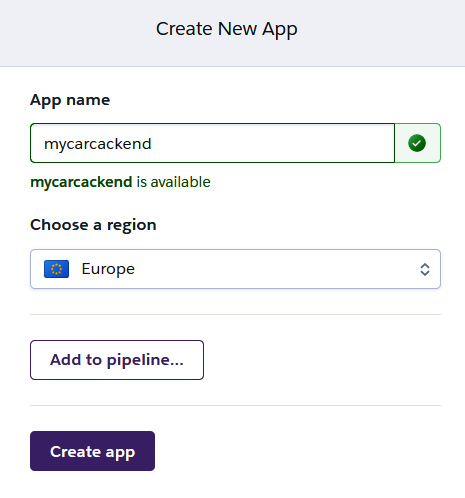
Figure 15.4 – Create app button
- Select a deployment method. There are several options; in the following example, we are using the GitHub option. In this method, you first have to push your application to GitHub, and then link your GitHub repository to Heroku:
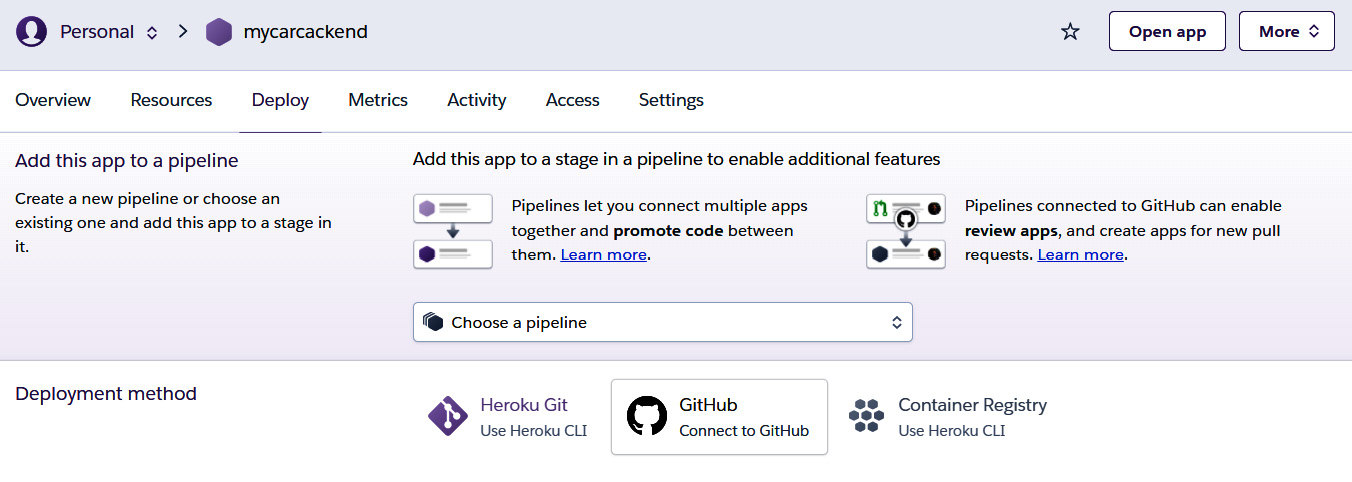
Figure 15.5 – Deployment method
- Search for a repository you want to deploy to, as illustrated in the following screenshot, and then press the appropriate connect button. In our case, we're using the Connect to GitHub option:
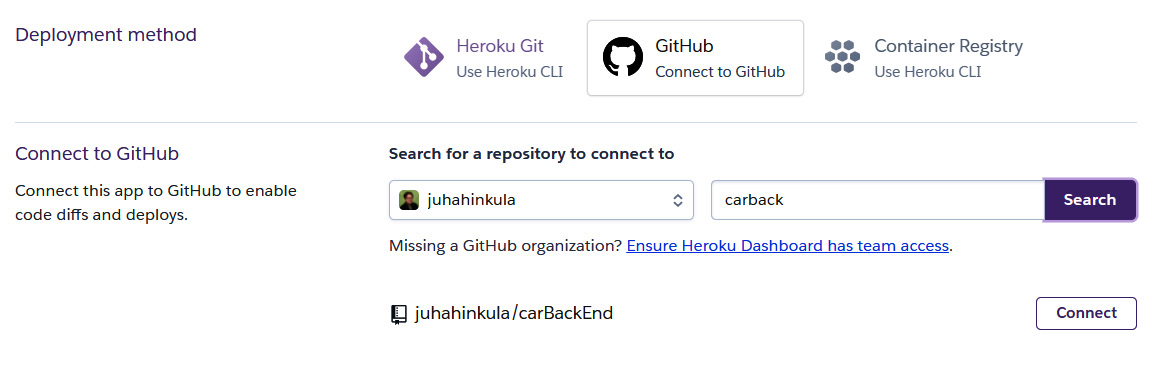
Figure 15.6 – Connect to GitHub option
- Choose between an automatic and manual deployment. The automatic option deploys your app automatically when you push a new version to the connected GitHub repository. You also have to select a branch you want to deploy. We will use the manual option, which deploys the app when you press the Deploy Branch button. The options are illustrated in the following screenshot:

Figure 15.7 – Manual deployment
- Deployment starts, and you can see a build log. You should see a message that says Your app was successfully deployed., as illustrated in the following screenshot:
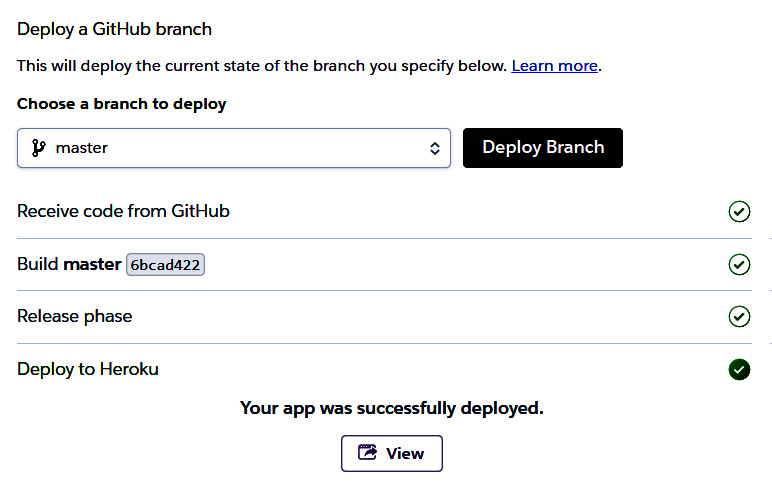
Figure 15.8 – Successful deployment
Now, your application is deployed to the Heroku cloud server. If you are using the H2 in-memory database, this will be enough, and your application should work. We are using MariaDB; therefore, we have to install the database.
In Heroku, we can use JawsDB, which is available in Heroku as an add-on. JawsDB is a Database as a Service (DBaaS) provider that offers the MariaDB database, which can be used in Heroku. The following steps describe how to start using the database:
- Open a Resources tab in your Heroku app page and type jawsdb into the Add-ons search field, as illustrated in the following screenshot:

Figure 15.9 – JawsDB
- Select JawsDB Maria from the drop-down list. Select a free plan and press the Submit Order Form button. Note that this step requires you to fill in the billing information in Heroku. After JawsDB is connected to your Heroku app, you can see the connection information of your database, as illustrated in the following screenshot:
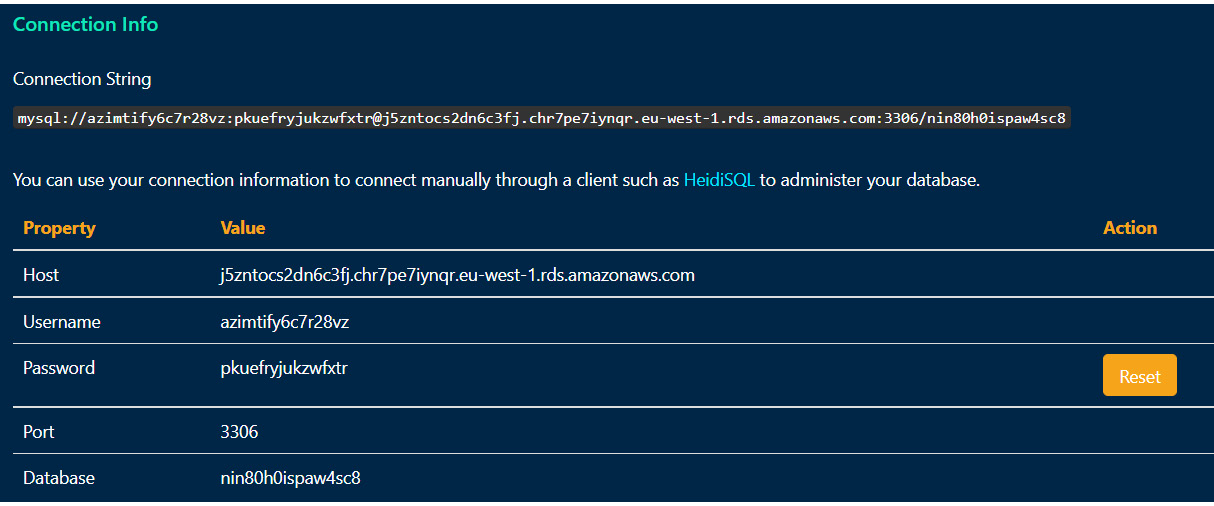
Figure 15.10 – Connection Info page
- Change the database connection definition in the application.properties file to the values from the JawsDB Connection Info page. In the following example, we use a plain password, but it is recommended that you encrypt a password using—for example—the Java Simplified Encryption (JASYPT) library:
spring.datasource.url=jdbc:mariadb://j5zntocs2dnc3fj.chr7pe6iynr.eu-west-1.rds.amazonaws.com:3306/nik920iia4sc7
spring.datasource.username=arimtyfj6cag78vz
spring.datasource.password=zkjeftjukktfxtor
spring.datasource.driver-class-name=org.mariadb.jdbc.Driver
- With the free account, we can have a maximum of 10 concurrent connections to our database; therefore, we also have to add the following line of code to the application.properties file:
spring.datasource.max-active=10
- Push your changes to GitHub and deploy your app in Heroku. Now, your application is ready, and you can test that with Postman. The Uniform Resource Locator (URL) of the app is https://mycarbackend.herokuapp.com/, but you can also use your own domain. If we send a POST request to the /login endpoint with the credentials, we can get a token in the response header. So, everything seems to work properly, as we can see here:

Figure 15.11 – Postman request
We can also connect to the JawsDB database using HeidiSQL.
We can watch application logs by selecting the View logs from the Heroku More menu, as illustrated in the following screenshot:
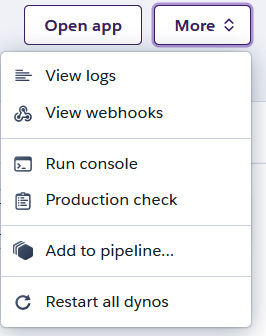
Figure 15.12 – More menu
The application log view looks like this:
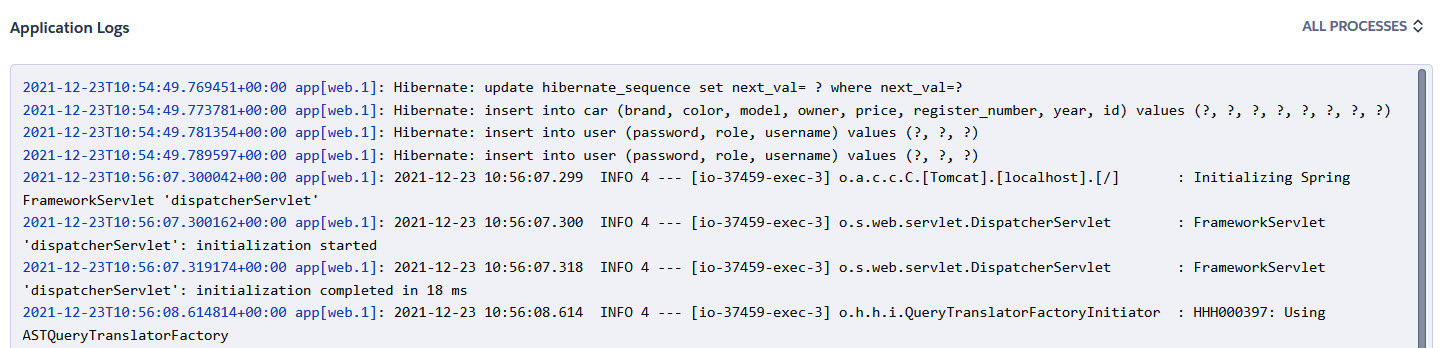
Figure 15.13 – Log view
Now, we are ready to deploy our frontend.
Deploying the frontend
You can deploy your frontend to Heroku as well, but we will now use AWS Amplify for the deployment.
First, we have to change our REST API URL. Open your frontend project with Visual Studio Code (VS Code) and open the constants.js file in the editor. Change the SERVER_URL constant to match your backend's URL, as follows, and save the changes:
export const SERVER_URL = 'https://carbackend.herokuapp.com/';
Then, push your code to GitHub and follow the next steps:
- Log in to the Amplify console (https://console.aws.amazon.com/amplify/home).
- Press the Get started button under Amplify Hosting, as illustrated in the following screenshot:
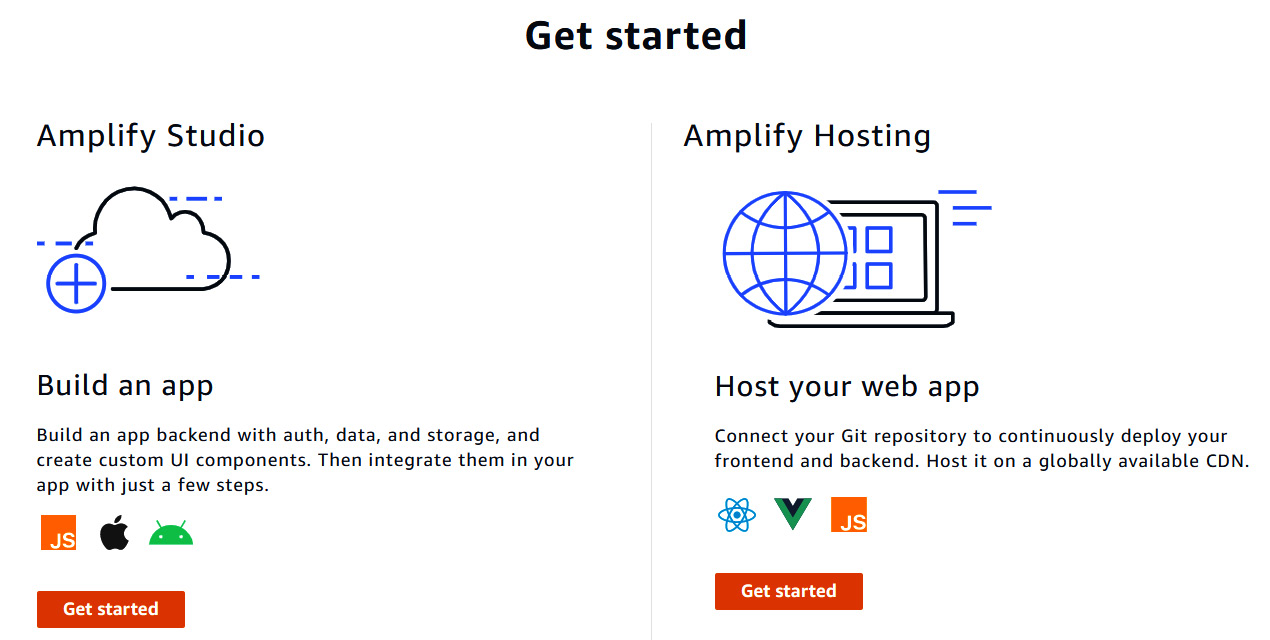
Figure 15.14 – Amplify Hosting
- Select GitHub and press the Continue button, as illustrated in the following screenshot. First, you have to link your GitHub account to Amplify:
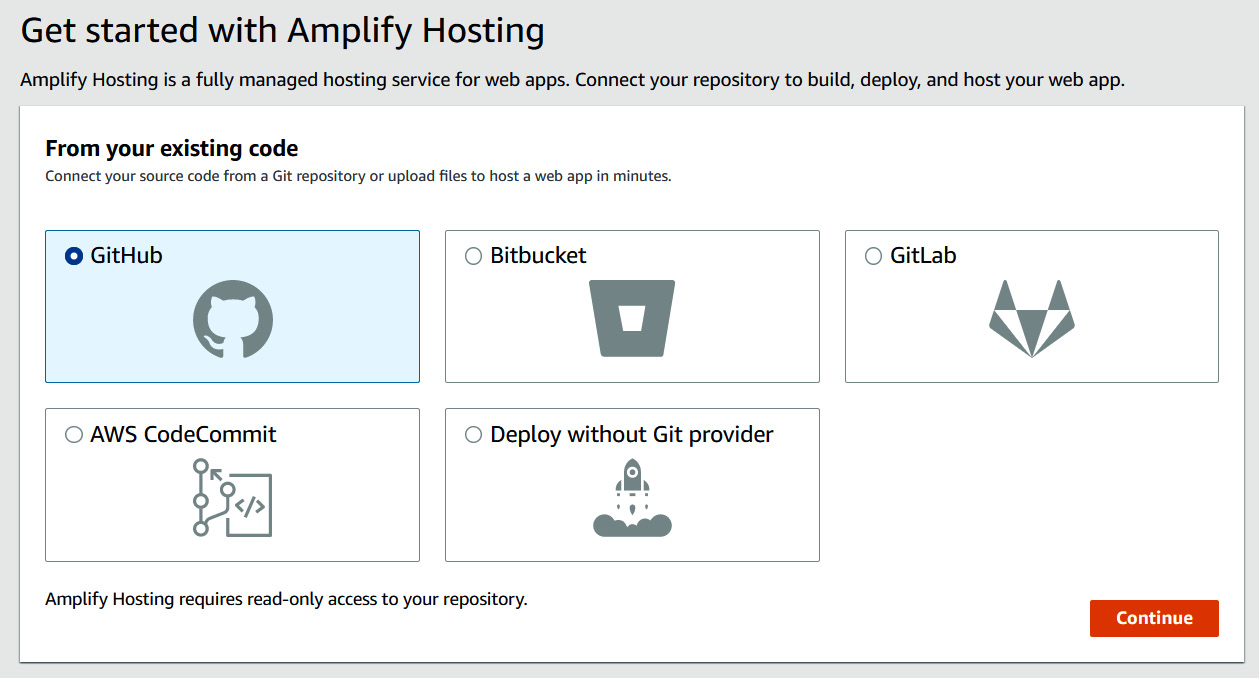
Figure 15.15 – GitHub repository
- Next, select the repository and branch where your frontend exists and press the Next button, as illustrated in the following screenshot:
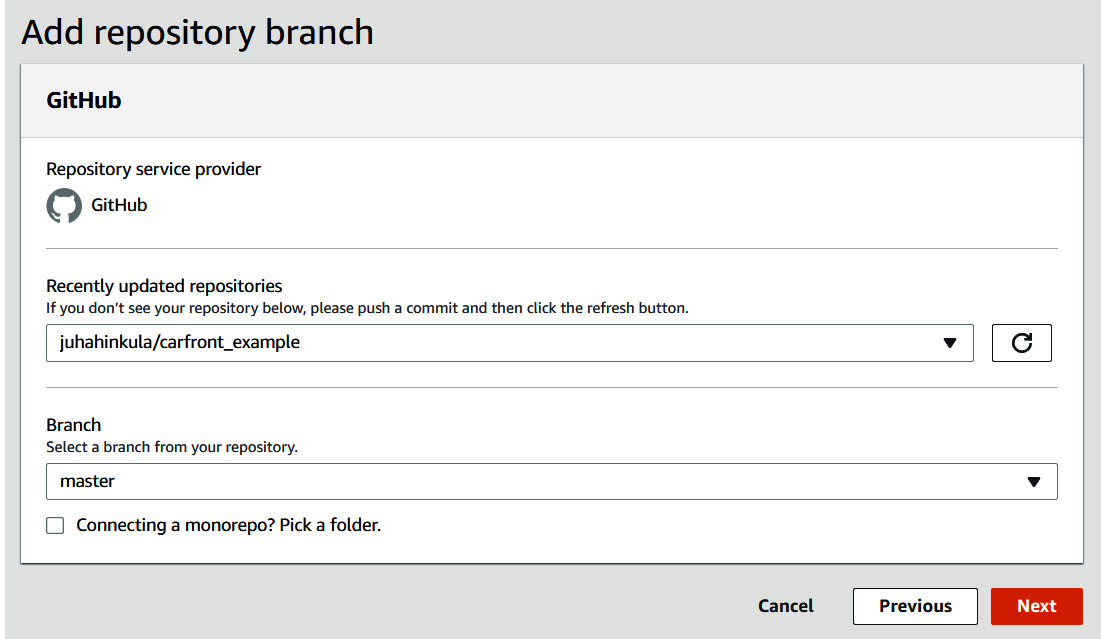
Figure 15.16 – Selecting a repository
- In the next phase, you can configure your build settings. We can continue with the default settings by pressing the Next button, as shown in the following screenshot:
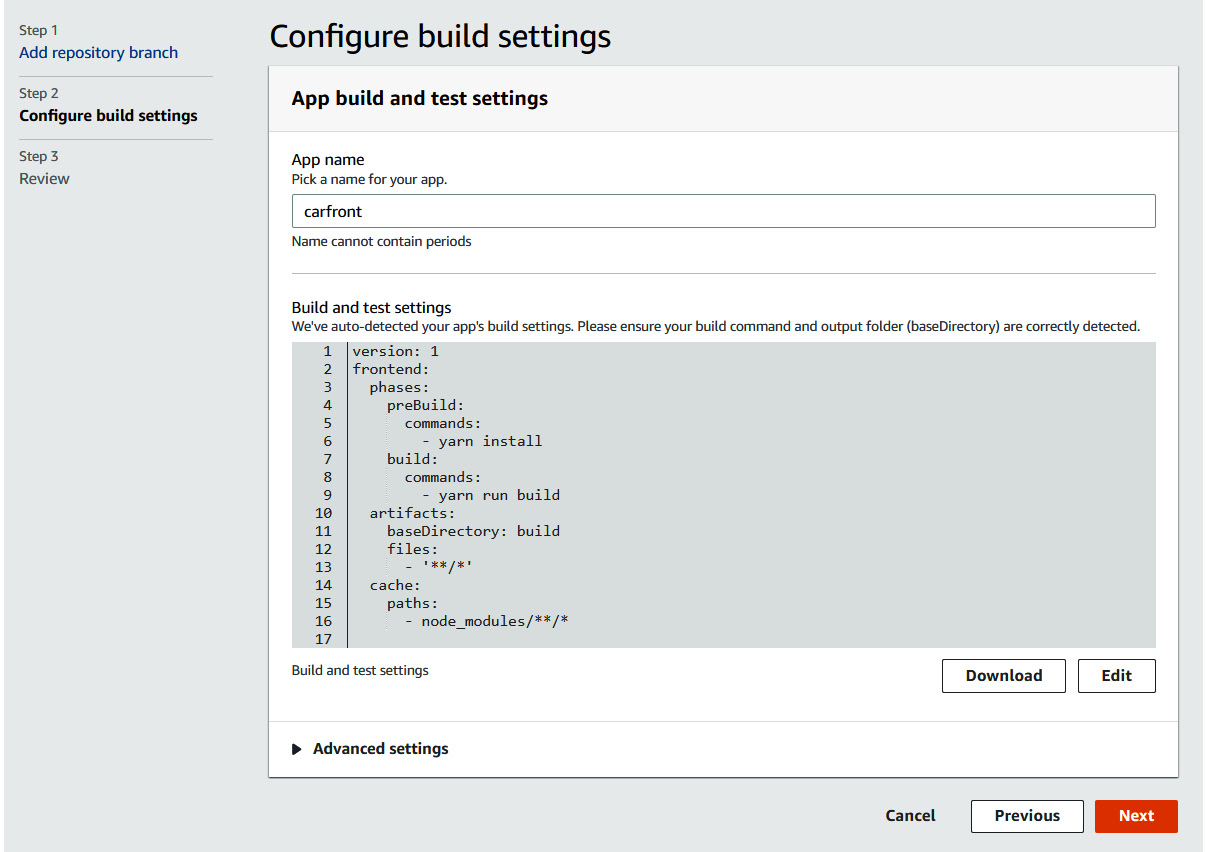
Figure 15.17 – Build settings
- Then, you can review your settings and start deployment by pressing the Save and deploy button, as shown in the following screenshot:
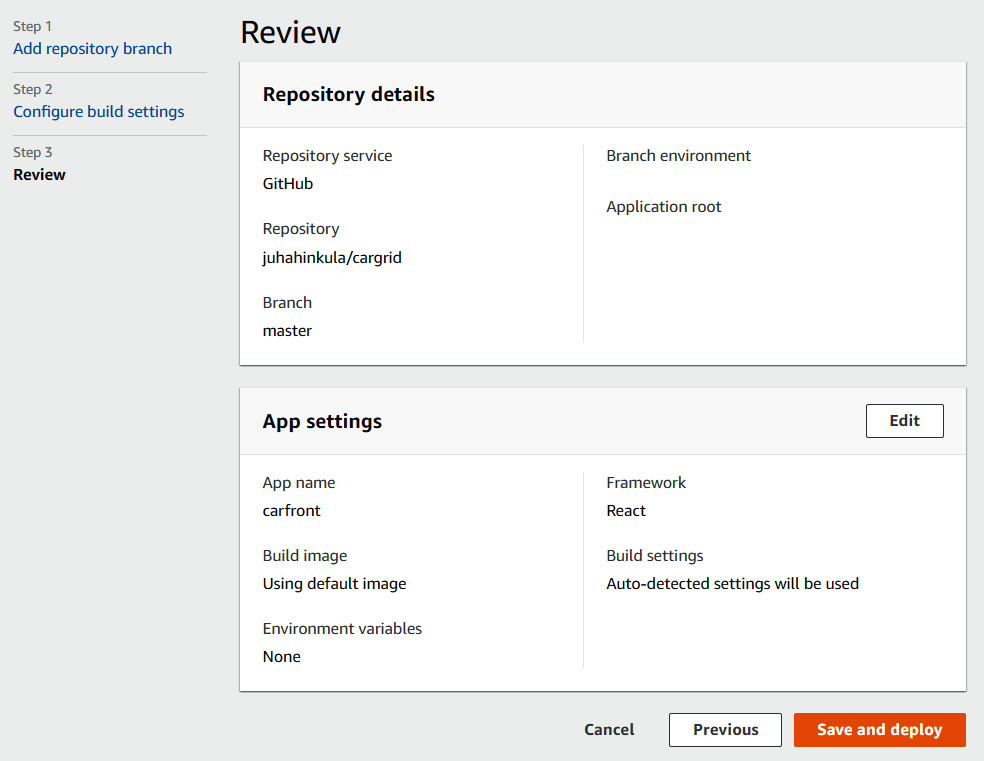
Figure 15.18 – Review settings
- Now, the deployment starts, and you can see a progress graph on this page, as illustrated in the following screenshot:
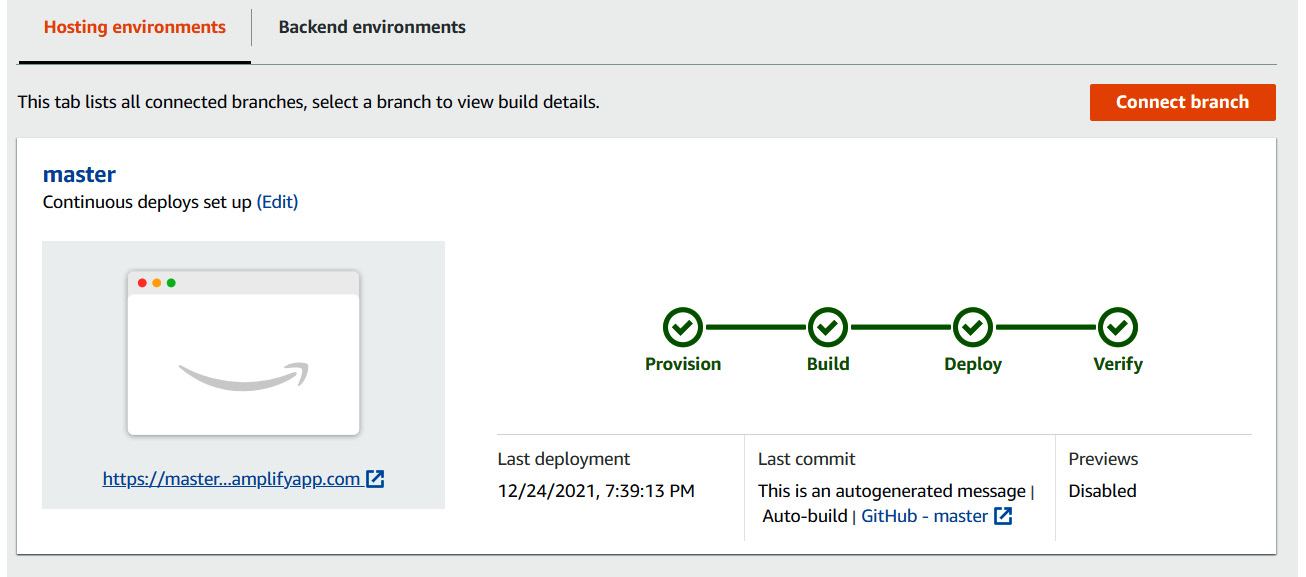
Figure 15.19 – Deployment
After the deployment is finished, you can get the URL of your frontend app from the previous screen or by selecting Domain management from the App settings menu, as illustrated in the following screenshot:
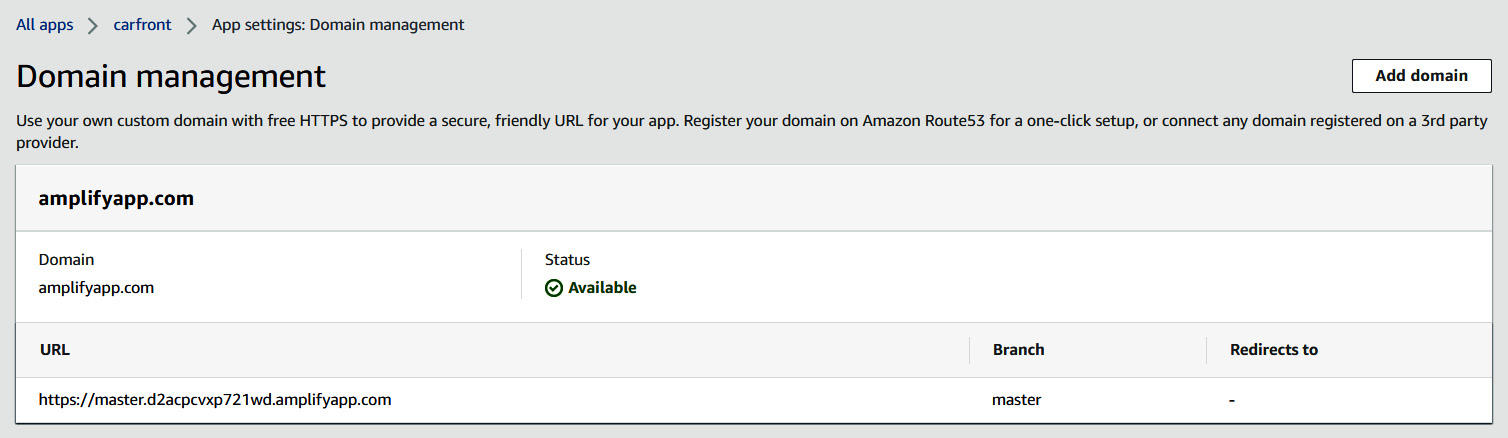
Figure 15.20 – Domain management
If you navigate to your frontend URL, you should see the login form, as follows:
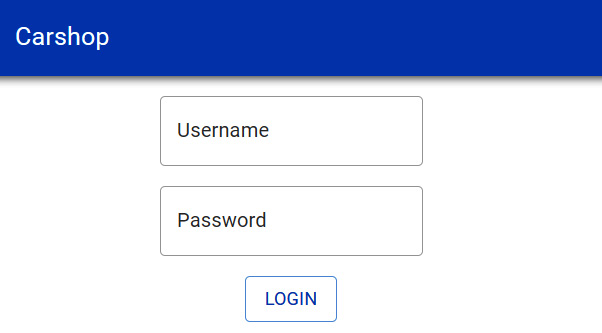
Figure 15.21 – Login screen
We have now deployed our frontend and we can continue with containers.
Using Docker containers
Docker is a container platform that makes software development, deployment, and shipping easier. Containers are lightweight and executable software packages that include everything that is needed to run software. In this section, we are creating a container from our Spring Boot backend, as follows:
- Install Docker on your workstation. You can find the installation packages at https://www.docker.com/get-docker. There are installation packages for multiple platforms, and if you have a Windows operating system, you can go through the installation wizard using the default settings. After the installation, you can check the current version by typing the following command in the terminal:
heroku --version
- First, we have to create an executable JAR file from our Spring Boot application, just as we did at the beginning of this chapter. Right-click your project in the project explorer and select Run as | Maven build... from the menu. Select your project in the Base directory field, using the Workspace… button. Type clean install into the Goals field and press the Run button. The process is illustrated in the following screenshot:

Figure 15.22 – Edit configuration and launch
- Once the build is finished, you can find the executable JAR file from the /target folder, as follows:
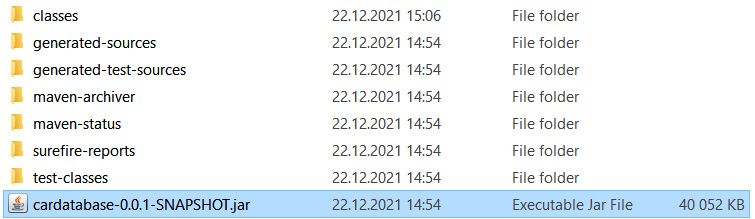
Figure 15.23 – Executable JAR file
- You can test that the build has executed correctly by running the JAR file with the following command:
java -jar .cardatabase-0.0.1-SNAPSHOT.jar
- You'll see the application's starting messages, and finally, your application will be running, as illustrated in the following screenshot:
Figure 15.24 – Running the JAR file
- Containers are defined by using Dockerfiles. Create a new Dockerfile in the root folder of your project and name it Dockerfile. The following lines of code show the contents of the Dockerfile. FROM defines the Java Development Kit (JDK) version, and you should use the same version that you used to build your JAR file. EXPOSE defines the port that should be published outside of the container. COPY copies the JAR file to the container's filesystem and renames it app.jar. ENTRYPOINT defines the command-line arguments that the Docker container runs:
FROM adoptopenjdk/openjdk11:latest
VOLUME /tmp
EXPOSE 8080
ARG JAR FILE
COPY target/cardatabase-0.0.1-SNAPSHOT.jar app.jar
ENTRYPOINT [“java","-jar","/app.jar"]
- Create a container with the following command. With the -t argument, we can give a friendly name to our container:
docker build -t carbackend .
At the end of the build, you should see a Building FINISHED message, as illustrated in the following screenshot:
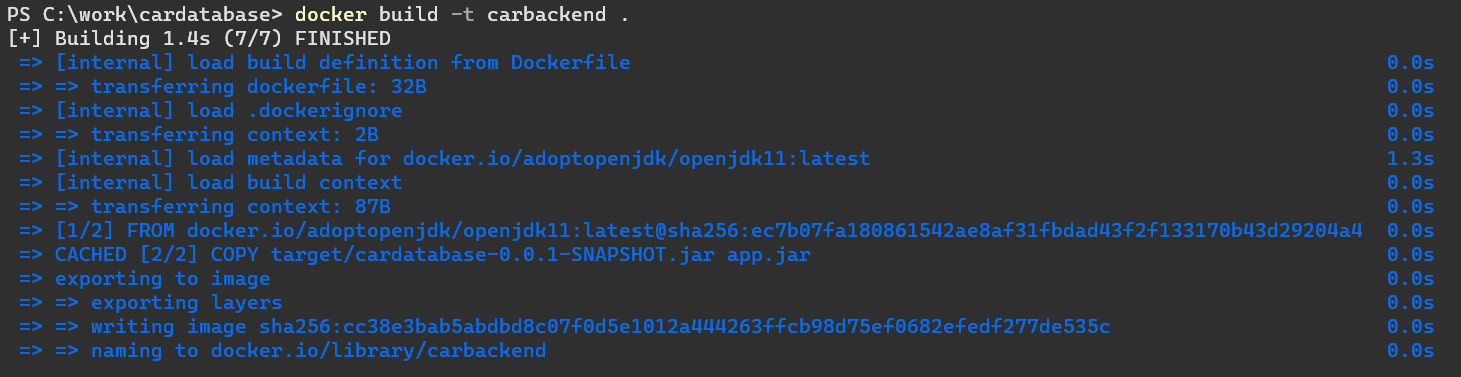
Figure 15.25 – Docker build
- Check the list of containers using the docker image ls command, as follows:

Figure 15.26 – Docker images
- Run the container with the following command:
docker run -p 4000:8080 carbackend
The Spring Boot application starts, but it ends with an error because we are trying to access the localhost database. The localhost now points to the container itself, and there is no MariaDB database installed.
- We will create our own container for MariaDB. You can pull the latest MariaDB database from Docker Hub using the following command:
docker pull mariadb:latest
After the pull command has finished, you can check that a new mariadb container exists by typing the docker image ls command again, as follows:

Figure 15.27 – Docker images
- Next, we run the mariadb container. The following command sets the root user password and creates a new database, called cardb, that we need for our Spring Boot application:
docker run –name cardb -e MYSQL_ROOT_PASSWORD=your_pwd –e MYSQL_DATABASE=cardb mariadb
- Now, we have to change the data source URL of our Spring Boot application. Open the application.properties file of your application and change the spring.datasource.url value to the following:
spring.datasource.url=jdbc:mariadb://mariadb:3306/cardb
After the changes, you have to recreate the JAR file and Spring Boot container, as we did previously. Before you can recreate the container, you have to delete the old one first by using the following command:
docker image rm carbackend --force
- After you have created a new carbackend container, we can run our Spring Boot container and link the MariaDB container to it using the following command. This command defines that our Spring Boot container can access the MariaDB container using the mariadb name:
docker run -p 8080:8080 --name carapp --link cardb:mariadb -d carbackend
- Now, when our application and database are running, we can access the Spring Boot application logs using the following command:
docker logs carapp
- And we can see here that our application is up and running:
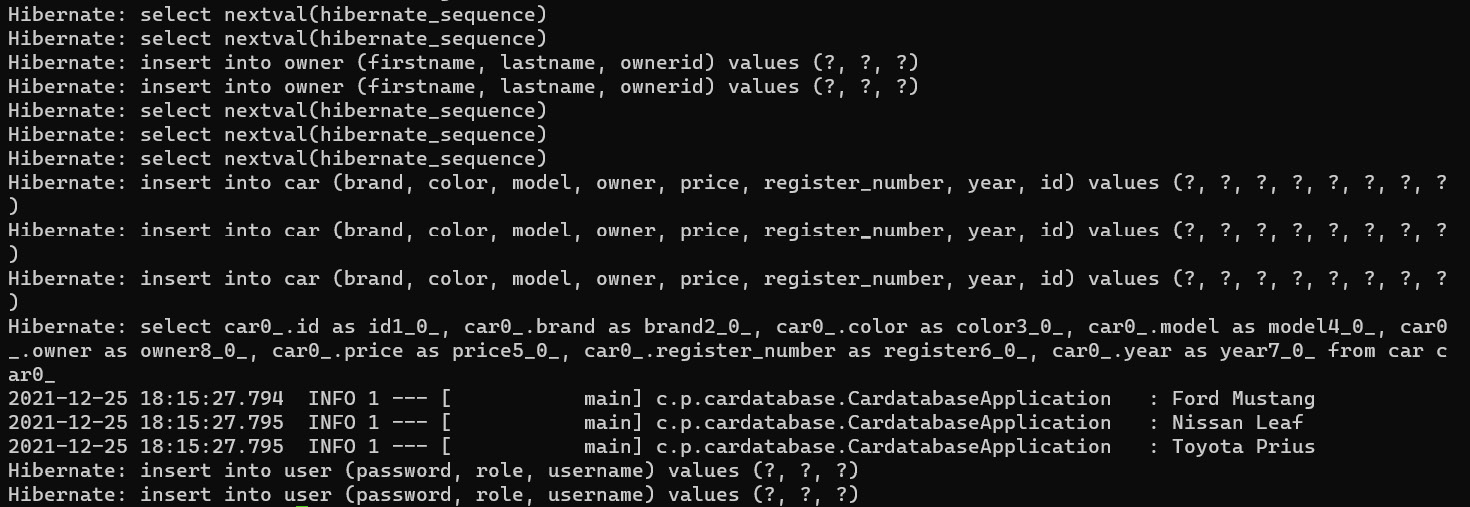
Figure 15.28 – Application log
We can see that our application has started successfully, and the demonstration data has been inserted into the database that exists in the MariaDB container.
Summary
In this chapter, you learned how to deploy the Spring Boot application. We went through the different deployment options for the Spring Boot application and deployed the application to Heroku. Next, we deployed our React frontend using AWS Amplify. Finally, we used Docker to create containers from our Spring Boot application and the MariaDB database.
In the next chapter, we will cover some more technologies and best practices that you should explore.
Questions
- How should you create a Spring Boot executable JAR file?
- How should you deploy a Spring Boot application to Heroku?
- How should you deploy a React app using AWS Amplify?
- What is Docker?
- How should you create a Spring Boot application container?
- How should you create a MariaDB container?
Further reading
Packt Publishing has other great resources available for learning about React, Spring Boot, and Docker. A couple of them are listed here:
- Mastering Docker, by Russ McKendrick (https://subscription.packtpub.com/book/cloud_and_networking/9781839216572/1)
- Docker for Developers, by Russ McKendrick and Scott Gallagher (https://subscription.packtpub.com/book/cloud_and_networking/9781789536058/1)