
Chapter 13: Testing Your Frontend
This chapter explains the basics of testing React apps. It will give us an overview of using Jest, which is a JavaScript testing framework developed by Facebook. We will look at how you can create new test suites and tests, and also how to run a test and work with the results. Unit tests make it easier to refactor and maintain code. Unit tests are also easy to automate, which allows us to run tests frequently.
In this chapter, we will cover the following topics:
- Using Jest
- Firing events in tests
- Understanding snapshot testing
Technical requirements
The Spring Boot application that we created in Chapter 5, Securing and Testing Your Backend, is required, as is the React app that we used in Chapter 12, Styling the Frontend with React MUI.
The code samples available at the following GitHub link will also be required to follow along with this chapter: https://github.com/PacktPublishing/Full-Stack-Development-with-Spring-Boot-and-React/tree/main/Chapter13.
Check out the following video to see the Code in Action: https://bit.ly/3NLSHIK
Using Jest
Jest is a testing framework for JavaScript developed by Facebook (https://jestjs.io/). Jest is widely used with React and provides lots of useful features for testing. You can create a snapshot test, whereby you can take snapshots from React trees and investigate how states are changing. Jest also has mock functionalities that you can use to test, for example, your asynchronous REST API calls. Jest also provides functions that are required for assertions in your test cases.
We will first see how you can create a simple test case for a basic JavaScript function that performs some simple calculations. The following function takes two numbers as arguments and returns the product of the numbers:
// multi.js
export const calcMulti = (x, y) => {
x * y;
}
The following code snippet shows a Jest test for the preceding function. The test case starts with a test method that runs the test case. The test method has an alias, called it, that can be used as well. The test method gets the two required arguments—the test name and the function that contains the test. expect is used when you want to test values, and it gives you access to multiple matchers.
The toBe function shown in the following code snippet is one matcher that checks whether the result from the function equals the value in the matcher. There are many different matchers available in Jest and you can find these from the Jest documentation:
// multi.test.js
import { calcMulti } from './multi';
test('2 * 3 equals 6', () => {
expect(calcMulti(2, 3)).toBe(6);
});
Jest comes with create-react-app, so we don't have to do any installations or configurations to start testing. It is recommended to create a folder called __test__ for your test files. The test files should have the .test.js extension. If you look at your React frontend in the Visual Studio Code (VS Code) file explorer, you can see that in the src folder, there is already one test file automatically created, and it is called App.test.js. You can see a representation of this in the following screenshot:
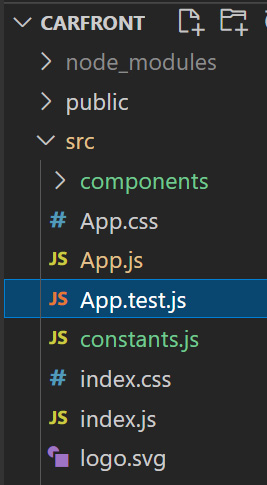
Figure 13.1 – Test file
The source code of the test file looks like this:
import { render, screen } from '@testing-library/react';
import App from './App';
test('renders learn react link', () => {
render(<App />);
const linkElement = screen.getByText(/learn react/i);
expect(linkElement).toBeInTheDocument();
});
The following test file renders the App component and tests whether the component renders a link element with 'learn react' text. This test case also uses React Testing Library (https://testing-library.com/), which comes with create-react-app. The screen object that we have imported from React Testing Library has different queries that are bound to document.body. For example, getByText is used to find 'learn react' substring text, and 'i' ignores case.
Important Note
React 18 requires React Testing Library version 13 or later. You can check the installed version from the package.json file.
You can run your tests by typing the following command into your terminal:
npm test
Or, if you are using yarn, type the following command:
yarn test
If the App.js file is modified and there is no link element, the test will fail. You will also see a reason for failure in the terminal, as illustrated in the following screenshot:

Figure 13.2 – Failed test run
If you create a React app using create-react-app and run the test without removing the link, the test will pass, as illustrated here:
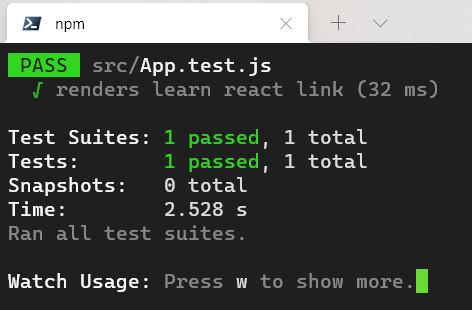
Figure 13.3 – Passed test run
Tests are run in watch mode, and every time your JavaScript files are modified and saved, it will rerun your tests automatically. You can stop the watch mode by pressing Q in the terminal.
We have now learned the basics of Jest and how to run tests in a React app.
Firing events in tests
React Testing Library provides a fireEvent method that can be used to fire Document Object Model (DOM) events in your test cases. In the following example, we will create a test case that opens our car addition modal form.
First, add the following imports to the App.test.js file:
import { render, screen, fireEvent } from '@testing-library/react';
import App from './App';
Next, we will create a new test case in the App.test.js file, as follows:
test('open add car modal form', () => {
});
Then, we use fireEvent.click, which creates a click event to a given DOM element. In our case, the DOM element is the button to open the modal form, and we can find it by using a getByText query, like this:
test('open add car modal form', async () => {
render(<App />);
fireEvent.click(screen.getByText('New Car'));
});
Finally, we verify that the modal dialog form is opened and there is 'New Car' text rendered (our modal form header text). We use the getByRole query to find our modal dialog. It can be used to query elements with a given role, and to check whether our MUI dialog component that we use in our modal form has a dialog role, as illustrated in the following code snippet:
test('open add car modal form', async () => {
render(<App />);
fireEvent.click(screen.getByText('New Car'));
expect(screen.getByRole('dialog')).toHaveTextContent
('New car');
});
Now, if you run the tests, you should see that two test cases are passed, as illustrated in the following screenshot:
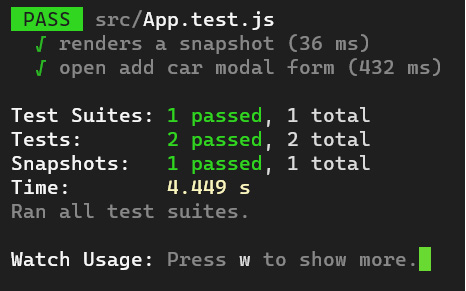
Figure 13.4 – Test run
There is also a user-event library available that contains more tools to simulate browser interactions than fireEvent.
Understanding snapshot testing
Snapshot testing is a useful way to test that there are no unwanted changes in your user interface (UI). Jest generates snapshot files when snapshot tests are executed. The next time tests are executed, the new snapshot is compared to the previous one. If there are changes between the content of the files, the test case fails, and an error message is shown in the terminal.
To start snapshot testing, perform the following steps:
- Install the react-test-renderer package. The --save-dev parameter means that this dependency is saved to the package.json file's devDependencies part, and it is only used for development purposes. If you type the npm install --production command in the installation phase, dependencies in the devDependencies part are not installed. So, all dependencies that are only required in the development phase should be installed using the --save-dev parameter, like this:
npm install react-test-renderer --save-dev
- After the installation, your package.json file contains the new devDependencies part, as illustrated in the following code snippet:
"devDependencies": {
"react-test-renderer": "^17.0.2"
}
- Let's now add a new snapshot test case to our App.test.js file. Remove the default test case from the file. The test case will create a snapshot test of our AddCar component. First, we add the following imports:
import TestRenderer from 'react-test-renderer';
import AddCar from './components/AddCar';
- Add the following test case to the App.test.js file. The test case takes a snapshot from our AddCar component and then compares whether the snapshot differs from the previous snapshot:
test('renders a snapshot', () => {
const tree = TestRenderer.create
(<AddCar/>).toJSON();
expect(tree).toMatchSnapshot();
});
- Run the test cases again by typing the following command in your terminal:
npm test
- Now, you can see the following message in the terminal. The test suite tells us the number of test files, and the tests tell us the number of test cases. We can also see that one snapshot file was written:
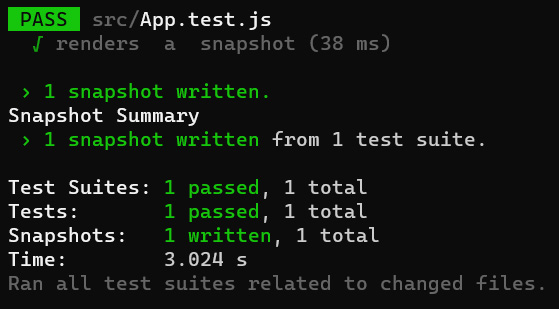
Figure 13.5 – Snapshot test
When a test is executed for the first time, a _snapshots_ folder is created. This folder contains all snapshot files that are generated from test cases. Now, you can see that there is one snapshot file generated, as shown in the following screenshot:
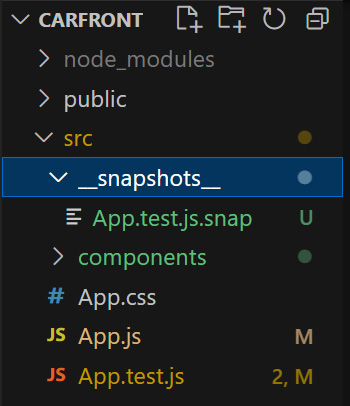
Figure 13.6 – Snapshots folder
The snapshot file now contains the React tree of our AddCar component. You can see part of the snapshot file in the following code block:
// Jest Snapshot v1, https://goo.gl/fbAQLP
exports['renders a snapshot 1'] = '
<div>
<button
className="MuiButton-root MuiButton-contained MuiButton
-containedPrimary MuiButton-sizeMedium MuiButton
-containedSizeMedium MuiButtonBase-root
css-sghohy-MuiButtonBase-root-MuiButton-root"
disabled={false}
onBlur={[Function]}
onClick={[Function]}
onContextMenu={[Function]}
onDragLeave={[Function]}
… continues
Now, we are ready with the basics of React testing.
Summary
In this chapter, we provided a basic overview of how to test React apps. Jest is a testing framework developed by Facebook, and it is already available in our frontend because we created our app with create-react-app.
We created a couple of tests with Jest and ran those tests to see how you can check the results of tests. We also learned the principles of snapshot testing.
In the next chapter, we will secure our application and add the login functionality to the frontend.
Questions
- What is Jest?
- How should you create test cases using Jest?
- How can you fire events in test cases?
- How should you create a snapshot test using Jest?
Further reading
Packt Publishing has other great resources available for learning about React and testing. A couple of them are listed here:
- Simplify Testing with React Testing Library, by Scottie Crump (https://www.packtpub.com/product/simplify-testing-with-react-testing-library/9781800564459)
- Mastering React Test-Driven Development, by Daniel Irvine (https://www.packtpub.com/product/mastering-react-test-driven-development/9781789133417)