JetBrains TeamCity is a commercial continuous integration server. TeamCity has a Professional Server license. This means that we can create 20 build configurations and one build agent. If we need more configurations or build agents, we can purchase other licenses. In this section, we will see how we can create a build plan with Gradle.
We can download installer software for Mac OS X, Windows, and Linux, from the JetBrains TeamCity website. We run the installer software to install TeamCity on our computer. TeamCity is also available as an archive for all platforms. To install the archive, we only have to unpack the contents to a directory on our computer. TeamCity is also available as a WAR file, which can be deployed to a Java web container.
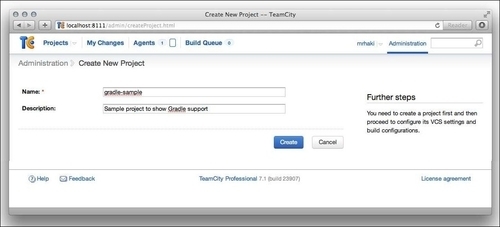
After we install TeamCity, we open a web browser and go to the URL http://localhost:8011/. We can create a new project from the Administration page. We can define the name of our project and provide a short description:
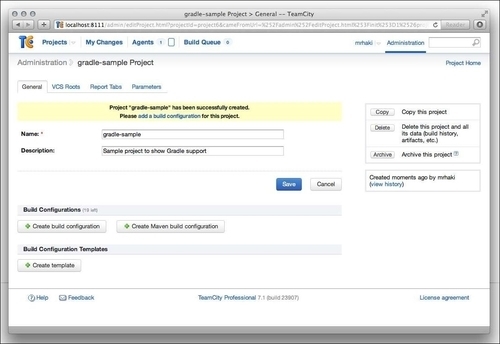
We click on the Create button to create the project and go to an overview page of our project:
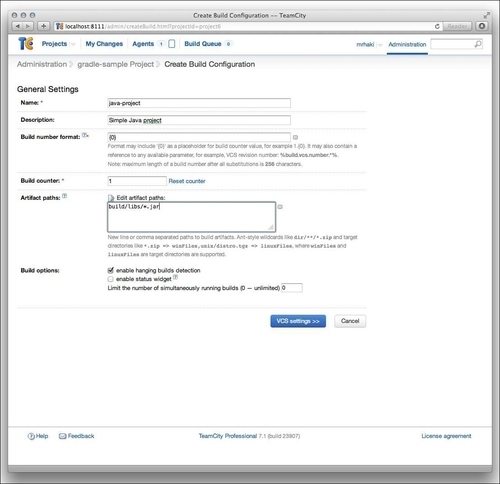
It is time to add a new build configuration. We click on the Create build configuration button in the Build Configurations section to add a build configuration. On the following screen, we can define the path of the artifacts in our project in the Artifact paths field. Here, we fill in build/libs/*.jar:
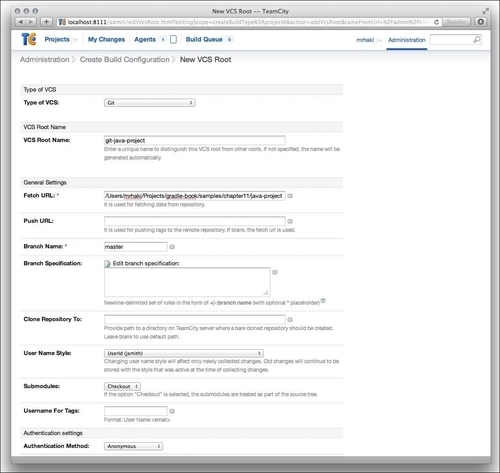
We must click on the VCS settings button to go to the next page and define our Git repository as version controller repository. Here, we must set the Fetch URL field with the location of the Git repository:
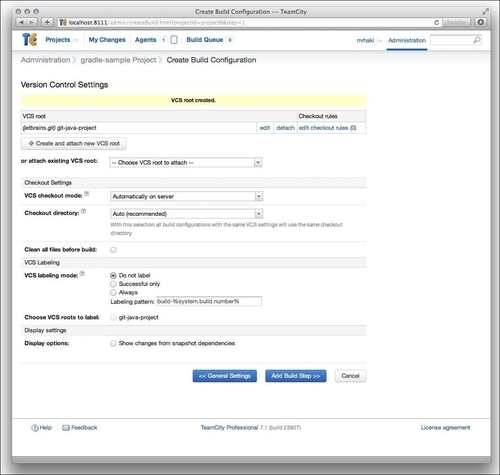
We save the configuration and return to an overview page with the VCS:
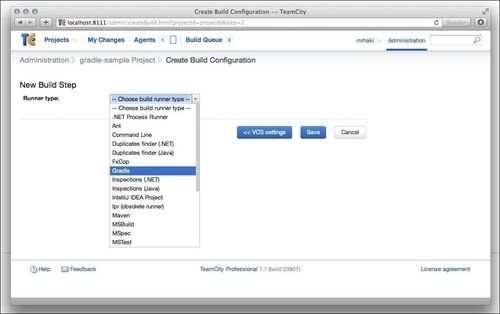
On this screen, we click on the Add Build Step button. We are taken to a new screen, where we can select the Runner type of the build. Here, we select the Gradle runner and click on the Save button:
We are on the configuration page for the build step:
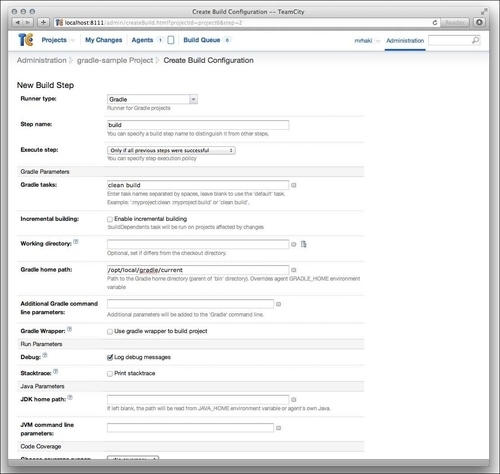
We can fill in a descriptive name for this build step in the Step name field. In the Gradle Parameters section, we can set the tasks in the Gradle tasks field. For our project, we want to invoke the clean and build tasks, so we fill in clean build. Note that we can enable Incremental building for multi-project builds. TeamCity will use the buildDependents task.
To set the Gradle version, we fill in the Gradle home path field. Extra command-line parameters can be filled in the Additional Gradle command line parameters field.
If our project has a Gradle wrapper, we can check the checkbox Gradle Wrapper. TeamCity will then use the gradlew or gradlew.bat scripts, instead of the Gradle home path location, to run Gradle.
We can save the build configuration, and we are ready to run it. At the top right, we can see the Run button with an ellipsis. When we click on the ellipsis, we get a dialog window with options that we can set before we run the build:
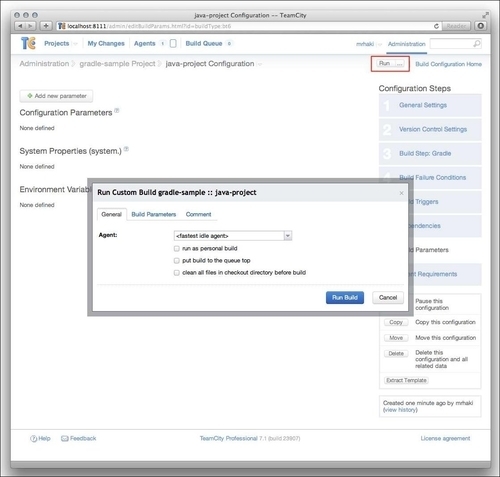
We leave all options unchanged and click on the Run Build button.
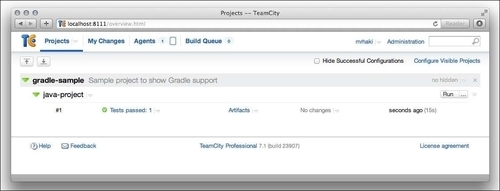
TeamCity instructs the build agent to run our build configuration. The code is checked out from the repository, and the Gradle tasks clean and build are invoked. On the Projects page, we see a summary of the build:
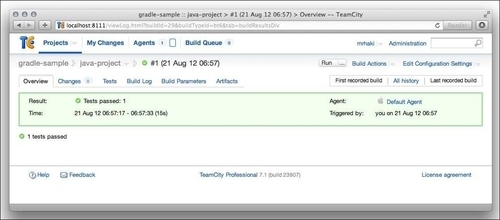
We can click on the project and see more details. The overview page of the project shows the date of the project build, the build agent used, and a summary of test results:
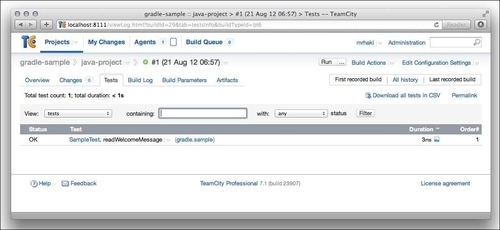
If we click on the Tests tab, we see the tests that have run and the time it took to execute them:
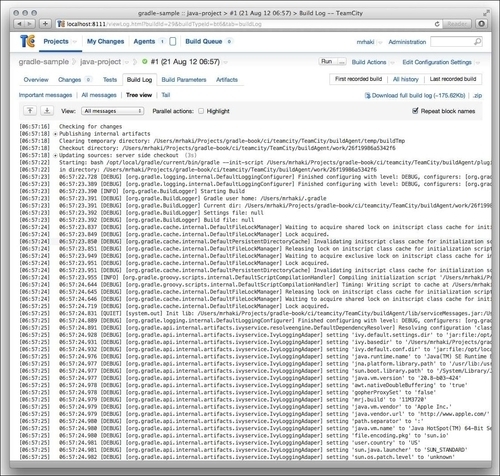
The Build Logtab page shows the output of the build process. Because we selected the debug level on the build configuration page, we see very detailed information here:
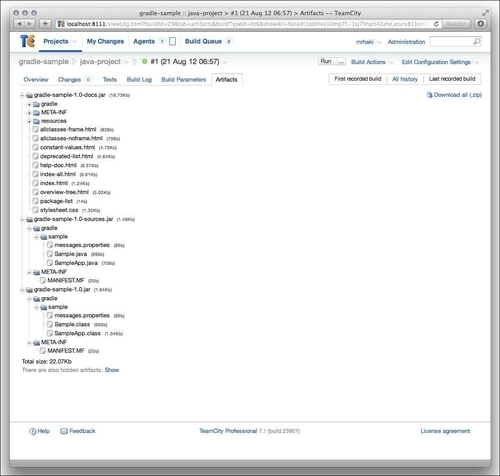
Finally, on the Artifacts page, we see the generated JAR files. We can click on the filename and see the contents of the files: