
We can generate IDEA project files with the IDEA plugin in our build file. IntelliJ IDEA has a Gradle plugin to import a Gradle project without first creating the project files. In this section, we learn how to use the Gradle plugin with IntelliJ IDEA 11.1.
We use the same project that was used with the Eclipse Gradle plugin to import the project into IntelliJ IDEA.
The Gradle plugin can be installed through the IntelliJ IDEA plugin manager. We need to go to IDE Settings in the Settings window, as shown in the following screenshot:
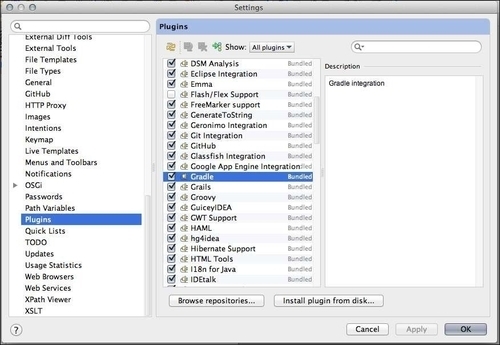
We select the Gradle plugin to install it in the IDE. Once we have installed the plugin, we can then import a project.
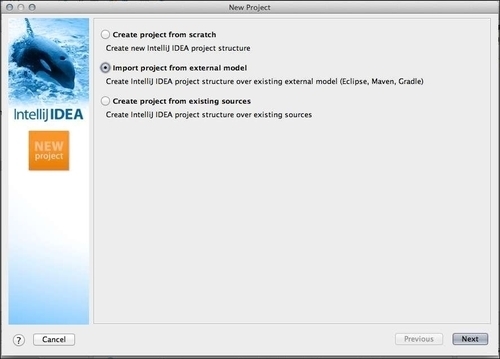
To import an existing Gradle project, we start the New project wizard. We select the New Project... option from the File menu. IntelliJ IDEA shows a dialog window in which we can choose the source of the new project. We select the Import project from external model option, as shown in the following screenshot:
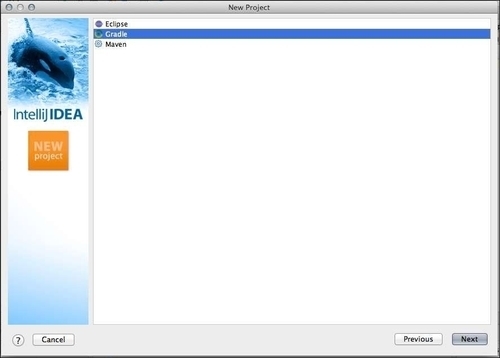
We click on the Next button and select Gradle as external model, as shown in the following screenshot:
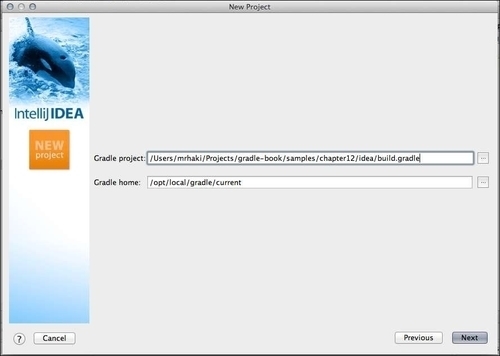
Now we can click on the Next button, and in the following window, we must fill in the location of the build.gradle file and the location of our Gradle installation as shown in the following screenshot:
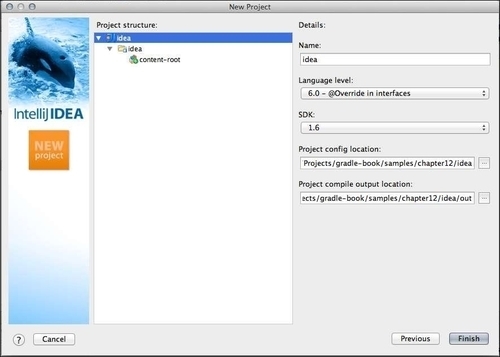
After we have filled in the values, we click on the Next button. IntelliJ IDEA will parse the build file and then show the determined Project structure in the following window. We can change the properties for the project, module, and content-root properties. In the following screenshot, we can see the properties that are set for the project property:
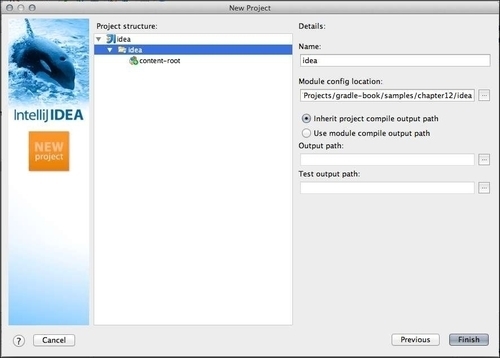
Next, we can see the properties that are set for the module property, as shown in the following screenshot:
In the following screenshot, we can see the properties that are set for the content-root property:

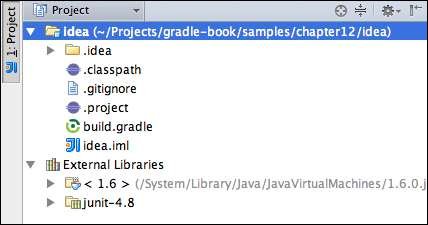
We click on the Finish button, and IntelliJ IDEA opens the new project. We can see the project and its dependencies, as shown in the following screenshot:
To see the Gradle project dependency structure, we can also open the JetGradle window. Here, we can see the differences between the IDEA module dependencies and the Gradle dependencies. We must click on the Refresh button to use the latest changes in the build.gradle file. For example, if we add a new compile dependency org.slf4j:slf4j-api:1.6.4, we must click on the Refresh button to see the changes, as shown in the following screenshot:
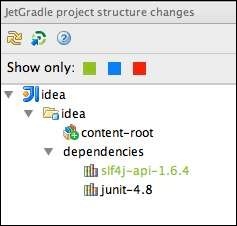
Notice that dependency name is in green. This means that the dependency is defined in the Gradle build file, but not in the IntelliJ IDEA module. We right-click on the dependency and then select Import to add the dependency to the IDEA module, as shown in the following screenshot:

If dependencies were added to the IDEA module, but not defined in the Gradle build file, the color of the dependency will be blue. Conflicting dependencies are shown in red.
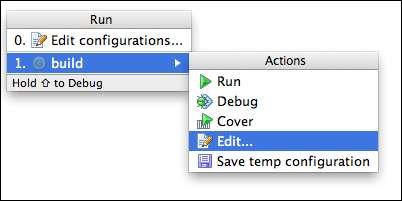
To execute Gradle tasks, we use IntelliJ IDEA's run/debug configurations. From the Run menu, select build. A pop-up menu is shown, and from here select the Edit... option, as shown in the following screenshot:
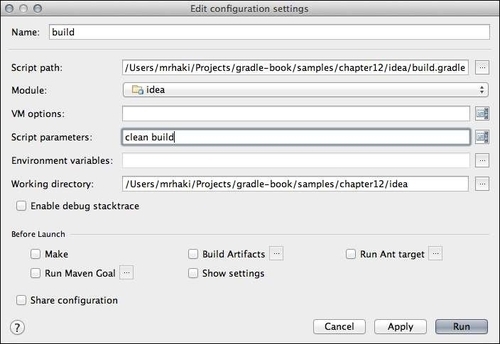
The Edit Configuration settings dialog window is then shown. This is the Groovy configuration dialog. In the Script parameters field, we can type the task names that we want to execute, as shown in the following screenshot:
We click on the Run button to execute the tasks. After the tasks are executed, we can see the output of the tasks in the Run window. The new configuration is added to the list of configurations. We can choose the configuration again to re-run the tasks.