The last continuous integration tool we are going to configure is Atlassian Bamboo. Bamboo is a commercial continuous integration server. There is a 30-day evaluation license available from the Atlassian website. We will see how we can configure Bamboo to use Gradle as a build tool for our Java project.
We can install Bamboo on our local computer. We first need to download the installation package from the Bamboo website. We can choose native installers for Mac OS X, Windows, and Linux. Alternatively, we can simply download a packaged version and unzip it to a directory on our computer. Finally, we can download a WAR file and deploy it to a web container.
Bamboo has no Gradle runner or plugin, but we can define a build plan and add a so-called script task. A script task can run any script as part of the build plan. To make sure Bamboo can build our Java project, we must add the Gradle wrapper scripts to the project.
We change our build.gradle file and add the task createWrapper:
// We create a Java project so we need the Java plugin
apply plugin: 'java'

// Set base name for archives.
archivesBaseName = 'gradle-sample'

// Version of the project.
version = '1.0'

// Definine Maven central repository for downloading
// dependencies.
repositories {
    mavenCentral()
}

// We have a single dependency on JUnit
// for the testCompile configuration
dependencies {
    testCompile 'junit:junit:[4.8,)'
}

// Extra task to create a JAR file with the sources.
task sourcesJar(type: Jar) {
    classifier = 'sources'
    from sourceSets.main.allSource
}

// Extra task to create a JAR file with Javadoc
// generated documentation.
task docJar(type: Jar, dependsOn: javadoc) {
    classifier = 'docs'
    from javadoc.destinationDir
}

// Add extra JAR file to the list of artifacts
// for this project.
artifacts {
    archives sourcesJar
    archives docJar
}

// Create Gradle wrapper
task createWrapper(type: Wrapper)
We run the createWrapper task from the command line. We now have the script files gradlew and gradlew.bat. Also, the directory gradle is created with the configuration for the Gradle wrapper. We add the directory and files to our Git repository:
$ git add .
$ git commit -m "Add Gradle wrapper output."
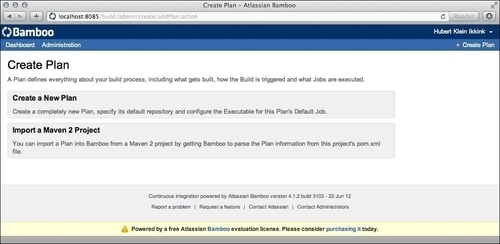
We are ready to create a new build plan in Bamboo. We start a web browser and open the URL http://localhost:8085/.After we have logged in to Bamboo, we select the Create Plan link. A new page is opened, where we can choose to create a new plan or Maven project:
We select the option Create a New Plan. We go to a new page, where we can set the properties of the build plan:
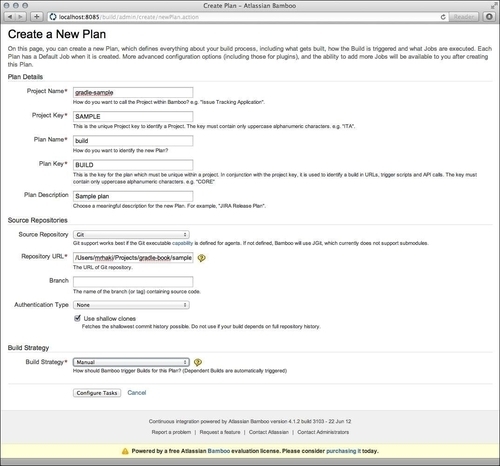
We must define a project name in the Project Name field. Bamboo also expects a short identifier in uppercase characters, as the project key, in the Project Key field. The plan that is part of the project also has a name and key; we fill these the Plan Name and Plan Key fields. We can set a short description in the Plan Description field.
In the Source Repositories section, we can define the Git repository location for our project.
Finally, in the Build Strategy section, we set the value of the Build Strategy drop-down box to Manual. This means we manually start the build via the run action in the Bamboo user interface.
We click on the Configure Tasks button to add tasks to our plan. A task contains some logic we want to execute as part of the plan.
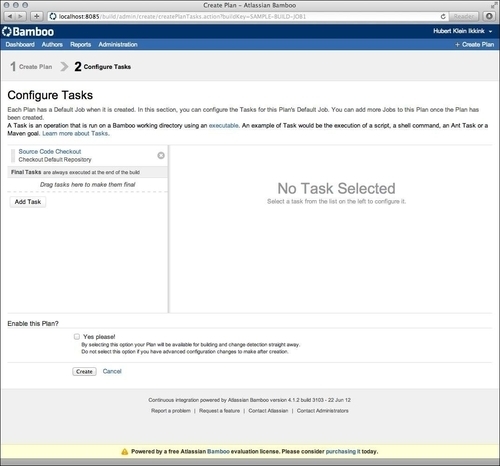
The first task is automatically added and is responsible for checking out the source code of the Git repository. We click on the Add Task button to create a new task.
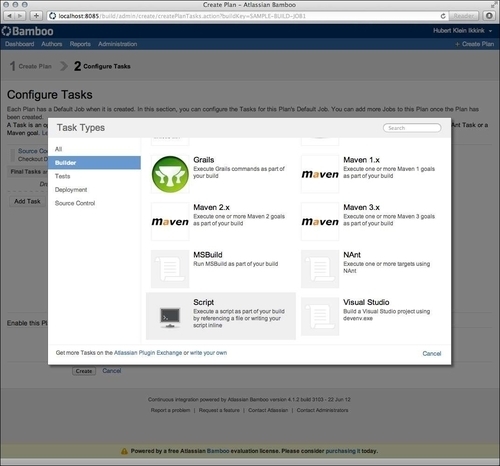
A dialog window is shown, and we select the Script task from the Builder section. With this task, we can configure the Gradle wrapper scripts to be executed.
We return to the tasks window, and we can fill in the fields under Script Configuration:
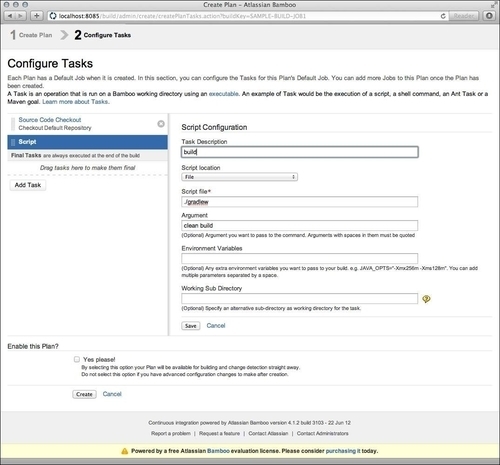
We fill in a description in the Task Description field. Script location must be set to File instead of Inline. The Script file field has the location of the gradlew or gradlew.bat script we want invoked.
In the Argument field, we pass the arguments to the gradlew script. We want to invoke the clean and build tasks, so we set the value to clean build.
We are ready to click on the Save button to save our script task configuration. The task is added to the list of tasks:
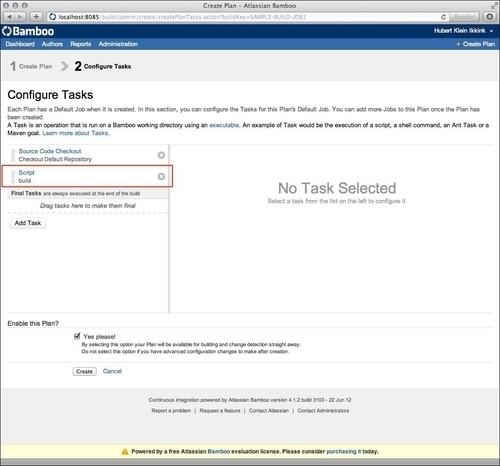
We enable the plan in the Enable this Plan? section by checking the checkbox Yes please!. Next, we click on the Create button to finish the configuration and save the plan in Bamboo.
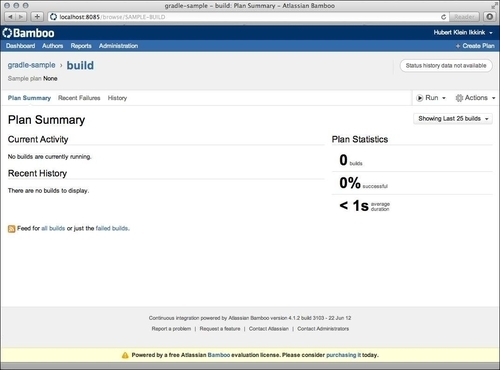
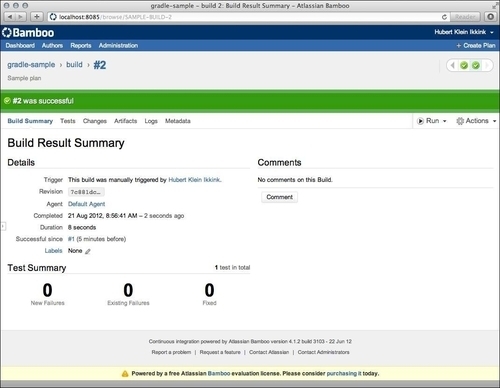
We are ready to run the build and click on the Run button at the top right of the page. While the build is running, we can see some of the log output. At the end of the log output, we can see that the gradle-1.1-bin.zip file is downloaded because of the Gradle wrapper script:

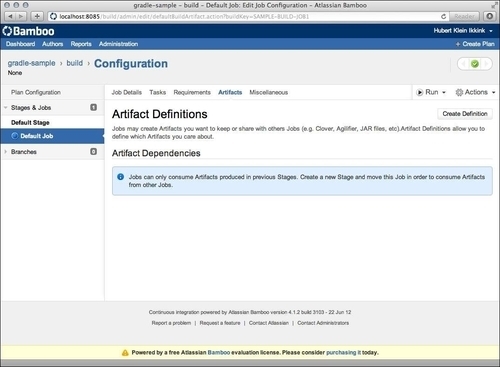
After the build is finished, we can see the results. We also want to add the project artifacts to our plan, and the test results as well. Therefore, we select the option Configure plan from the Actions menu:
We go to the Artifacts tab page and click on the Create Definition button to add a new artifact definition:
We see a dialog window, and we can define the name, location, and pattern of the artifacts:
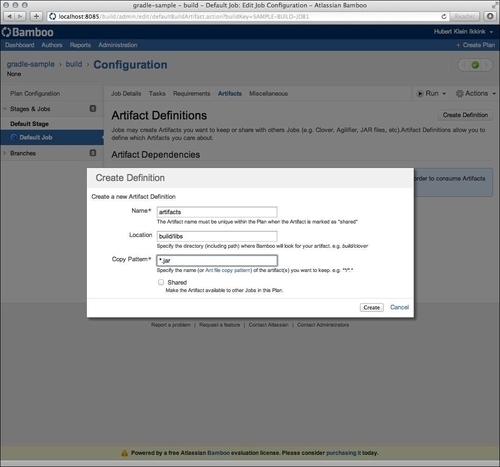
We fill in artifacts in the Name field and build/libs in the Location field. The Copy Pattern field is filled with the value *.jar, to include all JAR files. We click on the Create button to finish the configuration of the artifacts.
Next, we select the Tasks tab page and click on the Add Task button to create a new task:
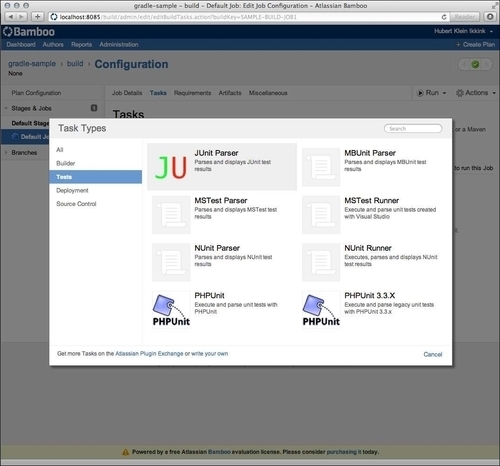
In the dialog window with task types, we select JUnit Parser from the Tests section. Bamboo shows the configuration fields for this task:
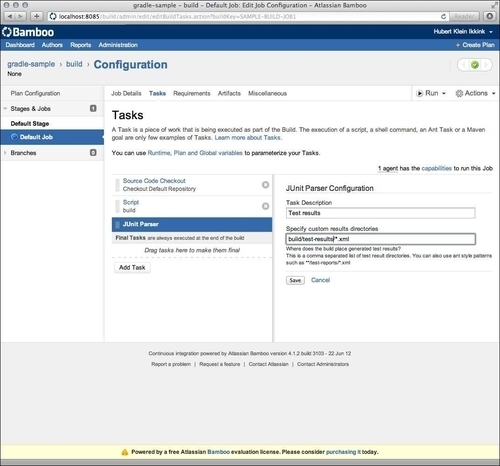
We set the Task Description with the value Test results. In the field Specify custom results directories, we set the pattern build/test-results/*.xml.
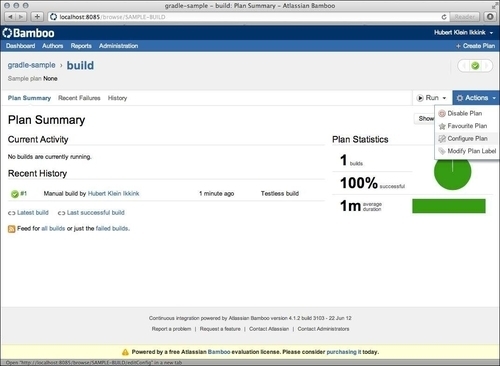
We are ready to run our plan again, but this time we have test results:
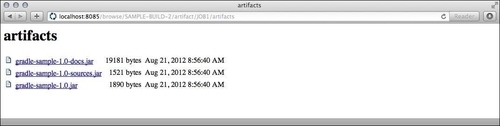
We click on the Artifacts tab and see that the plan has produced artifacts:
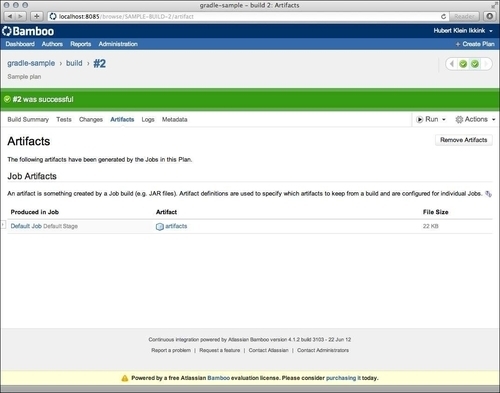
If we click on the artifacts link, we are taken to a page where we can download each artifact JAR file: