
In the previous section, we created a Java project with a web subproject. The web project has a simple servlet. To execute the servlet, we must create a WAR file and deploy the WAR file to a servlet container such as Tomcat or Jetty.
With the Jetty plugin, we can run our web project from the command line in a Jetty web container. We don't have to install Jetty on our computer; we only need to apply the Jetty plugin to our project. The plugin will take care of configuring Jetty and starting the web container. If everything is okay, we can open a web browser and access our servlet.
To add the Jetty plugin to our web project, let's create a new file, build.gradle, in the web directory. Here, we use the apply() method to add the Jetty plugin to the project:
apply plugin: 'jetty'
The plugin adds the following tasks to our project: jettyRun, jettyRunWar, and jettyStop. The following table shows the different tasks:
|
Task |
Depends on |
Type |
Description |
|---|---|---|---|
|
|
|
Start a Jetty web container and deploy the exploded web application. | |
|
|
|
Start a Jetty web container and deploy the WAR file. | |
|
|
|
Stop a running Jetty web container. |
We can test our servlet in a web browser after we execute the jettyRun or jettyWar task. We get the following output when we execute the jettyRun task from the root of the multi-project build:
root $ gradle :web:jettyRun
:common:compileJava UP-TO-DATE
:common:processResources UP-TO-DATE
:common:classes UP-TO-DATE
:common:jar UP-TO-DATE
:services:sample:compileJava UP-TO-DATE
:services:sample:processResources UP-TO-DATE
:services:sample:classes UP-TO-DATE
:services:sample:jar UP-TO-DATE
:web:compileJava UP-TO-DATE
:web:processResources UP-TO-DATE
:web:classes UP-TO-DATE
> Building > :web:jettyRun > Running at http://localhost:8080/web
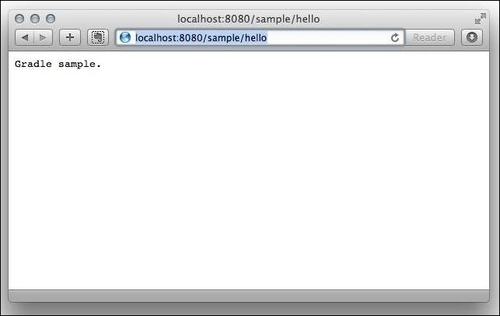
Gradle will keep running, and at the end, we see that the application is running at http://localhost:8080/web. We can open a web browser and access our web application. In the following screenshot, we see the output of the servlet:
To stop the Jetty web container, we press Ctrl+ C at the command line, to return to our prompt.
We can change the port number via the Project convention property, httpPort, added by the Jetty plugin or the task property, httpPort, of the jettyRun and jettyRunWar tasks. To change the context path, we can set the contextPath property of the jettyRun and jettyRunWar tasks.
If we want the Jetty container to automatically scan for changes, we can set the reload property to automatic. If the property is set to manual, we must press Enter on the command line, to reload changes. We can set the scan interval in seconds, with the property scanIntervalSeconds
In the following sample build file, we customize the Jetty web container with another HTTP port, context path, and automatic reloading:
apply plugin: 'jetty'

httpPort = 8090

jettyRun {
    contextPath = 'sample'
    reload = 'automatic'
    scanIntervalSeconds = 10
}
We can even customize the Jetty container further with custom Jetty configuration files. We could use the jettyRun task property, jettyConfig, to use configuration files. Or, we can add extra runtime libraries with the
additionalRuntimeJars property.
If we want to use the jettyStop task, we must also define the stopPort and stopKey properties in either our Project or task. If we have defined these properties, we can open a new command-line prompt and invoke the
jettyStop task to stop a running Jetty web container.
In the following example build file, we apply some of these properties and methods to customize the Jetty configuration:
apply plugin: 'jetty'

configurations {
    jettyAdditionalLibs
}

dependencies {
    jettyAdditionalLibs 'org.slf4j:slf4j-simple:1.6.6'
}

// Properties for stopping Jetty with jettyStop
stopPort = 8109
stopKey = 'JettyStop'

jettyRun {
    // External Jetty configuration file.
    jettyConfig = file('src/jetty/jetty.xml')

    // Extra libraries for Jetty runtime.
    additionalRuntimeJars configurations.jettyAdditionalLibs
}