
Sometimes when the requirements are too high and not related to the editor itself, there is also an option to create a Visual Studio Package for the project. The Visual Studio Package project creates a basic VSPackage. The template has the written code ready to implement a MenuItem class or a tool window.
Open Visual Studio and create a project from Visual Studio Package. Visual Studio Package is a complete installation of Visual Studio, which is signed with a valid key. We name the project VSPackageSample.
Once you select the project type, you will be provided with a wizard, as shown in the following screenshot:
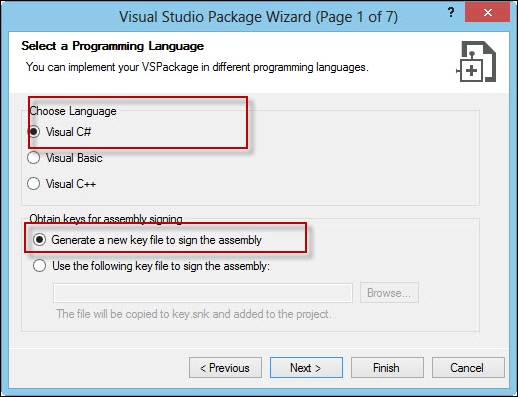
As we know, the Visual Studio Package is a complete install for Visual Studio, so it needs a singing assembly. We choose Generate a new key file to sign the assembly to move forward. You can even select a key for yourself using the Use the following key file option, as shown in the following screenshot:
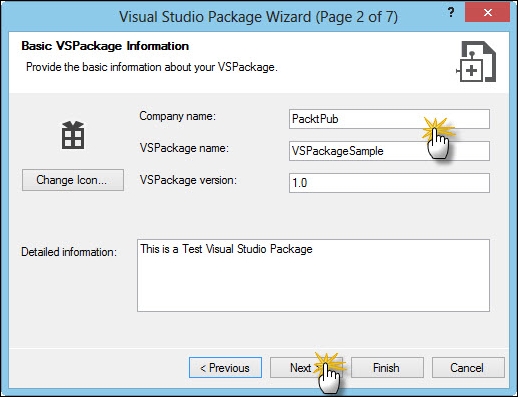
The next screenshot asks for the company name and basic package configuration. You can pick the icon here for the project and also provide a detailed description.
Here, we also need to choose what type of extensions we want to include.
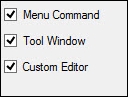
There are three options. One is Menu Command, which will add a menu to the tools menu and can be invoked to call a method you specify. You can also choose Tool Window to open a window and Custom Editor to edit something inside the IDE. The tool window is a WPF control, while the custom editor is Windows Forms Control.
Now, let's create a
VSPackage extension to implement such an editor:
- After you finish the wizard, the entire project is created. There are a number of files to work on. The very entry point of the project is the
VSPackageSamplePackage.csfile. Open the file and you will see a class that inherits from thePackageclass. - In the Package Members section, you will see how the menu and the command are initialized:
// Add our command handlers for menu (commands must exist in the .vsct file)
OleMenuCommandService mcs = GetService(typeof(IMenuCommandService)) as OleMenuCommandService;
if ( null != mcs )
{
    // Create the command for the menu item.
    CommandID menuCommandID = new CommandID(GuidList.guidVSPackageSampleCmdSet, (int)PkgCmdIDList.cmdidMyCommand);
    MenuCommand menuItem = new MenuCommand(MenuItemCallback, menuCommandID );
    mcs.AddCommand( menuItem );
    // Create the command for the tool window
    CommandID toolwndCommandID = new CommandID(GuidList.guidVSPackageSampleCmdSet, (int)PkgCmdIDList.cmdidMyTool);
    MenuCommand menuToolWin = new MenuCommand(ShowToolWindow, toolwndCommandID);
    mcs.AddCommand( menuToolWin );
}
In the preceding code, a
MenuCommandclass is created formenuItemandToolWindow. Both are added to theOleMenuCommandServiceclass. TheMenuCommandServiceclass lets you define the menu for the commands. - When the menu is clicked,
ShellMessageis invoked to showMessageBoxon the IDE. The menu will appear in the Tools menu. TheMenuItemCallbackclass usesuiShell.ShowMessageBoxto show the message:Microsoft.VisualStudio.ErrorHandler.ThrowOnFailure(uiShell.ShowMessageBox( 0, ref clsid, "VSPackageSample", string.Format(CultureInfo.CurrentCulture, "Inside {0}.MenuItemCallback()", this.ToString()), string.Empty, 0, OLEMSGBUTTON.OLEMSGBUTTON_OK, OLEMSGDEFBUTTON.OLEMSGDEFBUTTON_FIRST, OLEMSGICON.OLEMSGICON_INFO, 0, // false out result));You can write your custom code to invoke selection of the menu.
- On the contrary,
ToolWindowopens up theMyControl.xamlfile. You can designToolWindowusing XAML and show the content directly inside Visual Studio:ToolWindowPane window = this.FindToolWindow(typeof(MyToolWindow), 0, true); if ((null == window) || (null == window.Frame)) { throw new NotSupportedException(Resources.CanNotCreateWindow); } IVsWindowFrame windowFrame = (IVsWindowFrame)window.Frame; Microsoft.VisualStudio.ErrorHandler.ThrowOnFailure(windowFrame.Show());The window frame is created and the control gets loaded inside the frame to ensure there is a consistent feel to the IDE.
- Open the
MyControl.xamlfile and you will see a button placed inside the IDE, so that when the control is invoked,MessageBoxwill be shown. You can openToolWindowby navigating to View | OtherWindow | CommandExplorer.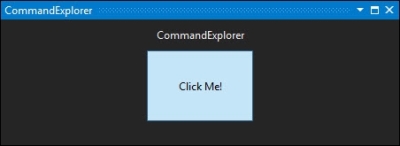
The window currently does nothing. It has a button, which can be clicked to open a
MessageBox. - There are some additional files such as
EditorFactory. This is the main editor class that handles the instance creation and destruction of the editor. TheEditorFactoryclass is registered to the extension and automatically called whenever any component of the editor is called. - Finally, when your package is built successfully, you can double-click on the
vsixfile on the debug screen to run and install the extension to Visual Studio.
The VS Package is the main packager for Visual Studio extensions. Visual Studio packager allows you to add UI elements to the IDE to provide a better experience for the user. You can deploy any package, either distributing manually or through the Visual Studio gallery, such that developers can download and use the extension that you have created.
The main criterion for the package to execute is written inside the VSPackageSamplePackage file. Here, the ProvideToolWindow function registers the extension tool window for the package. The EditorFactory class is registered for additional extension components and the VSPackageSamplePackage class itself creates the menu items.
After you compile the project, a VSIX file gets created. This file is nothing but a zipped archive with all the deployable components. Rename the file to a .zip extension, and you will see the following content:
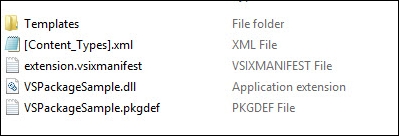
The pkgdef file is the package definition file, which stores all the metadata associated with the extension. The extension.manifest file is the manifest file for the extension. The manifest file includes the name of the extension, details, description, and so on. The main code is compiled as a .dll file, which represents the actual extension.
The Visual Studio extensions can be deployed and/or uploaded directly to the Visual Studio gallery at http://visualstudiogallery.msdn.microsoft.com/.