
Google Analytics is a popular service used to measure and record website traffic and activities. Most likely, your organization uses Google Analytics, or a similar service, to gather analytics about visitors to your site. Using a Titanium module, you can use the same Google Analytics platform within your app. This approach allows you to view both your mobile and web traffic in one easy-to-use dashboard.
In this recipe, we will demonstrate how to submit both "page view" and "action" events to your Google Analytics dashboard.
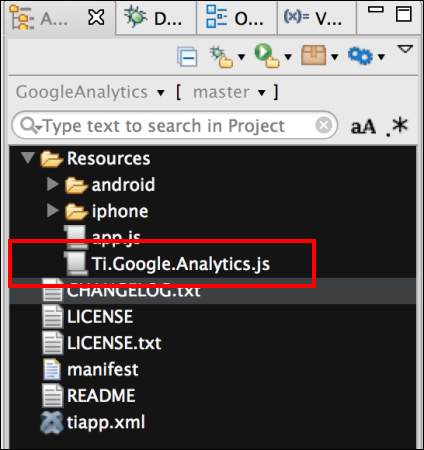
This recipe uses the Ti.Google.Analytics CommonJS module. This module and other code assets can be downloaded from the source code provided by the book, or individually through the links provided in the See also section at the end of this recipe. Installing this module into your project is straightforward. Simply copy the Ti.Google.Analytics.js file into your project, as shown in the following screenshot:
Once you've added the Ti.Google.Analytics.js file to your project, you need to create your application namespaces in the app.js file and use require to import the module into your code, as shown in the following code block:
//Create our application namespace
var my = {
  gAnalyticsModule : require('Ti.Google.Analytics'),
  isAndroid : (Ti.Platform.osname === 'android'),
  session:{}
};The next step in the recipe requires you to have a Google Analytics key. To obtain a key, please register your app at www.google.com/analytics. Once you have a key, you will need to create a new instance of the Analytics module and provide your analytics key, as shown here:
my.session.ga = new my.gaModule('YOUR_KEY_HERE'),Helper functions help to provide more meaningful information about the user's device. These functions are used throughout the recipe whenever a PageView action is fired.
- The following snippet demonstrates how the
isTabletproperty is attached to the application namespace on starting an app. This property is used by other functions to indicate if the app is running on a phone or tablet.my.isTablet = (function() { var tabletCheck = Ti.Platform.osname === 'ipad' || (Ti.Platform.osname === 'android' && (!(Math.min( Ti.Platform.displayCaps.platformHeight, Ti.Platform.displayCaps.platformWidth ) < 700))); return tabletCheck; })(); - The
basePageproperty works in a way similar to website routing, and sets the first part of the URL (that is sent to Google) as a device indicator. In Google Analytics, this will allow you to better segment usage patterns by device.my.basePage = (function(){ if(my.isAndroid){ return ((my.isTablet)? 'AndroidTablet' : 'AndroidPhone'), }else{ //Return iPhone or iPad return Ti.Platform.model; } })();
The next step is to call the start method. This will enable the module to start collecting analytics requests. The start method takes an integer value with the number of seconds on how often you wish the module to send queued analytics to Google. This is handled internally by the module using an interval timer.
my.session.ga.start(10);
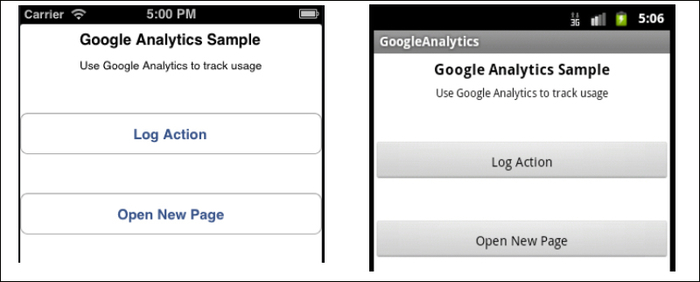
This section of the recipe outlines the sample UI used to trigger and submit Google Analytics requests.
- First, a
Ti.UI.Windowis created to anchor all UI controls.var win = Ti.UI.createWindow({ backgroundColor:'#fff', layout:'vertical' }); - After creating our window, two
Ti.UI.Buttoncontrols are added. These buttons will be used later in the recipe to demonstrate how to create atrackEventorPageviewevent.var button1 = Ti.UI.createButton({ title: 'Log Action', top:40, height:45, width:Ti.UI.FILL }); win.add(button1); var button2 = Ti.UI.createButton({ title: 'Open New Page', top:40, height:45, width:Ti.UI.FILL }); win.add(button2);
The trackEvent function
allows you to publish granular event tracking to Google Analytics. This method requires the following parameters that will be used to publish actions to your Google Analytics dashboard:
- Category: Typically, the object that was interacted with (for example, a button)
- Action: The type of interaction (for example, a click)
- Label: Useful for categorizing events (for example, nav buttons)
- Value: Values must be non-negative. Useful to pass counts (for example, four times)
The next snippet demonstrates how to call the trackEvent method when button1 is pressed. On firing of the button's click event, the trackEvent method is called with a category of button, an action of click, a label of recipe_button, and a value of trigger_event.
  button1.addEventListener('click',function(e){
    my.session.ga.trackEvent('button','click', 'win_button', 'trigger_event'),
  });
The trackPageview function is used to mimic the page traffic or views displayed in your Google Analytics dashboard. Using the basePage properties created earlier, you can create device-specific window tracking by using the convention shown in the following code block:
  win.addEventListener('open',function(e){
    my.session.ga.trackPageview(my.basePage + "/Main");
  });
  win.open();
The following section of the recipe demonstrates how to use the trackPageview and trackEvent methods to record when and how a child window or view is opened. When the user presses button2 and the click event is fired, the Google Analytics module is used to log each step of the navigation process.
button2.addEventListener('click',function(e){- Use the
trackEventmethod to record that the button to open a child window has been pressed:my.session.ga.trackEvent('button','click', 'win_button', 'open_win2'),You need to provide the following parameters to the
trackEventmethod:- Category: A category value of
buttonis provided in this sample - Action: An action value of
clickis provided in this sample - Label: A label value of
win_buttonis provided in this sample - Value: A value of
open_win2is provided in this sample
- Category: A category value of
- Create a new window to demonstrate the
trackPageviewfunctionality on a child window.var win2 = Ti.UI.createWindow({ backgroundColor:'yellow', layout:'vertical' }); - On loading of the
win2window, thetrackPageviewmethod is called, recording that the individual has viewed the page. Themy.basePageis used to create a route showing which type of device accessed the/win2window.win2.addEventListener('open',function(e){ my.session.ga.trackPageview(my.basePage + "/win2"); }); win2.open({modal:true}); });
- This recipe uses a modified version of Roger Chapman's Titanium Mobile Google Analytics module. To learn more about this module, please visit http:// github.com/rogchap/Titanium-Google-Analytics.
- For more information on detecting different device characteristics, see the Using platform indicators recipe in Chapter 1, Patterns and Platform Tools.