URL schemes on iOS and intent filters on Android provide an open integration point for you to expose functionality in your apps to others. This is particularly helpful if you are building a suite of enterprise apps such as a separate mileage and expense app and want to allow for integration points between them.
This recipe demonstrates how to create a cross-platform URL scheme within your Titanium Enterprise app. We will illustrate how to use this open integration point to access functionality within your Titanium app.
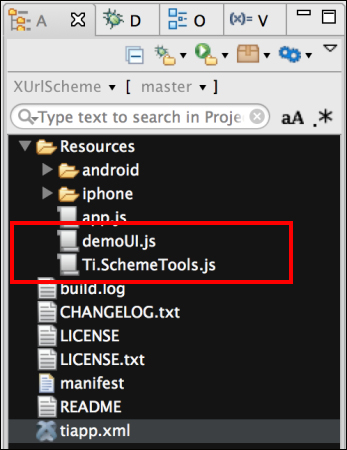
This recipe uses the demoUI and Ti.SchemeTools CommonJS libraries to help manage and demonstrate how to create cross-platform URL schemes. This module and other code assets can be downloaded from the source provided by the book. To install these modules, simply copy them to the Resources folder of your Titanium project as demonstrated in the following screenshot:
After adding the demoUI and Ti.SchemeTools modules, you will need to create your application namespaces and use require to import the module into your app.js as the following code snippet demonstrates:
//Create our application namespace
var my = {
  isAndroid : Ti.Platform.osname === 'android',
  scheme : require('Ti.SchemeTools'),
  ui : require('demoUI')
};To add the ability for other apps to launch this recipe, you must make a few updates to the tiapp.xml file. The following steps discuss how to create the bencoding-linkrecipe custom URL scheme:
- First, open your project's
tiapp.xmlfile and make the following changes to theiosnode:<ios> <plist> <dict> - Next, add the
CFBundleURLTypesnode. This is an array of dictionaries describing the URL schemes supported by the bundle. Under this node, you will list all of the URL and scheme names your app will respond to.<key>CFBundleURLTypes</key> <array> <dict> - Then add the
CFBundleURLNamekey. This key contains the abstract name for this URL type. This is the main way to refer to a particular app. To ensure uniqueness, it is recommended that you use a Java-package style identifier.<key>CFBundleURLName </key> <string>bencoding-linkrecipe</string> - Finally, add the
CFBundleURLSchemeskeys. These keys contain an array of strings, each of which identifies a URL scheme handled by this type. The following snippet shows URLs for the login, about, and root activities of the app:<key>CFBundleURLSchemes</key> <array> <string>bencoding-linkrecipe</string> <string>bencoding-linkrecipe://about</string> <string>bencoding-linkrecipe://login</string> </array> </dict> </array> </dict> </plist> </ios>
To create a custom URL scheme on Android, you will need to edit the tiapp.xml file to add an intent filter to listen for the specific android:scheme and android:host to be initialized.
- First open the
tiapp.xmlfile and edit the android configuration node.<android xmlns:android="http://schemas.android.com/apk/res/android">
- Next, add the
manifestnode.<manifest>
- Add the
applicationnode. This node will later be used to generate your project'sAndroidManifest.xmlfile, so make sure the attributes correctly match your project.<application android:debuggable="false" android:icon= "@drawable/appicon" android:label= "XUrlScheme" android:name="XurlschemeApplication"> - Next add the application's root activity.
<activity android:configChanges="keyboardHidden|orientation" android:label="XUrlScheme" android:name=".XurlschemeActivity" android:theme="@style/Theme.Titanium"> - Then add the app's main intent filter. This will be used to launch your app.
<intent-filter> <action android:name= "android.intent.action.MAIN"/> <category android:name= "android.intent.category.LAUNCHER"/> </intent-filter> - Next add a second intent filter with your custom URL information.
<intent-filter>
- Then add the data node with your
android:schemeandandroid:hostinformation. These values act as the protocol used whenTi.Platform.openURLis used to launch the URL scheme. The following highlighted code allows you to launch the app using a URL such asbencoding-linkrecipe://com.bencoding.<data android:scheme="bencoding-linkrecipe" android:host="com.bencoding"/> - Next a category must be added to the intent filter so that the app will be exposed correctly to third-party launchers and will open the app when the URL scheme is called. The following highlighted snippet shows the category information needed to correctly implement the custom URL scheme.
          <category android:name=
          "android.intent.category.DEFAULT" />
          <category android:name=
          "android.intent.category.BROWSABLE" />
          <action android:name=
          "android.intent.action.VIEW" />

        </intent-filter>

      </activity>
    </application>
  </manifest>
</android>
This recipe has a simple UI designed to demonstrate how different URL scheme features can be implemented.
- First, a
Ti.UI.Windowis created; this window is the rootTi.UI.Windowof the app.var win = Ti.UI.createWindow({ backgroundColor: '#fff', title: 'Url Receiver', barColor:'#000',layout:'vertical',fullscreen:false }); - Next if the recipe is running on an iOS device, a
Ti.UI.Buttonis added to allow the URL Receiver app to launch the App Launcher app created in the Launching one app from another recipe discussed earlier in this chapter.if(!my.isAndroid){ var launcherButton = Ti.UI.createButton({ title:'Press to open AppLauncher Sample', top:30, left:10, right:10, height:45 }); win.add(launcherButton); - When the
launcherButtonis tapped, the app will try to open the App Launcher if the app is available on the device. The highlighted code demonstrates how to use theTi.Platform.openURLmethod to launch the app.launcherButton.addEventListener('click',function(e){ if(Ti.Platform.canOpenURL( "bencoding-linkLauncher://") ){ Ti.Platform.openURL( "bencoding-linkLauncher://"); }else{ alert("Please install the AppLauncher Recipe"); } }); }
This recipe uses the assist object to help launch a different URL.
var assist = {- The
openWindowmethod opens a specific window based on the URL and parameter values provided.openWindow : function(url,params){ if(url == 'about'){ my.ui.openAboutWindow(); } if (url =='login'){ my.ui.openLoginWindow(params); } }, - The
openPageFromUrlmethod is called when an app is opened or resumed to determine if the app has been opened from a third-party app and if so, what routing information has been provided.openPageFromUrl : function(){ - The first step is to determine if the app has been opened from a third-party app. This is done by checking the
hasLaunchUrlmethod.if(!my.scheme.hasLaunchUrl()){ - If the app has not been launched from another app, the main page of the recipe will be displayed and any session variables will be reset.
my.scheme.session.reset(); return; } - If the app was launched by another app, we first need to check if the launching URL has changed. This avoids reloading the app if the same window has been requested. This can be done by calling the
hasChangedmethod as highlighted in the following code snippet:if(!my.scheme.session.hasChanged()){ return; } - Next the URL to be launched is obtained by calling the
getLaunchUrlmethod as the following code snippet shows. This URL is then loaded into asessionvariable for later use.my.scheme.session.launchUrl = my.scheme.getLaunchUrl(); - Then the requested page is obtained using the
getCurrentPagefunction. This will be used in determining which page to load using theopenWindowmethod.var requestedPage = my.scheme.getCurrentPage();
- Next, any launch parameters are obtained. The following code block demonstrates how to check if launch parameters have been provided and parses them into a formatted object.
my.scheme.session.launchParams = null; if(my.scheme.hasParams()){ my.scheme.session.launchParams = my.scheme.getParams(); } - Finally, the
openWindowmethod is called using therequestedPageandlaunchParamscreated in the preceding steps. TheopenWindowmethod will then open the requested window in the app.assist.openWindow(requestedPage, my.scheme.session.launchParams); } };
In order to have the recipe launch the requested window, listeners must be added to the resumed and open events. The following steps detail how to add the proper event listeners to your app:
- If the recipe is running on iOS, the resumed event listener is added. Please note this must be added to your
app.jswhen implementing in your own app.if(!my.isAndroid){ Ti.App.addEventListener( 'resumed', function(e) { - The
assist.openPageFromUrlmethod will be called each time the app is resumed. If no URL information is provided, the main window will be displayed.assist.openPageFromUrl(); }); }
- A listener is added to the open event on the main window. This event will be fired when the app is first launched.
win.addEventListener('open',function(e){ - On the first launch, the
assist.openPageFromUrlmethod is called to determine if the app has been opened by a third-party app.assist.openPageFromUrl();
- If the recipe is running on Android, a listener is added to the
resumeevent on the main window. This allows the recipe to detect if a third-party app tries to open the recipe while the app is running in the background.if(my.isAndroid){ win.activity.addEventListener('resume', function(){ assist.openPageFromUrl(); }); } }); win.open();
Cross-platform custom URL schemes are a great low-cost way to provide integration points with third parties. The following section details the end-to-end process for using the Launching one app from another recipe to access different app routes without this recipe's sample app.
This section provides a step-by-step description on how you can launch the About window in the URL Receiver recipe when launched from the App Launcher recipe.
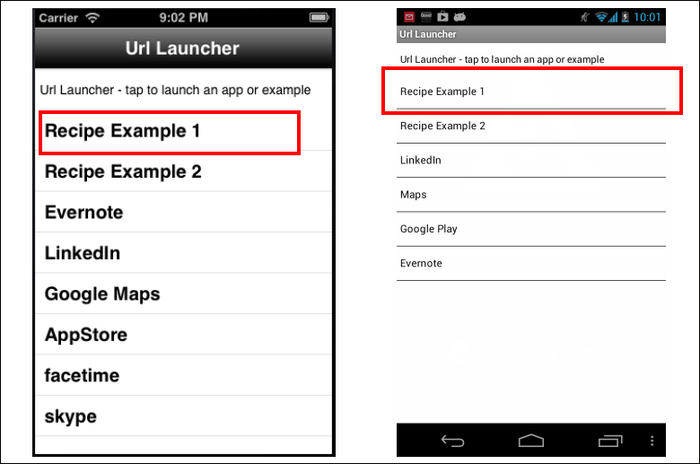
- Open the App Launcher application and tap on the Recipe Example 1 row in the table view as shown with the red boxes in the following screenshot.
- The App Launcher app runs the following code block.
- On iOS:
Ti.Platform.openURL('bencoding-linkrecipe://about'), - On Android:
Ti.Platform.openURL('bencoding-linkrecipe://com.bencoding/about'),
- On iOS:
- The URL Receiver recipe will then be launched on your device.
- The resumed or open event handlers will then parse the provided URL information. When the
getCurrentPagemethod is called, therequestedPagevalue will be set to a string with the value ofabout.var requestedPage = my.scheme.getCurrentPage();
- Next,
my.scheme.hasParamsmethod is called to determine if any parameters have been passed as part of the provided URL. In this case, no additional parameters have been provided, so thesessionparameter object remainsnull. - The
openWindowmethod is then called and the following About window is then opened: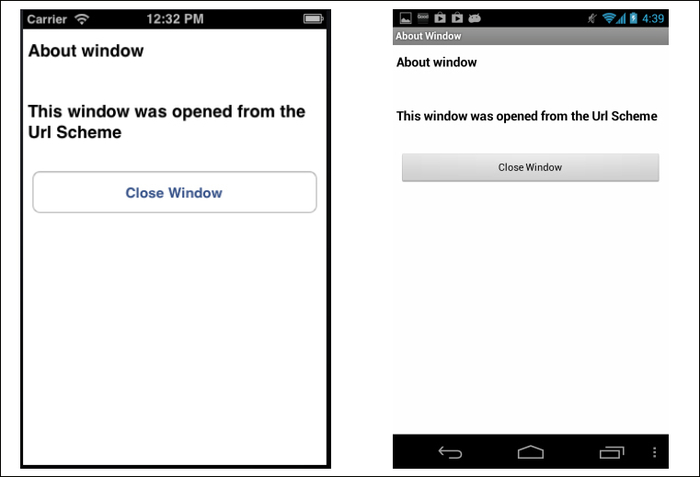
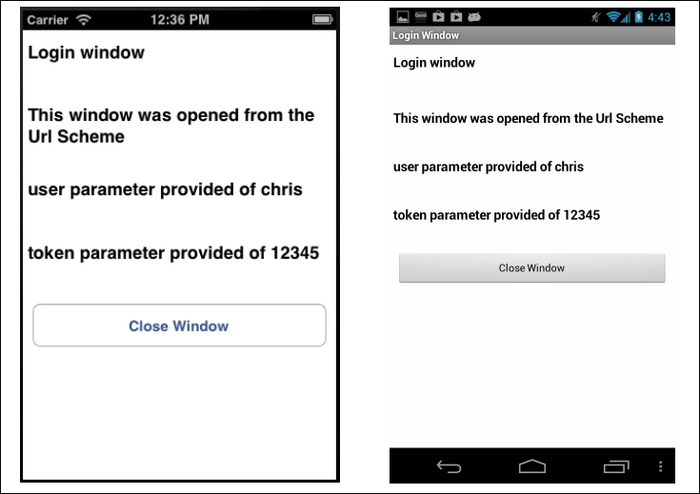
This section provides a step-by-step description of launching the Login window in the URL Receiver recipe when launched from the App Launcher recipe. As part of the launch process, the user and token parameters are provided by the App Launcher recipe then used to complete the form within the URL Receiver recipe app.
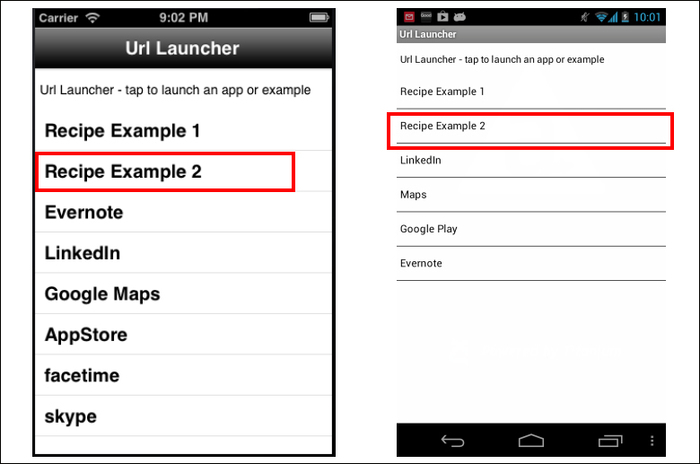
- Open the App Launcher application and tap on the Recipe Example 2 row in the table view as shown with the red boxes in the following screenshot:
- The App Launcher application runs the following code block.
- On iOS:
Ti.Platform.openURL('bencoding-linkrecipe://login?user=chris&token=12345'), - On Android:
Ti.Platform.openURL(
'bencoding-linkrecipe://com.bencoding/'+
login?user=chris&token=12345'),
- On iOS:
- The URL Receiver recipe will then be launched on your device.
- The resumed or open event handlers will then parse the provided URL information. When the
getCurrentPagemethod is called, therequestedPagevalue will be set to a string with the value oflogin.var requestedPage = my.scheme.getCurrentPage();
- Next,
my.scheme.hasParamsmethod is called to determine if any parameters have been passed as part of the provide URL. - The following parameter object is created using the query string parameters included with the calling URL.
{ user:"chris", token:12345 } - The
openWindowmethod is then called providing therequestedPageandparameterobjects. This will then open the Login page with the parameter used to complete the form as shown in the following screenshot: