
Chapter 13. Chatting and tweeting
- Messaging with Extensible Messaging and Presence Protocol (XMPP)
- XMPP status updates
- Messaging with Twitter
We covered a lot of Spring Integration adapters in previous chapters. You saw how to invoke both Simple Object Access Protocol (SOAP)-based and Representational State Transfer (REST)-based web services over HTTP. You saw how to send and receive messages using the Java Message Service (JMS) API. Those adapters, and most of the others that we covered up to this point, are focused on well-established technologies that are commonly encountered in the enterprise development environment. HTTP is a ubiquitous protocol that provides the foundation of the World Wide Web, and JMS is included among the Java EE specifications. In this chapter, we shift our focus to two different technologies: XMPP and Twitter. Both are well on their way to reaching mainstream status, if they aren’t already there. Many enterprise Java developers probably use both technologies daily, but XMPP and Twitter have relative newcomer status in the realm of enterprise Java applications. That trend is likely to accelerate, and in this chapter, you learn how easy it can be to introduce these technologies into your applications via Spring Integration’s corresponding adapters.
13.1. XMPP
XMPP stands for Extensible Messaging and Presence Protocol. It defines a fairly generic model for packets containing content and metadata which can be passed along with that content to describe it. As indicated by the name, the two categories of content are messages and presence notifications. Even though XMPP can be applied to many different domains, its most widely recognized role is in the implementation of instant messaging (IM) services. Even if you’ve never heard of XMPP, you might use it on a daily basis. Several popular IM services are built on it, including Google’s chat, and Apple’s iChat supports XMPP as well. The original server implementation is known as Jabber.
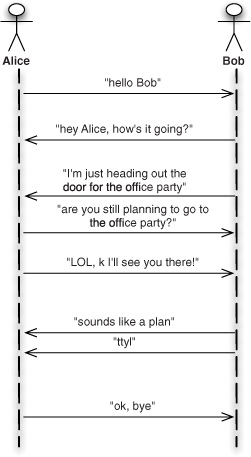
XMPP supports full-duplex communication. That’s a fancy way of saying that the messaging can occur in two directions at the same time. This concept is easy to understand by considering a common case of messages crossing in a real-time chat scenario. Figure 13.1 demonstrates a chat session in which both parties are busy typing a message at the same time rather than taking turns. You probably experience this on a daily basis.
Figure 13.1. XMPP supports full-duplex messaging, meaning that communication occurs bidirectionally, even simultaneously.
Spring Integration provides adapters for sending and receiving both message content and presence notifications with XMPP. The potential use cases for exchanging message content are relatively obvious. The applicability of presence notifications is less obvious, but it’s a distinctly powerful feature of the protocol. Consider the roster features of a typical IM client. When you use an XMPP-based IM client and you see the members of your friends list who are online, that functionality is driven by presence notifications. Likewise, when someone updates their status, your client receives that update in your roster. Those presence notifications are separate from but parallel to the message content. Let’s look at the adapters, beginning with the sending of simple message content.
13.1.1. Sending XMPP messages
We start with what’s probably the most common use case for XMPP in a Spring Integration application: sending messages. The concept of chat has many practical uses beyond the simple IM scenarios between friends. Two machines can exchange messages as a way to pass data or notify each other about important events. Likewise, machines can send messages to a central chat room. The clients reading messages in that chat room might be a combination of other machines and human users. The topic of such messages might be system-related notifications, such as “server X has encountered a problem,” or they might be events within the business domain, such as “order X has just been processed and all items are available in the warehouse.” Presence notifications can play a role as well, but we explore those adapters later.
The first step to using any of the XMPP adapters is to set up an account and its associated credentials. Once the account is activated, it can be used to create a connection to an XMPP server. Rather than configuring the account information every time you define an adapter, Spring Integration allows you to configure the connection separately so that it can be reused across multiple inbound and outbound adapters. The following is an example of such a connection:
<int-xmpp:xmpp-connection id="xmppConnection"
        user="johndoe"
        password="bogus"
        host="somehost.org"
        service-name="mychat"
        port="5222"/>
It’s generally recommended that you externalize the connection settings in a simple text file as key-value pairs. Using the same example, you could accomplish that by creating a properties file, such as xmpp.properties:
xmpp.username=johndoe
xmpp.password=bogus
xmpp.host=somehost.org
xmpp.service=mychat
xmpp.port=5222
Then, you could associate placeholder variables with the keys from that properties file. To load the properties, you’d include a single property-placeholder element in the configuration file:
<context:property-placeholder location="classpath:xmpp.properties"/>

<int-xmpp:xmpp-connection id="xmppConnection"
        user="${xmpp.username}"
        password="${xmpp.password}"
        host="${xmpp.host}"
        service-name="${xmpp.service}"
        port="${xmpp.port}"/>
Once the connection is defined, you can set up the adapter. Because we’re focusing on the outbound adapter that publishes XMPP messages, the element to use is the outbound-channel-adapter. We already provided all of the connection details with our XMPP connection, so this configuration is trivial. The only thing that’s required is the name of the Spring Integration channel where the application will send messages intended for the XMPP chat:
<int-xmpp:outbound-channel-adapter channel="chatChannel"/>
If you named the XMPP connection something other than xmppConnection, then you must provide its name explicitly via the xmpp-connection attribute on the outbound-channel-adapter element:
<int-xmpp:outbound-channel-adapter channel="chatChannel"
    xmpp-connection="myXmppConnection"/>
Hopefully, that configuration seems straightforward. Now you can turn to the use of these adapters from application code.
Using XMPP Adapters in an Application
As with any other channel adapter, the point of the abstraction is to enable the application to operate only in terms of the simple generic messages. Nevertheless, for the adapter to construct an XMPP message from a Spring Integration message requires one additional piece of information beyond the chat content. The adapter needs to know to whom the message should be sent. The way to pass that information is through a Spring Integration message header. The key of that header is provided as a constant value: XmppHeaders.TO. The following code provides an example of sending a message along with that header:
Message<String> message = MessageBuilder.withPayload("Hello XMPP!")
        .setHeader(XmppHeaders.TO, "myFriend")
        .build();
chatChannel.send(message);
As you know by now, it’s not necessary to work directly at the API level. Less invasive alternatives promote a separation of concerns. One of those alternatives is to use the aspect-oriented programming (AOP)-based technique that’s driven by the @Publisher annotation. Let’s look at an example of sending a chat message every time an order is processed:
@Publisher("processedOrders")
public String processOrder(Order order) {
   this.updateInventory(order);
   this.createInvoice(order);
   this.scheduleShipping(order);
   return this.generateConfirmationId(order);
}
This example would work perfectly if you intend to send the chat messages as a byproduct of the service method invocation. That method is already being called as part of your application logic. You’re intercepting that normal call in order to also send a chat message each time. Under the covers, Spring Integration is using AOP, where a proxy is created to decorate the service. The only thing you need to add to your configuration to enable such proxies is a one-line directive with an element defined in the core Spring Integration namespace:
<int:annotation-config/>
You can even add the default channel to use for any @Publisher annotation that doesn’t include one explicitly. That works well if you have a simple application and can rely on a single channel for all interceptor-driven messages:
<int:annotation-config default-publisher-channel="orders"/>
Another option is to use a gateway proxy. Even though this technique also relies on a proxy, it’s best suited for a different type of use case. We already saw that the intercepted application service method treats messaging as a by-product, and the primary responsibility of the code is still handled by the application service. With the gateway proxy, there’s no underlying service implementation to intercept. Rather than having messages as a by-product, the primary purpose of the gateway is to send a message. For that reason, you only need to provide an interface, not an implementation. Such an interface might look something like this:
public interface ChatGateway {
    void chat(String text);
}
Then, the configuration points to the fully qualified name of that interface:
<int:gateway id="chatGateway" service-interface="example.ChatGateway"
    default-request-channel="chat"/>
In this case, Spring Integration creates a proxy that implements the interface. You can then reference that instance, typically using dependency injection to make it available from client code. You might wonder why you would go through this hassle when you could just as easily inject the channel directly or, for more control, use a Messaging-Template instance. The advantage of using the gateway proxy is that it’s noninvasive. It’s the same justification for using the @Publisher annotation rather than requiring the calling code to have a direct dependency on the Spring Integration API.
In both cases, the underlying implementation provided by the proxy will handle the API-level concerns so that you don’t have to write that code. Also, in both cases, you can easily leave this configuration out of the picture for simple unit-level testing. In the gateway case, you can test the calling code by swapping a mock-driven implementation rather than the gateway proxy. Hopefully, you can recognize two of the main Spring themes here: (1) Inversion of Control in the sense that the framework handles the messaging responsibilities for you, and (2) test-driven development enabled by the use of noninvasive techniques based on coding to interfaces rather than implementations.
You may have noticed that we’re missing one important detail in the recent examples. We’re passing the chat message payload text, but we left out the recipient’s user-name. Obviously, that information must be provided so that the messages can be sent to someone. Therefore, we need to provide the TO header. Again, we’d like to keep this noninvasive.
Probably the simplest option, if it’ll work from the perspective of the calling code, is to rely on a method argument. Here’s a slightly modified version of the Chat-Gateway interface to demonstrate such an argument:
public interface ChatGateway {
  void chat(@Header(XmppHeaders.TO) String username, String text);
}
The unannotated argument is used as the payload of a newly created Spring Integration Message, and the argument annotated with @Header is added to that message with the annotation’s value as the header name. This example relies on the XmppHeaders.TO constant because that’s what the downstream XMPP adapter expects.
If you’re not willing or able to include the username in the method invocation, another option that’s even less invasive is to add a header-enricher to the message flow. Assuming the gateway is sending to the channel named chatChannel, the following configuration would work nicely:
<int-xmpp:header-enricher input-channel="chatChannel"
        output-channel="xmppOut">
    <int-xmpp:chat-to value="johndoe"/>
</int-xmpp:header-enricher>

<int-xmpp:outbound-channel-adapter id="xmppOut"
        xmpp-connection="myXmppConnection"/>
One obvious limitation of that particular configuration is that the header value is statically defined. If you need to determine the username dynamically, you can add an expression instead. Imagine a situation where the customer Account object is stored in a header already. Perhaps the Account instance was passed as an annotated method argument instead of just the username. Here we show just the header enricher’s chat-to subelement in isolation to focus on this option:
<int-xmpp:chat-to expression="headers.account.chatUsername"/>
A slightly more advanced option would use an expression that relies on some other bean that’s defined in the application context. For example, you might have the Account object, but it doesn’t provide the user’s IM username. At the same time, imagine you have a simple lookup service that can be used to find the chat username from the account number. The following would connect that service to the header enrichment step:
<int-xmpp:chat-to
    expression="@usernameMapper.findUsername(headers.account.number)"/>
This expression is one example, but the point is that combining the Spring Expression Language (SpEL) with the header enricher functionality provides considerable flexibility in how you derive the necessary information from the message context at runtime. That in turn enables the dynamic behavior often needed when sending messages in a chat application. Next, we turn to the receiving side.
13.1.2. Receiving XMPP messages
In the previous section, we covered all the details of sending XMPP messages via a Spring Integration channel adapter. Considering that XMPP is a protocol for chatting, there must be a receiver as well as a sender. As we described earlier, XMPP is designed for full-duplex communication, meaning that both parties involved in a chat can play the role of sender and receiver simultaneously. In Spring Integration, each direction of communication is handled by a distinct channel adapter. The outbound channel adapter represents the role of sending, because a chat message is sent out from the perspective of the Spring Integration application. Now, we turn to the corresponding inbound channel adapter. Its responsibility is to receive messages that are coming into the Spring Integration application.
The inbound adapter has much in common with the outbound adapter. Not only do they rely on the same protocol and the same underlying API for negotiating that protocol, but they both rely on the same connection configuration to use that API. That means that any of the xmpp-connection element examples displayed in the previous section would be equally valid on the receiving side. Otherwise, a simple inbound adapter looks like a mirror image of the outbound adapter:
<int-xmpp:inbound-channel-adapter channel="chatChannel"/>
This example assumes the XmppConnection instance is defined as a bean named xmppConnection. Each Spring Integration message sent to chatChannel would contain the body of the received XMPP message as its payload. That body contains text content and is therefore represented as a String instance. If you have a reason to use the entire XMPP message instance as the Spring Integration message payload, then the extract-payload attribute can be provided on the channel adapter XML element with a value of false.
That pretty much covers the essentials of sending and receiving basic chat messages. In the next section, we explore the Spring Integration support for the other major feature of XMPP: presence messages.
13.1.3. Sending and receiving presence status updates
You now know how to send and receive chat messages, and obviously those are the most important features of a chat service implementation. Nevertheless, when you consider your typical usage of an IM application, you may realize that you also depend heavily on the ability to know which of your friends are available. In fact, most IM applications support status messages that provide more detail than whether someone is online or offline. Your friends are listed on the roster, or buddy list, and some may have status messages that indicate, for instance, “do not disturb,” or they may have a custom message such as “in San Fran until Tuesday.” XMPP supports these types of messages as well, and they’re known as presence notifications. If you want to know when your friends become available online, go offline, or change their status message, you can listen to their presence notifications in addition to their chat messages. XMPP differentiates the two, and therefore Spring Integration provides separate channel adapters for presence notifications. As it has for the chat message support, Spring Integration has a pair of inbound and outbound adapters for presence.
Here’s an example of a simple inbound adapter for receiving presence notifications:
<int-xmpp:presence-inbound-channel-adapter channel="presenceChannel"
        xmpp-connection="xmppConnection"/>
Note that the presence adapter can be defined with an element from the same xmpp namespace. The difference is that this presence adapter is qualified as presence-inbound-channel-adapter, whereas chat messages are received on the unqualified inbound-channel-adapter. The rationale is that the more common feature is the chat messaging. As with the chat adapters, the xmpp-connection attribute is optional. As long as the name of the XmppConnection bean is xmppConnection, the attribute is unnecessary.
To send presence status updates, you can define the mirror image outbound adapter as shown here:
<int-xmpp:presence-outbound-channel-adapter channel="presenceChannel"
        xmpp-connection="xmppConnection"/>
You may decide to use the same channel for chat and presence messages, but by providing distinct adapters for each, the Spring Integration support allows you to make that decision on a case-by-case basis. If you were to implement a chat service, you’d most likely maintain the separation of concerns. One channel can be dedicated to inbound chat messages, and another can be dedicated to outbound chat messages. Likewise, you can provide one inbound and one outbound channel for transferring the presence notifications. Here again, the xmpp-connection attribute is unnecessary if the referenced bean is named xmppConnection.
As you’ve seen thus far in this chapter, XMPP is a useful protocol that spans a variety of interesting use cases. It caters well to building a chat server, but that only scratches the surface. Considering the trend toward highly distributed applications and event-driven architectures, XMPP can fill an important gap where applications, not just people, need to communicate with each other and notify each other when they come online or go offline. The channel adapters provided by Spring Integration make it easy to add such behavior to your own application without having to dive into the depths of XMPP or code directly against any XMPP client library.
In the next section, we discuss Twitter. We also define different types of messages, or tweets. Some are public; others are private. Spring Integration again provides corresponding channel adapters so that you can easily integrate the entire spectrum of Twitter features into your application.
13.2. Twitter
The first thing most people think of in relation to Twitter is the timeline. When someone tweets, they’re posting a status update or, more generally, some comment that will then appear in that user’s timeline. Likewise, if you use a Twitter client application, your standard view is most likely the combined timeline that displays the tweets of all the users you follow as well as your own tweets. Twitter provides additional features through its API. You can perform a search for all tweets that include some interesting text, regardless of whether those tweets were posted by users you follow. Similarly, you can find all tweets that mention your own username, and those results also may include tweets from users whom you don’t yet follow. Finally, Twitter provides support for sending and receiving direct messages, which are private alternatives to the more common broadcasting that’s visible to everyone. Because Twitter provides so many different options, Spring Integration provides a wide variety of Twitter adapters. Table 13.1 shows the name of each Twitter adapter element that can be configured in XML and the corresponding role of that adapter in terms of how it uses the underlying Twitter API.
Table 13.1. Spring Integration Twitter adapters
|
XML element name |
Twitter role |
|---|---|
| outbound-channel-adapter | Adds a Twitter status update for the authenticated user |
| dm-outbound-channel-adapter | Sends a Twitter direct message to a single recipient |
| inbound-channel-adapter | Reads the Twitter timeline for the authenticated user |
| dm-inbound-channel-adapter | Reads the Twitter direct messages for the authenticated user |
| mentions-inbound-channel-adapter | Reads any tweets that mention the authenticated user |
| search-inbound-channel-adapter | Reads any tweets returned by the provided query |
The remainder of this chapter focuses on the adapters listed in the table. You’ll see that Spring Integration covers the whole spectrum of Twitter functionality. With minimal configuration and no direct dependency on any Twitter API, you can easily add a Twitter search feature, or direct messaging, or plain old tweeting of status updates.
We start with the simplest case: Twitter search. The reason search is simpler than most of the other adapter types is because the underlying API enables search capabilities without requiring authentication. Let’s begin this tour of Twitter adapters with the ability to convert search results into inbound Spring Integration messages.
13.2.1. Receiving messages from a Twitter search
One of the most common uses of Twitter in a Spring Integration application is to perform a search periodically and send the results downstream in messages. The element to define in XML-based configuration is the search-inbound-channel-adapter. It also happens to be simple in its configuration because a Twitter search doesn’t require authentication. We explore other Twitter adapters that do require authentication because they’re focused on a particular user, but first let’s take a look at an example with the search adapter:
<int-twitter:search-inbound-channel-adapter channel="tweets"
        query="#springintegration">
    <int:poller fixed-rate="60" time-unit="SECONDS"/>
</int-twitter:search-inbound-channel-adapter>

<int:logging-channel-adapter id="tweets"/>
As you can see, the poller subelement dictates that the Twitter search should be performed every minute. The results are passed to the channel named tweets, and in this case, that channel is created by a logging-channel-adapter. Each message passed to that channel will contain a single tweet from those search results as its pay-load. The actual instance type is a Tweet class defined by Spring Social. That class defines a number of properties, listed here. This Tweet type is common to all of the adapters you see in this chapter. The following excerpt shows all of the instance variables defined on the Tweet object:
private long id;
private String text;
private Date createdAt;
private String fromUser;
private String profileImageUrl;
private Long toUserId;
private Long inReplyToStatusId;
private long fromUserId;
private String languageCode;
private String source;
Knowing those properties, you can control the content of downstream messages by using SpEL. Consider the previous logging example. You could add the expression attribute to have more control of the message to be logged:
<int-twitter:search-inbound-channel-adapter channel="tweets"
        query="#springintegration">
    <int:poller fixed-rate="60" time-unit="SECONDS"/>
</int-twitter:search-inbound-channel-adapter>

<int:logging-channel-adapter id="tweets" expression="payload.fromUser +
        ': ' + payload.text + ' [' + payload.createdAt + ']'"/>
You might be doing other things downstream besides logging. A more general approach would be to define a transformer element. Then you can reuse that transformer in different message flows:
<int-twitter:search-inbound-channel-adapter channel="searchResults"
        query="#springintegration">
    <int:poller fixed-rate="60" time-unit="SECONDS"/>
</int-twitter:search-inbound-channel-adapter>

<int:transformer input-channel="searchResults" output-channel="tweets"
        expression="payload.fromUser + ': ' + payload.text +
                ' [' + payload.createdAt + ']'"/>

<int:service-activator input-channel="tweets"
        ref="searchResultAnalyzer"
        method="addResult"/>
At this point, you know everything you need to know to periodically retrieve Twitter search results as Spring Integration messages. Another popular use for Twitter adapters on the inbound side is to read your Twitter timeline. It requires more configuration because you must provide the information necessary for configuration of authentication details. Whereas the search operation can be handled with an anonymous Twitter template instance, many other operations, including reading your timeline, require authentication. We cover the timeline reading adapter shortly, but first we discuss how you should provide the configuration necessary for creating a Twitter template instance that can pass OAuth credentials.
13.2.2. OAuth configuration for the Twitter template
The TwitterTemplate is provided by Spring Social. It implements a Twitter interface, and that interface provides access to a variety of operations instances which define the methods that all of these Spring Integration Twitter adapters depend on to interact with the Twitter API. As with other Spring templates, it provides a higher level of abstraction to simplify invocation of the underlying operations. In the case of Twitter, it means you can configure it once, share it across your application, and invoke those Java methods rather than performing REST requests directly against the Twitter API.
In the earlier search adapter examples, you didn’t see the TwitterTemplate instance because it isn’t a required reference attribute on the search-inbound-channel-adapter element. If not provided explicitly, it’s created behind the scenes. But if you were to look into the search adapter’s code, you’d see that it does delegate to the TwitterTemplate. The reason it doesn’t need to be created explicitly is because the search adapter doesn’t require authentication. To perform any Twitter operation that does require authentication, a TwitterTemplate must be configured in the Spring configuration so that the authentication credentials can be provided. The authentication mechanism used by this template is OAuth, and its credentials consist of a consumer key and an access token as well as their associated secrets. To learn more about OAuth, visit http://oauth.net/. If you’re looking for information specific to the use of OAuth by Twitter, then read through the Twitter OAuth FAQ list at https://dev.twitter.com/docs/auth/oauth/faq.
To create a TwitterTemplate with OAuth capabilities, you must first register your application at http://dev.twitter.com. Upon registration, you receive a consumer key and an associated secret. On the developer site, you should see a link to register your application. When filling out the form, be sure to specify the Application Type as Client. You must also click on the Access Token button to receive the access token and its associated secret. Be careful to store all of the keys and secrets in a safe place.
In the examples throughout this chapter, the OAuth configuration properties are stored in a file. Such a file can be protected so that your application has read access but other applications don’t. The properties file might be named oauth.properties, for example, and would look something like this:
twitter.oauth.consumerKey=abC012Def3G45abC012Def3G45
twitter.oauth.consumerSecret=abC012Def3G45abC012Def3G45
twitter.oauth.accessToken=12345678-abC012Def3G45abC012Def3G45
twitter.oauth.accessTokenSecret=abC012Def3G45abC012Def3G45
Then, the TwitterTemplate can be configured as a bean definition using property placeholders:
<bean id="twitterTemplate"
  class="org.springframework.social.twitter.api.impl.TwitterTemplate">
    <constructor-arg value="${twitter.oauth.consumerKey}" />
    <constructor-arg value="${twitter.oauth.consumerSecret}" />
    <constructor-arg value="${twitter.oauth.accessToken}" />
    <constructor-arg value="${twitter.oauth.accessTokenSecret}" />
</bean>
TwitterTemplate and Spring Social
Spring Social 1.0 was released during the development of Spring Integration’s version 2.1. As of that version, Spring Integration builds on the TwitterTemplate included in the Spring Social library. The examples in this chapter feature that template. But if you’re using Spring Integration 2.0, there’s a Twitter4jTemplate instead, and as its name suggests, it builds on the Twitter4J library. The configuration is almost identical. Both take the OAuth configuration values as constructor arguments, and they even appear in the same order. That means the only necessary change is in the fully qualified classname in the template’s bean definition.
Now that you know how to configure a TwitterTemplate instance that uses OAuth configuration properties, let’s discuss some of the adapters that require authentication. We begin with the inbound Twitter adapter for reading your timeline.
13.2.3. Receiving messages from your Twitter timeline
Along with the search functionality you saw earlier, reading the timeline is the other major use case for an inbound adapter accessing Twitter. Unlike searching, though, timeline reading requires an authenticated connection. You have to be logged in because the timeline is associated with your user account. As you saw in the preceding section, OAuth is the mechanism used to establish an authenticated connection.
If you’ve created a TwitterTemplate instance that has the required OAuth properties, as shown in the earlier excerpt, then you can provide a reference to it when creating a timeline-reading Twitter adapter. Here’s what the adapter looks like:
<int-twitter:inbound-channel-adapter id="timelineReadingAdapter"
        twitter-template="twitterTemplate" channel="inboundTweets">
    <int:poller fixed-rate="10" time-unit="SECONDS"
        max-messages-per-poll="25" />
</int-twitter:inbound-channel-adapter>
That adapter has a poller, and it’s configured to poll every 10 seconds. With each poll, it attempts to read up to 25 tweets from the timeline of the user whose OAuth credentials are provided to the template. One thing you might notice is that the element defined in the namespace for this adapter is named inbound-channel-adapter, whereas the adapter that performed a Twitter search was more explicitly named search-inbound-channel-adapter. The rationale is that reading the timeline is the most obvious thing you can do with Twitter. If you have a Twitter client on your desktop or phone, when you start that client application, the default view is most likely the timeline. In the next section, we explore what’s probably the most popular use of Twitter for outbound adapters: updating your Twitter status.
13.2.4. Sending messages to update your Twitter status
In the previous section, you saw how to read the Twitter timeline with an inbound adapter. If you hadn’t already known, you learned that the Twitter timeline is a collection of status updates, typically called tweets, from all of the Twitter users whom you follow. In this section, we explore the other side of that relationship. When you update your status by posting a tweet, all of your followers should soon see the update in their timelines.
As with reading the timeline, you must be authenticated with valid Twitter account information before you can send status updates. The configuration for the OAuth credentials is the same for all adapters that require authentication. In fact, each of these adapters delegates to the underlying TwitterTemplate instance, and your job is to ensure that the TwitterTemplate is configured properly, including the authentication credentials if needed. Only the Twitter search adapter can be used without authenticating, so in all other cases, the TwitterTemplate should be configured with the full OAuth credentials. Because the TwitterTemplate can be used concurrently, you’d most likely define only a single TwitterTemplate instance for a given Twitter user account. Then you can reference that template from each of the adapters that you might be using in an application as long as those adapters are intended to represent that account.
Once the TwitterTemplate is defined, the status updating adapter is trivial to define. Because updating your status is generally synonymous with tweeting, the adapter on the outbound (or sending) side that’s used for updating status has the unqualified element name outbound-channel-adapter. It’s the mirror image of the timeline-reading adapter on the inbound side:
<int-twitter:outbound-channel-adapter id="statusUpdatingAdapter"
                                      twitter-template="twitterTemplate"
                                      channel="outboundTweets"/>
Like Twitter itself, that’s pretty simple. Also like Twitter, your message text should be within the limit of 140 characters. In the next section, we look at another interesting use case that’s common with Twitter: the ability to receive any tweets that reference your own username.
13.2.5. Receiving messages from Twitter retweets, replies, and mentions
Status updates can be retweeted or replied to by those who follow you and see the status update in their timeline. Perhaps more interesting is that someone who doesn’t follow you but happens to notice your tweet, perhaps in a search result, might decide to retweet it. Likewise, they might decide to start following you and reply to the tweet. In some respects, a tweet is similar to a message sent to a chat room when using an IM application or XMPP, except for two key differences. First, the chat room is much larger and less restrictive, basically the internet itself. Second, you may or may not be posting a tweet in an attempt to solicit responses.
Even if you don’t expect or intend to provoke responses, others might be inspired to extend your isolated tweet into a dialog. You might be tweeting about something you find interesting without any intention of starting a discussion, but it could grow into an interesting discussion that pulls in people whom you had never known. On the other hand, you might initiate such a discussion more intentionally by posting an interrogative or poll message, such as “Which one of these laptops should I buy?” Compared to an IM or a chat room, a dialog via Twitter might be an unintended but welcome consequence and may include people who happened to stumble upon one of the tweets in that dialog. Twitter doesn’t organize tweets into threaded discussions: any tweet may have an in-reply-to value. It’s less structured than a chat room, but that lack of structure is what differentiates Twitter as an open-ended form of messaging among a massive community. In this section, we walk through the process of monitoring Twitter for any mentions of your username in retweets or replies.
When it comes to messaging styles, you can think of Twitter as a publish-subscribe scenario in which the person posting a tweet is the publisher and all of that person’s followers are subscribers. Considering that all of the tweets are visible to anyone who performs a search or visits the person’s public timeline, the pool of subscribers extends far beyond just the followers.
Once a tweet is posted, those subscribers may decide to retweet if they want to reiterate the point of the original tweet and make sure that their followers see the tweet. If they want to provide some commentary of their own or an answer to a question, then they can reply instead. The difference is subtle, but all retweets and replies share one thing in common: they contain the original publisher’s username, including the @ symbol that precedes all Twitter usernames.
In addition to retweets and replies, someone may refer to someone else’s user-name in a Twitter message, such as “I just had dinner with @somebody.” If you want to find all mentions of yourself, you could perform a search on your username, but because it’s such a common operation, the Twitter API provides explicit support for reading all mentions of the logged-in user’s username. Likewise, Spring Integration provides an inbound channel adapter for reading those mentions. It’s configured almost identically to the basic timeline-reading adapter, but with a different element name. Like the timeline-reading adapter, it requires a template instance injected with the user’s OAuth configuration properties:
<int-twitter:mentions-inbound-channel-adapter id="mentionsAdapter"
        twitter-template="twitterTemplate" channel="mentions">
    <int:poller fixed-rate="10" time-unit="SECONDS"
                max-messages-per-poll="25"/>
</int-twitter:mentions-inbound-channel-adapter>
Before taking this discussion too far, we should also consider that Twitter provides an alternative for direct messaging. Unlike the open-ended internet-as-chat-room approach of posting a status update that potentially starts a dialog, with direct messages, you send to a single explicitly specified recipient. This goes to show that Twitter provides both publish-subscribe and point-to-point messaging semantics. The difference between the two in Twitter terms is extreme: either broadcast to the internet or send a message to exactly one person. Let’s now look at the latter option.
13.2.6. Sending and receiving direct messages via Twitter
We mentioned that Twitter, in general, supports a broad publish-subscribe style of messaging. Although it’s probably not as popular, Twitter also supports a point-to-point style via direct messages. The concept is simple. If you want to send a message to someone who follows you, and you want only that person to receive it, then use direct messages instead of updating your status.
When considering the classification of communication options, direct messaging with Twitter seems to sit between email and chat. Just as some people refer to Twitter public timeline posting as microblogging, the direct message functionality may be thought of as micromailing. In both cases, the essential characteristic of the Twitter alternative is its enforced brevity. From a cultural perspective, it’s interesting to see the wild success of a technology that seems to be defined by a limitation. Even though the content and size of messages may have more in common with those of an IM chat session, the request-and-reply interaction typically feels more like email. To some degree, those who frequently use direct messaging with Twitter embrace the asynchronous nature of communication. They accept the reality that even if other parties are currently available, they may prefer to respond when it’s more convenient for them. Using a phone call analogy, it’s the same reason voice mail is so commonly used even on a mobile phone that’s most likely in the presence of its owner most of the time. When you send a colleague a message like “Want to grab a beer after work?” you probably don’t need to know the answer immediately. Likewise, the receiver will likely perceive it as more polite that the sender acknowledges the question as a lower priority than one that would necessitate a synchronous phone call. It’s as if Twitter gives the sender the option to go straight to voice mail. Enough philosophizing. Let’s take a look at the Spring Integration channel adapters that support direct messages.
The Outbound Channel Adapter for Direct Messaging
The outbound channel adapter for sending direct messages via Twitter looks similar to the status updating channel adapter. The key difference is that its element name is qualified with the dm- prefix. Because sending direct messages requires authentication, you also need to provide a reference to a fully configured TwitterTemplate instance. That configuration must include the OAuth credentials:
<int-twitter:dm-outbound-channel-adapter id="dmOutAdapter"
                                     twitter-template="twitterTemplate"
                                     channel="dmOutChannel"/>
There’s one more requirement when sending a direct message via Twitter. You must somehow specify the user to whom you’d like to send the message. As you’d likely expect by now, the target user information should be specified in a message header. There’s a constant defined to represent that header’s name: TwitterHeaders.DM_TARGET_USER_ID. Here’s an example of programmatically sending a Spring Integration message that ultimately triggers the sending of a Twitter direct message. This example assumes the configuration of the dmOutChannel, as shown in the earlier dm-outbound-channel-adapter example:
Message<String> message = MessageBuilder.withPayload("hello")
        .setHeader(TwitterHeaders.DM_TARGET_USER_ID, "someuser")
        .build();
dmOutChannel.send(message);
This code would send a direct message whose content is hello to the user whose name is someuser. Let’s look at the receiving side next.
The Inbound Channel Adapter for Direct Messaging
The receiving side is simpler because the target user ID is a responsibility of the sender. All you need to do on the receiving side is make sure you’ve configured a TwitterTemplate with the proper user information and OAuth credentials. Then, you can reference that TwitterTemplate from the dm-inbound-channel-adapter element. Any direct messages sent to that user will be received by that channel adapter. Here’s an example:
<int-twitter:dm-inbound-channel-adapter id="dmInAdapter"
                                     twitter-template="twitterTemplate"
                                     channel="dmInChannel"/>
The inbound channel adapter that receives direct messages is practically identical to all of the others that Spring Integration provides for receiving tweets. The element names are different, but the template reference configuration looks the same across all of them, and nothing else is required. With the preceding information and examples provided, you’ll be able to work with not only the status update Tweets that appear in the timeline but also with search results, mentions, and direct messages.
13.3. Future directions
In this chapter, we covered Spring Integration’s support for any XMPP-based chat service and support for the full range of Twitter options: search, timeline status updates, mentions, and direct messages. Spring Integration will continue to evolve to support additional chat and IM protocols, such as Internet Relay Chat (IRC) and Short Message Peer-to-Peer Protocol (SMPP). In fact, some prototypes have already been created in the Spring Integration sandbox repository for both of those protocols.
Likewise, Spring Integration will evolve to provide many more channel adapters in the social media realm. The relatively new Spring Social project provides support for a number of different social media technologies, and it’s easy for Spring Integration to build adapters on top of those underlying APIs. The supporting classes provided in the Spring Social project take the form of templates, strategies, and other common idioms of the Spring programming model. Twitter is one of the supported technologies, and as of version 2.1, Spring Integration relies completely on that library’s TwitterTemplate.
Other technologies supported by the Spring Social project will be represented by new channel adapters added in future versions of Spring Integration. In most cases, the template implementations for the various social media sites will be built on top of Spring’s RestTemplate, and many of them will depend on common OAuth configuration just as you saw with Spring Integration’s current Twitter support. You can expect to see support for Facebook, LinkedIn, GitHub, and more. In the meantime, you can rely on any of the Spring Social project’s template implementations from within simple service-activator elements defined in a Spring Integration configuration. We highly encourage such usage now because even when new channel adapters are added and the corresponding namespace support is provided, the underlying functionality will be the same. The new Spring Integration adapters will be invoking the same templates that you can go ahead and start using today.
13.4. Summary
XMPP and Twitter are aimed at different use cases. One distinction is that XMPP focuses on bidirectional messaging in real time. That presence earns one of the letters in the protocol acronym shows that being online and hence available for chatting is an important aspect of the intended usage. With Twitter, on the other hand, people tend to “catch up” when they have free time. When updating your status, you don’t expect people to respond immediately and likely don’t sit there waiting for that to happen (at least we hope you don’t). In terms of expected response time, even direct messages in Twitter are typically considered more like miniature email messages than chat messages.
Despite those differences, XMPP and Twitter also have similarities. Both require that you register with a username, and both provide ways to keep track of your friends. As you saw throughout this chapter, Spring Integration also treats them as consistently as possible and provides header enricher components for both so that you can dynamically determine the intended recipient of a message. Even more important, as with all of the adapters you’ve seen so far in the book, those described in this chapter enable you to easily interact with XMPP and/or Twitter without having any direct dependency on the underlying APIs. You can configure the channel adapters and then connect the associated message channel to other components such that you’re dealing only with the text content of the messages. Your code can be extremely simple, depending only on strings—a prime example of that clean separation of concerns we emphasized so early in the book, which is the essence of the Spring Integration framework.
This chapter concludes part 3 of the book. You have been presented with the most typical integration options. Other options can be implemented as extensions of Spring Integration or integrated as generic service activators, gateways, or channel adapters. In part 4, we discuss advanced topics such as concurrency, performance, and monitoring. The upcoming chapters build on the knowledge you’ve gained thus far and give you the tools to help you maintain solid integration solutions.