Create a PDF
Chances are good that you have a bunch of PDFs scattered around your Mac’s drive right now—and you can use PDFpen with any of them.
But real chefs cook up their own PDFs:
If you’re a complete do-it-yourselfer, you can make a PDF entirely from scratch (see below).
If you prefer to work with prepared ingredients, you can make a PDF from anything your Mac can print. See Print to PDF.
If you like imported delicacies, you can Import from Scans and Graphic Files to make a new PDF, and even perform optical character recognition (OCR) on them.
If you like to work with leftovers, you can make a new PDF from the bits and pieces of other PDFs you have hanging around. Read Combine Existing PDFs.
If you need to serve up multi-course banquets, you can gather multiple PDFs and the documents you used to create them and Create Portfolios (Pro Feature).
Or, if you like to order take-out, you can go online and convert webpages into PDFs. See Make PDFs from HTML (Pro Feature).
And, when you’re done cooking, you can write up the menu…er… Make a PDF Table of Contents (Pro Feature).
Make PDFs from Scratch
It’s easy enough to make a completely empty PDF with no pages. This isn’t as daft as it sounds. You want to do this when you need to specify the page dimensions and orientation of a new PDF.
Here are the steps for making a pageless PDF and then adding a blank page with the dimensions you desire:
Choose File > New > Blank Document.
PDFpen creates a completely empty PDF.
Choose File > Page Setup (⌘-Shift-P) and then, in the Page Setup dialog, specify the page dimensions and orientation that you want your PDF to have.
Choose Edit > Insert Blank Page (⌘-Option-B).
The new blank page matches the initial Page Setup settings.
If the default page dimensions (set them in System Preferences > Printers & Scanners) are what you want, though, you can create a PDF that contains a single page with those dimensions in a single step: choose File > New > One Page Document (⌘-N).
With blank page in hand (virtually), you can now populate your PDF with text imprints, drawings, and images. The Markup Tools and The Drawing Tools explain how to add text imprints and drawings, but you can also drag text, drawings, and images from most other programs directly onto a PDFpen page.
By the way, there’s yet another way to create a PDF from scratch—well, almost from scratch: use a page from an existing PDF as your model:
Open a PDF that has a page you want to use as the model for your new PDF.
Select that page in the Thumbnails sidebar (if you need help, read Navigate with Thumbnails), and then choose File > New > From Selection (⌘-Shift-N).
PDFpen creates a new, untitled PDF with the selected page as its only page. Now customize it to your heart’s content.
Print to PDF
It’s no secret that you can save a document as a PDF in the standard Print dialog. It’s an easy way to create a PDF on which you can then work in PDFpen. Use this technique to turn a document created in another program, such as a report or manuscript, into a PDF.
Here’s how to create a PDF from almost any application on your Mac:
Choose File > Print.
In the lower-left corner of the Print dialog, click PDF, and then choose Save as PDF from the pop-up menu (Figure 22).

Figure 22: You can create a PDF document with the Print dialog’s PDF pop-up menu. In the Save dialog, give the document a name, choose where to save it, optionally specify PDF metadata and security options, and then click Save.
Once you have the PDF, it’s easy enough to open it with PDFpen and make any changes and enhancements you require. But what if you want to save a document as a PDF and work on it immediately in PDFpen? Simple: Smile provides two PDF workflows—Open with PDFpen and Open with PDFpenPro—that you can download and install in the Print dialog’s PDF menu. Once that’s done, you can choose the appropriate workflow from the PDF menu to save the document as a PDF and open it in PDFpen or PDFpenPro.
Import from Scans and Graphic Files
PDFpen can scan documents and create PDFs from the scans. It can also create PDFs from graphic files. If you have printed copy or graphic files that you need to make into PDFs, use the techniques in this section.
You don’t have to forgo PDFpen’s text editing capabilities just because the PDFs you make with these techniques start out as graphic images: PDFpen can recognize text in the images and perform optical character recognition (OCR) to make the text editable.
Use a Scanner to Make a PDF
PDFpen supports any scanner that your Mac’s Image Capture software recognizes. (To learn about working with documents you’ve already scanned, see Use OCR on Scans and Graphic Files.)
When you scan a document with PDFpen, the program creates a new PDF document. You can save the resulting document as a separate PDF, or add its pages to an existing PDF—or do both.
You use PDFpen’s scanning capabilities as follows:
Choose File > Import from Scanner.
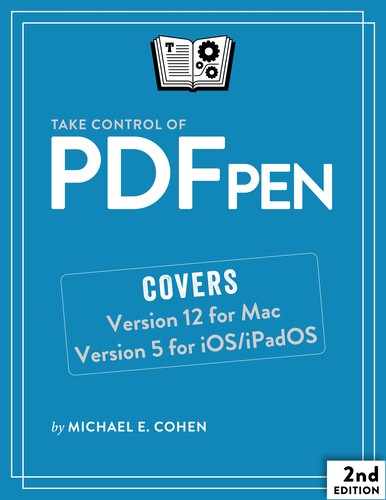
A Scan window appears (Figure 23).
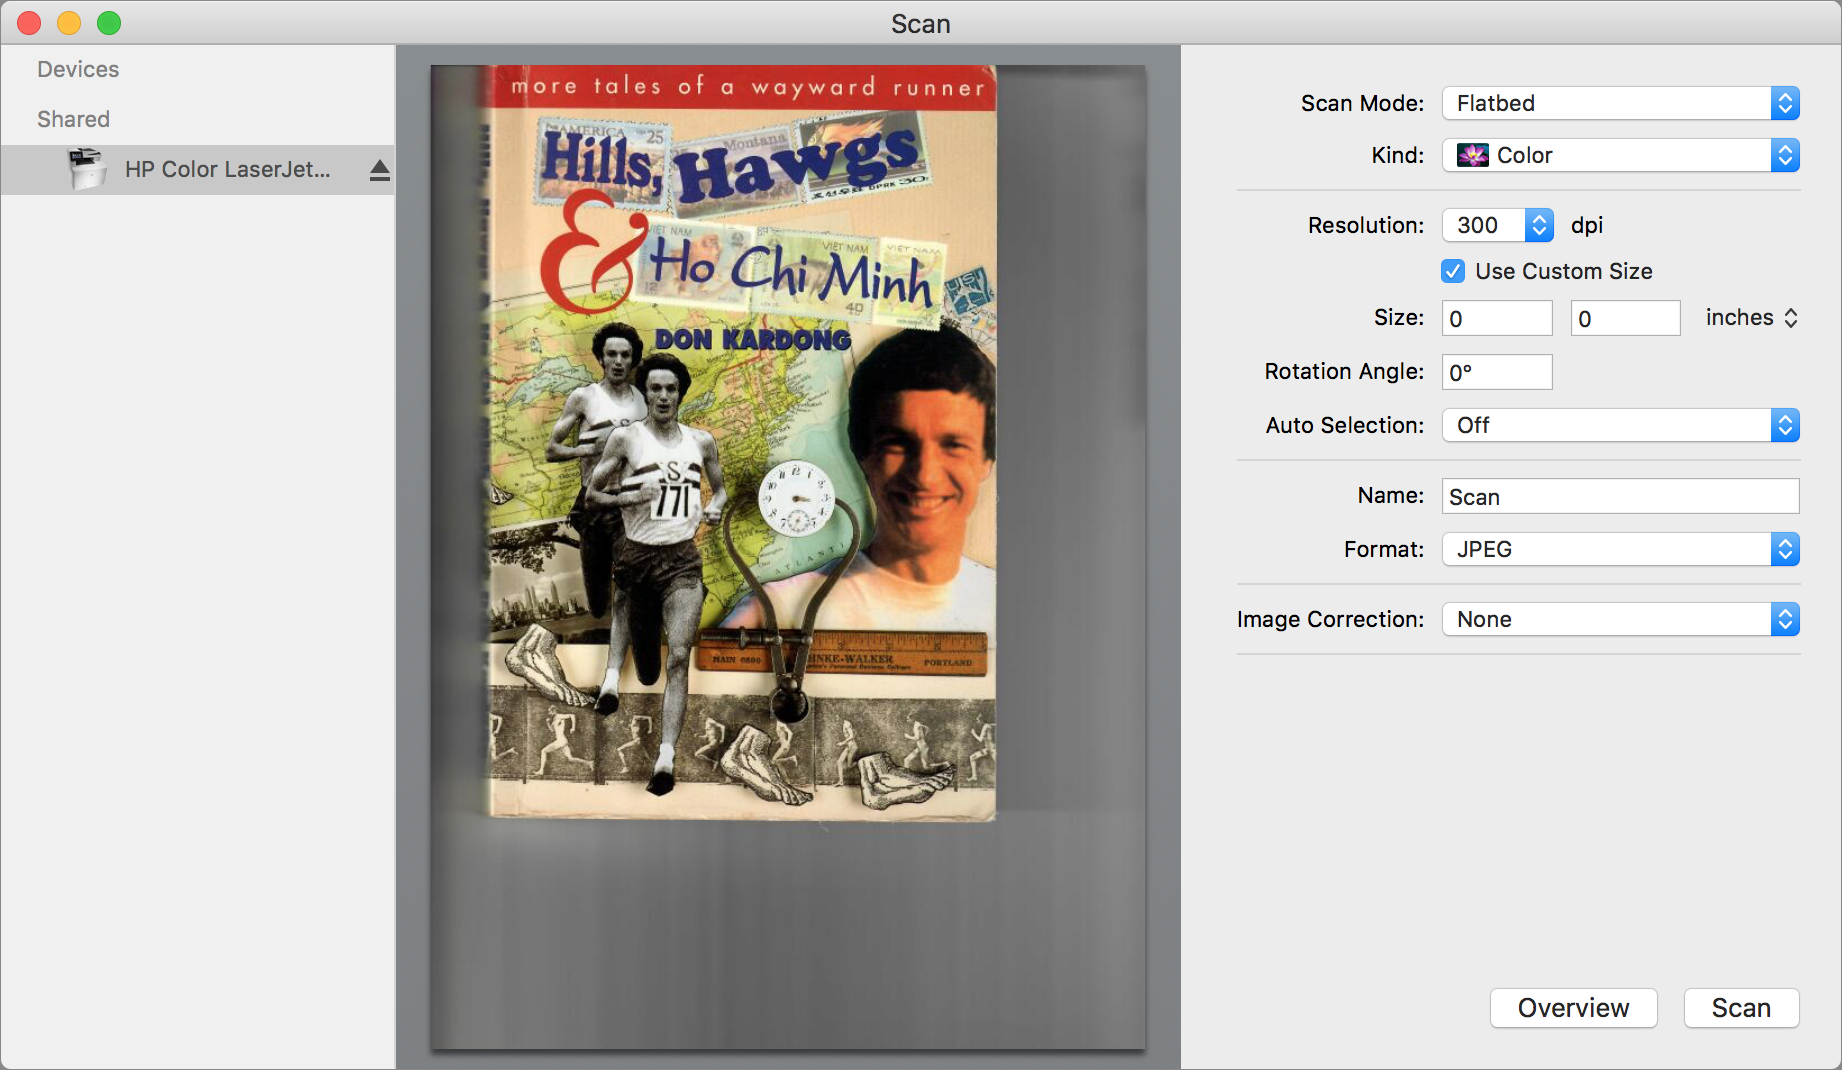
Figure 23: The Scan window has several scanner-specific options. Near the top-right of the Scan window, click the Kind pop-up menu and choose the kind of scan:
Text: This choice scans the document in 1-bit black and white, which is suitable for text-only documents.
Black & White: Sometimes known as grayscale, this choice, depending on the scanner, may offer several grayscale options with various levels of gray. This choice is suitable for documents that combine text with black-and-white photos or diagrams.
Color: This is best for documents that contain color images. There can be several color choices available, depending on your scanner’s capabilities.
Choose a resolution from the Resolution pop-up menu.
The higher the resolution, the more detail the scan contains, but the larger the file is. The resolution you choose depends on how the PDF is to be used; for viewing online, 150 to 300 dpi is more than adequate, but if the PDF is to be printed the scan resolution should match the printer’s resolution.
Choose a scan format from the Format pop-up menu.
This format determines the image encoding in the PDF, and it affects the file size: for text-only documents, TIFF is a good choice; for photos, JPEG provides good results; otherwise, choose PDF.
Set any other scan options you require, and then click Scan.
A new PDFpen document opens containing the scanned page. The Scan window remains open so you can perform additional scans to add to the document.
When you have finished scanning, close the Scan window.
Open Graphic Files as PDFs
You can also create new PDFs directly from graphic files, such as JPEG, TIFF, PNG, or GIF files. Turning a graphic file into a PDF file is simple:
Choose File > Open to display the Open dialog.
Select a graphic file and click Open.
PDFpen creates a new PDF document with a single page that contains the graphic.
Use Continuity Camera
Would you like to scan a document into a PDF but don’t have a scanner? Or do you want to insert a photo into a PDF of something you have right there in front of you? If you have a recent iOS device running iOS 12 or later nearby, and your Mac is running Mojave or later, you can do either, courtesy of the Continuity Camera feature that iOS and macOS provide. This feature turns your iPhone or your iPad into a camera that other apps can use.
Apple describes what this feature requires in its support article, Use Continuity Camera on your Mac. The article also describes the process of taking pictures and making scans with your iOS device.
You can find the Continuity Camera-related Import from iOS Device(s) menu command on PDFpen’s File menu (Figure 24); the exact name of the menu item, and whether it even appears, depends on the presence of suitable iOS devices near your Mac.
PDFpen provides two commands for each available device that your Mac detects:
Take Photo: Choose this to take a single photo. PDFpen inserts the photo into the current document on the current page, or, if there is no current document, PDFpen creates a new PDF with a page that contains the photo.
Scan Documents: Choose this to take multiple photos of one or more documents and combine them as a scan. The iOS device provides the ability to select the portion of each image that will constitute a page of the scan. PDFpen inserts the scanned pages into the frontmost PDF document by adding pages after the currently selected page; if no PDF is open, PDFpen creates a new scanned document to contain the pages.
Use OCR on Scans and Graphic Files
When PDFpen creates a scanned document, or when it opens a graphic file as a PDF, it can perform OCR on it to make the text editable. It’s useful to make text editable even if you don’t intend to edit it. Editable text can be searched (see Navigate with Search Results), and it can be highlighted (see Highlight Text).
Both PDFpen and PDFpenPro can perform OCR on individual documents. In addition, PDFpenPro provides the capability of performing OCR on multiple documents at a time (see Use OCR on Multiple Documents (Pro Feature)).
Use OCR on a Single Page or Document
To instruct PDFpen to perform OCR on any page in a scanned document, choose Edit > OCR Page.
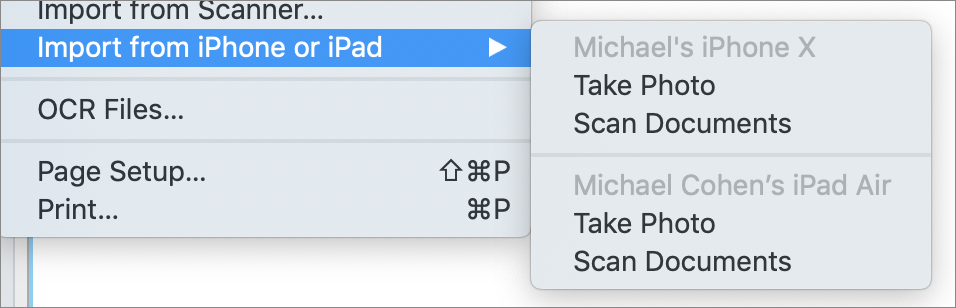
You can set PDFpen to perform OCR automatically upon opening a scanned document, or when you make a selection on a scanned page that appears to contain text. Go to PDFpen > Preferences > OCR to turn on these settings (Figure 25).
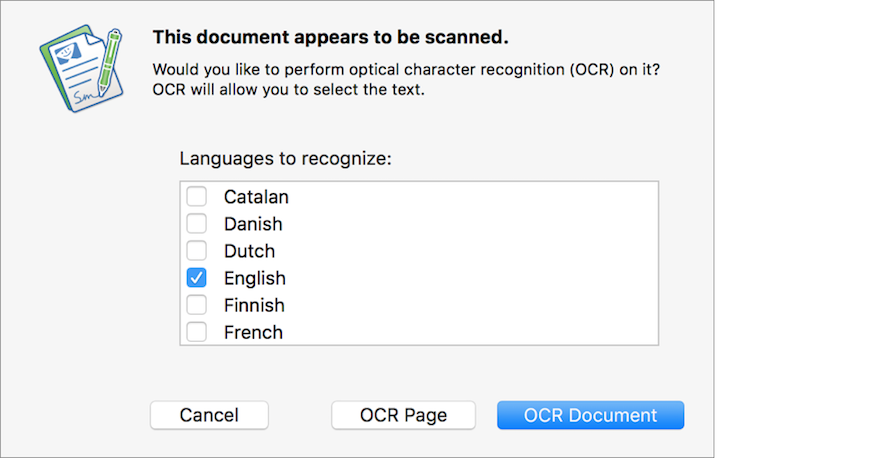
When you create a PDF from a graphic file and you’ve set PDFpen’s preferences to prompt for OCR when opening a scanned document, the program presents a dialog asking if you want OCR performed (Figure 26).
Use OCR on Multiple Documents (Pro Feature)
If you happen to have multiple PDFs on hand that don’t contain selectable text, you can perform OCR on them in a batch with PDFpenPro.
Here’s what you do:
Choose File > OCR Files. An OCR Files window appears (Figure 27).
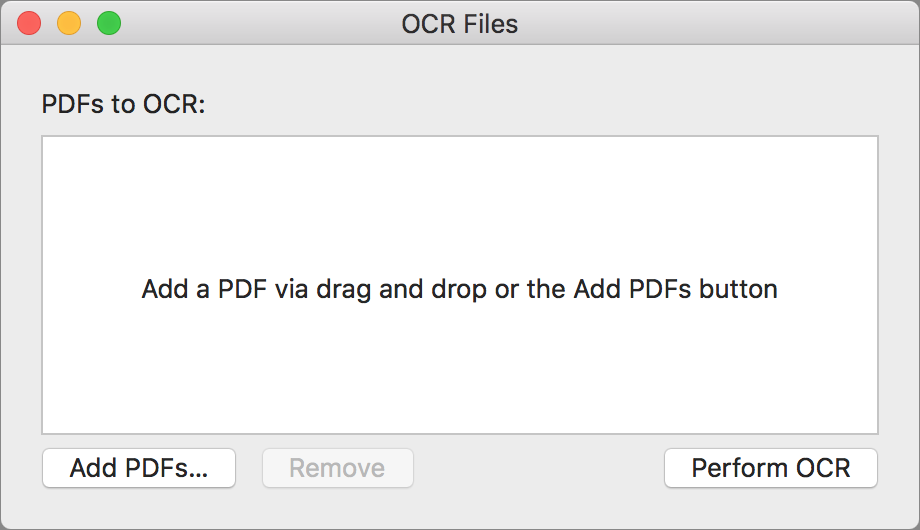
Figure 27: Add files upon which you want to perform OCR to this window. Do either of the following:
Drag PDFs from the Finder into this window.
Click Add PDFs and choose the PDFs you on which you want to perform OCR from a standard file dialog.
Click Perform OCR.
As OCR processing completes for each PDF, a green circle appears beside its name in the list; when all PDFs in the list are processed you hear a soft tone. After recognition is complete, you can add additional PDFs to the window and perform OCR on them. PDFpenPro skips over PDFs that have been previously processed.
To remove a PDF from the list, click it in the list to select it, and then click Remove. You can remove both unprocessed PDFs and PDFs that have been previously processed.
Combine Existing PDFs
Combining pages from multiple PDFs is a matter of drag and drop between documents. If you have separate PDF files that contain pages you want to use in another PDF, this technique is what you want.
Here’s how to create a new PDF from one or more existing PDFs:
Create a new, empty PDF document (see Make PDFs from Scratch).
Choose File > Open or File > Open Recent to open one or more existing PDF documents.
Show the Thumbnails sidebar in all open document windows (described in Navigate with the Sidebar).
Drag one or more thumbnails from the sidebar of an open document to the empty document area of the blank document.
You don’t have to start with a blank PDF file as shown in the steps above, of course: you can drag pages from any PDF into the Thumbnails sidebar of any other PDF with PDFpen (Figure 29).

You needn’t drag pages one by one: you can Shift-click or ⌘-click to select multiple page thumbnails from the sidebar and then drag them all at once. Or you can add a PDF’s entire contents to a document by dragging that PDF into the Thumbnails sidebar from the Finder. You also can use of one or more of the supplied AppleScripts to combine PDFs (see Appendix A: The PDFpen AppleScripts).
Create Portfolios (Pro Feature)
With PDFpenPro you can create PDF portfolio documents. As described in Navigate Portfolios, portfolios are often used to collect related PDFs, as well as their source or supporting documents, into a single file that can be shared with colleagues or collaborators on a project.
Here’s what you can do with portfolios:
Create a new portfolio: Choose File > New > Portfolio Document. An empty untitled portfolio window opens, ready to be populated.
Add files: Click the add
 pop-up menu at the bottom of the window and choose Add Files (Figure 30). Then choose the files you want to add from the file dialog that appears (you can Shift-click or ⌘-click in the dialog’s file list to choose more than one file to be added).
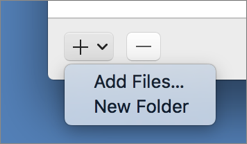
Figure 30: Add files and folders to a portfolio with the Add button at the bottom of the portfolio window. Create folders: To group files into a folder in the portfolio, create the folder before you add the files; choose New Folder from the add
pop-up menu. You can click the folder’s name to select and rename it, and you can create folders within folders.Remove files and folders: Select them (Shift-click or ⌘-click to select multiple items) and then click the delete
 button.
When you finish working with the new portfolio, simply close the window: PDFpenPro prompts you to name the portfolio and choose where to save it.
To save the portfolio but continue to work with it, click Save at the bottom of the window: the portfolio is saved with the name you give it and in the location you specify, but the window remains open.
Make PDFs from HTML (Pro Feature)
If there is a website that you want to save in PDF form, you can always use the Print to PDF technique described earlier. However, that requires you to print each page on the site separately, which will quickly become tedious. PDFpenPro, on the other hand, can follow the links on a webpage and add the linked pages to a PDF:
Choose File > New > From HTML.
The New From HTML dialog appears (Figure 31).
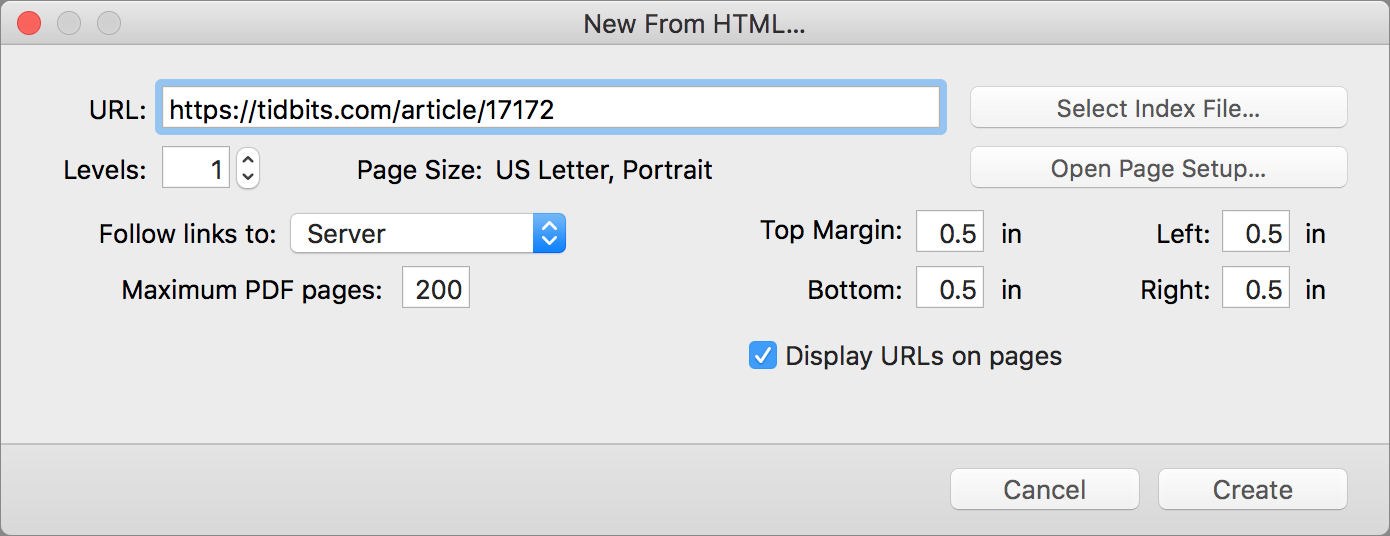
Figure 31: You can create a PDF from one or more webpages. Do one of the following, depending on whether the website is located on the Internet or stored locally:
On the Internet: Enter the URL of the webpage that is the starting point for the PDF.
Stored locally: Click Select Index File and then, from the standard file dialog that appears, navigate to the starting page.
In the Levels field, enter how many levels of links to include.
A setting of 1 produces a PDF from the page that you’ve specified but doesn’t follow any links to produce more pages. A setting of 2 follows each link on the first webpage and produces PDF pages from those linked webpages. A setting of 3, as you might expect, follows links on the linked Web pages to produce more PDF pages, and so on. In theory, you could include almost every page linked on the Internet in a single PDF by choosing a high enough level number—if your Mac didn’t run out of memory or melt first.
Choose an item from the Follow Links To pop-up menu:
Subtree: This choice restricts the followed links to those that lead to pages within the same directory hierarchy as the webpage’s URL.
For example, if the starting URL is
http://www.example.com/dir1/index.html, then the linked pageshttp://www.example.com/dir1/somepage.htmlandhttp://www.example.com/dir1/dir2/apage.htmlwould be included in the PDF, but a linked page found athttp://www.example.com/dir3/apage.htmlwould not, because it’s not in the same directory as the starting URL.Server: This choice restricts the followed links to those that lead to pages on the same server as the webpage’s URL. For example, if
http://www.example.com/dir1/index.htmlis the URL for the first page in the PDF, the linked pagehttp://www.example.com/dir2/apage.htmlwould be included in the PDF, but a linked page athttp://www.smilesoftware.com/would not.Any: This choice allows PDFpenPro to follow links to any directory or site and include those pages in the PDF.
Optionally, specify the maximum number of pages to include in the PDF. This is useful for preventing your Mac from being tied up for hours when you accidentally ask PDFpenPro to turn the entire Google index into a PDF.
Optionally, set the margins for the pages that will be created.
Optionally, click Open Page Setup, and set the dimensions and orientation of the pages to be created.
Click Create, and stand back as PDFpenPro does its magic.
Before you know it (depending on the speed of your Internet connection and the complexity of the pages involved), you’ll have a PDF version of a website.
Make a PDF Table of Contents (Pro Feature)
Not every PDF needs a table of contents, but if you have a PDF that is more than a few pages long, providing a table of contents is a courtesy to your readers. In PDFpen and PDFpenPro, as with Apple’s Preview, you view a PDF’s table of contents in the document window’s sidebar (see Navigate with the Sidebar).
In PDFpenPro, you can also edit a PDF’s table of contents. With the table of contents displayed (choose View > Table of Contents or select it from the Sidebar ![]() pop-up menu), use the action menu at the bottom of the sidebar (Figure 32) to fine-tune the entries.
pop-up menu), use the action menu at the bottom of the sidebar (Figure 32) to fine-tune the entries.

To add a table of contents entry, do the following:
Choose View > Table of Contents.
This command has the virtue of both displaying the sidebar if it is hidden and showing the table of contents in one step.
Go to a page that has a heading or content that you want to include in the table of contents, and then, with the Edit
 tool, click anywhere on that page.
From the Table of Contents action menu, choose Add Entry.
PDFpenPro puts the new entry in the table of contents, and names the entry Page # where # is the number of the currently displayed page. The entry name is selected so you can easily change it.
You can also add entries hierarchically: Add Aunt adds an entry one level above the current level (unless you are at the top level already); Add Child adds an entry nested within the current one.
Here’s how to rename a table of contents entry:
In the sidebar, double-click the entry.
Type the new name and then press Return.
As you work on a PDF, you may find yourself rearranging the order of the pages (see Rearrange Pages). In such cases, you may find it necessary to reorganize the Table of Contents. You can change the order in which entries appear, remove entries, and nest entries hierarchically. This last capability is useful for structured documents that have headings and subheadings (much like this book, in fact); see Navigate with a Table of Contents for an example of nested entries.
Here are the methods by which you organize a table of contents:
Change where an entry appears: Drag the entry up or down the table of contents to the desired position.
As you drag, a translucent image of the entry follows your pointer, and a line appears to show you where the entry will be placed when you release the mouse (Figure 33).

Figure 33: Drag to reposition a table of contents entry. Delete an entry: Click the entry to select it and then press Delete. You can also click it and then choose Remove Entry from the Table of Contents action menu.
Nest or un-nest an entry: While dragging an entry you can control whether it is nested under another entry—pay attention to the location of the blue line and drag directly onto another item to nest the entry under it. Or you can do one of the following:
To nest an entry beneath the entry above it, click the entry and then choose Demote from the Table of Contents action menu.
To un-nest an entry, click the entry and then choose Promote from the Table of Contents action menu.