Edit a PDF
The conventional wisdom is that PDF documents are great to share because, unlike word processing files, PDFs are in final form and can’t be modified.
Yeah, right. If you’ve read any part of this book, you know that PDFs are far from unmodifiable. Nonetheless, it is true that PDFs are not easily modifiable—that is, not unless you have a tool like PDFpen. Armed with PDFpen, you can make all sorts of changes, such as:
Fix typos in a magazine article.
Update an old flyer, even if you don’t have the original.
Sharpen and stylize pictures on the page.
Redact sensitive or confidential material.
Crop pages or rotate them.
Add a watermark to one or more pages.
Add headers, footers, and page numbers to a PDF.
Create links to other pages in the PDF or to webpages.
In this chapter, you’ll learn how to do all of these things and more.
Add, Edit, and Remove Text
You’ve already seen how to add a text imprint to a PDF in Fill Out a Text Entry: select the Text ![]() tool and click or drag on a page in the PDF. Each time you create an imprint, it contains the sample text “Text,” which is selected so you can quickly replace it by typing.
tool and click or drag on a page in the PDF. Each time you create an imprint, it contains the sample text “Text,” which is selected so you can quickly replace it by typing.
Set Wrapping in a Text Imprint
Whether text wraps in an imprint depends initially on whether you created the imprint by clicking or by dragging:
Clicking: When you click with the Text
 tool to make an imprint, the text box expands horizontally as you type. The text doesn’t wrap, so you may find yourself typing a long line of text that extends beyond the edge of the page. Similarly, if you paste a lengthy chunk of text into the imprint, the text ends up on a single line.
You can change this behavior by enabling text wrapping before the text imprint becomes too wide. When text wrapping is enabled, typed text wraps when it reaches the right border of the box. To turn on text wrapping, do the following:
Place the cursor within the imprint, or select the imprint with the Edit
 tool.
tool.Choose Edit > Wrap Text.
Dragging: When you drag to create an imprint, the text that you subsequently type wraps automatically to the width of the imprint, and the imprint expands vertically once the text reaches the bottom. This is because the Wrap Text command is enabled for imprints that you create by dragging. If you choose Edit > Wrap Text on such an imprint, Wrap Text is disabled, and the text imprint behaves like one that was created by clicking.
Whether the text wraps or not, you can adjust the size of a text imprint:
Choose the Edit
 tool and click the imprint.
Drag a handle at a corner of the imprint to resize and reshape it.
Change the Appearance of Text
A newly created text imprint uses PDFpen’s current default font (described in Fill Out a Text Entry). But the text imprint doesn’t have to remain in that font. In fact, you can mix fonts and text colors within an imprint, and you can set the font, text color, and background color for the imprint as a whole.
By default, imprints are transparent, but you can give them a background color. You can make an imprint’s background color completely opaque, or you can adjust the color’s opacity so that objects behind the imprint can be seen.
Here’s how you change the background color of an imprint:
With the Edit
tool, click to select the imprint.In the Editing Bar, click the Colors
 object property pop-up menu, and then click the Background Color
  icon at the top of the menu.
On the menu, click the background color that you want. If the menu does not contain your desired color, click the Other Colors
 icon at the bottom of the menu, and then use the Colors panel that appears to choose the color you want.
You can format a range of selected text in an imprint or the imprint as a whole. Here are the text formatting settings you can make:
Text styles and relative sizes: Choose Format > Font and an appropriate submenu item. The submenu items include Bold, Italic, Underline, Smaller, Larger, Kern, Ligature, and Baseline. Note that you can set kerning, ligature, and baseline only for text selections, not for a selected imprint.
Text alignment: Choose Format > Text, and then choose either Align Left, Center, Justify, or Align Right.
A specific font (family, typeface, and size): Choose Format > Font > Show Fonts, and then specify a font with the Fonts panel.
Text color: Choose Format > Show Colors, and then choose a color in the Colors panel.
Here are explanations of the less common formatting terms:
Kern: The commands on this submenu control the amount of space between individual characters. Here are your choices:
Tighten and Loosen: These two commands, respectively, bring the characters closer together or send them farther apart. Place the cursor between two characters to adjust the kerning between them, or select a range of text to adjust the entire selection.
Use Default: Select this to use the kerning pairs built into the font. The available kerning pairs vary from font to font.
Use None: Choose this to ignore the default kerning pairs and space the characters equally.
Ordinarily, Use Default is the best choice unless you have specific typography needs.
Ligature: Some fonts have special characters that are designed to replace specific character combinations. For example, “ff” and “fl” are frequently replaced with ligatures that combine the two characters to make them fit together more attractively. Moreover, some decorative fonts include less common ligatures, such as ligatures for “ct” and “st.” Which character combinations PDFpen replaces by ligatures depends on the ligatures available in the selected text’s fonts.
Here are the Ligature submenu choices:
Use Default: This command substitutes the common ligatures for matching character combinations in the selected text.
Use All: This command substitutes any available ligature, common or not, for matching character combinations in a selection.
Use None: This command does not do any ligature substitution, and removes ligatures placed by the other two commands.
Use Default is ordinarily the best choice.
Baseline: The commands on this submenu affect the amount of vertical spacing between selected characters and the baseline:
Superscript and Subscript: These commands raise or lower the selected characters a bit more than half the character height each time you apply them. You might use these when typing formulas.
Raise and Lower: These commands raise or lower the selected characters a small amount (about 1 point) from the rest of the characters on the line each time you apply them. Use these commands to make fine adjustments, such as when you correct text on a page.
Use Default: This puts the characters back where they belong.
Correct or Remove Items on a Page
It’s easy enough to edit text imprints that you put on the page, but what about the native text or graphic objects that a PDF may already contain? PDFpen provides several tools and commands that give you some mastery over a PDF’s native objects.
Use the Correct Text Command
The Correct Text command gives you the ability to modify the contents of a PDF’s native text objects. Here’s how to use it:
With the Select Text
 tool, select the text you want to change.
On the document window toolbar, click Correct Text, or choose Format > Correct Text.
Depending on the underlying structure of the text object in the PDF, the text you’ve selected and a varying amount of surrounding text appear within a text imprint (Figure 62).

Figure 62: PDFpen puts your selection and surrounding text into an imprint when you use the Correct Text command. Type your changes, or use a formatting or editing command, such as Format > Font > Bold, or Edit > Cut.
Your changes take effect. What’s more, you can now move the imprint around, resize it, and do all the other stuff that you can do with the text imprints that you make. Zounds!
Here’s how text correction works: PDFpen analyzes the various PDF text objects that contain your text selection, removes the text from those objects, and puts the text into a similarly sized imprint, matching the original objects’ layout and formatting as best as it can. “As best as it can” is key here—your Mac, for example, might not have the same fonts installed that were used to create the document. Or maybe the text was created from OCR (see Use OCR on Scans and Graphic Files). In those cases, PDFpen has to “fake it” when it makes the imprint.
There are two kinds of “faking it” (these are gross oversimplifications—the processes belong in the realm of You Really Don’t Want to Know):
The font is not on your Mac: PDFpen examines whatever layout information it can scrounge up about the font and looks for the closest fit it can find on your Mac. The imprint will look similar, but not identical, to the original text. You may have to manipulate the imprint slightly to smooth out the differences.
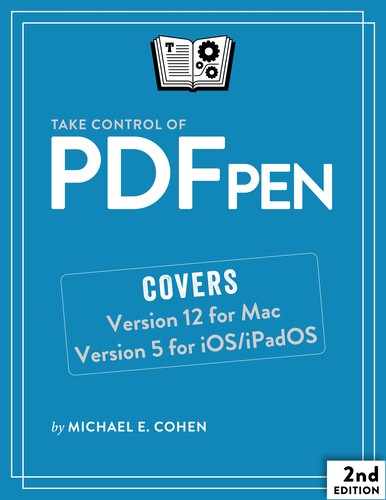
The text object is the result of OCR analysis: PDFpen looks for a font that lays out with roughly the same dimensions as the scanned text, but doesn’t try to match the original font’s look in the imprint that it creates (Figure 63). You may have to work hard to make the imprint come close to matching the original’s appearance.

Fortunately, to make the corrected text imprint look as much like the original as possible, you have access to PDFpen’s full range of text formatting capabilities: fonts, colors, sizes, baseline adjustments, kerning adjustments, line spacing, and so on. Learn them, and use them (see The Font Bar and Change the Appearance of Text).
Redact Text
There’s another kind of text correction you can make that doesn’t require as much work: you can remove text completely. That is, in PDFpen terminology, you can redact it.
If there are confidential passages in your document, here’s how you can remove each one with PDFpen’s redaction capabilities:
With the Select Text
tool, select the text you want to remove.Do one of the following:
Choose Format > Redact Text – Block.
Choose Format > Redact Text – Erase.
Here is how the two commands differ:
Redact Text – Block: This command removes the text from the underlying text object, and places a black rectangle where the text was (Figure 65). In the case of scanned text, it also deletes the part of the image from which the scan was derived.

Figure 65: The names in this manuscript have been redacted to protect the innocent. The black redaction rectangles are separate objects that you can move, fill with a different color, or resize—just on the off-chance you want to make your redactions a cheerful rainbow.
Redact Text – Erase: This command removes the text from the underlying text object, and, in the case of scanned text, it deletes the part of the image from which the scan was derived.
Fine-Tune with the Precision Edit Tool
As you learned in The Selection Tools, there’s a tool hidden behind the Edit ![]() tool: the Precision Edit
tool: the Precision Edit ![]() tool. With this tool you can select and then move, scale, or remove native PDF text and graphic objects.
tool. With this tool you can select and then move, scale, or remove native PDF text and graphic objects.
Here’s how to use it:
In the Editing Bar, double-click the Edit
tool, or choose Tools > Precision Edit Tool. This selects the Precision Edit  tool, and your pointer changes to the precision
  pointer.
Click the item you want to manipulate, either text or graphic. This selects the item, indicated by a bounding box with control handles
 at its corners (Figure 66).
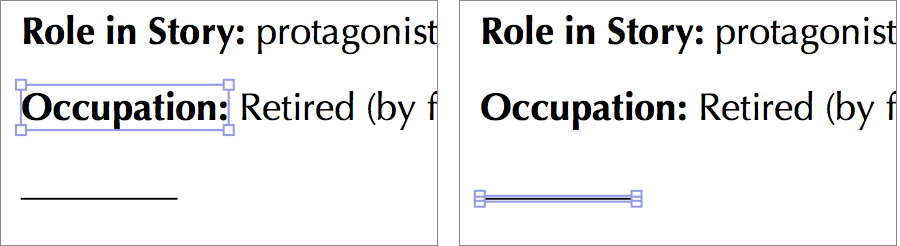
Figure 66: The Precision Edit tool can select either native text objects (left) or graphic objects (right). Do any of the following:
Place your pointer over the object so your pointer becomes a move
 pointer, then drag to move the object.
Place your pointer over one of the object’s control handles so your pointer becomes a resize
 pointer, and then drag to scale the object.
Press Delete to remove the object from the PDF.
Search and Replace or Redact Text
In addition to the correction capabilities described in Correct or Remove Items on a Page, above, there’s yet another avenue to modifying a PDF’s native contents: the Find feature.
If you’ve been reading this book from front to back, you’ll have read that you can navigate in a PDF with PDFpen’s Find feature (see Navigate with Search Results if you are of the non-linear reading persuasion). Find, though, is only one-third of that feature: it’s really Find, Find and Replace, and Find and Redact.
You can search and replace text like this:
Choose Edit > Find > Find and Replace (⌘-Option-F).
The Replace window opens if it is not already visible, with the cursor positioned in the Find field.
Enter some text in the Find field. As you type, matching results appear in the window (Figure 67).
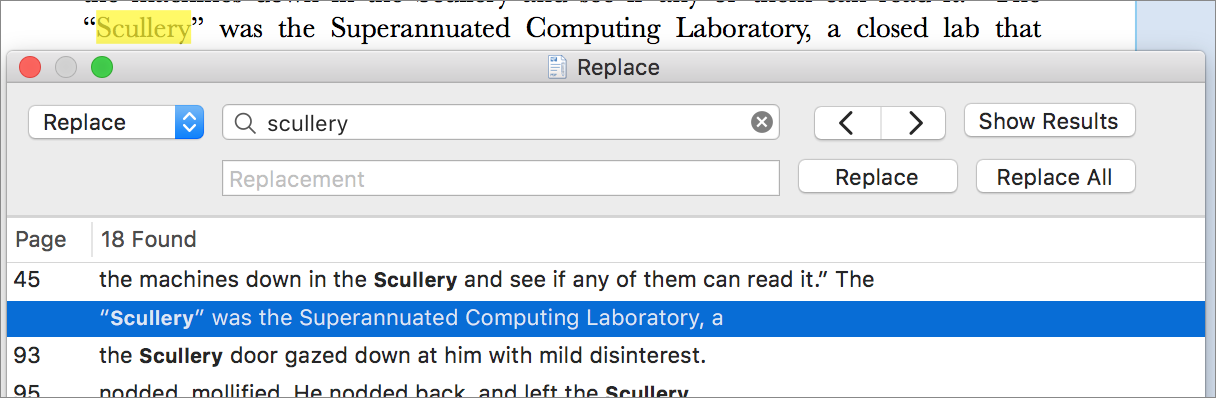
Figure 67: Use the window to perform Find and Replace operations. Enter some text in the Replacement field.
Do one of the following:
Click a result in the Replace window and then click Replace—no, not the first Replace menu button to the left of the Find field (shown in the figure above), but the second one, between the Replacement field and the Replace All button.
Click Replace All.
When you choose Replace, the following actions happen so quickly that you may not notice all the steps. First, the document displays the result that you clicked and selects the matched text. Then, that text is replaced with the contents of the Replacement field, after which the search result that you clicked vanishes from the window. Finally, the window selects the next search entry, if any. The end result is that everything is set up so that you can click Replace again to replace the new currently selected search entry. Lather, rinse, repeat.
On the other hand, when you choose Replace All, PDFpen replaces every occurrence of the text that matches the Find field with the Replacement field’s contents. Depending on the size and complexity of the PDF document, this can take a few seconds. When the process finishes, no search results remain in the window, and the document shows the final replacement selected.
Here are some important points to keep in mind when you perform a Search and Replace:
The search is both case-insensitive and word-boundary insensitive. If, for example, you search for the name
Alfand replace it withSigurd, not only will all occurrences of the name be replaced, but words containing the search term receive the replacement as well:halfway, for example, becomeshSigurdway.If the found text is not already in a text imprint (that is, if it is in a PDF text object embedded in the page), the act of replacing it creates a text imprint, just as though you had selected the text and chosen Format > Correct Text (read Use the Correct Text Command). It even works with OCR text in a scanned image.
The steps to perform a Search and Redact operation are similar to those for a Search and Replace:
Choose Edit > Find > Find and Redact (⌘-Shift-F).
The Redact window shows its Find field and includes a menu with redaction options (Figure 68).
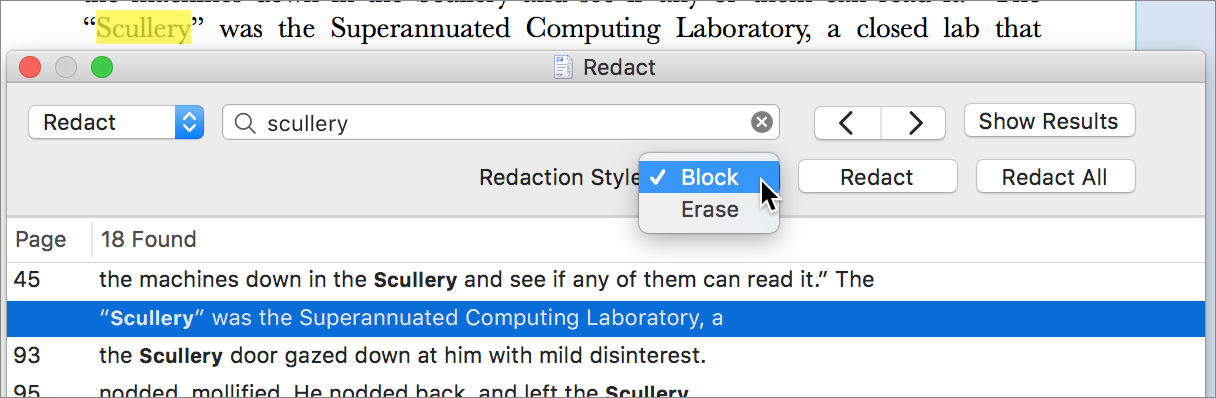
Figure 68: The Redaction Style menu gives you the option of blocking out or erasing search results. In the Find field, enter text that you’d like to redact.
PDFpen displays any matches in the lower portion of the window.
From the Redaction Style pop-up menu, choose a redaction style. You have the same two choices as for manual redactions: Erase or Block (described in Redact Text, a few pages earlier).
Do one of the following:
Next to the Redaction Style pop-up menu, click Redact to redact matching results one by one.
Click Redact All to redact every occurrence of the search term in the text.
Keep these points in mind when you search and redact:
Redaction searches are also case and word-boundary insensitive, matching the search string no matter where it occurs in the PDF.
As with manual redaction operations, the redact operation only redacts text that is in a PDF text object embedded in the page; it does not redact any text that occurs within text imprints. Instead, you can perform a find-and-replace on those occurrences and remove the text from imprints that way (you will have to create the black redaction box by hand if you want to indicate a redaction).
Find and Redact doesn’t search a PDF’s metadata. (For instructions on modifying a PDF’s metadata, read the bullet item on “Document Information” in The Inspector.)
Insert Line Numbers
In some documents, such as transcripts or legal documents, you may find it useful to number some lines of text for reference. You can select text with the Select Text ![]() tool or select a rectangular area containing text with the Select Rectangle
tool or select a rectangular area containing text with the Select Rectangle ![]() tool and then choose Edit > Insert Line Numbers. PDFpen places numbers to the left of the selected text.
tool and then choose Edit > Insert Line Numbers. PDFpen places numbers to the left of the selected text.
Inserted line numbers have the following properties:
Inserted line numbers always begin with 1.
They use the default page number font as specified in PDFpen’s preferences (PDFpen > Preferences > Editing).
Once added, they cannot be edited; to remove them, choose Arrange > Unlock All (⌘-Shift-L), click them with the Edit
tool, and then either choose Edit > Delete or press Delete.
Add and Alter Pictures
PDFpen can import a number of image formats, including all the usual suspects: JPEG, TIFF, GIF, PNG, and Photoshop. When images are imported, PDFpen converts them silently to PDF image objects.
You can import image files simply by dragging them from a Finder window or your desktop directly onto the page currently displayed in the PDFpen document window.
You can also drag an image file to the Thumbnails sidebar, in which case PDFpen creates a new page and centers the document on that page.
Or, if you prefer, you can follow these steps, which use the standard Open dialog and help you if you need to search for the file by name:
Click the Insert
 button on the document window toolbar.
The standard Open dialog slides down.
In the dialog, optionally use the search field to locate the file, and then select the file and click Open.
The image appears centered on the page currently displayed in the document window. In a new, blank document, a page is created and the image placed on it.
Once the image is in PDFpen, it can be moved from one page to another by cutting or copying it from its current page and pasting it onto a different page.
Resize and Crop an Image
It’s rare that an image you insert into a PDF is exactly the right size and shape. However, you can resize and crop it painlessly.
To resize an image, do the following:
With the Edit
tool, click the image.Drag any corner of the image to resize it; hold down Shift as you drag to maintain the image’s proportions.
Cropping an image is not much more difficult:
With the Edit
tool, click the image and then choose Edit > Crop Image.A cropping control panel appears at the bottom of the document window and the image is highlighted with its current dimensions indicated at the top left and bottom left (Figure 69). A cropping rectangle is superimposed on the image.
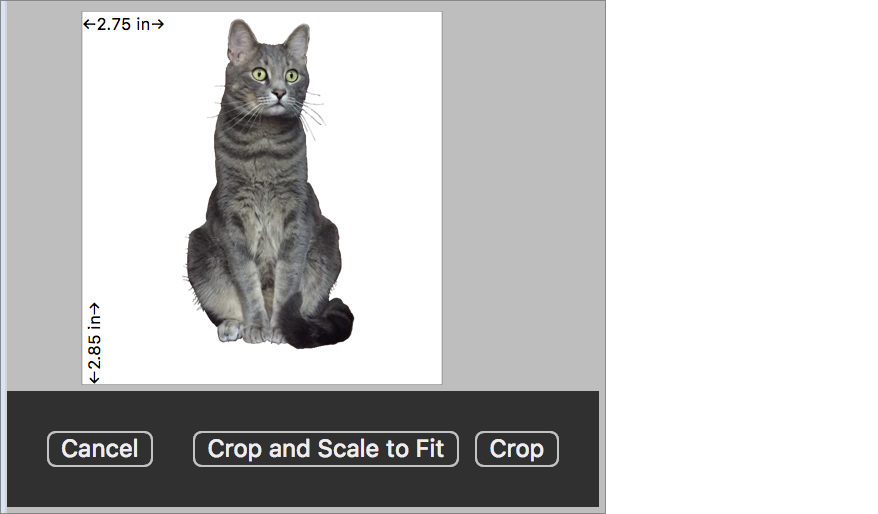
Figure 69: This image is on the verge of being cropped. Drag within the image boundaries to move the cropping rectangle; drag from any corner or edge to resize it.
As you move the cropping rectangle, the area outside of the cropping rectangle appears with reduced contrast to highlight the area to be cropped, and the size indicators change to reflect the current dimensions.
Do one of the following:
Click Crop to crop the image to the highlighted area.
Click Crop and Scale to Fit to crop the image but have the cropped image scale to match either the original horizontal or vertical dimension.
If the horizontal dimension of the cropped image is the largest dimension, the image scales to fit the original horizontal dimension; if the vertical dimension is largest, the cropped image scales to fit the original vertical dimension.
Straighten and Adjust an Image
When an inserted image is slightly skewed or is poorly exposed, you can compensate—within limits, of course: PDFpen can work minor wonders, but not miracles:
With the Edit
tool, click the image and then choose Edit > Deskew and Adjust Image.The Deskew and Adjust controls appear at the bottom of the document window (Figure 70).
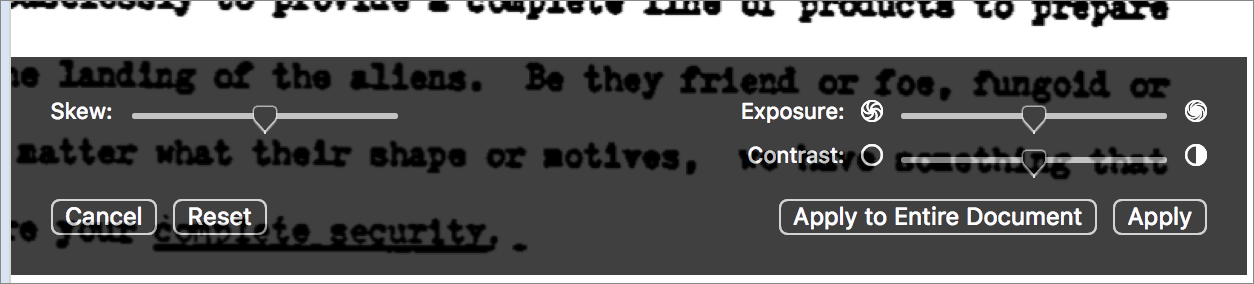
Figure 70: The Deskew and Adjust controls can affect the selected image or all of the images in the document. Drag the Skew slider left or right to adjust the tilt of the image so it appears straight. The Skew slider is limited to about 20 degrees of adjustment.
Drag the Exposure slider left or right to decrease or increase the exposure (brightness) of the image; drag the Contrast slider left or right to decrease or increase the image’s contrast.
Click Apply.
You can make more complex image adjustments as well with PDFpen’s Image Edit panel:
With the Edit
tool, click the image and choose Edit > Adjust Image to open the Image Edit panel, which appears with its Adjust tab selected (see Figure 71).
Figure 71: The Image Edit panel provides controls similar to those found in Photos and many other image-editing applications. Drag the various sliders to adjust the image’s appearance; if things get out of hand, click Reset All and try again.
Close the Image Edit panel or click another tab in the panel to make your changes take effect.
You can apply some preset effects with the Effects tab of the Image Edit panel as well, such as blurring the image, applying an “antique” effect, and inverting all of the colors to make a color negative of the image. The Effects tab displays thumbnails showing the various effects so you can preview before you try them. Unlike the controls in the Adjust tab, they don’t take effect when you switch tabs: to apply an effect, select it and then close the Image Edit window.
The Image Edit panel’s Details tab displays statistics about the image. It has no controls that you can adjust.
Resample an Image
When you know that your PDF is going to be reproduced on a black-and-white printer, or if the size of your PDF file is too large because of all the color images in it, you can resample the images to change their color depth and resolution.
To resample an image, click the image with the Edit ![]() tool and choose Edit > Resample Image. The Resample controls appear at the bottom of the document window (Figure 72).
tool and choose Edit > Resample Image. The Resample controls appear at the bottom of the document window (Figure 72).
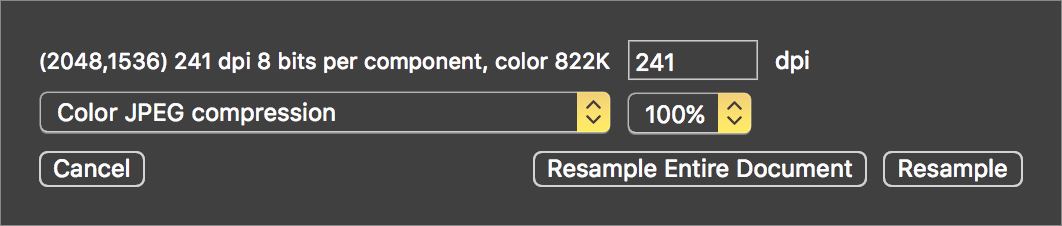
Here are the resampling actions you can take:
Type a different DPI value: Lower values make the image appear blurrier but reduce how much storage the image requires. (Higher values have no visual effect but increase the storage requirements.)
Change the compression type: Here’s what the choices on the pop-up menu mean:
Color JPEG Compression: This is the standard format for color PDF image objects in PDFpen.
Grayscale: Grayscale will make your image look like a black-and-white photo.
1-Bit Threshold: Every pixel in the image that is more than 50% gray is made white and all the others black, creating a silhouette effect.
1-Bit Dither: Black-and-white dot patterns simulate levels of gray; the resulting image has less detail and resembles a low-resolution fax.
Choose a quality percentage: This pop-up menu is available only for Color JPEG and Grayscale compression. Generally, the higher the quality percentage, the more storage space the image requires. Reducing the percentage can make a color or grayscale image look dithered or banded, but saves storage space.
Click Resample to have your settings take effect; click Resample Entire Document to apply the settings to every image in the document.
Tip: Unfortunately, the Resample controls don’t give you a preview of how they effect the image, but you can choose Edit > Undo Edit Image if the results are not to your liking.
Make a Transparent Image
PDFpen can select a color or color range in an image and “knock it out” so that any objects behind the image on the page can be seen through the knocked-out holes. This is exactly what you need when you make a signature to use on forms (see Add a Scanned Signature), and it is useful for decorative purposes, such as for creating a border on a page.
You can knock out a color range in an image to make it transparent in three quick steps:
With the Edit
tool, click the image and choose Edit > Make Transparent Image.In the dialog that slides down, click the eyedropper on the color you want to knock out (Figure 73), and then slide the Tolerance slider until the image shows the desired transparency (Figure 74).
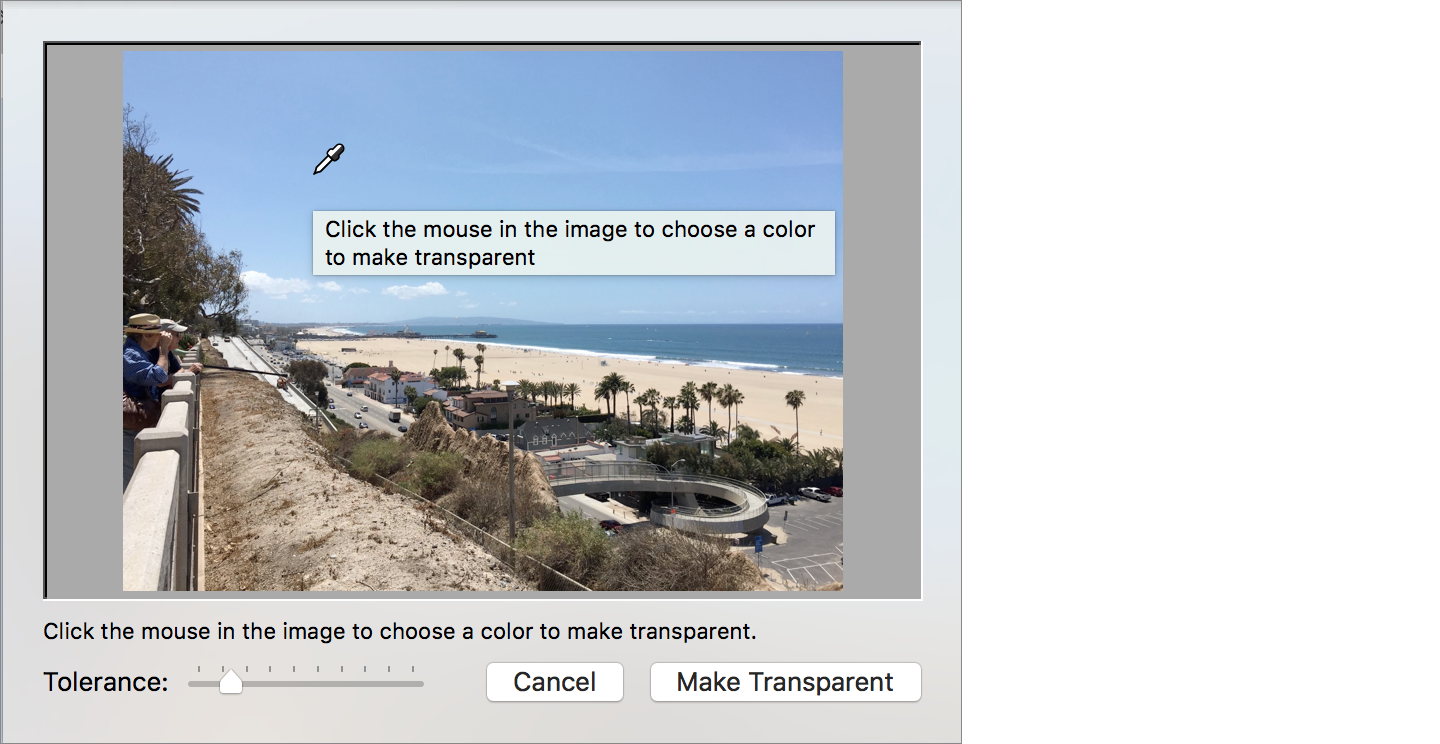
Figure 73: This image is about to have the sky knocked out. 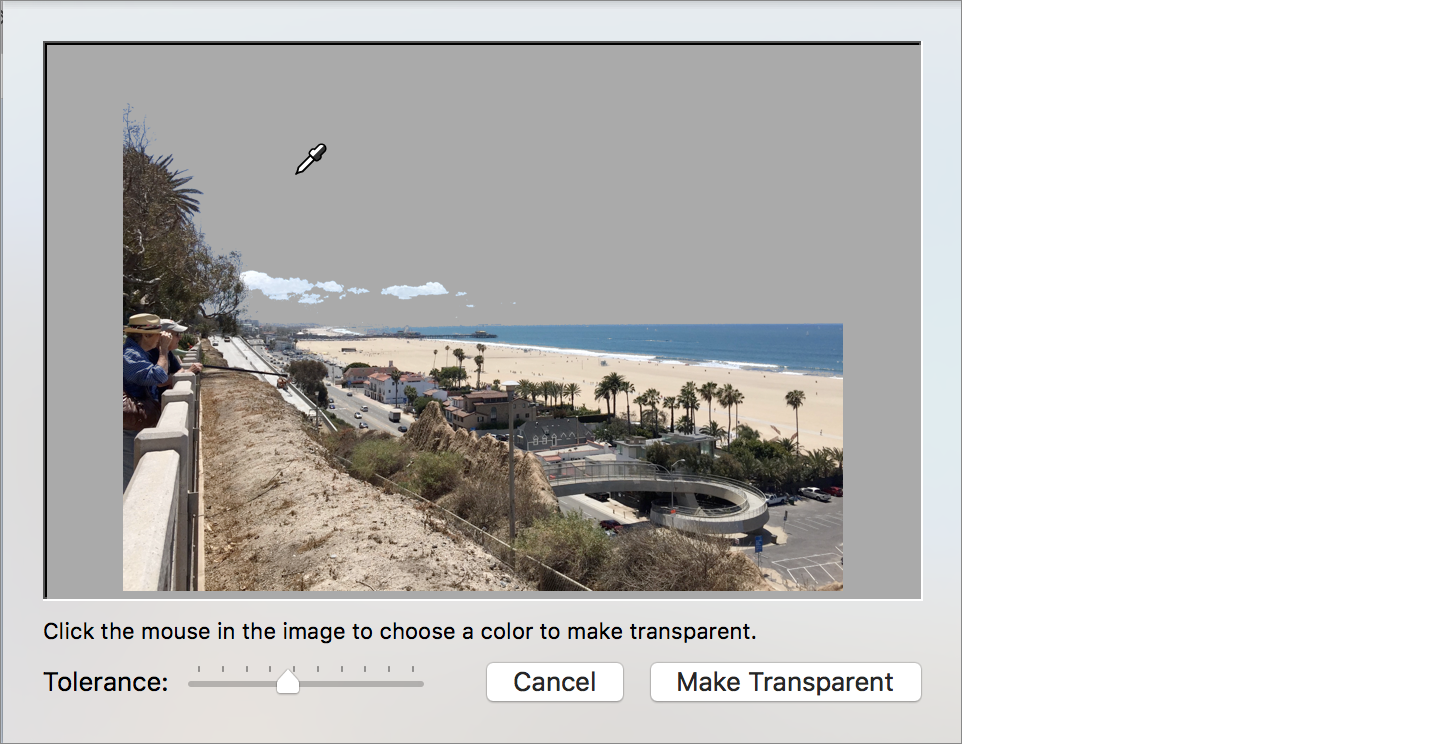
Figure 74: Excuse me while I lose the sky… Click Make Transparent.
Colors that fall within the range you specified disappear, and anything behind the image can be seen through the no-longer-visible parts of the picture.
Add a Watermark
You may have some documents that are not in final form or are confidential and need to have their pages marked accordingly, and others that need to display some sort of corporate or organization brand. PDFpen gives you watermarks to satisfy that need. Watermarks are non-editable images that appear behind the other elements on a page, such as the stamp shown in Figure 75.
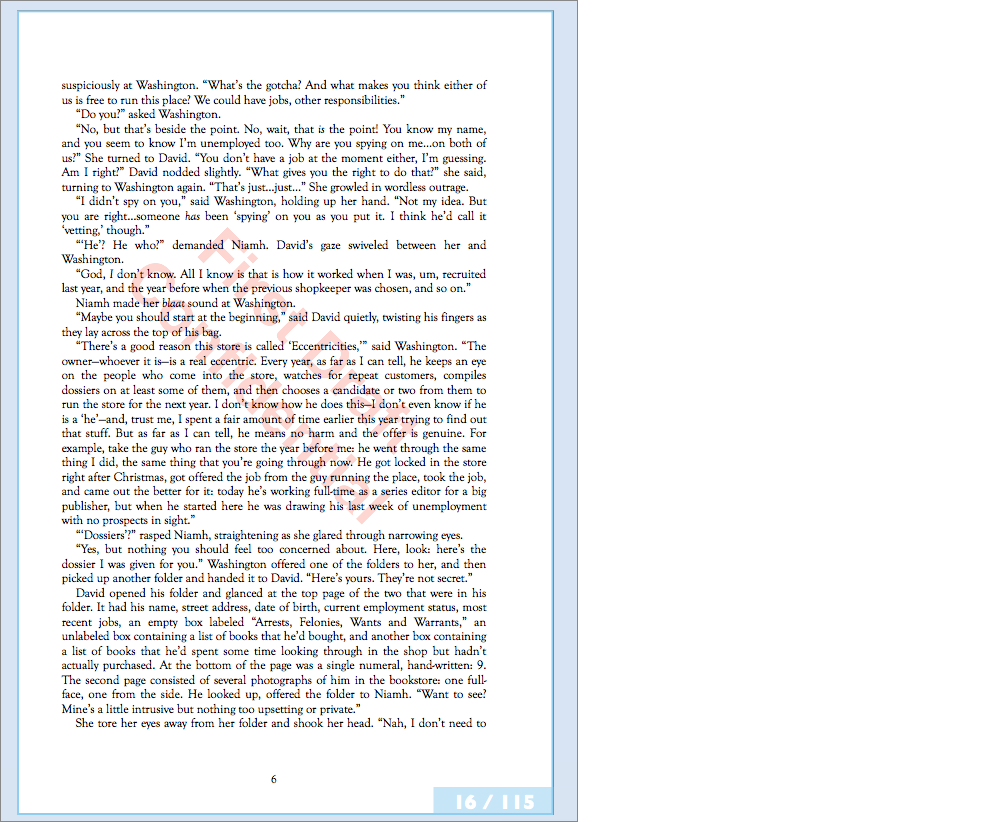
You can turn either a text imprint or an image into a watermark, and the watermark can appear on all of a PDF’s pages, or a range of pages, or just a selected page.
To create a watermark, do the following:
Go to any page where a watermark should appear.
Place an image, draw something with PDFpen’s drawing tools, or create a text imprint on that page.
Scale and format the item so it is the right size, but don’t worry about orienting it.
Select the item you placed if it is not already selected, and then choose Edit > Watermark > Convert to Watermark. The Convert to Watermark dialog appears (Figure 76).
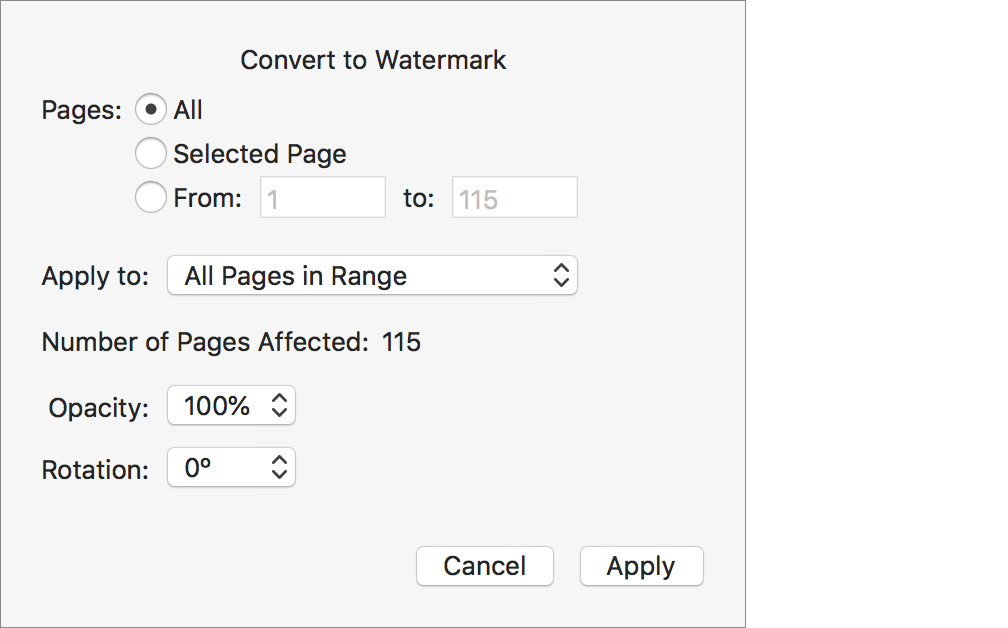
Figure 76: This dialog turns the item you placed on a page into a watermark. In the dialog, specify the pages on which you want the watermark to appear.
Optionally, use the “Apply to” pop-up menu to put the watermark on every page in the range, or only on odd or even pages.
Use the Opacity and the Rotation pop-up menus to choose the watermark’s opacity and the angle at which the selected item should be rotated when it is converted.
Click Apply. The watermark appears on the pages you specified.
You can remove a watermark from any page or range of pages:
Select the thumbnails of the pages from which you want to remove the watermark in the sidebar (see Navigate with the Sidebar)
Choose Edit > Watermark > Remove Watermark from Selected Pages.
Rearrange, Rotate, and Crop Pages
When you create a PDF out of bits and pieces of other PDFs (see Combine Existing PDFs), you may want to adjust the pages that you’ve brought together. For example, a page may consist of a full-page graphic and need to be rotated from landscape to portrait orientation, or a range of pages may need to be reordered, or some legal-size pages may need to be cut down to letter size.
PDFpen can help you with all those tasks.
Rearrange Pages
The Thumbnails sidebar and your preferred pointing device are the tools you need to rearrange pages in a PDF:
Choose View > Thumbnails to show the Thumbnails sidebar if it isn’t already visible.
Drag the thumbnail of the page you want to move to its new location in the sidebar.
As you drag the thumbnail, a black line appears to the right of each thumbnail you pass over, indicating that, were you to drop the dragged thumbnail at that moment, the page would be placed at that point.
But suppose you need to move a small group of pages to a new location in a very long PDF. Dragging could become tedious. The following steps explain how to do big moves over long distances in a PDF:
In the Thumbnails sidebar, Shift-click or ⌘-click to select the pages you want to move.
Choose Edit > Cut.
Scroll to the thumbnail of the page after which you want place the pages you’ve cut, click it, and then choose Edit > Paste.
The pages appear following the page you clicked.
Rotate a Page
When a page doesn’t match the orientation of the others in a PDF document, hilarity can ensue when the document is printed. Some programs, like PDFpen, can automatically rotate such pages, but not everyone (yet) uses PDFpen. A recipient of your PDF might have a program that crops the disorientated page to fit when it prints.
To reorient a disorientated page, follow these steps:
Navigate to the page that is oriented differently from the others. An easy way to find such pages is by viewing them in the Thumbnails sidebar (Figure 77).
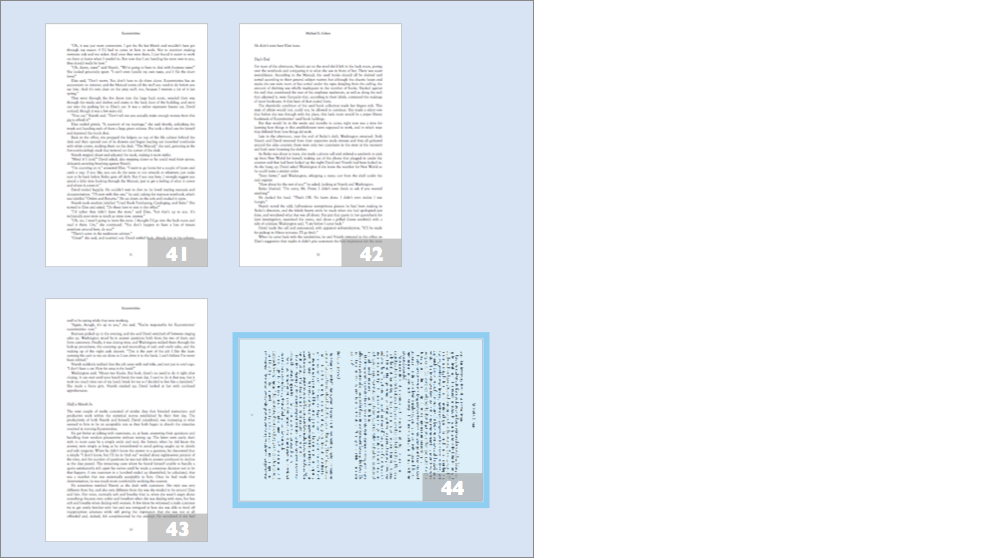
Figure 77: One of these pages is not like the others. Click the page and then do one of the following:
To rotate the page 90 degrees clockwise, choose View > Rotate Right (⌘-R).
To rotate the page 90 degrees counterclockwise, choose View > Rotate Left (⌘-Shift-R).
Which direction depends on your needs (and maybe the direction in which your head tilts best), but, in either case, the page is reoriented.
Crop a Page
As common as 8½-by-11 pages are in the United States, not everyone uses pages with those dimensions, and, when it comes to PDFs that are to be printed in a book or pamphlet, the page dimensions can differ significantly.
When you have a PDF that must be cut down to size, PDFpen can help:
Navigate to the page you want to crop.
In the Editing Bar, click the Select Rectangle
 tool.
tool.On the page, drag to select the proper dimensions.
As you drag, the current dimensions of the selection rectangle appear along its sides (Figure 78).

Figure 78: This page is getting a much-needed trim. Choose Edit > Crop Page to Selection or click Crop Page to Selection on the Editing Bar.
The page is cropped to the dimensions you chose.
Add Headers, Footers, and Page Numbers
After you have changed and rearranged the pages in your PDF as described elsewhere in this chapter, you may want to put page numbers, headers, or footers (or all three) on its pages. PDFpen has a command for that: Edit > Headers, Footers, Page Numbers > Insert. This command opens the dialog shown in Figure 79.

The dialog is divided into four parts. The function of each part is as follows:
Position: Use this two-item pop-up menu to specify whether the element you are inserting goes at the top (Header) or bottom (Footer) of each page.
Page Numbering: This checkbox and its related settings let you specify whether PDFpen inserts a page number, where on the page top or bottom the page number appears, and the format of the number.
Header/Footer Text: You use this group of settings to specify the content of header or footer text, the typeface and size in which it appears, and where at the top or bottom of the page the text appears.
Advanced Options: Use this to create a more complex page number layout and more completely control the pages on which the inserted material appears. I explain these options in more detail below.
Keep in mind that you can use this command several times for a given PDF, and there are times when you will want to do so: once to specify page header text, once to specify page footer text, and once again to specify the page numbering.
Here are explanations of some of the less obvious items in the Page Numbering section of dialog:
Inside, Outside: These options appear on the Alignment pop-up menu and are useful when the PDF will be printed double-sided and bound. When you choose Outside, page numbers appear aligned with the right margin on recto pages (pages on the right in bound books) and with the left margin on verso pages (the left-hand pages in bound books). Inside places the number on the left for recto pages and on the right for verso pages.
Bates Numbering: This option, found on the Format pop-up menu, is a numbering system often used for legal and business purposes. With this kind of numbering, each page of the document is given a unique page identifier, for example “Exhibit 5A00034”. You supply a prefix for the page number and the number of digits to be used for the page number in the two fields that appear.
Following the Page Numbering section is where you specify page header or footer text. Whether you insert a header or footer depends on your choice in the Position pop-up menu. You can specify as many as three different texts to appear in a header or footer: one at the center of the header/footer area of the page, one at the left side of the area, and one at the right side.
The text positions you can specify for the header or footer texts change, however, when you choose to insert a page number and also choose either Inside or Outside from the Alignment pop-up. In either case you can add center text, but you can then specify only one other text item: either at the inside edge of the page (if you have chosen Outside for the page number location) or at the outside edge (if you have chosen Inside for the page number location).
The Advanced Options (shown in Figure 79, a page or so back) give you additional control over where and how the headers, footers, and page numbers appear:
Template: Use this option to add text to the page numbers and to show the total number of pages, such as “Page 3 of 70”. This option is dimmed if you have not chosen to insert page numbers. You can choose one of the supplied numbering templates as-is from the pop-up, modify one of the templates, or make your own from scratch.
Click # to insert
&[Page]in the template, which resolves to the current page number; click ## to insert&[Pages], which resolves to the total number of pages in the PDF. You can also add your own text. For example,Page &[Page] of &[Pages] wonderful pagesproduces a page number like “Page 3 of 70 wonderful pages”.Insert from Page/To Page: Enter the page number in the Insert from Page field on which you want your headers, footers, or page numbering to start, and enter the page number on which you want them to end in the To Page field.
Margin Positioning: Use these advanced settings to specify how far from the left and right edges of the page to place headers and footers. The Vertical setting controls how far from the top or bottom edge of the page headers and footers appear. The measurement units are in points.
When you click Insert, PDFpen creates native text objects containing the texts and numbers you have specified on each page of the PDF starting from the page specified in the Insert from Page field in the Advanced Options and ending on the page entered in the To Page field; by default, all the pages in the PDF are included unless you specify otherwise.
PDFpen remembers whether you have inserted headers, footers, and page numbers and where you have placed them, so if you choose the command again and make different settings in the dialog, any previously placed headers, footers, or page numbers that conflict with your new settings are removed before the new items are placed in the PDF.
You can also manually remove any headers, footers, or page numbers you have previously placed: use the Edit > Headers, Footers, Page Numbers > Remove Page Header (or Page Footer) command to strip them from your PDF.
Create Links
Sometimes you want to direct your readers to a different page in a PDF, or to a webpage that has useful information; for yourself you might want to link to another PDF document on your Mac. In fact, if you are reading this book in PDF form (and many of you are), you have already seen, and probably used, some of the page and URL links that appear within it.
Unlike HTML links, which are attached to text or objects on a webpage, the links you create in PDFpen consist of transparent rectangular objects that you place on top of some text, an image, or, in fact, any area of the page that you want to link to another location.
As I described in The Markup Tools (←oh, look: a link!), there is a tool for creating links: the Link ![]() tool.
tool.
You can move and reshape link objects with the Edit ![]() tool. You can also change their appearance: by default, PDFpen makes them completely transparent with no border stroke, but you can change that with the object property tools in the Editing Bar (see Draw Attention). You may, in fact, want to give link objects a stroke or a semi-transparent fill color because, otherwise, they are impossible to see once you have created them!
tool. You can also change their appearance: by default, PDFpen makes them completely transparent with no border stroke, but you can change that with the object property tools in the Editing Bar (see Draw Attention). You may, in fact, want to give link objects a stroke or a semi-transparent fill color because, otherwise, they are impossible to see once you have created them!
To link to another page in the current PDF, do the following:
Choose Tools > Link (⌘-9), or, in the Editing Bar, click the markup tools segment of the tool-selection
 button and then click the Link
  tool.
tool.With the Link
tool, drag a rectangle over the text, image, or page region that you want to link to another page in the document.In the Set Link dialog that appears (Figure 80), click Page, enter a page number in the Page Number field, and then click OK.

When you set a page link and then add pages to the document so that the page to which you linked moves, the page link still works. For example, if you set a link on page 1 to go to page 4, and then you add a page between pages 1 and 4 so that page 4 becomes page 5, the link on page 1 still works as intended, taking you to page 5.
A URL link, when clicked, opens a web browser (usually the default browser on the device displaying the PDF), and loads the webpage pointed to by the link.
You add a URL link that goes to a web address like this:
Choose Tools > Link (⌘-9), or, in the Editing Bar, click the markup tools segment of the tool-selection
button and then click the Link tool.With the Link
tool, drag a rectangle over the text, image, or page region that you want to link to a web address.In the Set Link dialog, click URL at the top of the dialog, enter a web address in the URL field that appears, and then click OK. (Partial URLs do not work. For example, if you enter
smilesoftware.comin the Set Link dialog, the URL link does nothing when clicked. However,https://smilesoftware.comdoes open your browser and load the page at that address.)
The process of creating a link to a PDF file on your Mac is quite similar to those for creating Page or URL links; in fact, first two steps are identical: choose the Link ![]() tool and then drag out a rectangle where you want the link to go. Only the last part of the process is different:
tool and then drag out a rectangle where you want the link to go. Only the last part of the process is different:
In the Set Link dialog, click File.
Click the Browse button, and then, in the file dialog that appears, navigate to the PDF file you want the link to open and click Select.
Optionally, in the dialog’s Page Number field, specify the page on which you want the linked PDF to open; page 1 is the default.
Click OK.