Chapter 9. Gaming
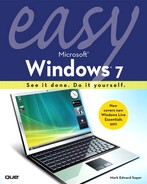
Windows 7 makes it easy to organize your games. Games Explorer provides one-click access to games made for Windows, helps you find out how powerful your computer needs to be to run games, and makes it easy to restart saved games. If you have games that don’t automatically install into Games Explorer, you can easily add shortcuts, and use Games Explorer to help you solve problems with games that aren’t running. Let the games begin!

Using the Games Explorer
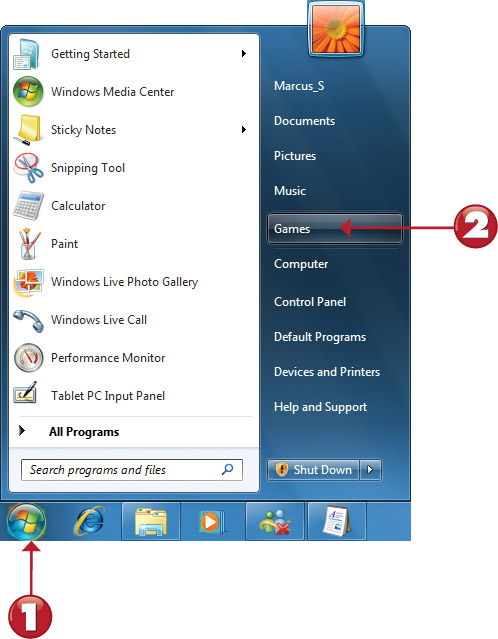
The Games Explorer library provides access to all preinstalled games on Windows 7. Games that are specially designed for Windows Vista and Windows 7 will also be installed to Games Explorer. Some older games might not be installed to Games Explorer.
![]()
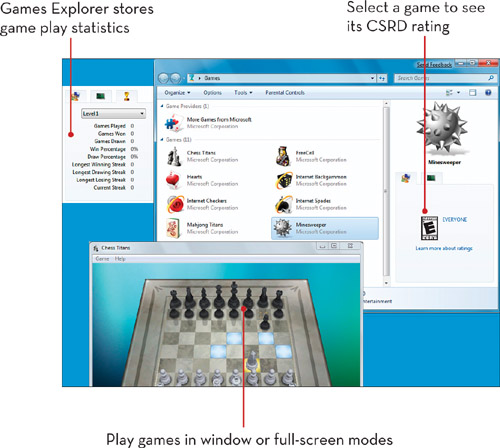
![]() Click the Start orb.
Click the Start orb.
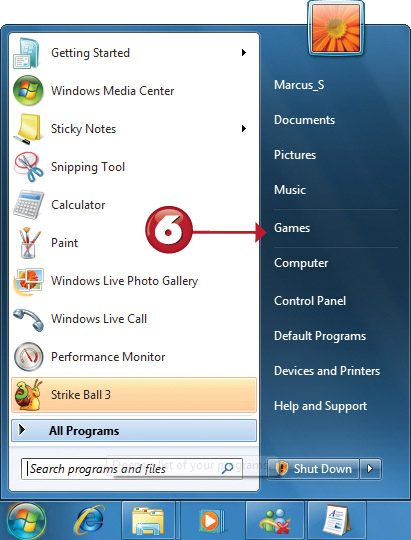
![]() Click Games.
Click Games.
![]() The Games Explorer window.
The Games Explorer window.
![]() Your system’s performance information.
Your system’s performance information.

The first time you open the Games Explorer, a Set Up Game Updates and Options dialog appears. Click OK to continue. To learn more about this dialog, see “Setting Up Game Updates and Options,” this chapter, p. 152.

Learning More About a Game
Before you start a game, you can display its rating, the Performance Rating (Windows Experience Index) recommended for the game, and other information, such as the publisher. Note that not all games provide this information.
![]()
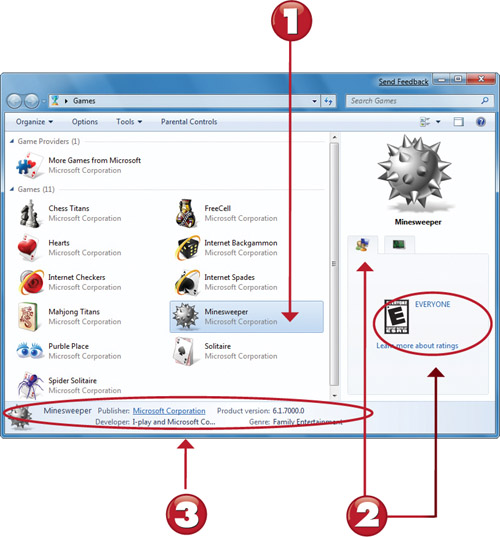
![]() Click a game for more information.
Click a game for more information.
![]() Click to see the game’s ESRB rating.
Click to see the game’s ESRB rating.
![]() Publisher, version, and other information about the game.
Publisher, version, and other information about the game.
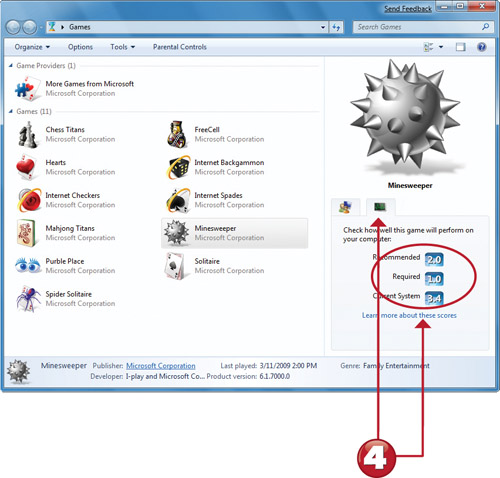
![]() Click to see a comparison of game’s and system’s performance information.
Click to see a comparison of game’s and system’s performance information.
If you try to play a game that requires or recommends a higher Performance Rating than your system has, the game might not run or might run very slowly.
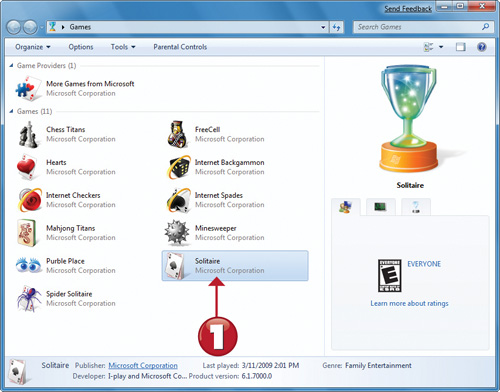
Playing, Saving, and Continuing a Game
Preinstalled games in Games Explorer are sometimes referred to as “casual games,” and one of the features of most of these games is the ability to start a game, save it, and continue it later.
![]()
![]() Double-click an icon to start the game.
Double-click an icon to start the game.
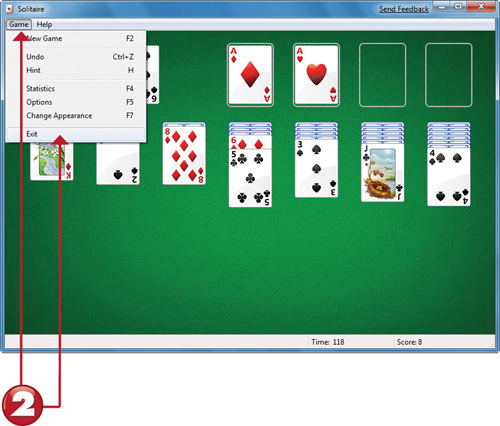
![]() Click Game, Exit to quit the game.
Click Game, Exit to quit the game.
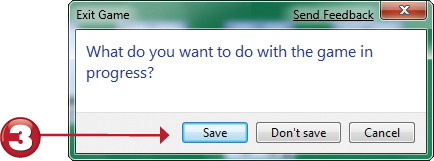
![]() Click Save to save the game.
Click Save to save the game.
With some games, you might see a prompt to select a gameplay level before the game window opens.
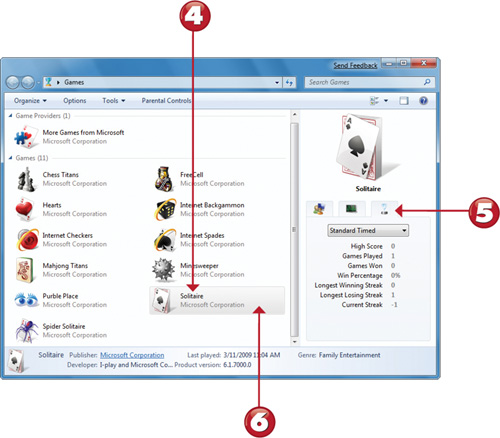
![]() Select the game.
Select the game.
![]() Select the Statistics tab to see how you’ve done in previous games.
Select the Statistics tab to see how you’ve done in previous games.
![]() Double-click the game icon to restart the game.
Double-click the game icon to restart the game.
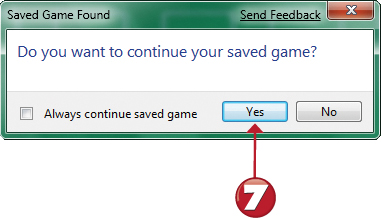
![]() Click Yes when prompted to continue your saved game.
Click Yes when prompted to continue your saved game.
If you answer No in Step 7, a new game begins.
Adding a New Game to Games Explorer
Some games install themselves automatically to Games Explorer. However, if you install a game that does not install itself into Games Explorer, you can add it manually.
![]()
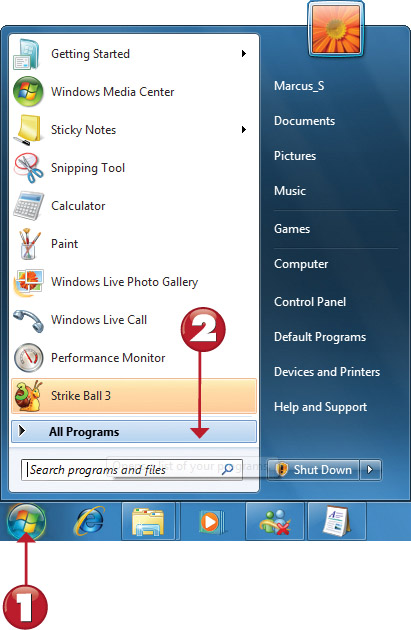
![]() Click Start.
Click Start.
![]() Hover the mouse over All Programs.
Hover the mouse over All Programs.
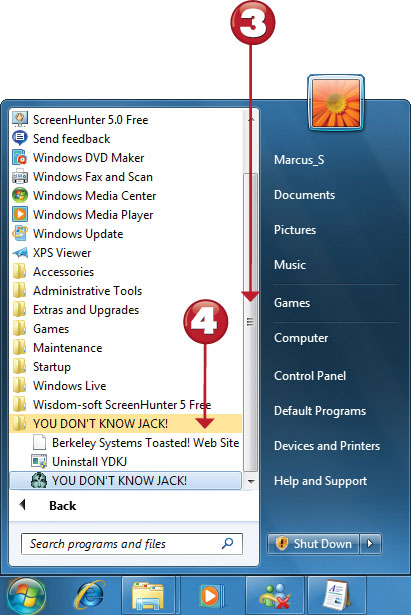
![]() Scroll down to the folder containing the game.
Scroll down to the folder containing the game.
![]() Open the folder.
Open the folder.
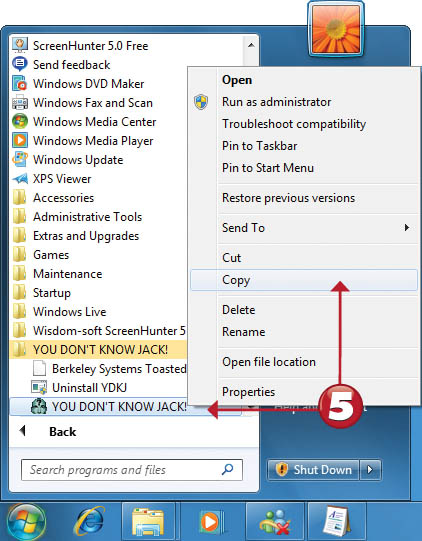
![]() Right-click the program and select Copy.
Right-click the program and select Copy.
If the game did not add a shortcut to the Start menu, but added a desktop shortcut, you can right-click the desktop shortcut and copy it.
![]() Open the Games Explorer.
Open the Games Explorer.
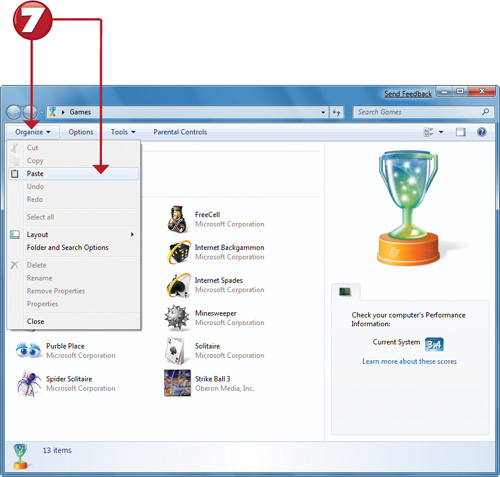
![]() Click Organize, Paste.
Click Organize, Paste.

![]() The game appears at the bottom of the Games Explorer.
The game appears at the bottom of the Games Explorer.
Games you add manually to Games Explorer generally will not have performance ratings or publisher information, and might not list ESRB ratings.
Setting Up Game Updates and Options
To control how Games Explorer works, use the Set Up Game Updates and Options menu. This menu is used to specify options for automatically updating game updates, game news, and games folders settings.
![]()
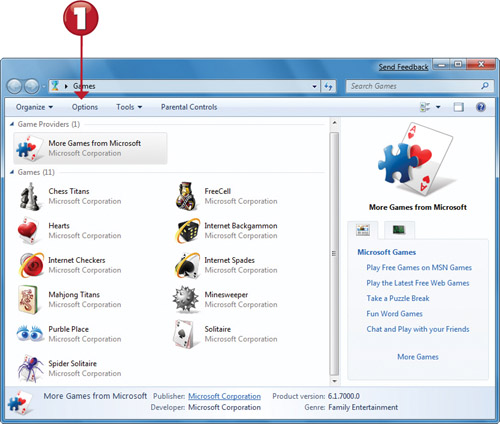
![]() Click Options.
Click Options.
To solve problems with hardware, your video card or monitor, input devices (controllers, mice, keyboards), audio, Windows Firewall, or programs and features, open the Tools menu and select the appropriate option.
You can control access to games by some users by setting up different accounts, installing parental control software, and using the Parental Controls dialog in Games Explorer. See Chapter 11, “User Accounts and System Security,” for details.
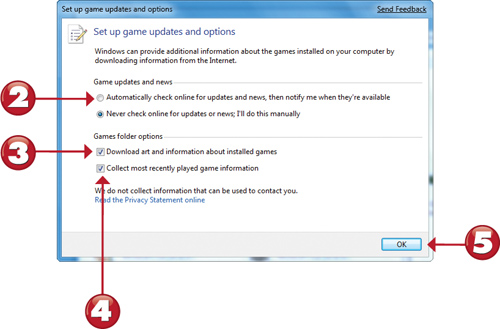
![]() Click to automatically check online for game and game news updates.
Click to automatically check online for game and game news updates.
![]() Clear if you do not want to download art and info for installed games.
Clear if you do not want to download art and info for installed games.
![]() Clear if you do not want information collected about recent games played.
Clear if you do not want information collected about recent games played.
![]() Click to save current settings and close the dialog.
Click to save current settings and close the dialog.