DIGITAL PAINTING // PAINTING WITH PHOTOSHOP
![]()
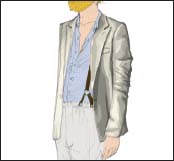
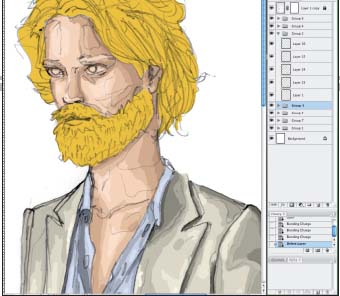
The digital painting technique shown in this chapter is the most complex technique in digital illustration. In order to achieve good results using brushes in Photoshop, you need to know how to work with real ones, and you need to master the use of a graphics tablet.
This exercise shows you how to create a realistic image. The original photograph serves as a guide and sets the parameters when painting. This style is even more difficult to paint because you need to have meticulous control over areas and colors of the illustration. You need to be very patient when painting this way and it is recommended that you adjust the graphics palette to make your work as easy as possible.

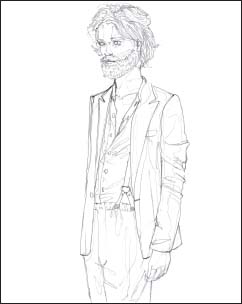
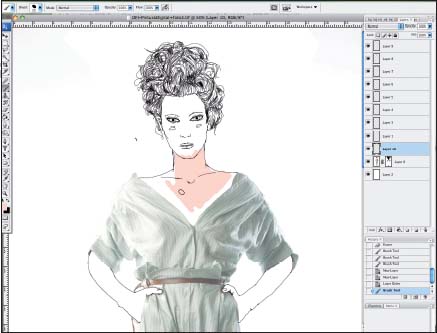
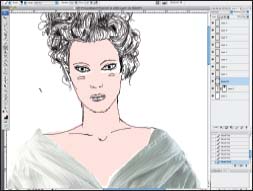
1. Open and clean the illustration in Photoshop. As a guideline for the different areas for shading, fine lines have been made throughout the sketch, also giving it depth.

2. Use the Magnetic Lasso to select each of the elements in the drawing. Fill them with an intermediate color, each on a different layer. Darker and lighter shades will be added later.
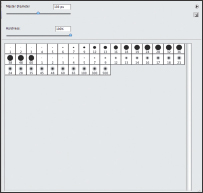
3. This is the Brush Preset Picker window. When you select the Brush tool and click on the brush in the toolbar, this window pops up. You can see the different brush diameters and degrees of hardness.

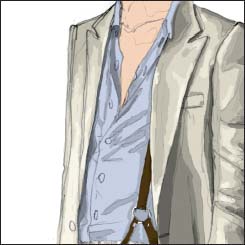
4. To make things easy, place each layer containing a different color in a different group. Start painting the jacket in a shade that is darker than the base.
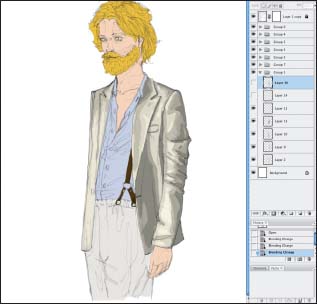
5. Then do the intermediate, darker, and lighter shades. It is recommended you use one layer for each shade so that any mistakes will be easy to erase.
6. Finally, add the lightest and darkest shades to the garment, just like using a paintbrush on canvas. This adds realism and depth to the drawing.

7. Now do the pants. This follows the same process as the one before. Use a shade that is darker than the base color on a new layer. Use the lines of the sketch as a guide.

8. Choose a shade between the two that have already been used to continue painting on a new layer. This will blend with the two and soften the contrast.

9. Add the darkest shades to the pants. Lighter shades are not required because of the fabric being represented. The darkest shade is the base color.

10. Then do the shirt. Paint it a shade that is darker than the chosen base color. The areas painted in this color can later be painted over in another if required.

11. In order to restrict the chosen shades to the same color, raise or lower the circle in the Color Picker in a straight line.
12. Then do a darker shade. Paint over the areas you colored in the previous step. This leaves areas with color grading for added realism.

13. Color the lightest parts of the shirt to finish it. You can see that these touches give the shirt the required volume.
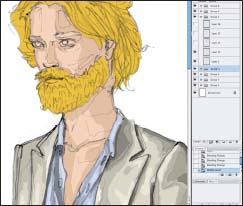
14. Now color the areas of skin. Of all the elements in the illustration, this is the most difficult because it requires great precision and skill in applying color.
15. Paint the darker shades of skin with a brush, including the hands. Remember to adjust the brush diameter for the different areas to increase your precision.
16. Finally, apply a shade that is lighter than the skin and one that is darker than the previously used ones. This produces a realistic effect of volume.

17. The last part is the hair. Start with the intermediate shading following the lines of the sketch, which are guidelines for the direction of the hair and beard.
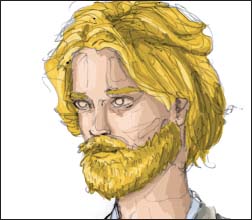
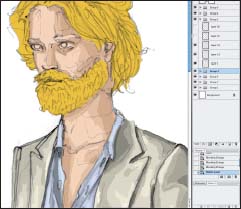
18. Then add the darker and lighter shades of hair. Paint the eyebrows in a uniform, semi-dark shade.

19. The final details are the eyes. Color them on a new layer: first paint the white part, then the iris in sky blue, and finally the pupil in black.
TRACING WITH PHOTOSHOP
![]()
Digital tracing is a basic and effective method, particularly when using a photograph as a reference for an illustration. Working with a graphics tablet, as in this case, offers greater precision than a mouse. However, it needs calibration so that it adjusts to the needs of the specific drawing.
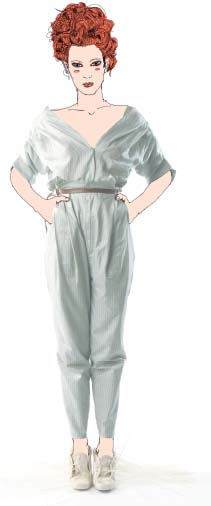
This exercise uses an image of a model as the guideline for an illustrated figure that shares a number of features. Just because you are tracing a photograph does not mean you should make everything the same. It is always good to add a personal touch to your projects and make new and creative images rather than focus on superficial aspects and ease of action.
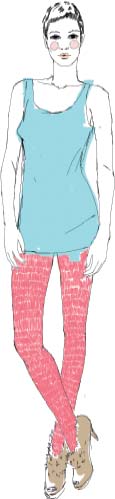

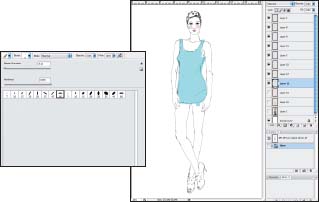
1. Find a photograph with a look similar to what you want to represent. You should start with easy postures to practice drawing with a graphics tablet.

2. Lighten the fill of the photo layer. Seeing this is a fashion model, the length of her legs need stylizing to achieve the right look. Select them with the Rectangular Marquee and stretch them downwards with the Move tool.

3. Open the dropdown brush menu. Select Calligraphic Brushes for a more artistic outline; in this case select the Oval brush at 20 pixels.
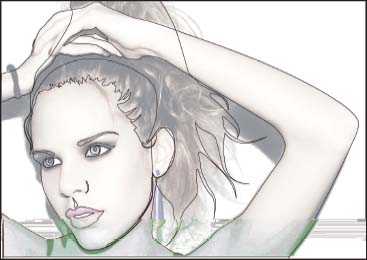
4. Create the outline by drawing it on the graphics tablet. Start with her face and arms. The idea is to achieve an irregular line, similar to freehand drawings on paper.

5. Trace the tank top. As you can see, the image in the photograph is not copied faithfully. Instead, it is stylized as it is being drawn.

6. When the photo layer is disabled, you can see what the figure’s outline looks like. It all goes on one layer.
7. Once the general outline is finished, draw in the facial features on a new layer. Use the eyes, nose, lips, and cheeks as a guide, but use you own style to represent them.
8. Now draw the hair on another layer, this time over the others. Here the style is more illustrative and personal.
9. Because the tank top is to be colored with a different brush, choose one from the Brush Preset Picker, in this case an Oval brush at 60 pixels. Apply the color on a new layer. You do not have to follow all of the lines and it is good to leave blank spaces in order to let the illustration seem more relaxed.
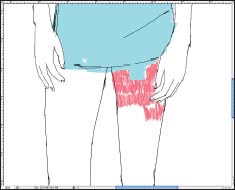
10. Use the previous brush at the same thickness as the line to color the model’s leggings. A knit texture is created here.
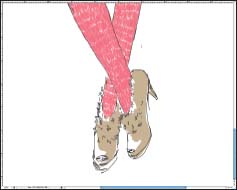
11. Use a more rounded brush to color the shoes on another layer. Adjust the brush thickness in order to color all of the areas of the figure, such as the tip of the heel.

12. Finally, do the facial details that require color. Erase the line forming the top of the figure’s head from the layer containing the outline so that only the hair can be seen.
ILLUSTRATION AND PHOTOGRAPHS
![]()
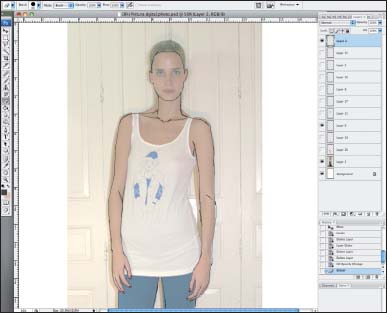
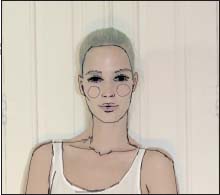
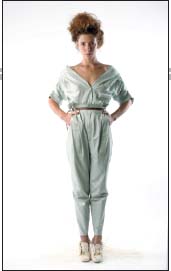
In this exercise, a high-quality photograph is used in combination with an illustration. This is a way of adding an illustrated touch to an already-designed outfit, or, as in this example, a way of creating an illustrated figure to wear a real garment.
The figure is represented in an illustrated fashion with basic features. The use of layer masks is very useful to cover the parts of the real image where digital color is applied. You need to be very careful during this process so that the illustration fits perfectly with the photo.
1. The photograph for this project should be of high quality, as work will be done at 300 dpi. The most recommendable image format here is TIFF.

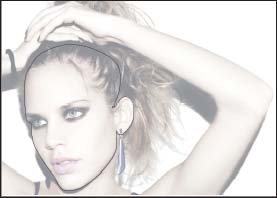
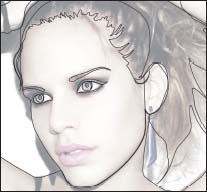
2. Lower the color levels of the photograph and use a brush to draw the outlines of skin, hair, and face.

3. Create a layer mask on the photograph and carefully blacken the areas that will only be illstrated.

4. Cover the layer mask completely. A small brush has been used with great care to do the garment edges.
5. Use a large Calligraphic Brush to color the skin on a new layer – this area is larger.
6. The most difficult-to-do areas have been left blank so that they can be colored later with a small-diameter brush.

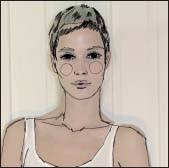
7. The effect of the illustration-photograph combination can now be appreciated. Finish coloring the arms.

8. The areas containing hands and ankles require a smaller brush as they are more detailed and reduced.

9. Use basic brushes for the hair – a large one for larger areas and a smaller one for shaping and for some of the details.

10. Color the facial features – eyes, cheeks, and lips – last of all. Do the eye makeup with a soft brush to give the effect of eye shadow.
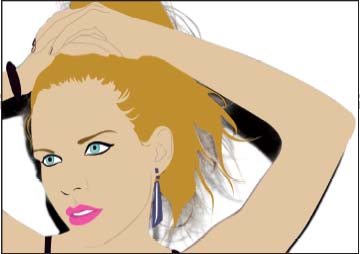
TRACING WITH ILLUSTRATOR
![]()
This exercise explains how to use vectors to create a realistic illustration from a photograph. The difficulty lies in mastering Illustrator. If you are experienced with this program, it will be a long but simple process. However, it will be a complex exercise if you are new to it.
The idea here is to copy the photograph as faithfully as possible, so special care should be given to the strokes made. The Pathfinder tool, which serves especially to create new shapes from the superimposed objects, is introduced in this exercise.
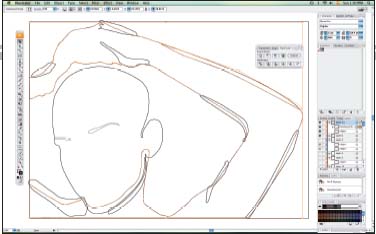
1. Set the photograph on a new document and soften the image by up to 30 percent so you can see clearly what you are tracing. Start to trace the outline of the face with the Pen.

2. Now do the arms and neck. Outline these as a single element. They should be closed spaces so that they can be colored properly.

3. Patiently and carefully, trace the outline of the hair with the Pen. Try to keep its form and volume.

4. Once the large shapes are done, start with the details. The eyes must be vectorized perfectly so that the perspective is correct and so that the model is not gazing into space.
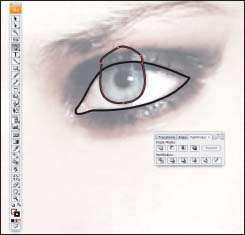
5. To achieve the exact shape of the iris, first draw a figure that follows its outline faithfully in the eye. It does not matter if it goes beyond the line of the eye.
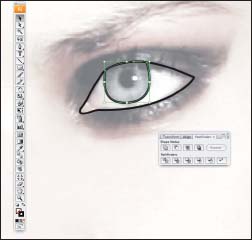
6. Copy the eye shape and paste it in front (Ctrl+F). Select this element and the iris in the Pathfinder window. Select the Intersect Shape Areas option and press Expand.
7. Now draw the eyelids. Use the same procedure to do the other eye and outline the eyebrows.
8. Now it is time to do the nose and mouth. These features determine the look of the illustration, so they must be traced as well as possible. Trace the outline of the shading under the jaw line.
9. Trace the model’s earrings, hair elastic, and nails, and the straps of her top. Also trace the lines that give her lips volume.

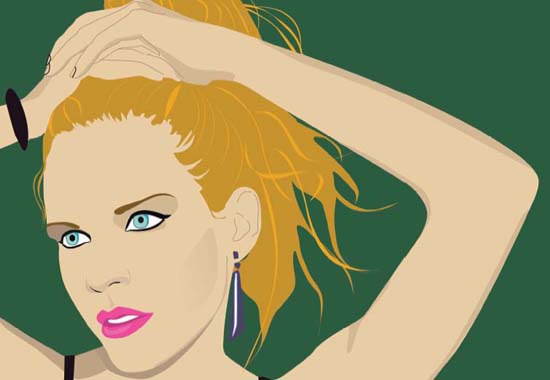
10. Add color. As you fill the spaces, erase the black line so that only the color is left (the effect of eyeliner is created by coloring with black).

11. One way of choosing color for the figure is to take it from the photograph directly using the Eyedropper tool.

12. Apply color to the hair. The outline of the hands should end up over the hair. If this is not the case, invert the order of the layers.
13. Color the arms, the hair elastic, and the straps. The image is very two-dimensional at present, so more details need to be added.

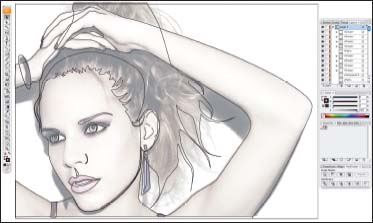
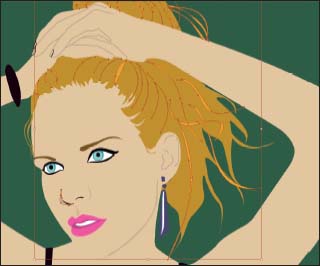
14. To obtain a real notion of your progress with the illustration and so as not to see the photograph, color the background uniformly.
15. Give the hair volume and movement by creating shapes similar to lighter streaks that follow the hair’s natural direction.
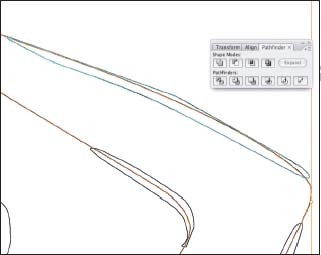
16. You need to give the arms the impression of volume, so create shading. To draw the shapes, use Pathfinder>Intersect Shape Areas, as you did when drawing the iris.
17. First draw all of the shapes and then start to intersect them. Remember to copy and paste the arms in front as many times as there are shaded areas.

18. Coloring the shaded areas of the arms and hands immediately adds a three-dimensional quality to the illustration.

19. As a last step, add shading to the finer details, such as the eyes, cheeks, and lips, and a large shaded area on the figure’s left shoulder.