INTRODUCTION
Fashion illustration is an essential tool in the world of fashion design. It enables pieces to be represented and the designer’s main ideas of a certain concept or look to be conveyed.
The first fashion illustrations appeared some 500 years ago. They were predominant in fashion magazines until the early twentieth century. At that time, howver, advances in printing led to the inclusion of photographs in magazines, which replaced illustration, particularly in the most important publications of the day, such as Vogue and Harper’s Bazaar. But because photography is a faithful representation of reality, and illustration is an artistic representation, with more space for imagination and subjectivity, illustration was never completely lost. There were always people interested in showing their particular view of fashion.
In recent years, digital technology has breathed new life into illustration in general. Among other things, it enables techniques to be combined and has brought a speed to illustration tasks that was previously unknown, producing results that were unheard of before. This revival has also spread to fashion illustration. Digital illustration is increasingly being used in publishing and advertising, to represent designs and promote designers, labels, and stores, and as it does, it pushes the boundaries of fashion.
The pages of this book feature step-by-step instructions for creating digital illustration at the hand of fashion illustrator and designer Loreto Binvignat Streeter. The book begins with her explanation of the basics of working with digital technology – for example, cleaning an image and digitally retouching it, or tracing a figure with vectors – and gradually shows you new techniques and styles that she applies in each exercise. You are not required to be an expert with Photoshop and Illustrator software to follow them. You only need to be a little familiar with them. If you do all of the exercises in this book, in a few days you will be able to create digital illustrations with a certain level of complexity and creativity, and decide for yourself what methods and tools suit you best when you continue to illustrate.
The illustrations included here can be classified into one of two groups: basic or creative. Basic illustrations are those that a designer would use to bring designs to life, for the purpose of representing garments and pieces as closely as possible to real life for clients and buyers to see the presented designs clearly. On the contrary, creative illustrations mostly resemble those that a fashion illustrator would not use to give a realistic impression of a piece or a collection, but rather use to transmit the essence or main idea.
EQUIPMENT
![]()
Here is a description of the equipment needed for creating digital illustrations. Added to this are the materials normally used for illustration on paper.
It is advisable to buy quality items but at reasonable cost. There is no need to go all out and have the latest and best in brands and quality. All you need is something to make digital illustrations with; in the end, what gives quality to the illustration is the care you give to it and the effort and creativity that go into making it.
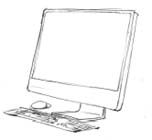
COMPUTER
This can be a PC or a Mac. It is important to have enough RAM to run the required programs (2 GB are enough for the computer to work at its best). It is recommended a minimum of 300 GB of memory in the hard drive.
EXTERNAL HARD DRIVE
This is useful for backing up the information you have in your computer and, obviously, to have more available storage memory space. Digital artists need one, given that they are constantly creating high-definition files and using programs that take up a lot of memory. Having a hard drive of this kind enables your computer to work better. They are not expensive compared to the benefits they provide, and they are available in fixed (directly connected to a power supply) and portable formats.

USB FLASH DRIVE
Having one of these is essential because you will constantly be copying files from one computer to another. The possibility of importing and exporting files with one infinitely makes it extremely useful. It should have at least 2 GB of memory.

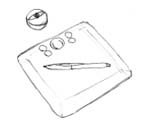
GRAPHICS TABLET
This is of great use because it is much more precise than a mouse. It might seem a little difficult to use at first because of its sensitivity, but you can adjust it to suit your style. The advantage of the tablet is that it enables you to draw digitally as if you were doing so with a pencil or paintbrush and to use digital programs and their tools with greater ease and precision. What size tablet to acquire depends on the precision needed for the job – a larger one gives higher resolution, but a small one can be perfect for working with – or how much money you want to spend, although graphics tablets are generally available at a reasonable price.
PRINTER
This is a support to the creative process that lets you print out drafts of your work. Unless you have a professional-quality printer at home or in the studio, it is better to have final illustrations printed professionally because the quality offered is far better than that achieved with a basic printer.

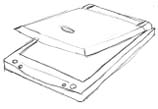
SCANNER
Your scanner should at least be A4 size, although the bigger the better. The scanners on the market are generally good; a good quality device can be acquired at a reasonable price and can serve all of your requirements, unless you have something very specific in mind.
DIGITAL CAMERA
If you use a camera as the way to digitize your illustrations before working with them on the computer, you will need to have a good quality one. If this is not the case, it is highly likely that you will have to do some major retouching to your images in Photoshop and that the resolution will not be the best. If working with an average priced camera, you will have to take your photographs with the greatest precision possible and at the highest resolution if you are to make working with them easier.
PHOTOSHOP
![]()
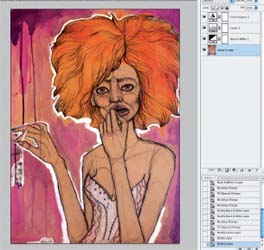
Here is a general overview of the features and uses of this program. As there is a wide range of possibilities with this program, this explanation will focus on those most commonly used in fashion illustration, which are image editing and correction, and digital color application. If you have a specific question about its use at any time, the best thing to do is use the Help menu to find the solution to your problem. Photoshop software works like a painting and photography studio. You work over a digital canvas that serves for editing images, re-touching photos, and digital coloring. When you use this program, you work with a bitmap, which means that every image you handle is composed of pixels.
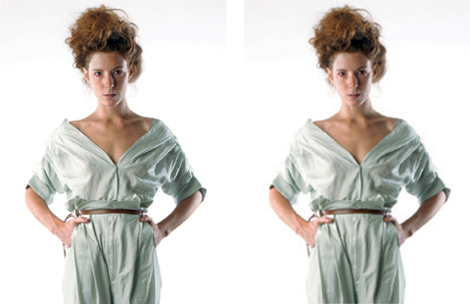
A pixel is the smallest unit of a graphic image and is generally represented as a square. The number of pixels an image has determines its quality or resolution, to use digital speak. For illustration – and for all images that are to be printed – the working resolution is 300 dpi (dots per inch), meaning that there are 300 pixels along a line measuring one inch, while the screen resolution – images that will not be printed but only used on the computer – is 72 dpi. These images show the difference in resolution between an image at 300 dpi (left) and another at 72 dpi (right).

The main features of the Photoshop interface are:
COMMAND MENU
The menu bar organizes the different commands into groups: File, Edit, Image, Layer, Select, Filter, Analysis, View, Window, and Help.
CONTEXT OPTIONS
This bar shows the different options available for the tool you have selected.
TOOLS
This bar contains the necessary tools for working with the software. Those related by function are grouped together.
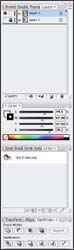
PALETTES
These are windows that help to control and view the work being done. They can be placed anywhere on the workspace and the ones you want to be visible can be selected in the Window menu. The example shows the Layers, History, and Paths palettes.
DOCUMENT
This shows the image being worked on. A number of different document windows can be kept open at the same time.
These are some of the most commonly used objects and commands for retouching images.
TOOLBAR
This is very important for creating and modifying images. The following are the most commonly used: Move, Rectangular Marquee, Lasso, Magic Wand, Crop, Correction Brush, Brush, Clone Stamp, Eraser, Paint Bucket, Dodge, Pen, Horizontal Text, Path Selection, Custom Shape, Eyedropper, Hand, Zoom, and Fore-ground/Background Color.

BRUSH
When the Brush tool is selected, this panel pops up at the top, below the Photoshop menu (in this example, where the brush appears with the 30), showing the current brush settings (type, master diameter, and tip hardness) and their context options. This is a very important panel as it is used continuously in the exercises. It offers a choice from a wide variety of brushes, which can be modified with these options. Flow is a very useful brush option because it enables the intensity of paint application to be regulated.

ADJUSTMENTS
These are used directly to retouch and correct the main properties of images such as color, hue, saturation, and contrast. The adjustments are found on the Image menu (Image>Adjustments) and can be applied directly over the image, or what is more recommendable, over an Adjustment Layer, which is a duplicate of the layer the image is located on, so that modifications are only made on this layer, with the original being preserved.

FILTERS
These are quite common in this program, although they are used on only few occasions for the type of exercises carried out in this book. Filters let you create a host of effects – they can even be added to others – and can be applied to whole layers or selected areas.
ILLUSTRATOR
![]()
This program works like an art workshop. It is based on vectors that are used to create digital drawings; although it also lets you edit and retouch bitmap images to a certain point. This is a very extensive and complex program, meaning that mastering it requires a great deal of time and patience. In order to use it confidently, at least the most basic points need to be learned. The exercises given in this book only require the basic tools for making vector outlines and pictures. One of the great advantages of working in this way (with vectors), unlike working with Photoshop, is that everything that you draw or color can be enlarged without losing resolution, as shown here:


Given that Photoshop and Illustrator are from the same company (Adobe), the workspace is practically the same. They also have common main components in the command menu, the tools with their respective options, the palettes, and the document.
It works in a similar way to Photoshop:
TOOLBAR
There are many tools that are identical to Photoshop, and they are also grouped according to function. The most commonly used tools are Selection, Direct Selection, Magic Wand, Lasso, Pen, Type, Line, Rectangle, Brush, Rotate, Symbol Sprayer, Gradient Mesh, Gradient, Eyedropper, Crop Area, Eraser, Hand, Zoom, Swap Fill/Stroke Colors, and Gradient/Color/Line. Of these, the tool you will use most is the Pen, the basic implement for creating vector outlines.
PALETTES
The picture again shows the Layers palette. Illustrator also works with layers. This option helps to organize the drawing, but, unlike Photoshop, layers are not always necessary. Color, Links and Pathfinder palettes are also shown. The last of these is very useful as it lets you create shapes from overlapping figures.
TRACING VECTORS
Vector shapes are created as a set of dots. Controlling these dots when drawing can be a little difficult so it is necessary to practice and gain experience in handling them, particularly all of their direction lines, which determine the curve of the outlines depending on their length and how pronounced they are. The fewer points there are on a curve, the cleaner the line.
HOW TO CLEAN A SCANNED IMAGE
![]()
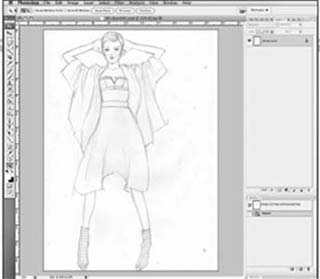
When working with digital illustration, you should first make a freehand drawing or draft to work on using the computer. This exercise shows how to clean a draft or drawing using Photoshop.
Before scanning a drawing, you should make sure it is as finished as possible. If the drawing is done well at the start, the result will be good. However, if the base is not right, it will be more difficult and laborious to fix it digitally. Few changes should be made to the base drawing, which is why you should try to use as few lines as possible – cleaning will be easier and faster before beginning the digital part.
The resolution the drawing is scanned at will determine the size and weight of the resulting file; if it is very large, it may be difficult to work with if your computer does not have enough RAM. It is important to know the purpose of each image being scanned. To obtain a digitized image at a good resolution, it should be scanned at 300 dpi as a TIFF file. Where work will be done in sections, a resolution of 150 dpi can be used, whereas for high-resolution projects and some black and white images, scanning can be at up to 600 dpi.
To scan this drawing, a TIFF file of 300 dpi was made in grayscale, considering it is a pencil drawing.

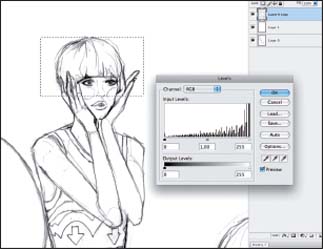
1. Never work on the original. Make a copy of the layer where the image is located and work on the copy. This way you can do all kinds of experiments, and there will no problem if they turn out wrong because the original will still be intact.
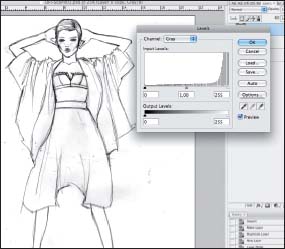
2. You generally start by adjusting the levels (Image>Adjustments>Levels). You can alter the intensity of the blacks, grays, and whites by moving the arrows. It can also be adjusted numerically or with the eyedropper.

3. When the desired line is achieved and the background has been cleaned enough, use the Polygonal Lasso and follow the outline of the figure (you can also use the simple Lasso, although as the Polygonal one lets you mark the dots, it makes the job easier).

4. When the figure is closed, choose Select>Invert (Ctrl+Shift+I) to switch to the background. By doing this, you can crop the image leaving the white of the lower layer (if you have not already added a white layer, you can do this now).

5. Once the background is removed, you have to clean the edges of the figure. Use the eraser for this. You will have to change the size of the image depending on the area you are cleaning.

6. You can also choose specific areas with the Rectangular Marquee or Magnetic Lasso tools and so modify the levels of these areas only.
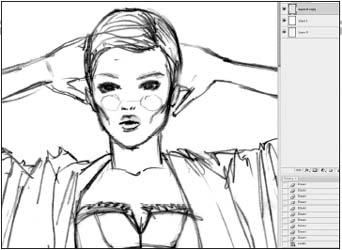
7. You have to make sure that every part – including the spaces between the arms, for instance – are completely clean and that the background is truly white.

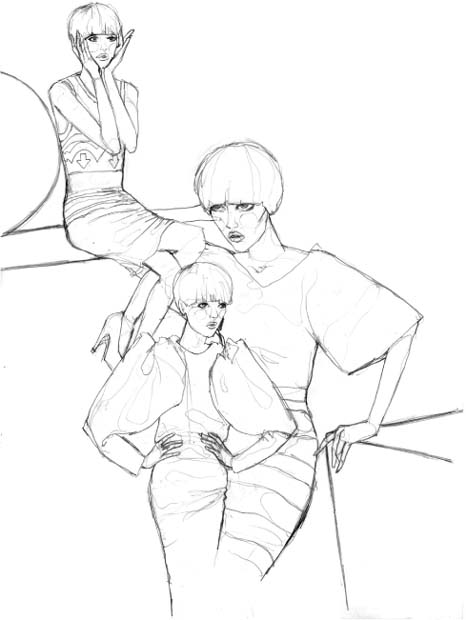
8. With a clean background, you can intensify the line by duplicating the image (layer). Select Multiply in merge layer mode.

9. This action turns the white transparent, leaving the line twice as intense as before. To soften a little, adjust the fill and opacity of the layer.
HOW TO SCAN DIFFERENT PARTS OF AN IMAGE
![]()
Often you will need to work with images that are larger than the scanner, but this does not mean they cannot be digitized. This exercise shows you how to scan the parts of an image and later join them in Photoshop.

1. Place the paper on the scanner so that the edges are lined up perfectly with it from the corner of the sheet. In this way, all of the sections to be scanned will have the same angle and can be joined without gaps.
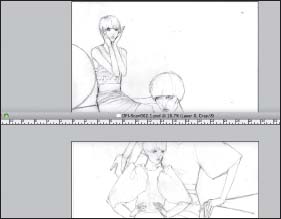
2. The drawing has been scanned in two parts, both at 300 dpi as TIFF files and in grayscale, meaning that there are now two document files.
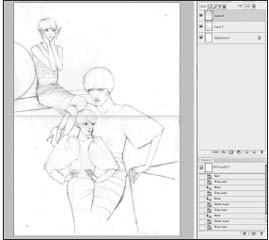
3. Open a new document in Photoshop with the dimensions of the original image and a resolution of 300 dpi, the same as the scanned images. Copy the two scanned files and paste them onto the new document (you can also click and drag them) and arrange them like the original.

4. To make the images coincide, the best thing is to add a layer in Multiply mode (on the dropdown menu next to Opacity and Fill in the Layers palette). Enlarge the image so that the overlapping lines can be seen in detail.

5. When the image has been fitted together, set the layer to Normal. On doing this, a darker band will appear caused by the curving of the paper during scanning.
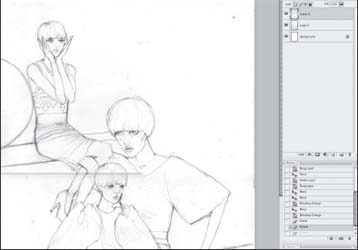
6. Use the eraser to remove the band. As one part of the image has been superimposed over the other, you can erase this area from one layer without erasing the drawing.
7. Join the layers together (Layer>Merge Down or Ctrl+E) to produce a single image. You can now clean it and adjust its levels.

8. The image is now ready to be digitally modified as you wish.
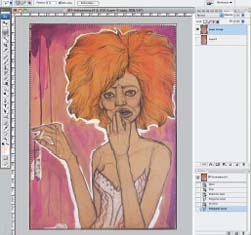
PHOTOGRAPHIC CAMERA
![]()
A digital camera is used to digitize large-scale images or those on a support that makes scanning impossible. For the best results, it is recommended that a camera with the highest resolution available be used, and always with a tripod. The photo should be taken in natural light – so as not to alter the colors of the image – and as fully front on as possible, so as not to create odd perspectives.
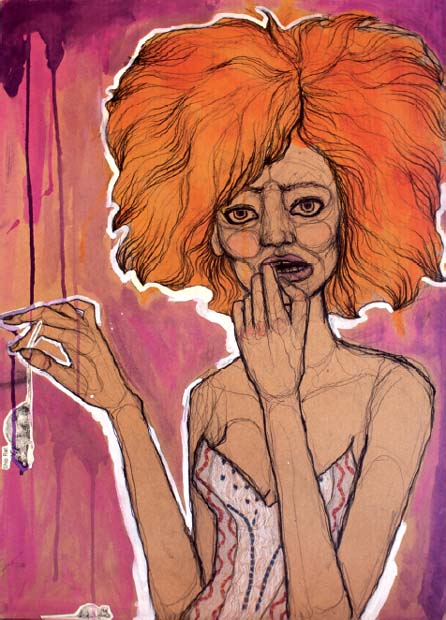

1. When photographing an image, it is best to leave a margin and not to square the photo completely as this can be done easily in Photoshop.

2. Once the image has been imported into the computer, open it in Photoshop and use the Crop tool to remove as much of the margin as possible.
3. It is very difficult to take a fully front-on photograph, which means that there is always a small distortion and the edges will not line up completely with the document. Sometimes the Crop tool is not enough.
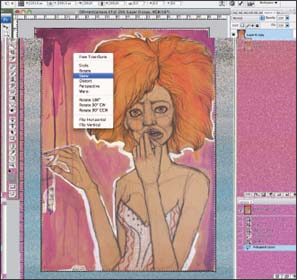
4. To square the image, select the area with the Polygonal Lasso. Select Free Transform (Edit menu or Ctrl+T), and by right clicking over the area with the mouse (using Click+Ctrl for Mac) choose the Skew option. This adjusts the edges of the selected area with the corners of the document.

5. The next step is to retouch the image. Start with the levels, but instead of using the Adjustment menu, look for a half-white and half-black circle in the Layers palette. This enables you to create an Adjustment Layer. There are a number of different options, Levels among them.

6. The advantage of working with these layers is that if they are erased or become invisible, the adjustment disappears. It is also good to use Color Balance to recover the original colors.
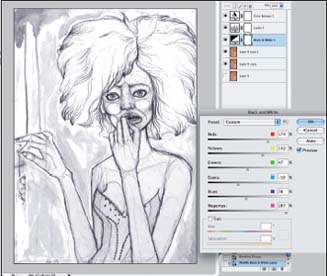
7. The third Adjustment Layer to be created is Black and White, which removes the color and lets you work easily with the black drawing line.

This layer is created in Multiply mode and the values are adjusted for the fill so as to highlight the line, but without saturating it.
8. The image is ready for working with. As it is still with the Adjustment Layers, select Layer>Flatten Image in the menu to leave a single image, although this is not necessary.