PATTERNED FABRIC // BASIC PATTERNED FABRICS WITH PHOTOSHOP
![]()
Patterned fabric can be applied in different ways with Photoshop, depending on the result you are trying to achieve in the illustration.
This first exercise starts with the easiest and most basic way to apply a patterned fabric: by scanning a real one. Besides being a very efficient and realistic solution, another benefit with working this way is that when the fabric is digitized, it can keep its form and the colors can be changed as needed. No extreme changes will be made in this case, although with what you have learned in the color retouching exercise, you have the tools and know-how to do those.

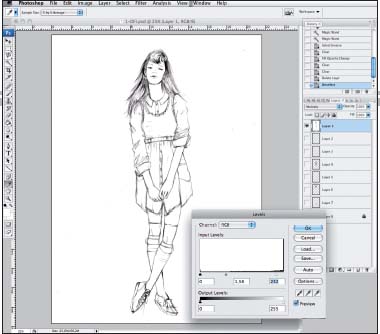
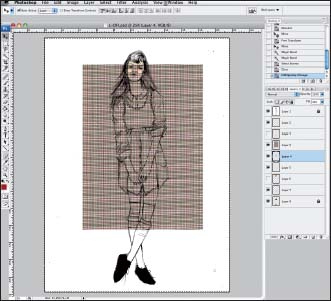
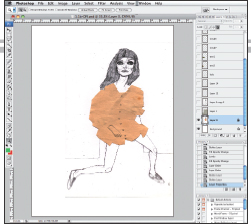
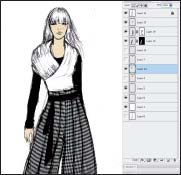
1. Open the cleaned illustration in Photoshop. Select the Blend layer mode Multiply, so that the layer is always on top, and modify the Levels in the Image>Adjustments menu.
2. Select the skin areas with the Magnetic Lasso and choose the tone you want to use for them in the Color Selector. Apply the color on a new layer.

3. Color the vest and shoes on the same layer, seeing they are the same color. The leggings and cheeks go on separate layers.

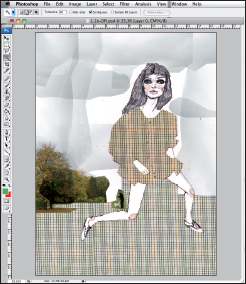
4. Now select the girl’s shirt and create a new layer, which is where the patterned fabric will later be applied.
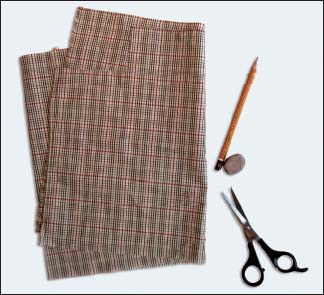
5. This is a photograph of the real patterned fabric. A piece has been cut off so that it can be scanned well and so as not to distort the plaid.

6. In Photoshop open the document with the fabric, which was scanned with the same resolution as the illustration.
7. Drag the fabric over the document with the illustration and place it over the shirt, ensuring it covers the selected area completely.
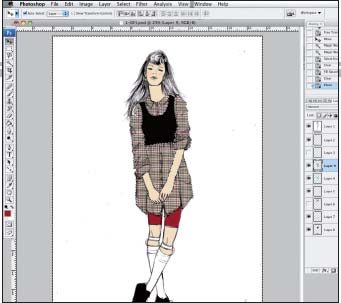
8. With the fabric layer selected, go to Select>Invert in the menu and press the Delete key. This leaves the fabric only in the shirt area.
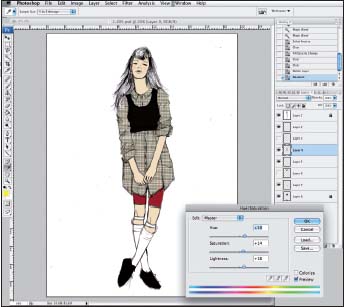
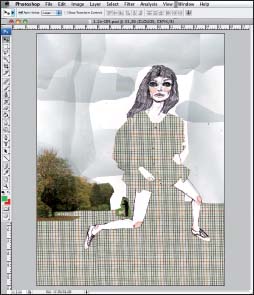
9. Go to Image>Adjustments>Hue>Saturation in the menu to modify the shade of color. In this case the fabric is given a slightly more greenish tinge than the original.
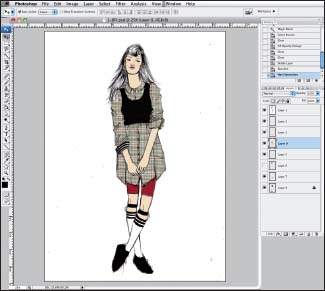
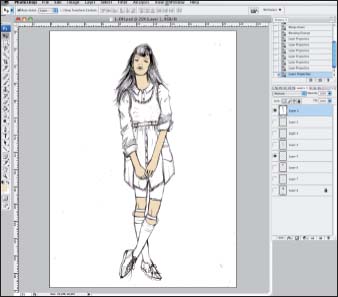
10. Add lines to the socks and sleeve on the shoes and vest layer. Also finish off the lips – on the same layer as the cheeks – and the eyes.

11. The last step is to color the hair. Now you have an illustration incorporating a real fabric in its color scheme, giving it more realism.
CREATIVE DIGITAL PATTERNED FABRIC
![]()
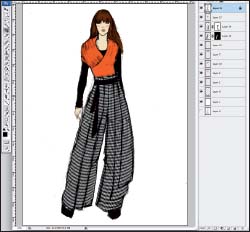
This exercise builds on an element already dealt with on a basic level – the plaid fabric used in the previous exercise – to produce a creative illustration.
The method of applying the patterned fabric is the same as previously shown, but the difference is in the type of illustration, which here is more personal and expressive, and emphasis is given to the fabric (featured on a large expanse of this composition for effect).
Additionally, a background made from paper cut-outs has been incorporated, which gives life and volume to the illustration.


1. Draw the figure on paper. Draw the jacket on a different piece of paper, together with a hand and buttons, and cut them out. By overlaying them onto the drawing, the effect of texture and volume is evident. This effect will be reproduced digitally.
2. Digitize the illustration and the colored paper together. Open them in Photoshop. Create a layer in Multiply mode that only contains the black lines so as to intensify them.
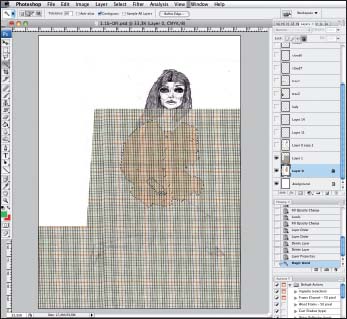
3. Import the patterned fabric on a new layer, also in Multiply mode. Use the Magnetic Lasso to select the outline of the cut-outs, removing the buttons and hand from the selected area (use the Lasso and the Alt key to remove zones from selected areas).

4. Add the background area to be covered with the fabric (use Lasso and Shift key) to the selected area. Be careful not to include the legs.

5. Invert the selection and delete what is now selected so as to only have the fabric in the desired areas.
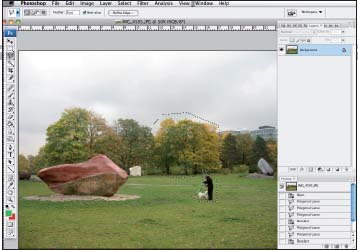
6. Find an image (or images) from your personal image library that will help to add a personal touch to the illustration; here it is cold and gray. Select the elements with the Polygonal Lasso, simulating the effect of cutting out with scissors.

7. Place each element on a different layer. This enables you to adjust the size of each and with the composition on the whole.
8. To make the sky, make a random selection of pieces of sky with the Polygonal Lasso and copy them to the new composition. Using the same tool and technique keeps unity in the project.
9. Each piece of cloud is imported on a new layer, which is set in Multiply mode to make it translucent and to add depth to the composition.

10. As there are so many cloud layers, select all and go to Layers>Link Layers in the menu (you can also do this by right clicking on the mouse).

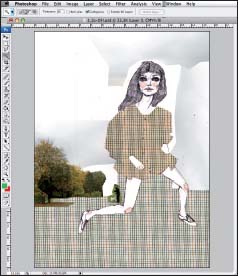
11. To make the illustration tidier, all of the cloud layers – now joined – are placed in a new folder.
12. Once the illustration is complete, you can see that the jacket color makes no real contribution as it is distinguishable from the pattern, so the layer is deactivated.
ADJUSTING THE PATTERNED FABRIC IN PHOTOSHOP
![]()
In order to give a fabric imported to Photoshop even more realism, it can be adjusted to the form of the garment. Use the Deform option, which enables you to experiment with the three-dimensional nature and volume of the fabric. This works by means of control points you create inside a selected area.
A classic gingham fabric has been chosen for this particular exercise. As it has a linear, horizontal and vertical pattern, it allows you to appreciate clearly the effect and the result produced with this tool.


1. Open the drawing in Photoshop. Clean the image and place the layer in Multiply mode, keeping it at the top throughout the exercise.

2. Use the Magnetic Lasso to select sectors of skin – hand, face, and neck – and fill them on a new layer with the Paint Bucket.
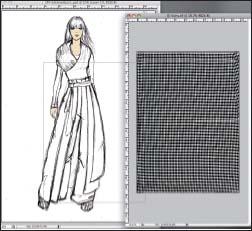
3. Scan the fabric, maintaining the same resolution and format as the illustration. Use the Move tool to drag it to the document containing the illustration.
4. As each of the pant legs faces a different direction, their volumes are also different. Work separately with each of them. Starting with the right leg, select an area of fabric to cover it and erase the excess.

5. With the fabric selected, press Ctrl+T to freely transform the selection. Then right-click with the mouse and choose the Deform option. Adjust the points until you achieve the desired volume and direction.

6. Add a mask to the layer in order to adjust the pattern so that only the right pant leg is seen.

7. Import a new area of fabric to cover the left leg. Position the material so that it follows the direction of the fall of the fabric.

8. As with the other leg, use the Deform option and move the points to adjust the direction and volume of the fabric. Then create a mask to cover the area not included in the pants.
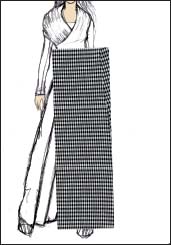
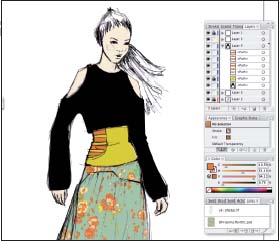
9. With the gingham pants now ready, color the rest of the illustration. Color the belt, T-shirt, and shoes on the same layer, as they are all the same color.

10. Color the top in red on one layer, and the lips, and cheeks together on another. Because the color chosen for the face is very bright, adjust the fill of this layer until you achieve a more suitable shade.
11. The last step is to color the hair. You can clearly see that each leg has its correct volume and that the fabric falls in the right direction.
BASIC PATTERNED FABRICS WITH ILLUSTRATOR
![]()
The time has come to learn how to apply a patterned fabric to an illustration with Illustrator. The process here is somewhat different than Photoshop, basically because you need to work with vectors instead of images. The Clipping mask is the principal tool. This particular exercise focuses on color, making use of hues in the print for the rest of the illustration to maintain harmony.

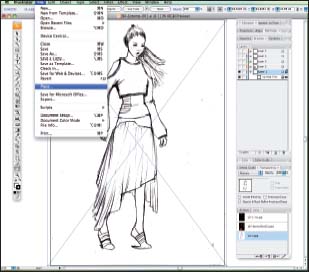
1. Place the sketch, previously cleaned in Photoshop, on a new document with File>Place.
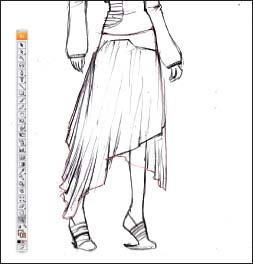
2. Trace the area for the fabric, the skirt in this case, with the Pen tool. This produces a vector form that can be filled.

3. Now place the patterned fabric on the document. Once imported to the same layer as the skirt, adjust the motif size (if it is larger than the original, it will be pixelated; just reduce it) and place it over the skirt.
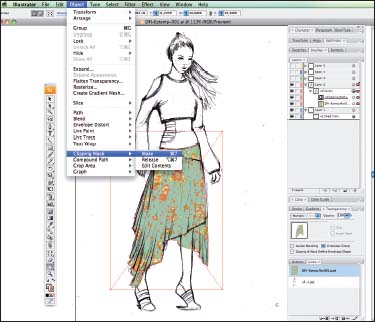
4. Select the skirt and the fabric and choose the option Object>Clipping Mask>Make. For this to work, the vector form of the skirt must be over the fabric.
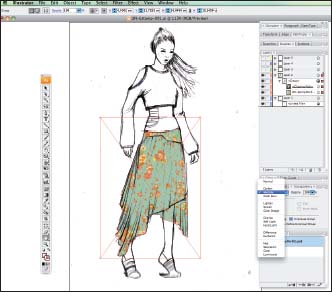
5. Once the Clipping Mask has been created and selected, choose the Multiply option on the Transparency panel so that the folds of the skirt can be seen from under the mask.
6. Vectorize the rest of the illustration for coloring. Do the areas of skin first. Draw them on a different layer.

7. Go on to the sweater. Black has been chosen for the fill as it is a neutral color and will match the skirt.
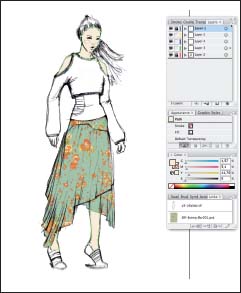
8. Draw the complete form of the T-shirt that goes under the sweater and color it yellow. Draw the stripes on the same layer and color them orange.

9. Last of all, color the hair, shoes, and facial details. Here, although they have been placed on different layers, they can be done on one layer as long as the order of the elements is respected.
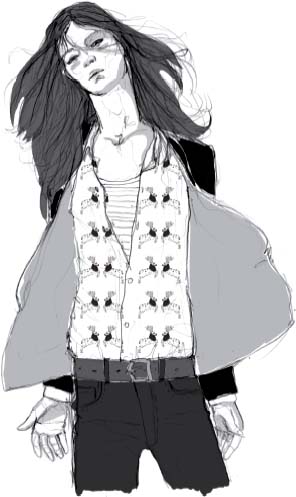
PATTERNED FABRIC WITH ILLUSTRATOR AND PHOTOSHOP
![]()
When making an illustration, there are things you can do that turn out better in Photoshop, and others that work better in Illustrator. Because both programs are from the same company (Adobe), they are designed to be compatible. You can easily work on parts of the illustration separately before joining them as one document.
This exercise is a guide to creating a patterned fabric from a unique motif—to be done in Illustrator, which is more efficient for repeating images—for coloring in Photoshop.
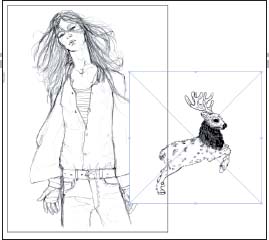
1. Start in Illustrator. Import the image of the figure and the element to be used in the pattern – a deer in this case – on the same document.

2. In order to create a pattern in Illustrator, the motif must first be vectorized. Select the deer and go to Live Trace>Make on the Object menu.

3. Once the drawing is vectorized, adjust the size required for the pattern, in this case so that it is proportionate to the shirt.

4. The pattern is made up of two deer facing each other. You will need to copy the deer, line up the copy in front of the other and paste it. Right click with the mouse and choose Transform>Reflect.
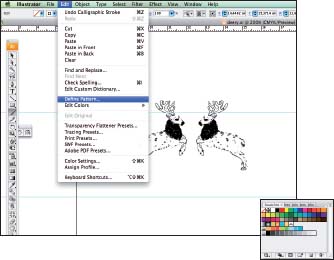
5. Set them at the desired distance apart, group them (Ctrl+G), and choose Define Pattern on the Edit menu. This creates a new pattern, which works like a color to fill outlined forms. It can be found in the Swatches panel.

6. Vectorize the shirt area. Do this without lines. Use the deer motif as fill. If the resulting pattern is not what you expected, you can modify it or create a new one (it is advisable that you only delete the deer when are sure of what you want).

7. Now this patterned fabric is transferred to Photoshop so the rest of the illustration can be colored. To do this, open the figure with this program. Then copy the shirt from the Illustrator document (Ctrl+C) and paste (Ctrl+V) in Photoshop. When you do this, a box will open showing the different paste options. Paste it as a Smart Object.

8. The patterned fabric has been imported from Illustrator. Now it has to be placed over the shirt, which means that the layer containing the figure (now on top) has to be in Multiply mode.

9. Color the rest of the illustration. Leave blank spaces at the edges of the figures to give them character.
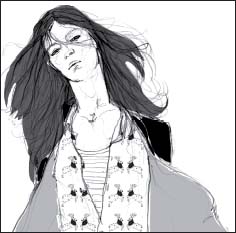
10. Because the hair has more movement, trace it with the Pen so that the area is better defined. In the Paths panel, the outline is selected and later filled.

11. The last step is to do the shading on the face, chest, and hands, and to finish off the the edges of the pants so they look like they have been painted.
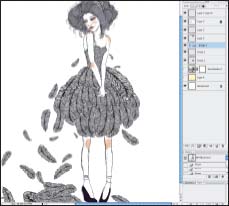
CREATIVE PATTERNS WITH PHOTOSHOP
![]()
Until now, motifs have only been looked at as repetitive patterns – either ready-made or created by the illustrator – to be applied as complete fill for an area. This exercise, however, uses an element as a template, enabling you to reproduce and modify the pattern as you wish. One object can produce thousands of different results.
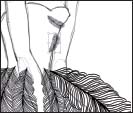
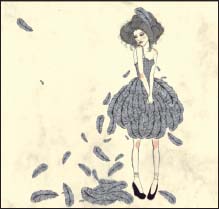
The element chosen for this illustration is a feather. With only one, you can create a dress of dark feathers, while others float in the air and scatter on the floor.

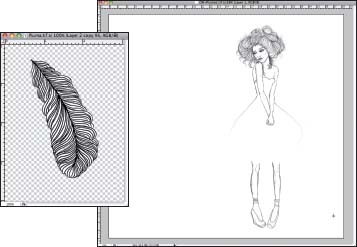
1. Open the illustration on one document and the feather on another. Remove the background from the feather with the Magnetic Lasso or the Pen without erasing the line.

2. Import the document of the girl. When you do this, you will see that the feather is large enough so as not to become pixelated. This is the largest size that it can be used.
3. Copy the feather layer and use Transform (Ctrl+C) to adjust the size, rotate, and turn over (Flip).
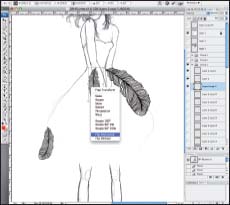
4. One way of doing this more quickly is to select several feathers, go to the Layers palette and right-click to choose Duplicate Layers. This way you will not need to copy them one at a time.
5. Once the desired volume for the lower part of the skirt has been achieved, open a folder and place all of the layers with feathers to make the job easier.
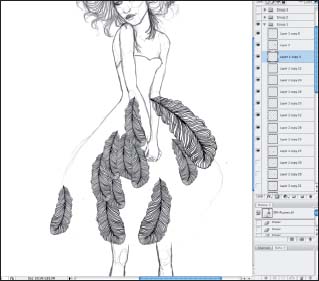
6. The bodice is also covered in feathers, but smaller, so the next set you make have to be that size.
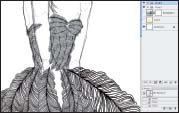
7. Position the feathers to follow the form of the torso and bust, as if they were sewn to the dress. When you have finsihed, create another folder for these layers.

8. In order to clean the feathers from the arms, the layers from each group have to be merged. Right-click over the group and select Merge Group.

9. Use the Polygonal Lasso or the Pen to select the arms and delete this area from both layers (skirt and bodice).
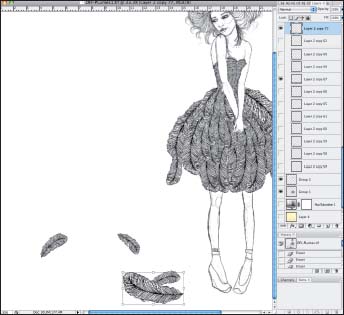
10. Place the feathers that appear to fall. Use feathers of different sizes for a greater effect.
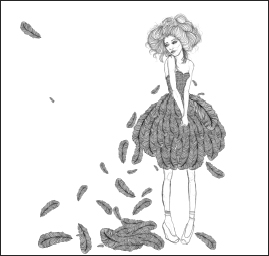
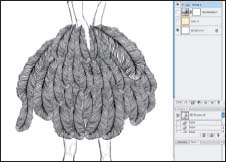
11. Now all of the feathers needed in the illustration are ready: Some come off the bodice and fall to the floor, and others float away, carried by the breeze.
12. Now give the girl color. The shoulders, elbows, and knees have been colored using a medium-sized soft brush.
13. Introduce the desired texture for the background.

14. Because the original color of the texture is very warm and the illustrator had something grayer in mind, a Hue/Saturation Adjustment Layer is added and the saturation is lowered to zero.
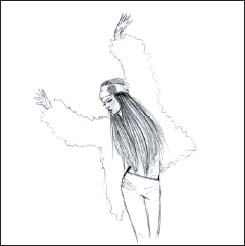
PATTERNS WITH SYMBOLS
![]()
This type of pattern is similar to the previous exercise. A motif is created for repetition, but not exactly. This time it will be applied as if it were a symbol with the tools Illustrator features for this specific purpose.
In this case, the symbol will be a hair to be used to cover a coat. A choice can be made from the variety offered by the default symbols library that comes with the program.

1. The image is previously cleaned in Photoshop and placed on a new Illustrator document. Keep it in Multiply mode over the other layers.
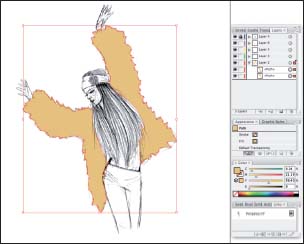
2. Start by vectorizing the hairy coat area. It is important to maintain an irregular outline to intensify the volume of the coat. Color the form without adding a line.

3. Without adding a line, continue tracing and filling the forms requiring flesh tones: the face, hands, and midriff.
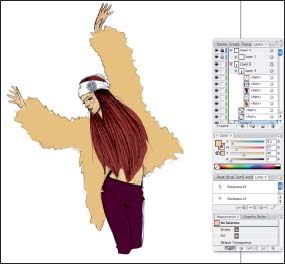
4. Then vectorize the form occupied by the hair, which goes over the midriff, and the pants. Both go on the same layer.
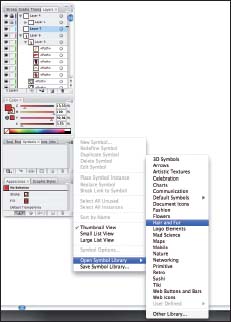
5. Go to the Symbols dropdown menu and choose Open Symbol Library>Hair and Fur.

6. Choose the most suitable hair symbol for the fur type you want to represent. Select the Symbol Sprayer tool from the toolbar and start applying.

7. The hairs are grouped together as they are sprayed. From the selection you have made, if you want to change the direction of the hairs, use the Symbol Spinner tool.

8. Continue spraying. As the preset distance between each hair is large, use the Symbol Scruncher tool to bring them closer together.

9. To achieve the most suitable color range, the hues have been modified. The hairs on the coat have been rotated a little to give them more movement.
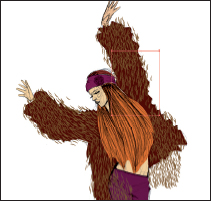
10. A faster way of working is to copy a selection of hairs that have been modified (direction and distance between hairs) and to paste them where they are needed.
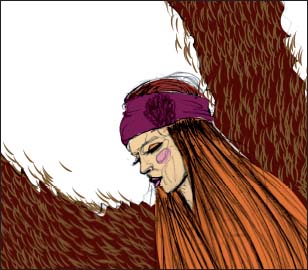
11. When the coat is finished, vectorize the facial features and add color to them one at a time. First do the eyes, followed by the cheeks and lips.

12. To finish, feathers are added to the head scarf and the color of the pants has been changed.