TEXTURES // COLOR HALFTONE FILTER
![]()
Creating and using textures in digital illustrations is a highly appreciated skill that can bring added value to a project. It is for this reason that it is very useful to know how to apply them correctly.
From among the wide variety of filters available in Photoshop, the Color Halftone filter may be one of the most popular. Generally, it is applied to give an illustration a pop-art feel; this being a look that still has great appeal today. The most interesting thing about this filter is that it lets you see the colors that really bring the forms together.
This exercise shows you how to create a texture with this filter. For this effect to be noticeable, an illustration has been created with strong, well-defined colors.

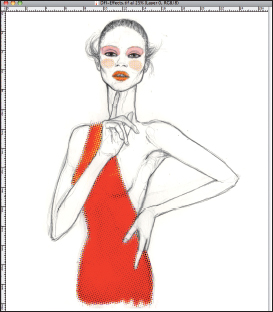
1. Open the selected drawing (with plenty of color), clean the background and retouch the color if needed until it is ready to have the filter applied to it.
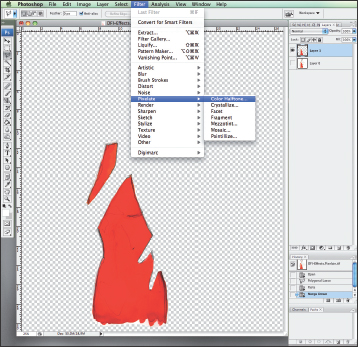
2. Select the outline of the dress with the Magnetic Lasso. Copy (Ctrl+C) and paste it on a new layer. Select Filter>Pixelate>Color Halftone.
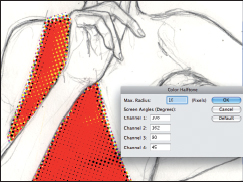
3. In the Color Halftone window, you will see options for modifying the maximum radius of the pixels (Max. Radius) and the filter Channels. In this case, leave it in 16 pixels and keep the channels.
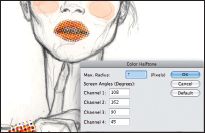
4. Select the lip area with the Magnetic Lasso. Copy it and paste it on a new layer, and apply the same filter as in the last step. This time the maximum radius of the pixels is varied to 7, which creates a smaller dot than in the previous step.
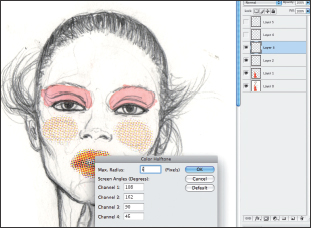
5. Now do the same with the cheeks. This time the maximum radius should be 6.
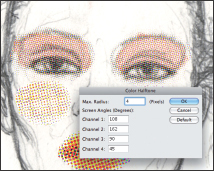
6. Continue with the eyelids. Again, copy and paste them on a new layer and apply the filter. This time the maximum radius should be 4, the lowest value available.
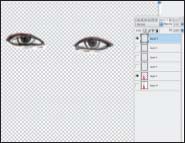
7. Once these effects have been applied, the eyes are not strongly defined. Copy them and paste them on a new layer to be left on top with Blend Layer>Multiply.

7a. The lines of the eyes are intensified without losing the filter effect applied to the lower layers.

7b. When you see the image, you clearly notice the difference in the size of the dots depending on the ratio used and the visual effect this creates (the original color is separated to a degree).
TEXTURE WITH FONTS
![]()
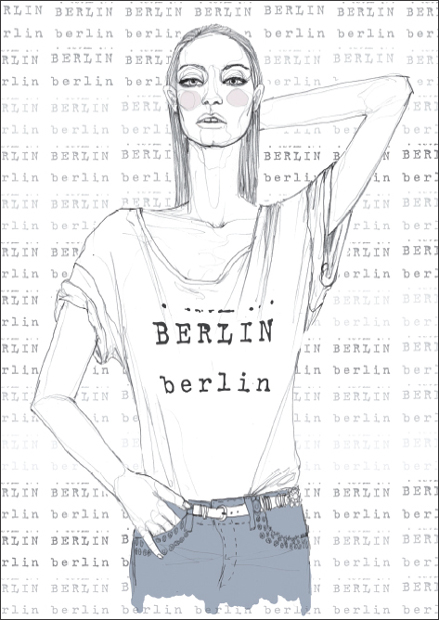
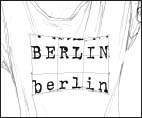
Text is used in illustrations to give the message the drawing contains. In this particular case, it will be used this way, but it will also create a background texture that enhances the text on the garment. The star piece of clothing for text is a T-shirt, which is why this illustration makes use of it. The illustrator’s favorite city, Berlin, is also featured.
Many fonts come with computer programs. It is also possible to purchase them or download them from specialized websites. They can be manipulated in many ways, the most common being to change their size, color, and direction.
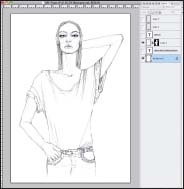
1. Open and clean the illustration in Photoshop. Select the outline and create a Layer Mask to cover the background.
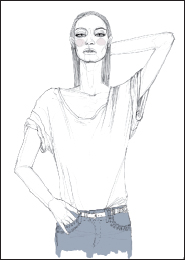
2. The few colors used in the drawing are added now. Select the cheeks and color them on a layer. Do the same with the pants. The lower edge has been applied with a medium brush to create an irregular finish.

3. Select the horizontal Text Tool and there will be different text options on the tool bar. Choose the font you want to use by clicking in the box for font settings, which will show you the options. In this case, the HammerKeys font has been selected. This was downloaded from the Internet.
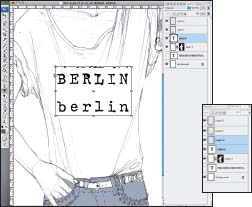
4. With the Text Tool still selected, make a rectangle over the T-shirt where the desired text will go. Treat the text like an image when working with it. Create an empty layer over the text and link both layers.
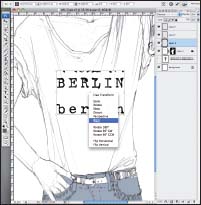
5. The text is manipulated using the Warp option in order to make it appear part of the T-shirt. As it is already an image, use Free Transform (Ctrl+T), right-click and select Warp.
6. Use the control points given with this option and go for the form required for the letters on the T-shirt. Owing to their position, not much is needed, and the warping should not be overdone.
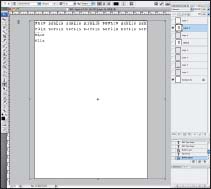
7. To create a background with text, disable all of the layers so you can see only what you are writing. Make the text box bigger than the document so that all of it fits inside.

8. Copy and paste words so as to avoid having to write text all over the page. Once this is complete, select areas and add different shades of gray to make the texture more interesting.
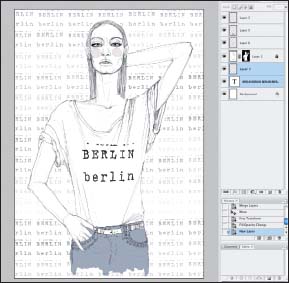
9. When the background texture is complete and you are satisfied with the color changes, turn it into an object (create an empty layer and blend it with the text layer).
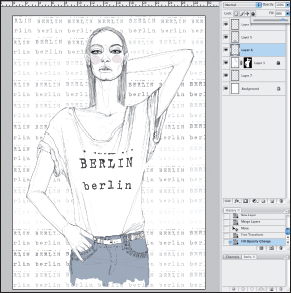
10. As a final touch, soften the Fill of the layer with the font texture so that it appears as a background and does not overwhelm the illustration.
TEXTURED BACKGROUND
![]()
The range of textures you can apply to an illustration is an infinite; the texture you add just depends on what you want to convey. For a good result, it is important to experiment with textures and see the effect they give to an illustration before deciding to make it permanent.
Paper textures have been left to one side for this illustration in order to try a new texture – cement. The illustration can be seen clearly over it.

1. Open the illustration in Photoshop. To remove the background, create a new layer with a layer mask. Select Image>Apply Image from the menu and then invert (Ctrl+Shift+I) so that only the lines can be seen. Fill the layer with black.

2. Because the overalls will be black, the lines of the details need to be in a lighter color – gray – to be seen. So copy the layer with the mask and, instead of black, use a gray fill.

3. Select the overalls with the Magnetic Lasso and copy onto a new layer, placed under the ones created using masks. Apply the color fill.

4. Go to the layer with the mask that you previously colored in gray. Trace the stitching on the overalls with white so that the gray lines appear.

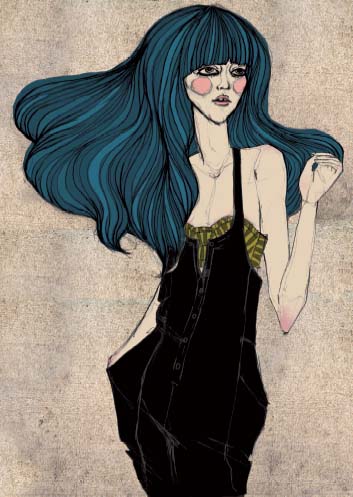
5. The lines of the hair need more intensity. Select the hair and paste it onto a layer on top of the illustration. Do this with the Multiply blend mode so that it is not too strong and the line is intensified only a little.

6. Now color the bustier. As the areas are quite small, it is better to do this with a brush. Add each color on a different layer.
7. Use the Magnetic Lasso to select the areas of skin. Choose the desired tone with the Color Picker and fill the selected areas.
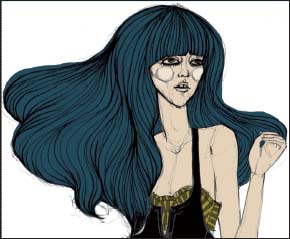
8. Select the hair. Add a new layer and fill the shape with the desired color. In this case, we have used dark teal.

9. To give the impression of volume, add streaks in two lighter shades of the same color – each one on a different layer.

10. Complete the details on the illustration before finally adding the cement texture. It is important to ensure that the size and resolution of the background is suitable for importing to the illustration.
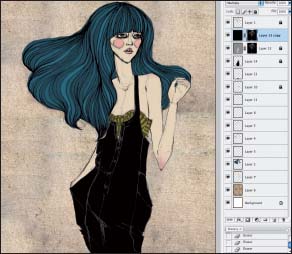
11. Drag the texture across and place it under everything. Because it was very gray, the levels have been adjusted using the Image menu to make it warmer and more appropriate for the illustration.
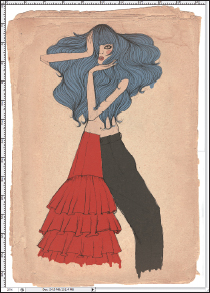
VINTAGE TEXTURE
![]()
One of the advantages of digital illustration is the infinite range of possibilities it offers, which enable us to revisit other times and space. This exercise in particular focuses on applying texture. It creates the impression that the illustration was made on very old paper by adding the paper texture and working the edges to appear timeworn. This technique is very popular in digital illustration. It is very difficult to achieve such a good results by other means.

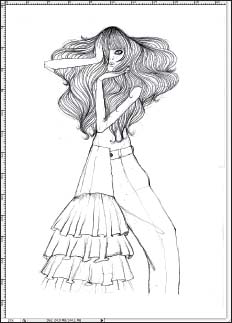
1. Scan the image at 300 dpi and open it in Photoshop. Clean it and place it on a Multiply blending layer.
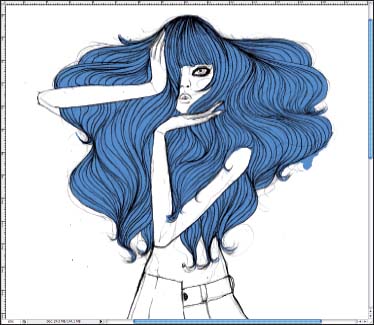
2. Because the hair is the most extensive area, start by coloring it. Select it with the Magnetic Lasso and color on a new layer. Details such as tips or edges that are not perfect can be fixed with a brush.

3. Select the areas of skin with the Magnetic Lasso and fill them on a new layer.

4. Select the half with the pants and color on a new layer. Do the same with the skirt half. Do the bottom edge and details with a medium brush.

5. Draw the facial features – eyes, cheeks, and lips – on another layer with a fine brush. Place all parts of the figure in a group to keep the illustration organized.

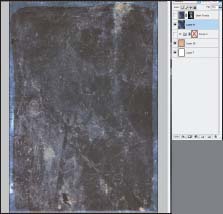
6. Open the texture and drag it onto the document. Remember that the size and resolution of the texture should correspond to those of the illustration. If it is smaller and you try to enlarge it, it will become pixelated and the result will be substandard.

7. Place the texture layer at the bottom and the group with the illustration in Multiply blend mode. Even though it looks good, the full desired effect has not yet been achieved.
8. Add a layer mask to the layer group where you used the same texture as the background. The texture will appear on the illustration, but that is exactly what we are looking for.
9. In order to accentuate the texture, the texture of an old wall is imported and placed over the other layers. Invert its colors (Image>Adjustments>Invert).

10. Duplicate the layer with the new texture. Apply the image from the illustration only (Image>Apply Image) and invert. This will enable only certain details of the inverse texture to be seen, not all of them.
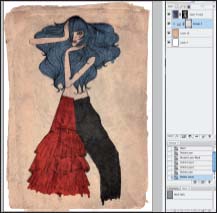
11. Finally, eliminate the layer containing only the inverted texture. You can modify the fill values of the layer with the texture and the mask until the illustration is the way you want it to look.