
Section 2: Digital Photography
The greek roots of the word photography loosely translate to “drawing with light.” In this sense, digital photography is no different than photography using analog methods, but of course the digital camera lets you save files rather than negatives and create prints without a wet lab. Photography developed as an art form at the intersection of the sciences and technology. The camera obscura (FIGURE S2.1), a forerunner of the camera we know today, was a dark room that projected a scene onto its wall as a result of distributing light through a hole in the building (or later, a box). It was used as a drawing aide by Renaissance artists such as Leonardo da Vinci.
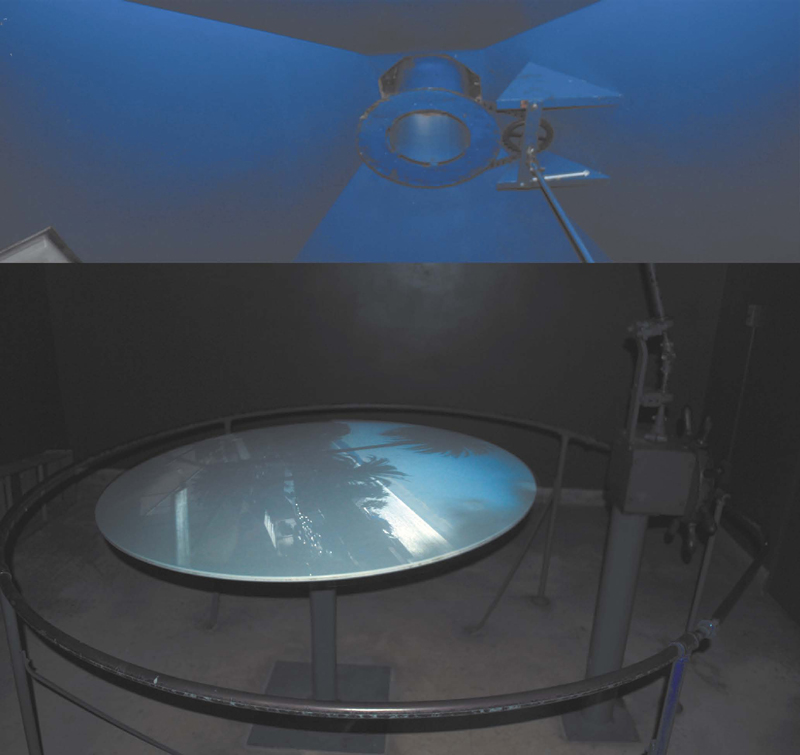
FIGURE S2.1 In Santa Monica, California, you can walk into a room-sized camera obscura to see a view of the Santa Monica pier projected onto a disk. The top image portrays the room’s ceiling, where the lens in the roof collects light that’s projected onto the disk beneath it via carefully positioned mirrors.
Kodak developed the Brownie camera, one of the first snapshot technologies in the early 1900s. As the company’s advertisement demonstrates (FIGURE S2.2), it was so easy to use that even a woman could operate the device (sarcasm intended in my interpretation). Digital art and design students have access to a broad range of tools. Some use a digital single lens reflex camera (DSLR), while others primarily rely on a camera phone to create their imagery.
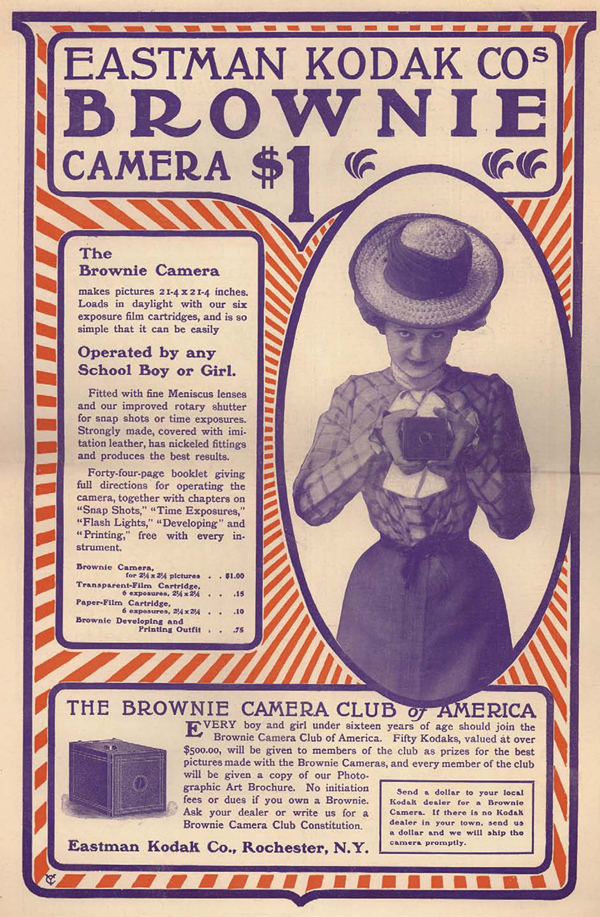
FIGURE S2.2 An original advertisement for Kodak’s Brownie camera. Adjusted for expected inflation in 2013, the cost for each camera was approximately $27. Image courtesy of Ellis Collection of Kodakiana—Database #K0430, Emergence of Advertising On-Line Project, John W. Hartman Center for Sales, Advertising & Marketing History, Duke University, David M. Rubenstein Rare Book & Manuscript Library, http://library.duke.edu/digitalcollections/eaa/.
This section will heighten a digital artist’s or designer’s awareness of the digital photographic image, regardless of her capturing device. The process of creating a photograph is nearly the opposite of the process of creating vector illustrations (reviewed in the first section of this book). For instance, when you begin to create a vector illustration, you start with a blank page (or a white Adobe Illustrator artboard). Vector illustration is an additive process—you add dots, lines, or shapes to the composition. Photography necessitates a process of selective reduction. Instead of adding to the empty canvas, photographers frame their surroundings to capture just the right moment in time. Compositional design elements are still active within the frame, but technological components relating to the camera—we might call this the “hardware”—play a large role in the resulting image. The chapters in this section will help you understand the interplay between composition and lighting by first teaching you the mechanics of your digital camera and then explaining how to identify the compositional attributes that apply specifically to the photographic frame and how to adjust the digital histogram that renders the tonal scale within the image.
Of course, photographs (digitized by the camera or the scanner) are made of pixels, and you’ll edit or manipulate pixels in Adobe Photoshop. If you’re new to this material, this section of the book may be your first experience with bitmap images. It would be convenient if I could assert that the pixel is to the digital photograph what the anchor point is to the vector illustration, but that just isn’t accurate. The two systems of image construction are so different that an analogy is not possible. A pixel is a single unit of color, sampled from the original image. If the bitmap image is created with a digital camera, then each pixel is sampled from the scene at the time of the photograph, according to the specific lighting conditions and camera settings. If a bitmap image is created by scanning a print, then the pixel is a sample taken at the time of scanning according to the input specifications in the scanner software. Pixels are finite. You can resample pixels, and there are ways you can add pixels to a document, but for most people who operate some version of Photoshop and want to print on their home inkjet printer, you’ll have only as many pixels as were sampled at the time the bitmap image was created. This means that unlike vector art, bitmap images are not infinitely scalable.
The exercises in Chapter 4, Creating and Organizing Digital Photographs, will teach you to use settings that might be available on your digital camera. You’ll also learn to organize your files using Adobe Bridge, which can be especially helpful as you’re editing the many photographs you’ll take while exploring your camera.
In the mid-twentieth century, Ansel Adams developed the infamous zone system with Fred Archer: an 11-step scale (counting step zero) to delineate, pre-visualize, and understand the relationship between the luminance of the scene, the density values of the negative, and the final printed image. Using Roman numerals to avoid confusion with so many other numbers on the camera, the scale starts at Zone 0, a black part of a photograph with no texture or image details. It ends at Zone X (ten) where white appears in the print with no texture. The middle point, Zone V (five), is considered middle gray, though it’s about an 18% gray value. (When we review the zone system for digital photographers, you’ll learn that this percentage decreases a bit.) While the zone system directly helps photographers with the craft of printing, and although “negative densities” may not seem relevant to digital images, understanding the zone will help you see what Adams describes as a “practical interpretation of sensitometry” [1]. Since the zone system is so specifically related to value, I’ve included a study of an adapted zone system for digital photographers in Chapter 5, Resolution and Value.
Ansel Adams, Camera and Lens (New York: Morgan & Morgan, 1970). pg. 22. If you really love it, you can check out Adams’s series, The Camera, The Negative, and The Print. The zone system is most thoroughly explicated in Book 2, The Negative.
Contemporary artists continue to use the zone system as a method for understanding the values and tonal range in a photographic image. Terry Flaxton’s In Re Ansel Adams was created in homage to one of Adams’s seminal photographic images—the resolution of the digital image is more robust than the tonal range in the original print (FIGURE S2.3). Add the movement of the video and the soundtrack of the waterfall, and the scene comes to life (FIGURE S2.4).
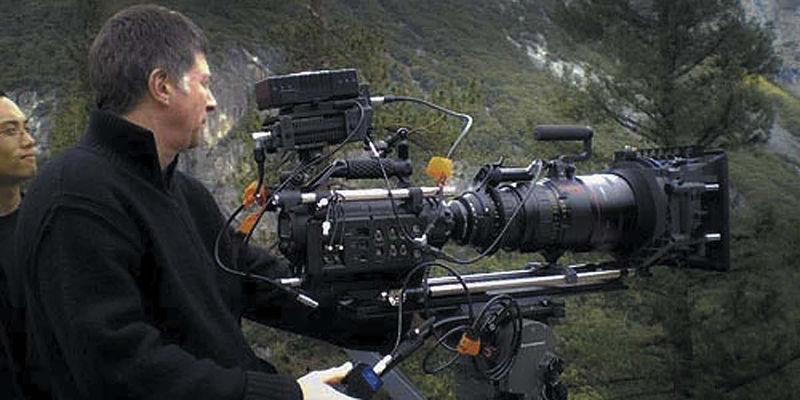
FIGURE S2.3 Terry Flaxton operates a high-resolution camera during the making of his In Re Ansel Adams.

The exercises in Chapter 5 will help you learn to see the zone system in a digital photograph. You’ll understand the image’s histogram and learn to modify the tonal range to increase the contrast of the composition.
In the days of analog photography, working in color was vastly different from shooting, processing, and printing with black-and-white film. For most photographers, working in color implied that they were unable to process their own film (where much experimentation took place with negatives) and necessitated the use of a color lab for printing. This was not nearly as affordable as a black-and-white darkroom you could rig in your home. Shifting to color typically changed the experience for the photographer from working in solitude with complete control over film processing to working in a shared lab with far less control over film processing. The digital camera, especially the DSLR, has mostly returned the photographer to solitude (if she wishes to work in this manner), where post-production takes place on a home computer. Shooting in color, from the perspective of processing, is the same as shooting in black and white—in both situations, you will “process” the images on your computer. Color is a basic design element that should be learned alongside value. We’ll study color with bitmap images, although the same principles of color apply to vector graphics.
The exercises in Chapter 6, Color Models, will help you understand essential properties of color including harmony, contrast, and digital color modes.
In these three chapters, you’ll work with the foundation elements of digital photography: the photographic image, value, and color, and you’ll be encouraged to think about the relationship between these design elements and digital technologies. As Ansel Adams wrote, “With photography we touch the domains of science, illustration, documentation, and expressible art” [2]. Keep the lessons of the first three chapters in mind, too. You’ll continue to see dots (maybe in the form of pixels), lines, and relationships between shapes while you’re interpreting value and composing with the rule of thirds.
Link
The Masters of Photography website, www.masters-of-photography.com, provides a substantial introduction to historically relevant photographers of the twentieth century.